
Licensing has quietly become one of the more consequential architectural changes in the VCF 9.0 ecosystem. First, VCF 9.0 adopted subscription-based licensing, and now, in VCF 9.1, this change has been pushed for Avi and vDefend. What used to be a 25-character key pasted into NSX Manager is now managed through a dedicated, centralized service: License Hub. With the release of License Hub 2.0, Broadcom has taken that model further by decoupling it from the Security Services Platform (SSP) installer, shrinking its footprint, and adding the operational tooling (APIs, backup/restore, NFR support) that a standalone licensing control plane needs to run at scale.
This post walks through what License Hub is, what changed in 2.0, why it matters for anyone running vDefend 9.1 or Avi 32.1.1, and what to plan for if you’re upgrading.
What License Hub Actually Does?
License Hub for VMware vDefend and Avi Load Balancer provides centralized license management and reporting for VMware vDefend and VMware Avi subscription license files. Instead of licensing each NSX Manager or Avi Controller individually, you register those instances as endpoints against a single License Hub and manage capacity from there.
Its core capabilities, largely carried forward from earlier releases, include:
- Central license management across multiple vDefend and Avi deployments — assigning vDefend licenses to multiple NSX Manager instances and Avi licenses to multiple Avi Controller instances from one place.
- Support for both connected mode (linked to VMware Avi Cloud Console) and disconnected mode, which requires no internet connectivity.
- A shift from 25-character serial number keys to digitally signed subscription license files.
- A mandatory license refresh policy — usage must be submitted from License Hub every 180 days.
- Unified usage reporting across vDefend and Avi instances, visualized in VMware Avi Cloud Console.
- Scale of up to 120 vDefend and Avi endpoints per License Hub instance, covering NSX Manager 9.1+ and Avi Controller 32.1.1+.
If you’re running a multi-site or multi-tenant environment, the value proposition is straightforward: one licensing pane of glass instead of per-instance key management, plus a compliance reporting cycle that doesn’t depend on someone remembering to check expiration dates manually.
Important Note: License Hub 2.0 went GA on August 5, 2026. Broadcom no longer supports deploying License Hub 5.1.2 (the old one) and has pulled the installation binaries off the support portal. To see what’s new in License Hub 2.0, see the product documentation
License Hub 2.0 Architecture
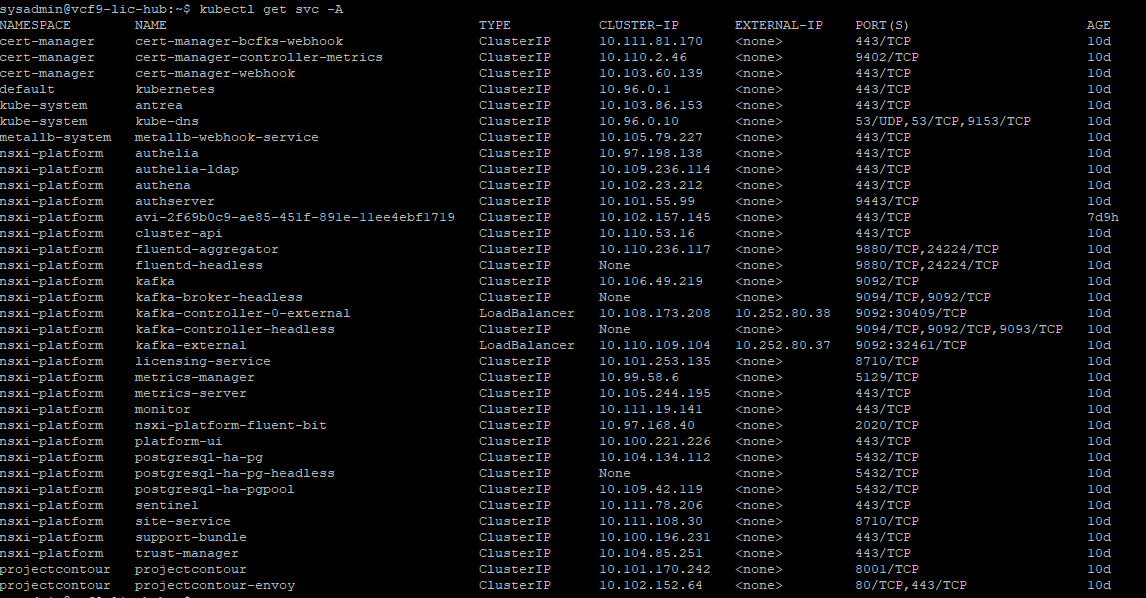
Although the License Hub 2.0 is deployed as a separate appliance, under the hood it leverages the Kubernetes platform. All services running on this appliance are deployed in a microservice architecture. Details of the deployed services can be found by connecting to the appliance over SSH.
The license hub operates in 2 modes:
- Disconnected Mode: In this mode, the license hub doesn’t have connectivity to the Avi Cloud Console. The registration is file-based. This mode is suitable for isolated or air-gapped environments.
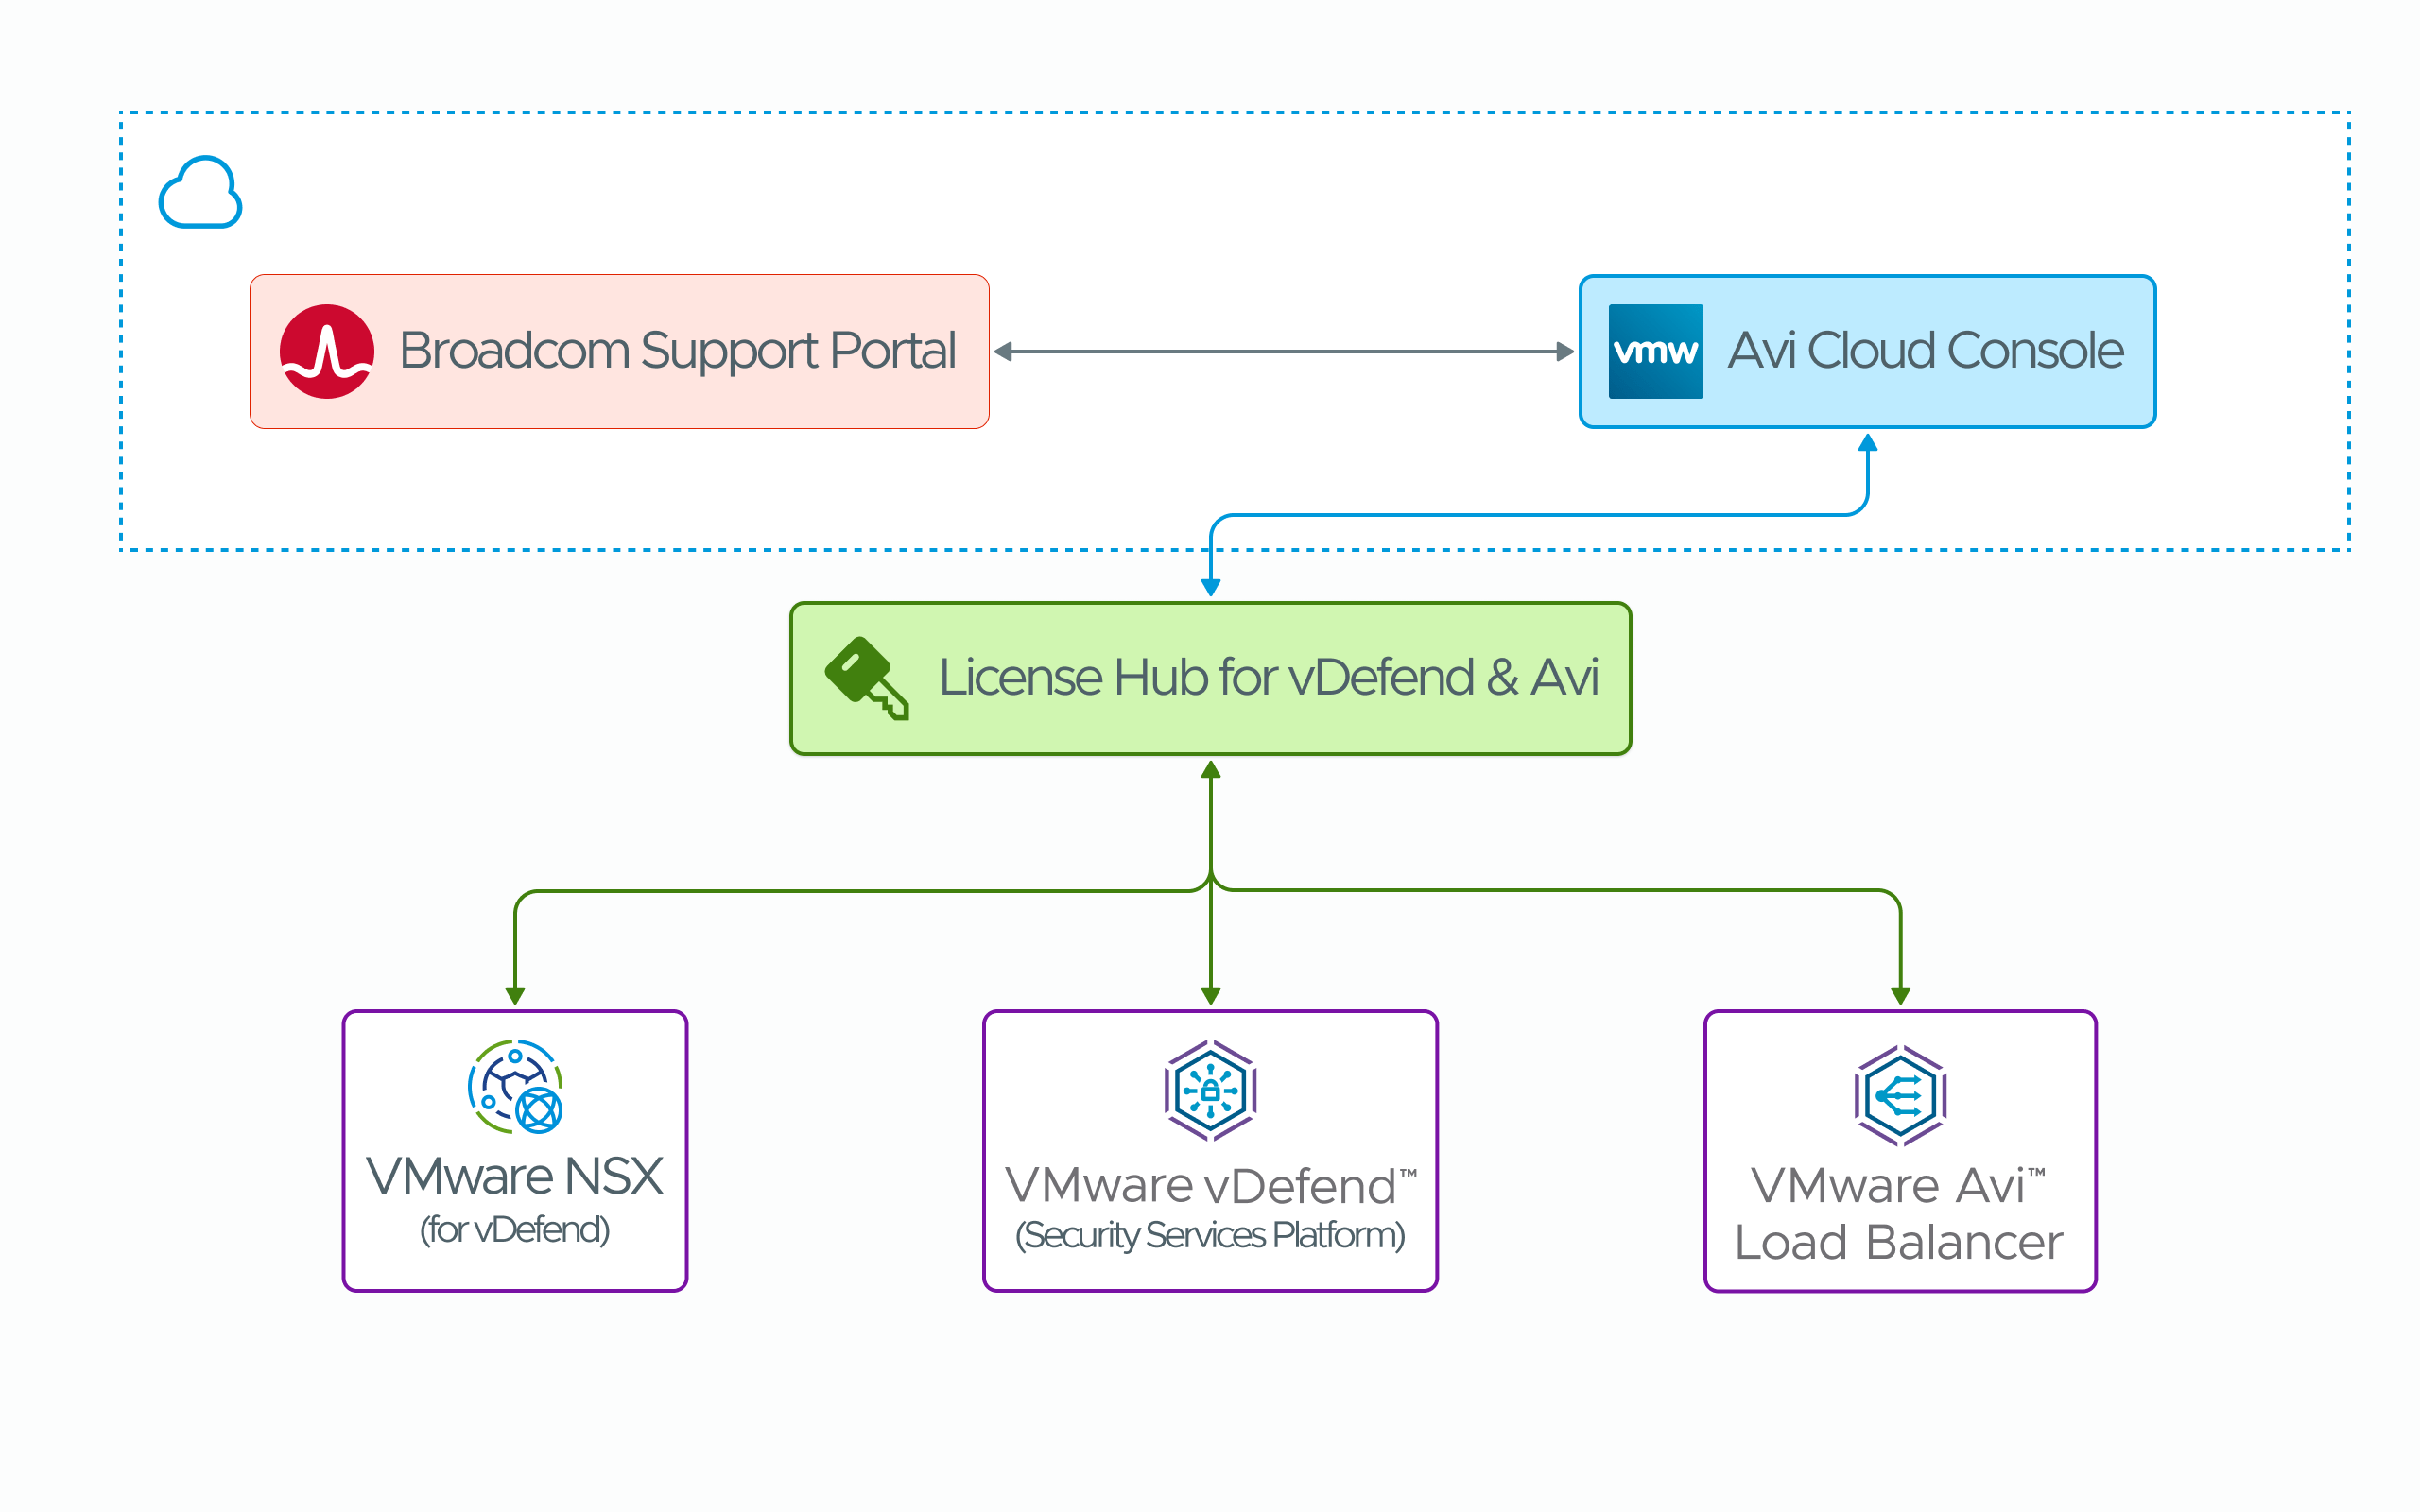
- Connected Mode: In this mode, the license hub connects with the Avi Cloud Console to sync the licenses. The Avi Cloud Console fetches the licenses directly from the Broadcom support portal.
The diagram below shows a high-level architecture for the connected mode deployment.
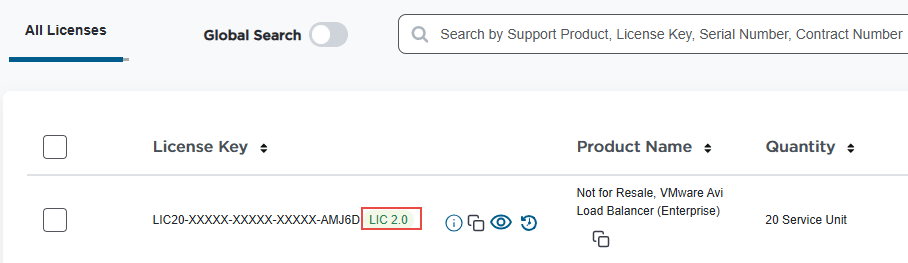
Note: The license keys must be upgraded to 2.0 before Avi Cloud Console recognizes them. See product documentation for more information.
The upgraded license key reads 2.0 in the Broadcom Support Portal.
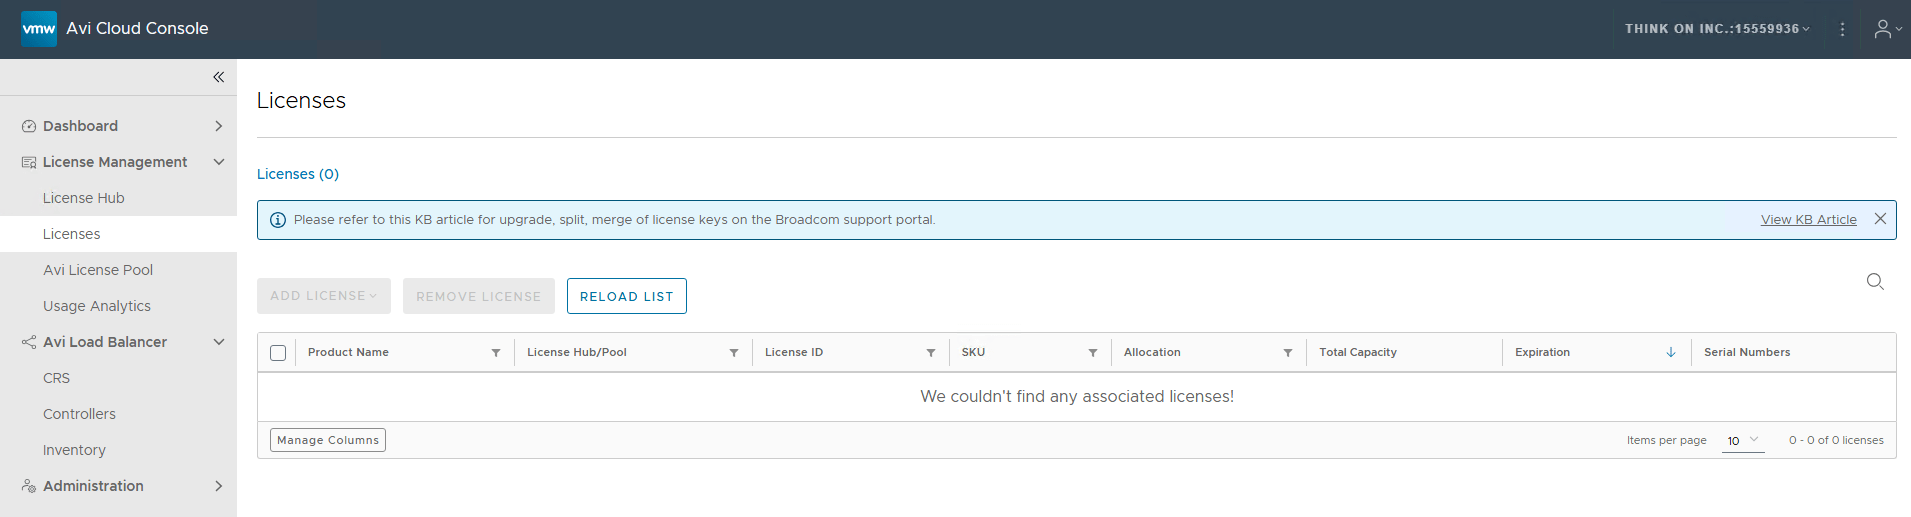
If a license key is not upgraded to 2.0, it’s not visible in the Avi Cloud Console.
License Hub 2.0 Deployment
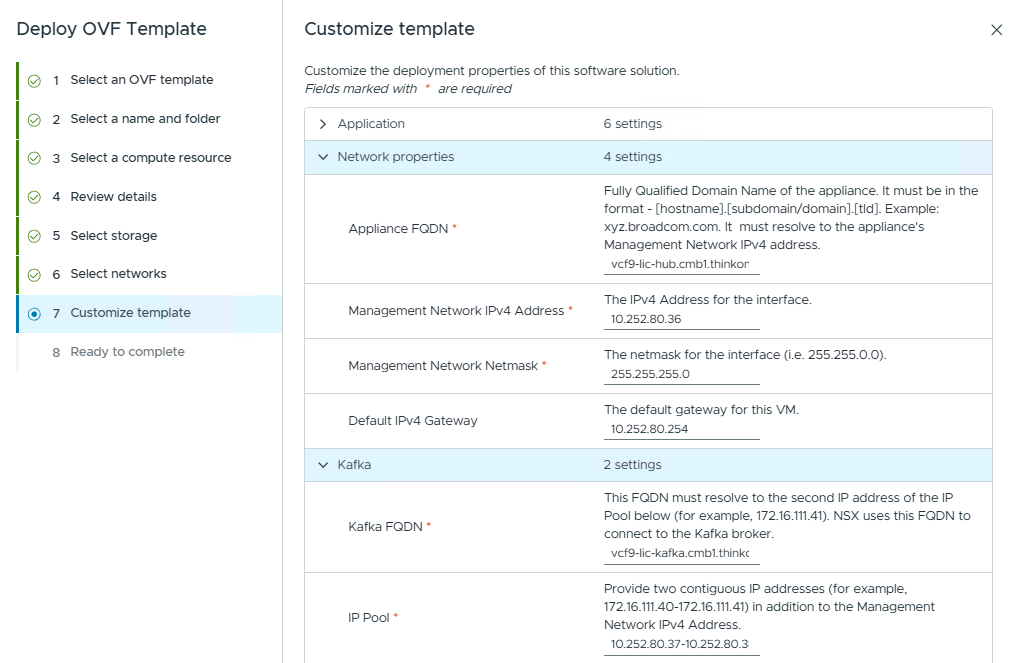
The License Hub is deployed as a standard OVA deployment. The important configuration is networking. The appliance requires three IP addresses.
- One management IP address for the appliance.
- One IP address pool with two contiguous IP addresses (for example, 172.16.111.40 – 172.16.111.41). It is not required that the management IP address and the IP address pool be on the same subnet as long as they are reachable.
Also, the installer requires 2 FQDNs:
- One FQDN for the appliance portal access. This FQDN must map to the management IP address of the appliance.
- One FQDN for Kafka. This FQDN must map to the first IP address in the IP address pool (for example, licensehub-kafka.example.com maps to 172.16.111.40).
Note: In my lab, the Kafka IP pool is from the management network itself.
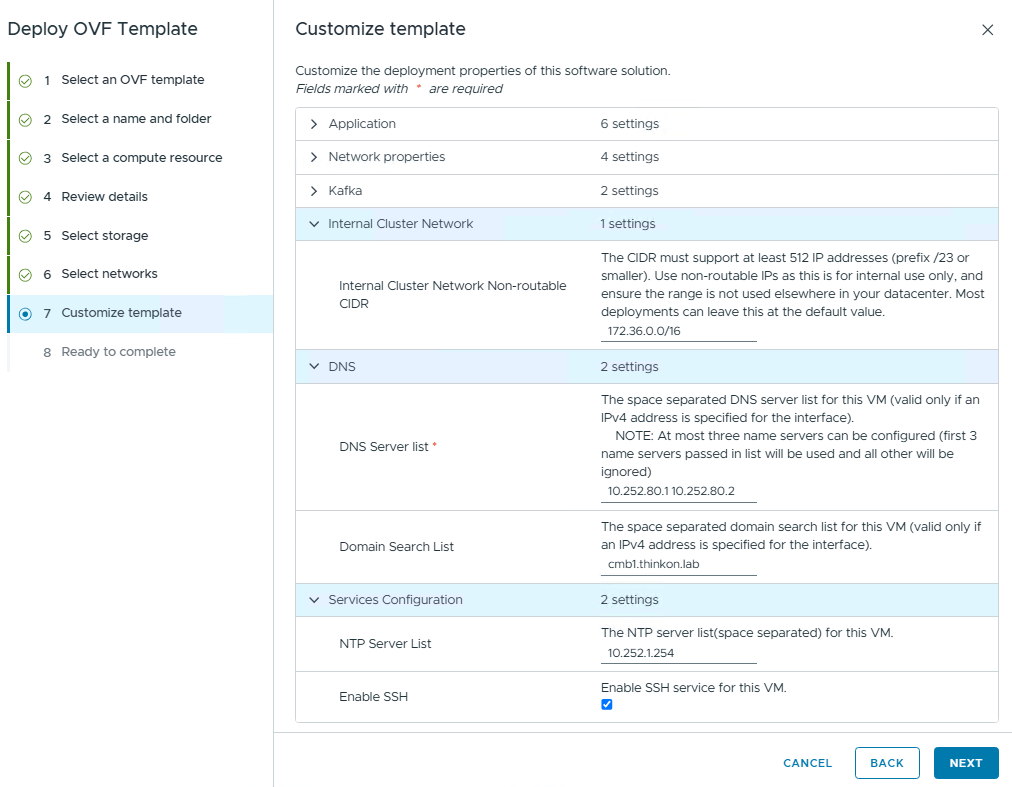
For the internal cluster network, you can choose any /16 CIDR. This CIDR does not need to be routable.
After the appliance is deployed and boots up, connect to the appliance VAMI interface <appliance-fqdn:5480>
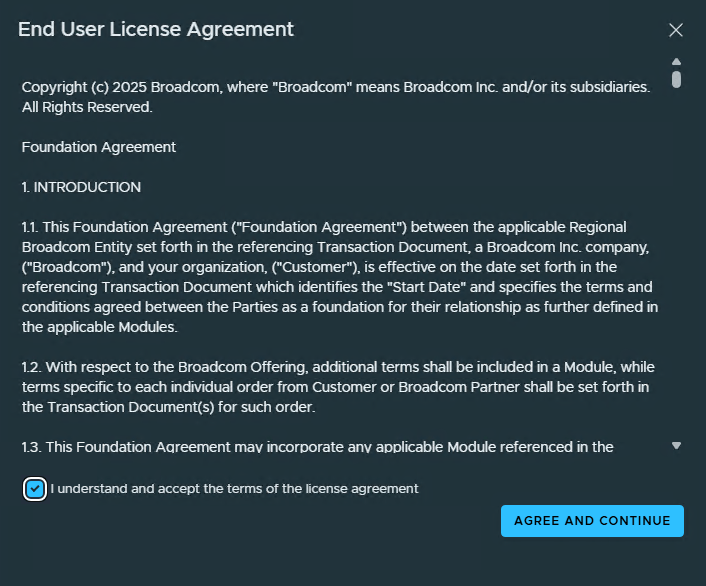
Accept the EULA.
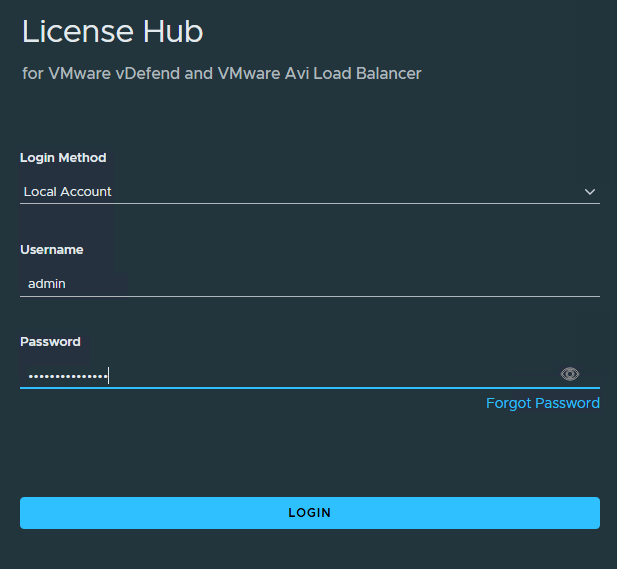
Upon login, you will observe that a deployment is going on. At this stage, the system is deploying the license hub service. Click View details.
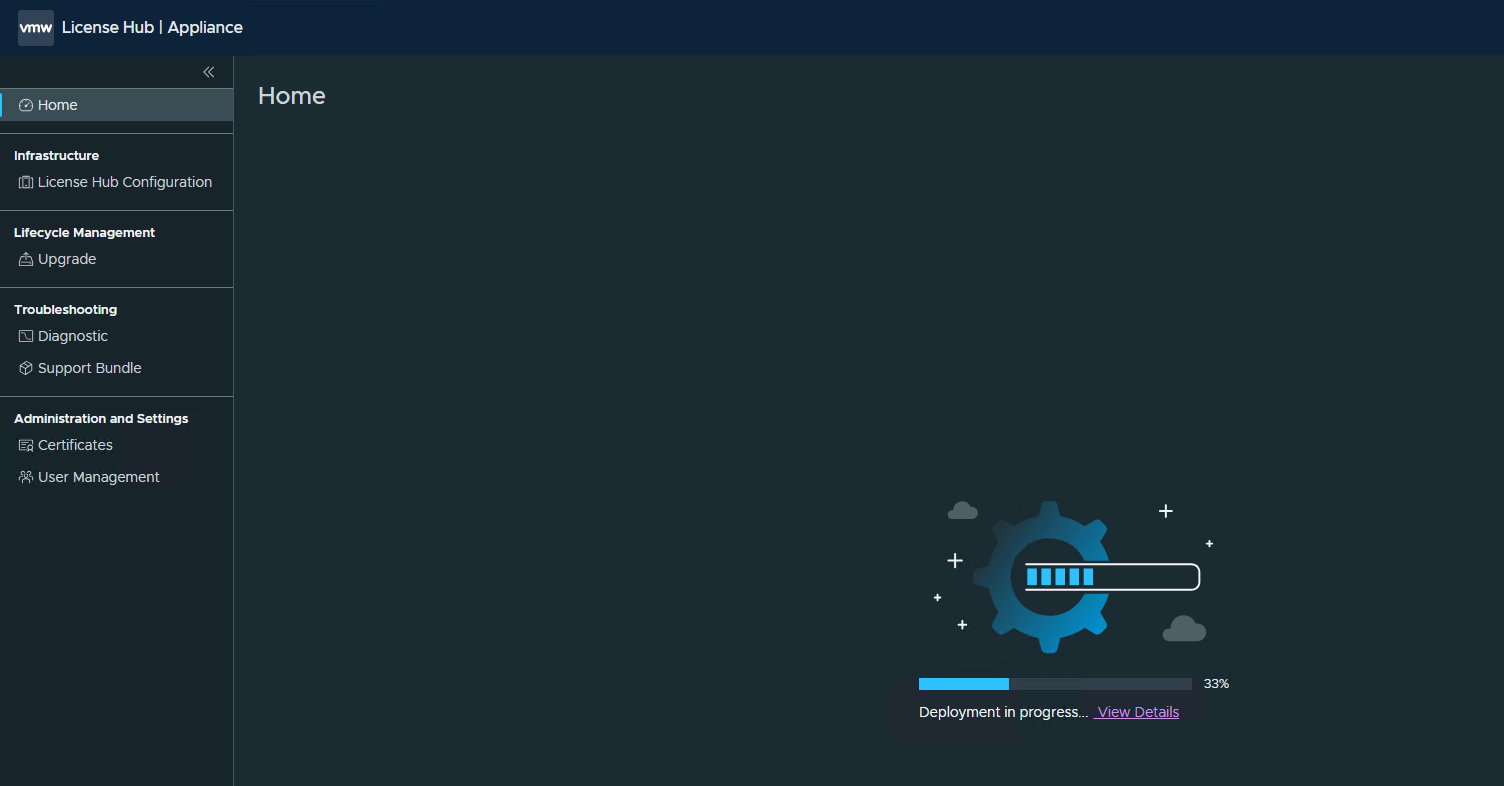
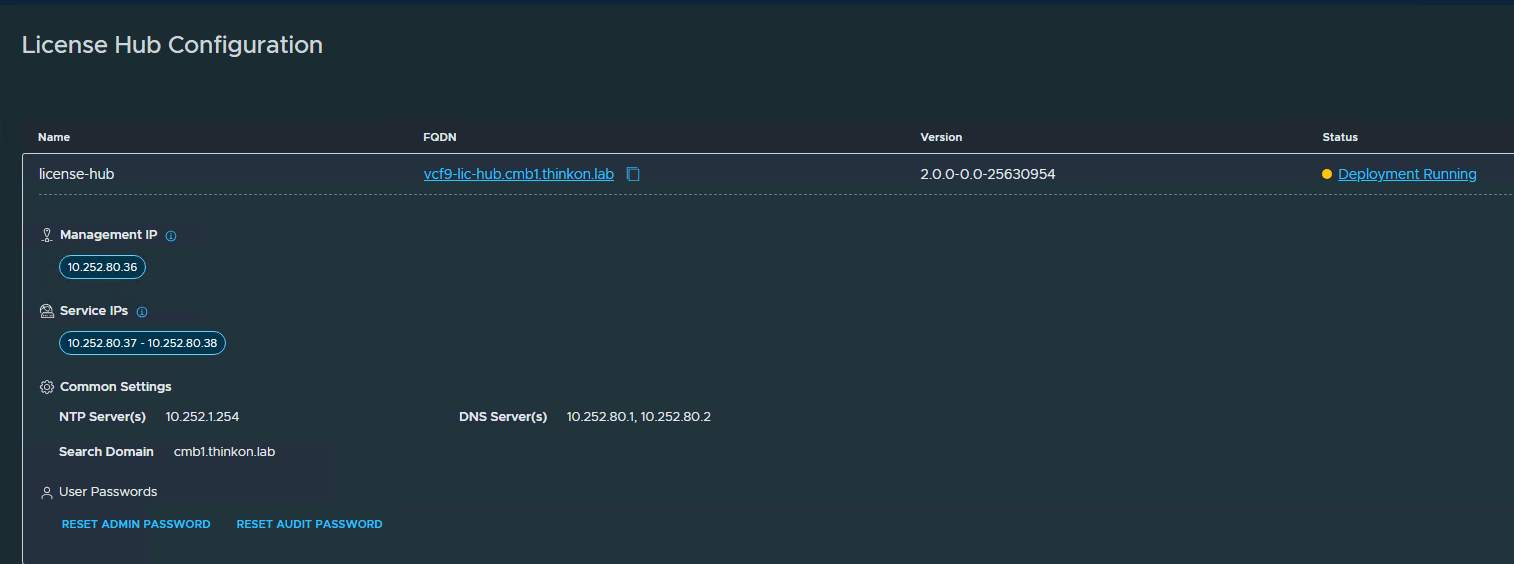
The dashboard displays the system information. It roughly takes 10-15 minutes for the deployment to finish.
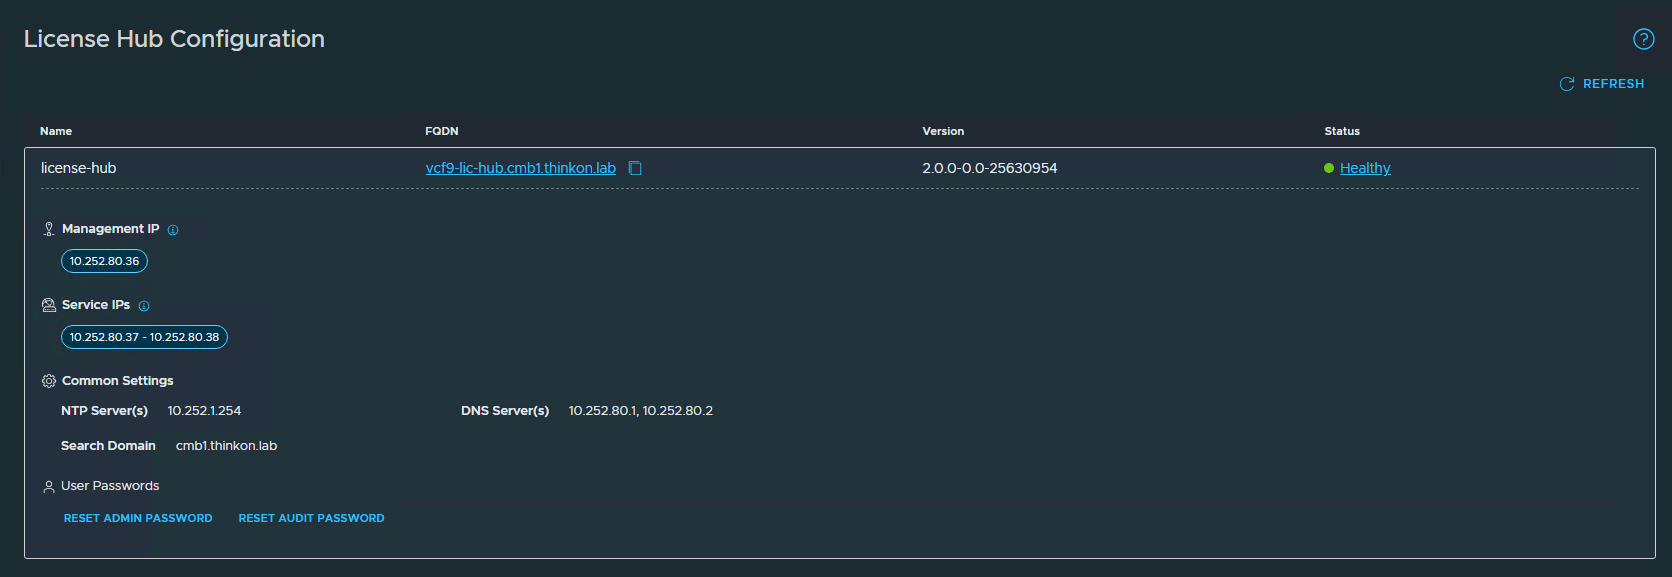
When the deployment finishes, the status turns healthy.
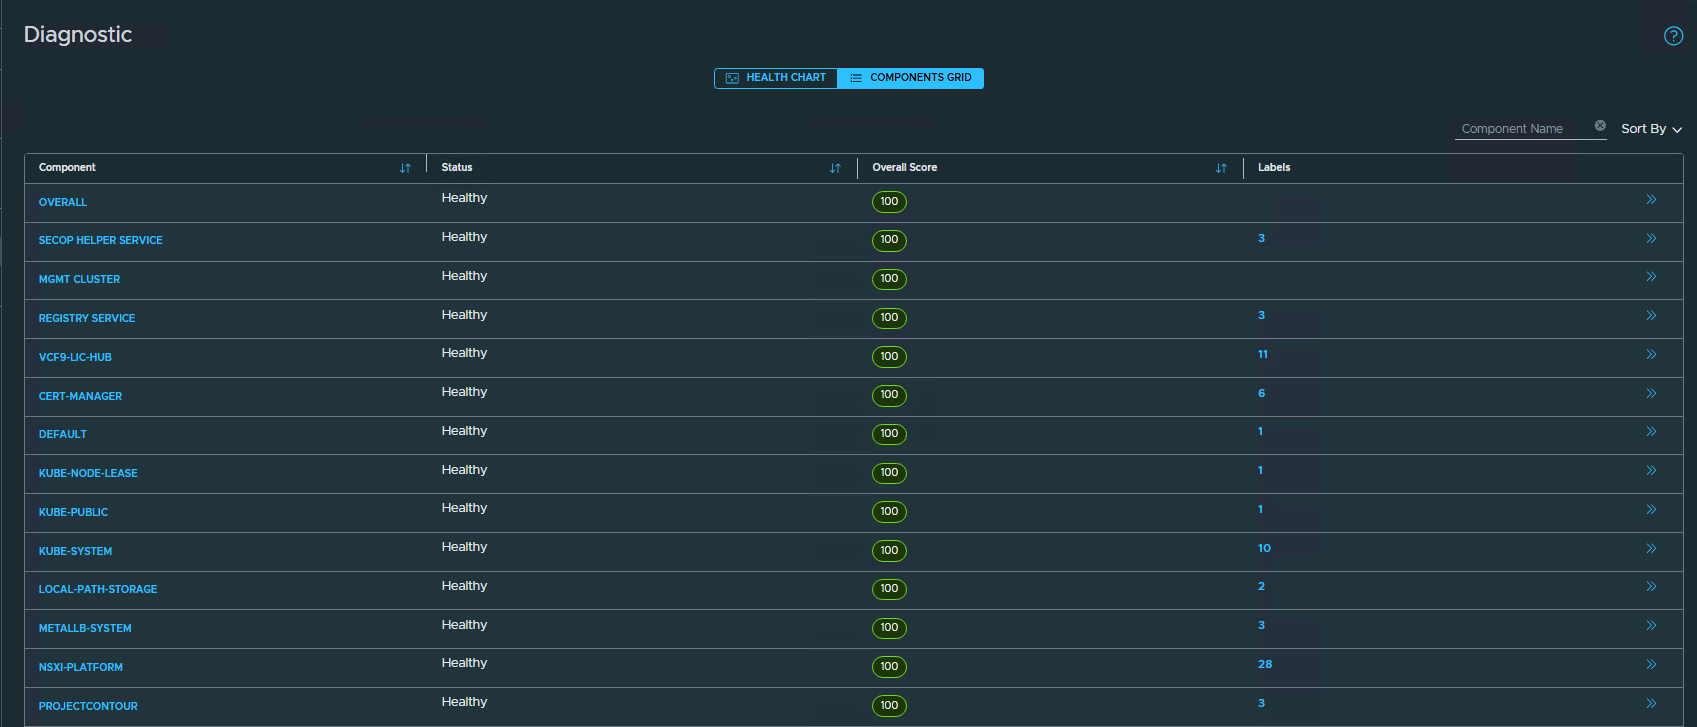
Navigate to the Diagnostic page to see the health of the Kubernetes platform.

Log out of the VAMI portal and connect to the appliance portal at https://<appliance-fqdn>/
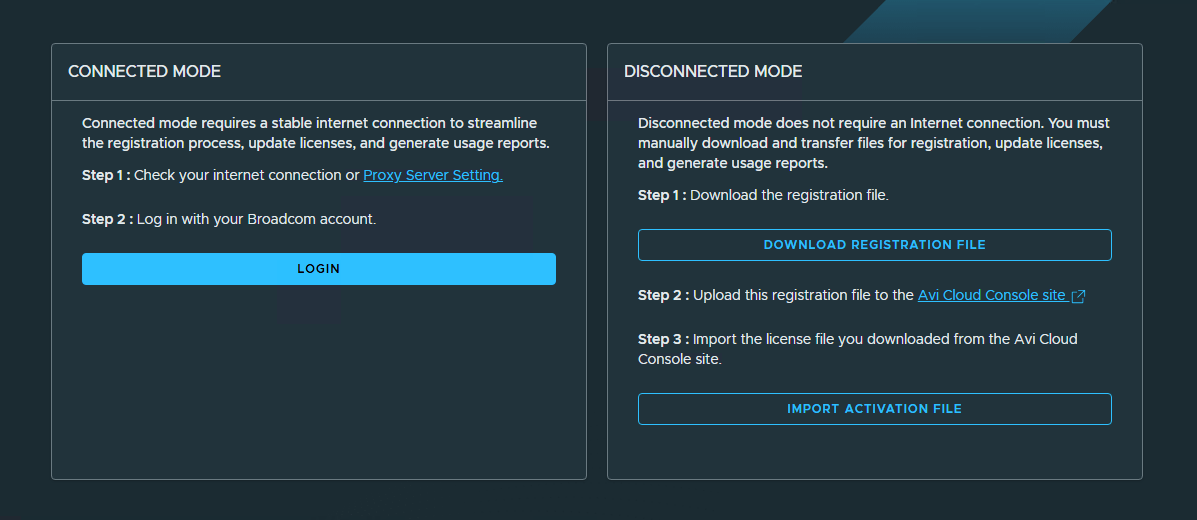
Navigate to the Registration and Reporting page and choose between connected and disconnected mode. In my lab, I have internet connectivity, so I choose the former.
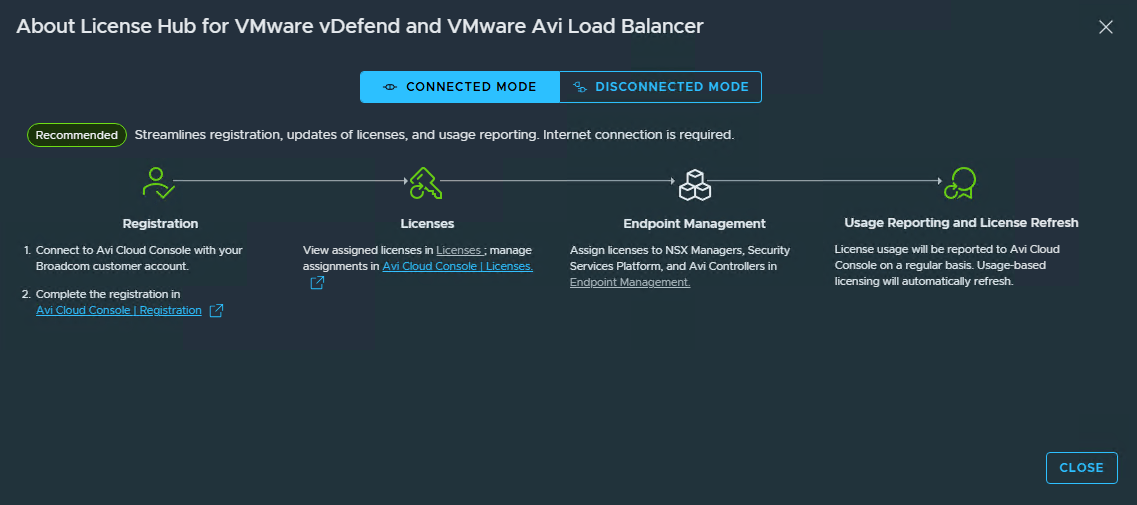
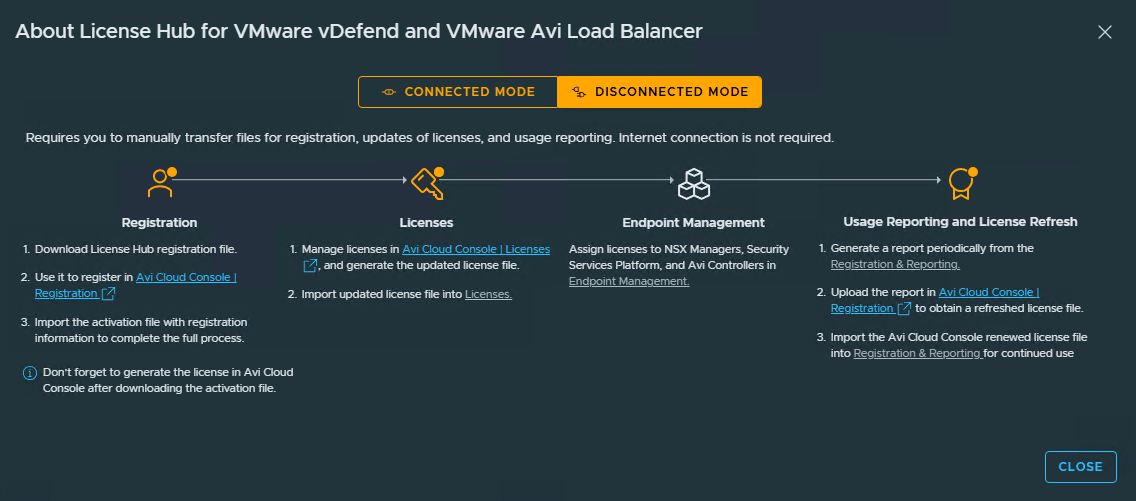
Clicking the disconnected mode provides you with a set of instructions to be followed for registering the license hub.
Upon selecting the connected mode, you must first login to the Avi Cloud Console using your Broadcom support portal credentials.
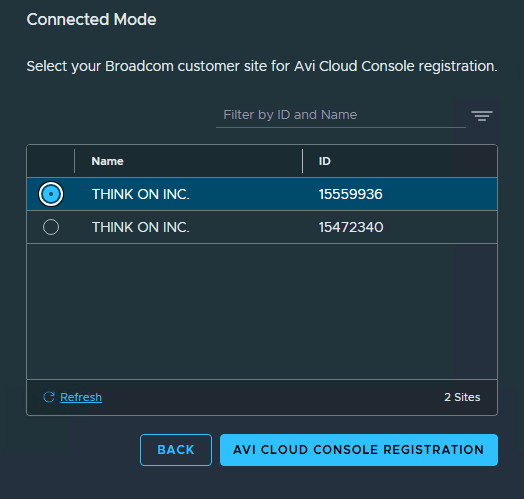
Select the Site-ID under which the License Hub will be registered.
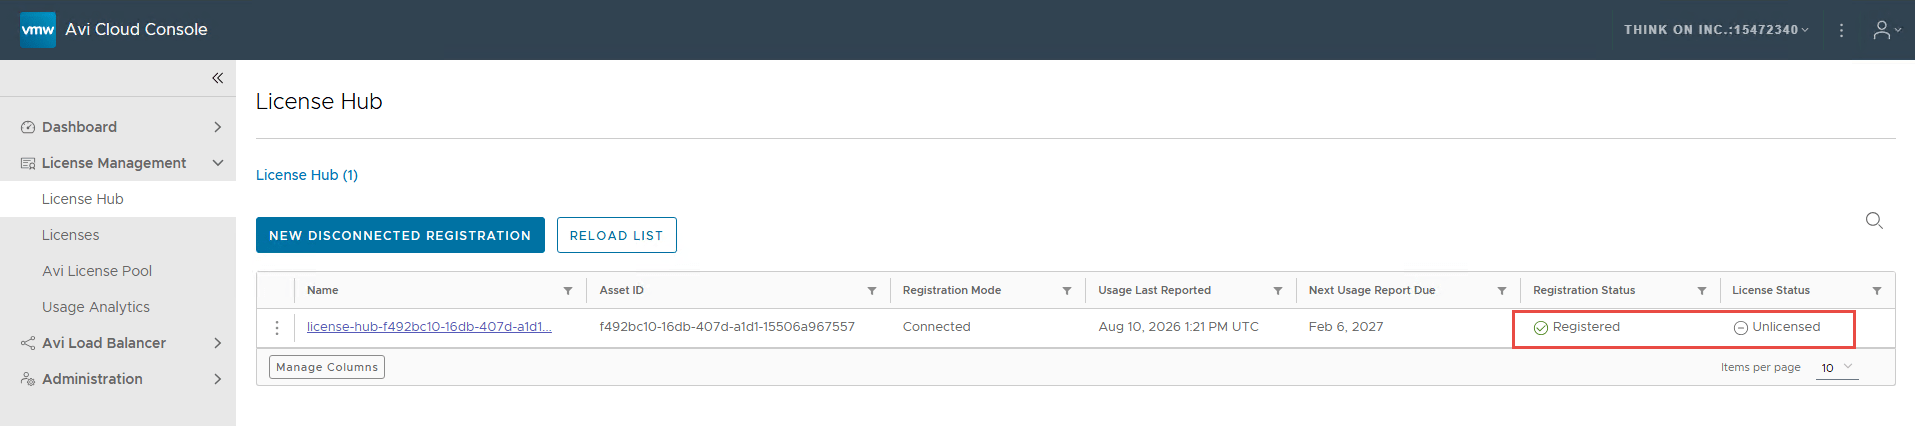
The License Hub is now registered in the Avi Cloud Console portal, but it is unlicensed.
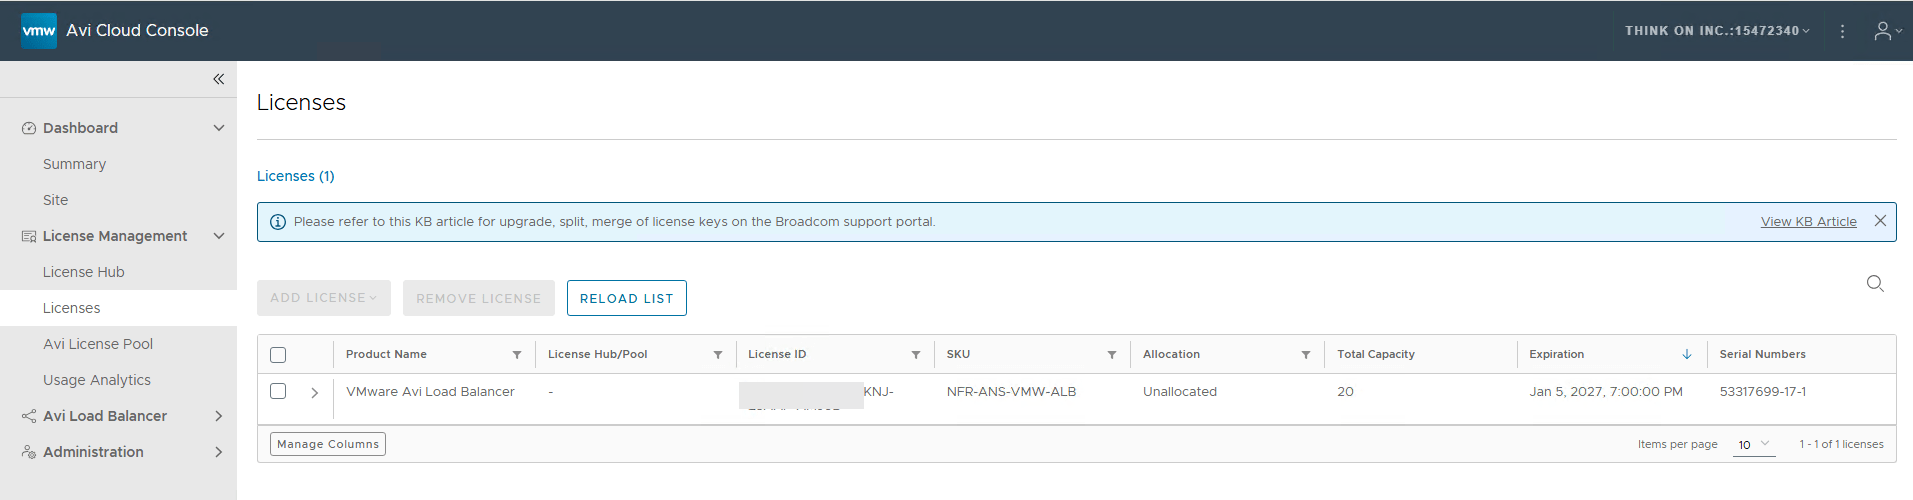
To assign a license to the License Hub, navigate to the Licenses tab and select the available license.
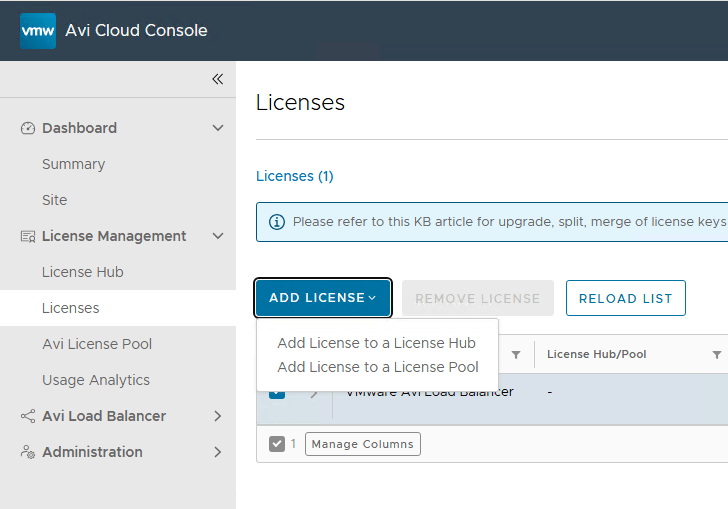
Click Add License and select “Add License to a License Hub.”
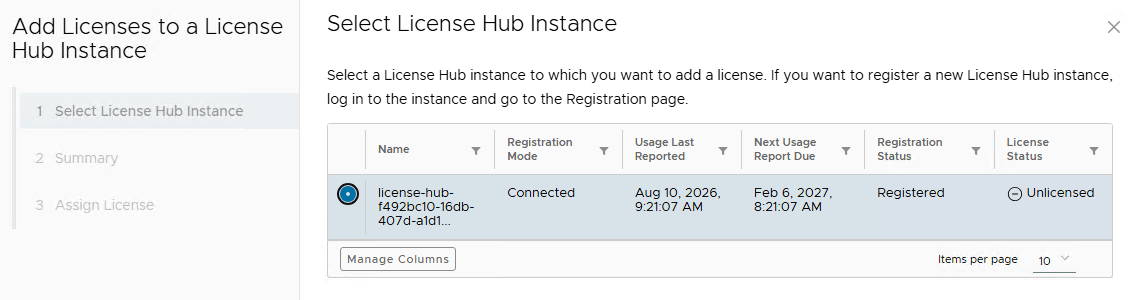
Select the License Hub instance from the list and click Next.
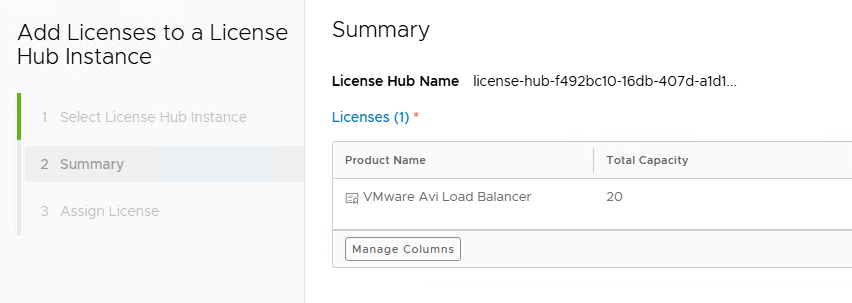
Verify the license capacity on the summary page and click Next.
Click Finish to complete the license assignment wizard.
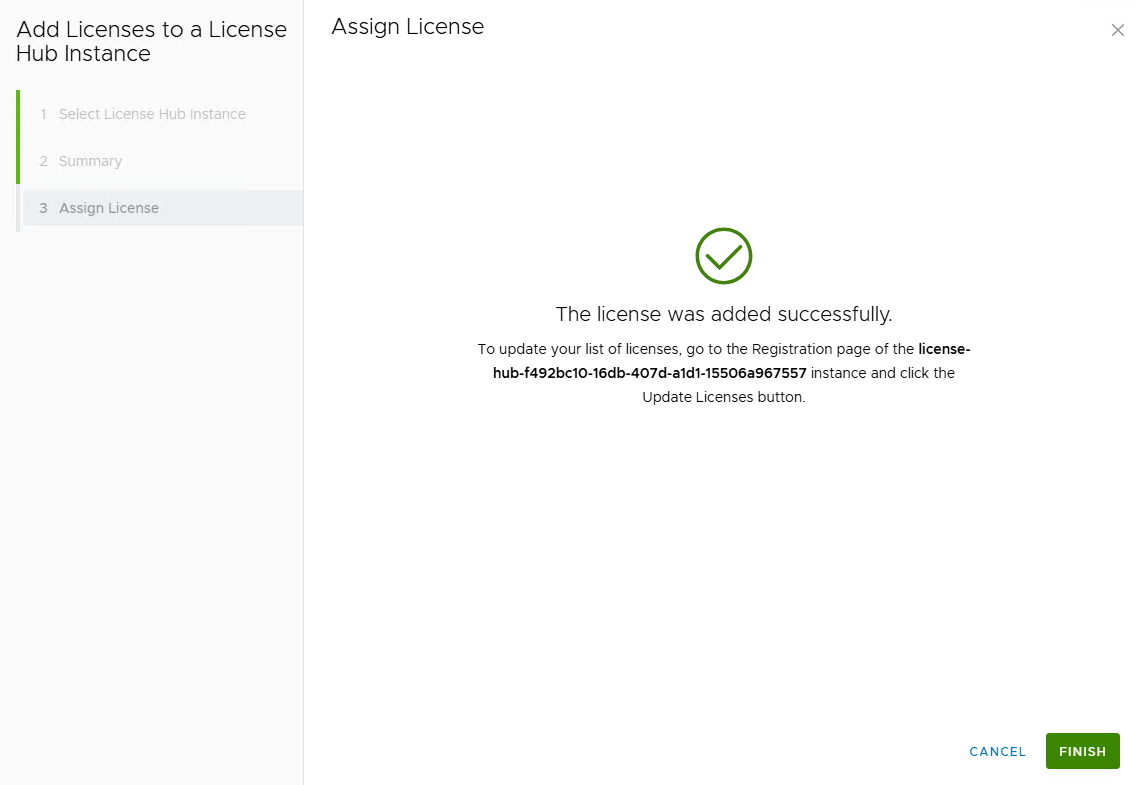
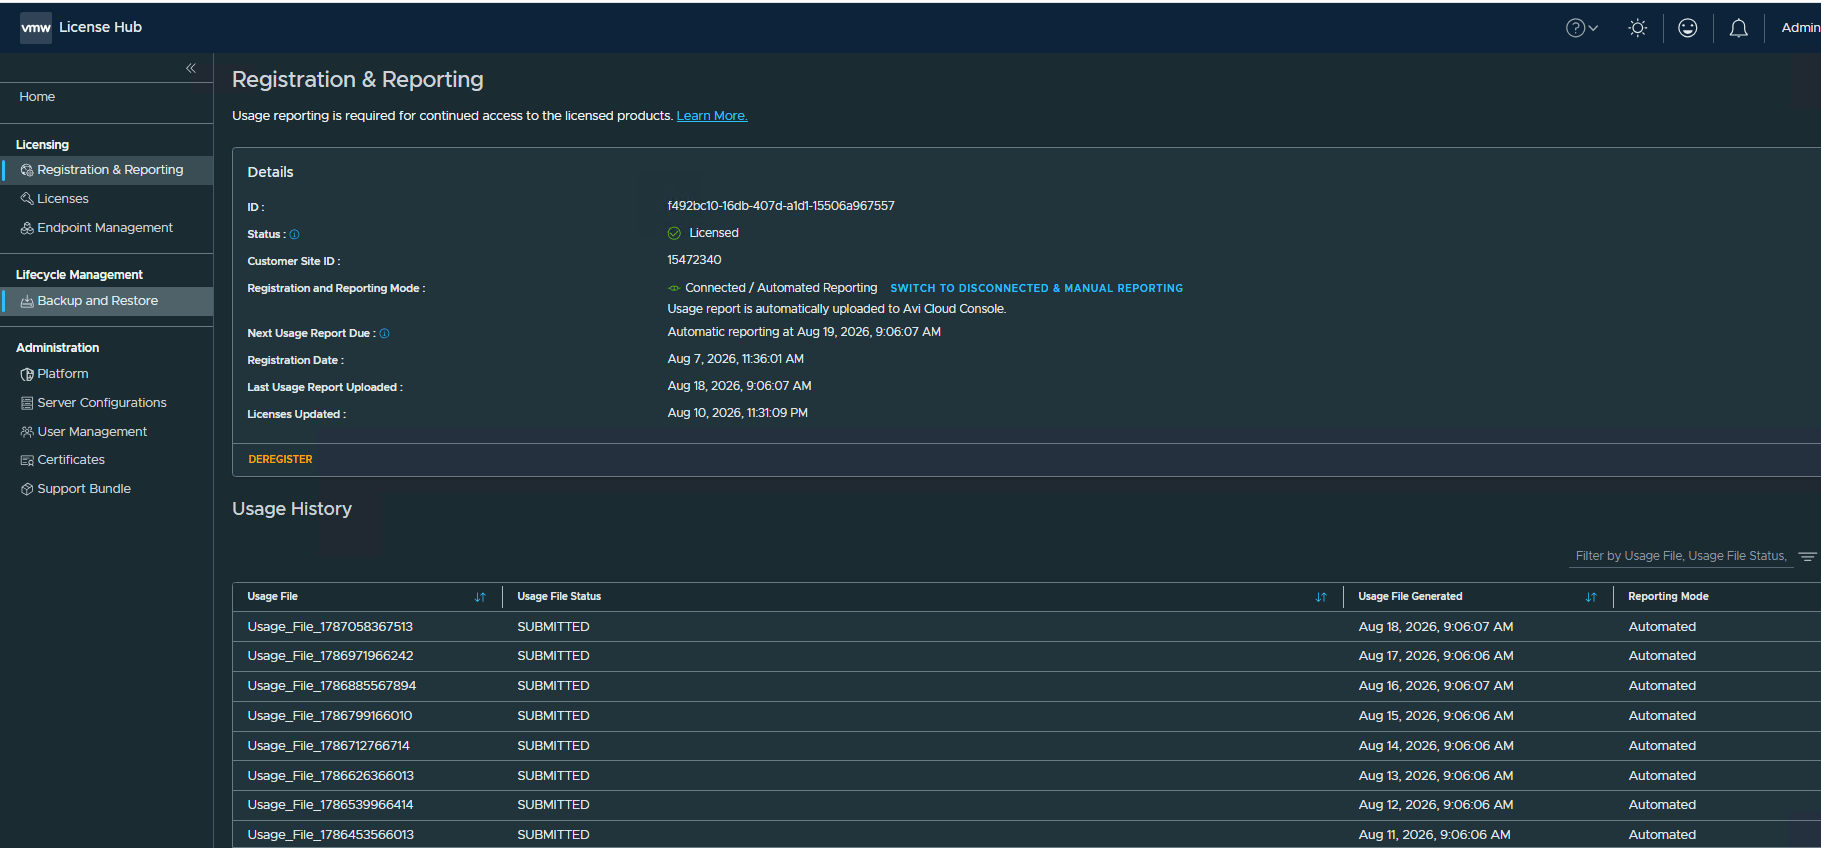
The License Hub now reports Licensed.

The next step in the configuration is to register the Avi controller in the License Hub and assign the license.
Navigate to the Endpoint Management page and click “Onboard An Endpoint.”
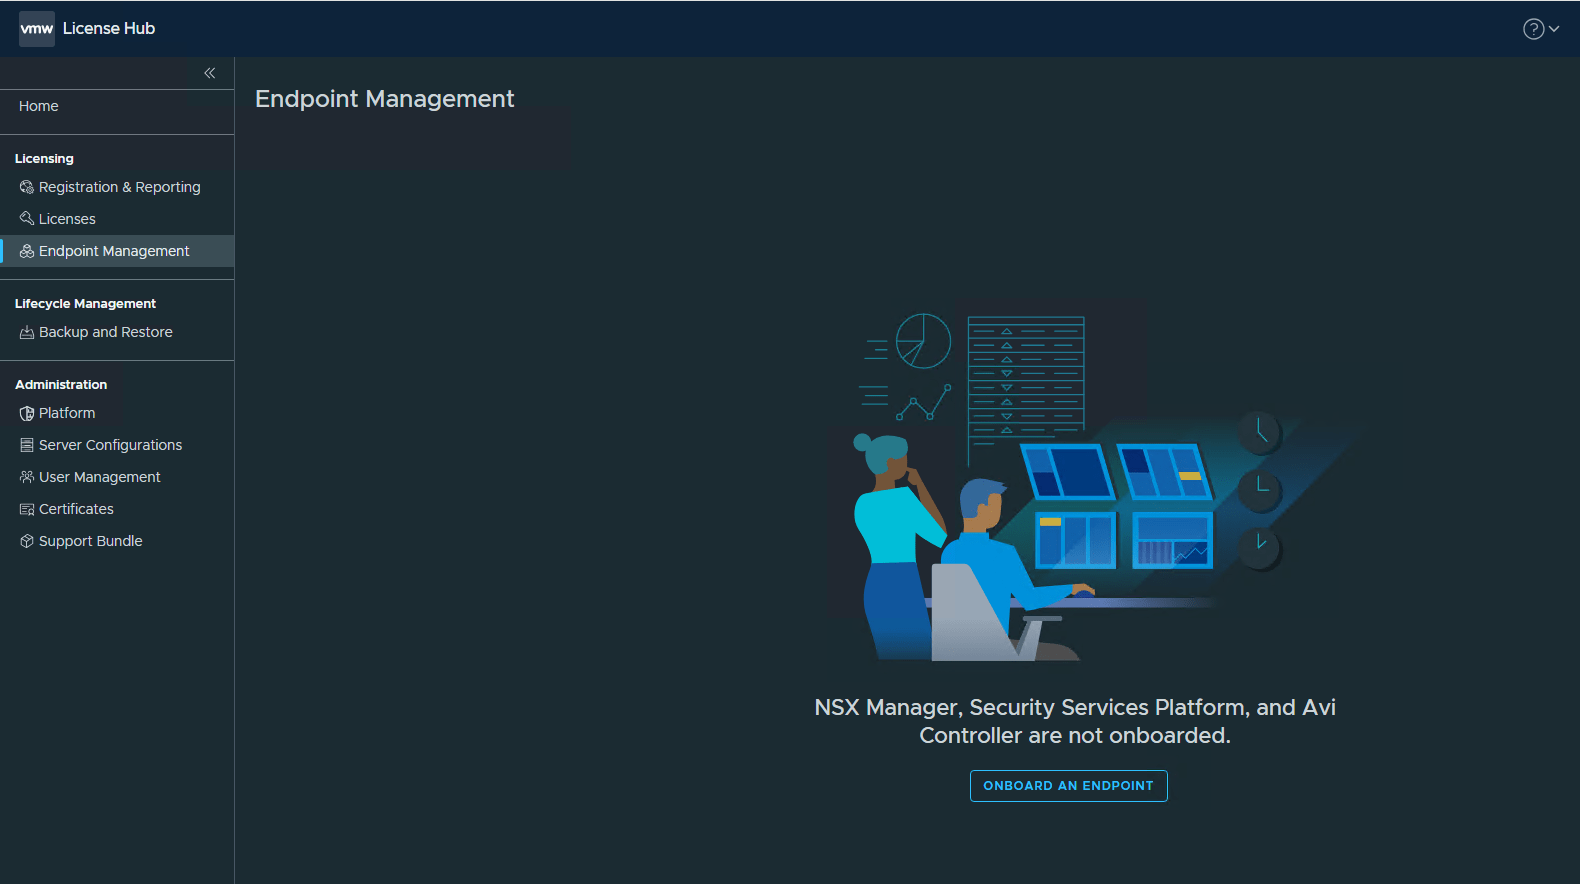
Select the type as Avi Controller and specify the endpoint name and Avi FQDN/credentials.
Under the certificate section, enter the Avi CA cert full chain in the PEM format. For instructions on how to retrieve the certificate chain, see the product documentation

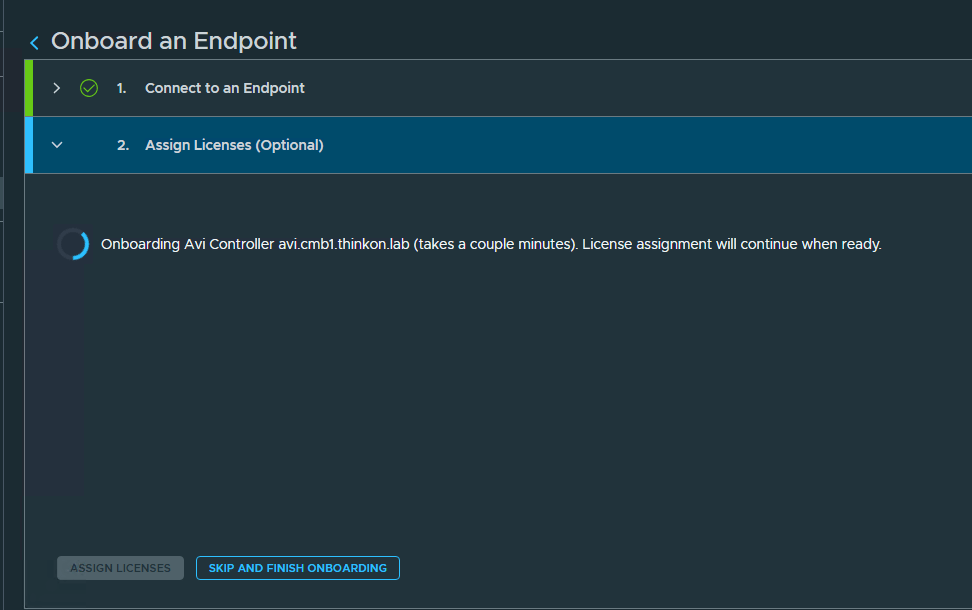
The Avi Controller onboarding starts.
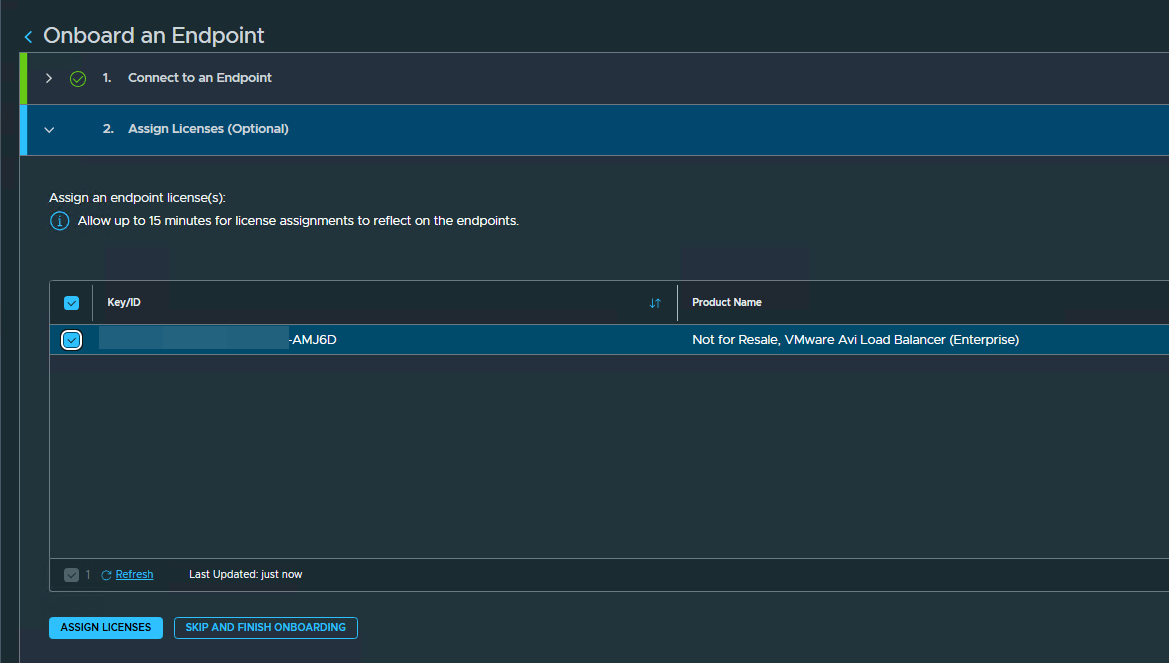
Select the license from the list and click Assign Licenses.
Note: It can take up to 15 minutes for the license to appear here after you assign the license to the License Hub in the Avi Cloud portal.
The Avi Controller endpoint now shows as ready.

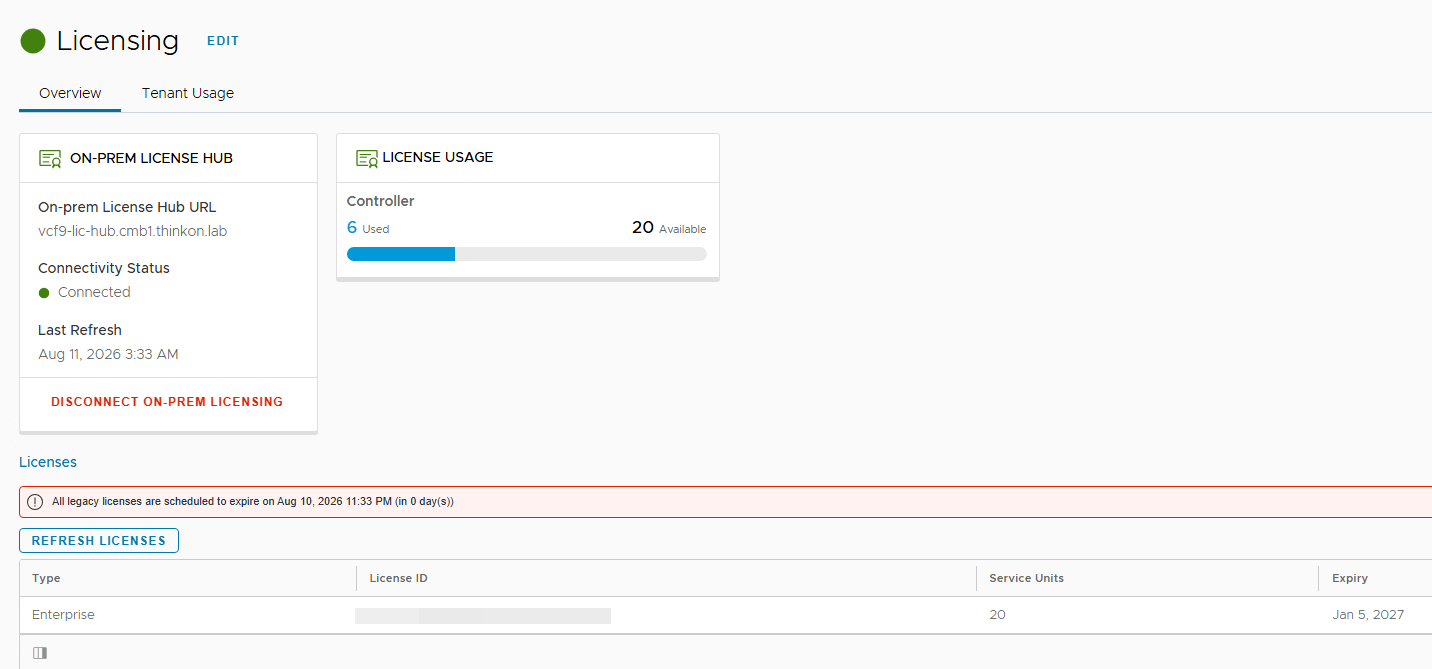
Login to the Avi Controller, change the licensing model to “On-Prem Licensing,” and delete any legacy license keys.
The License Hub appliance provides the automated usage report to the Avi Cloud portal periodically.
Platform Status and Diagnostics
The diagnostics page of the License Hub provides the component status and health score.
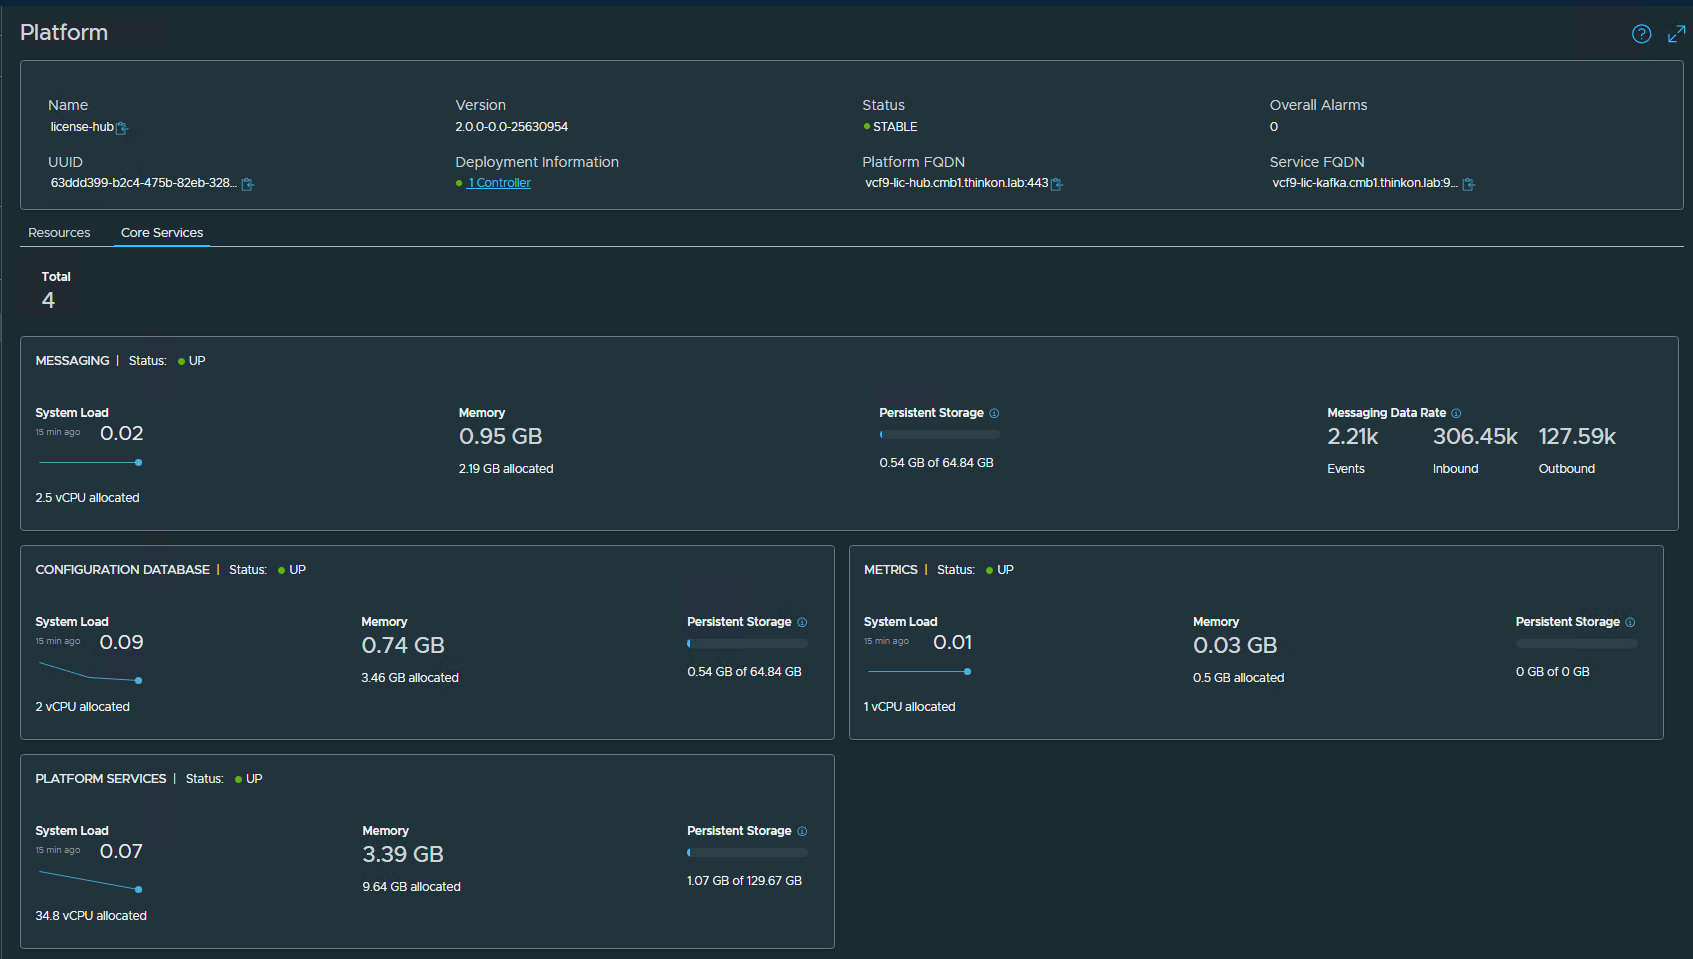
In the License Hub portal, navigate to the Platform page to see the status of the core services.
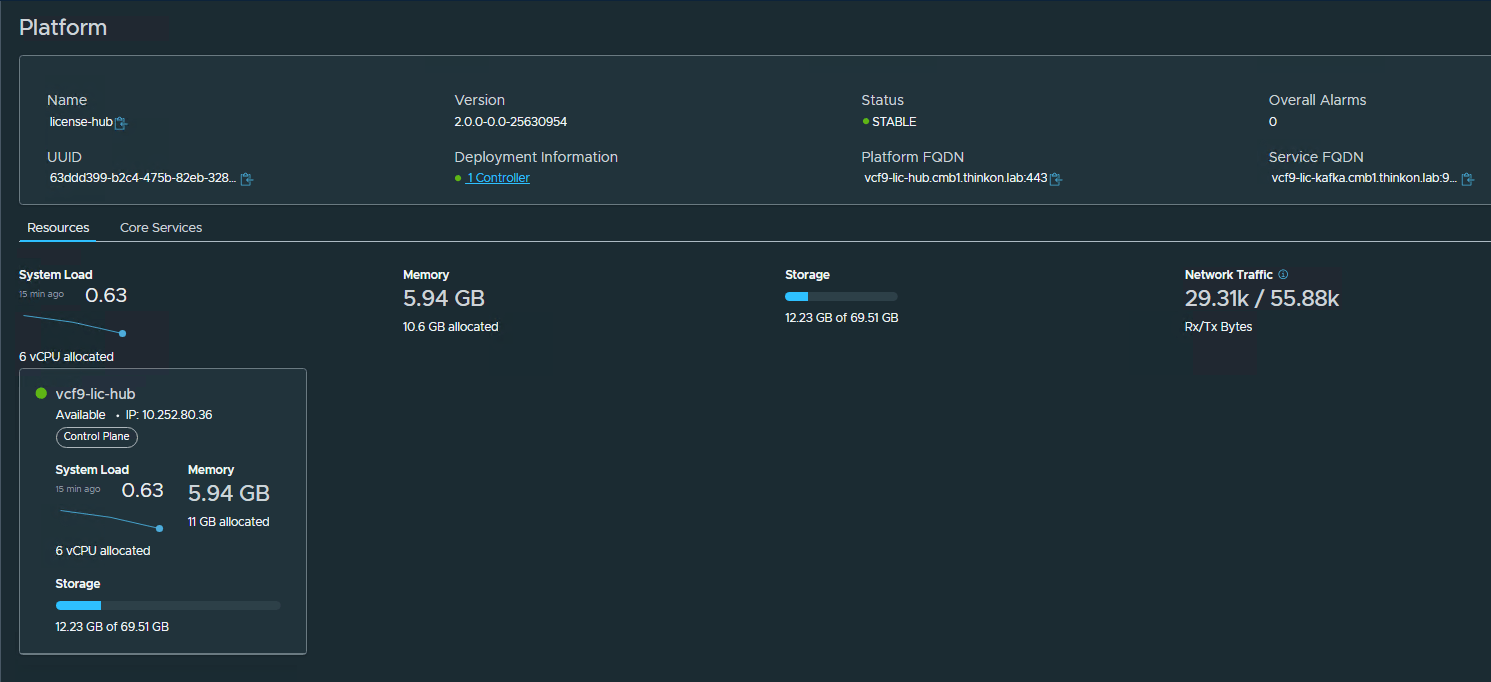
Under the Resources tab, the platform’s compute and storage allocation/usage can be evaluated.
Login to the VAMI console of the appliance, navigate to the Diagnostics page, and click the Components Grid to check the availability status of the components.
And that’s it for this post.
I hope you enjoyed reading this post. Feel free to share this on social media if it is worth sharing.