Welcome to part 2 of the VCF-9 series. In part 1, I discussed what’s new in VCF-9 and the deployment models and cluster topologies supported by VCF. In this post, I will walk through the deployment of VCF using the new VCF installer tool.
The cloud builder tool that was included with earlier VCF editions has been replaced by the VCF installer. The new installer offers a whole new experience for deploying VCF instances and is lightweight. VCF-9 deployment methodology is more robust, well-designed, and efficient than the previous Excel-based Cloud Builder method. The installer can deploy VCF instances via UI or through JSON files and supports both brownfield and greenfield deployments. The installer also includes an improved built-in validation.
The VCF installer is available in the OVA file format and can be downloaded from here.
Prepping the Environment
Network & VLANs
I am using a VyOS router to provide network connectivity to my nested lab and have configured the following VLANs.
| Name | VLAN | CIDR | Purpose |
| Infra-VLAN | 1610 | 172.16.10.0/24 | Infrastructure Management VLAN |
| vMotion-VLAN | 1611 | 172.16.11.0/24 | vMotion NW for ESXi Host |
| vSAN-VLAN | 1612 | 172.16.12.0/24 | vSAN Storage Network |
| TEP-VLAN Host | 1613 | 172.16.13.0/24 | VLAN for ESXi Host Overlay |
| TEP-VLAN Edges | 1614 | 172.16.14.0/24 | VLAN for Edge Overlay |
| BGP Peering VLAN 01 | 1615 | 172.16.15.0/24 | Edge Uplink01 VLAN |
| BGP Peering VLAN 02 | 1616 | 172.16.16.0/24 | Edge Uplink02 VLAN |
| Reserved VLAN | 1617 | 172.16.17.0/26 | Reserved VLAN for Future Use |
DNS Records
I am running an AD-integrated DNS on Windows Server 2022 and have configured the following DNS records.
| Name | IP Address | Purpose |
| vcf-deployer | 172.16.10.70 | VCF 9 Installer |
| mj-vcf9-esxi01 | 172.16.10.51 | Mgmt Domain ESXi host 01 |
| mj-vcf9-esxi02 | 172.16.10.52 | Mgmt Domain ESXi host 02 |
| mj-vcf9-esxi03 | 172.16.10.53 | Mgmt Domain ESXi host 03 |
| mj-vcf9-esxi04 | 172.16.10.54 | Mgmt Domain ESXi host 04 |
| vcf-m1-vc01 | 172.16.10.21 | Mgmt Domain vCenter |
| mj-vcf9-vsa | 172.16.10.50 | vCenter Server |
| mj-vcf9-nsx | 172.16.10.60 | Mgmt Domain NSX Virtual IP |
| mj-vcf9-nsx01 | 172.16.10.61 | Mgmt Domain NSX Node 01 |
| mj-vcf9-edge01 | 172.16.10.62 | Mgmt Domain NSX Edge 01 |
| mj-vcf9-edge02 | 172.16.10.63 | Mgmt Domain NSX Edge 02 |
| mj-vcf9-ops | 172.16.10.71 | VCF Operations appliance. |
| mj-vcf9-fleetm | 172.16.10.72 | VCF Fleet Manager appliance. |
| mj-vcf9-fleetcp | 172.16.10.73 | VCF Fleet Collector appliance |
Nested ESXi Configuration
The nested ESXi VMs are deployed as per the following specifications:
| Component | Specification |
| vCPU | 12 |
| Memory | 72 GB |
| Disk | 900 GB 1×50 GB HDD for ESXi installation 1×150 GB SSD for vSAN Cache 2×350 GB SSD for vSAN Capacity |
| Network | 2×10 GBPS connected to trunk port group |
After you install the nested ESXi host, configure the following:
- Configure the NTP server and set the NTP service to start and stop with the host. Ensure you use the same NTP server that you configured in the VCF installer.
- Start the SSH service and set the service policy to start and stop with the host.
- Edit the VM network group and tag it for the VLAN you designated for infrastructure management.
- Regenerate ESXi self-signed certificates: Execute the command /sbin/generate-certificates and reboot the host.
VCF Installer Deployment
Deploy the VCF installer OVA and login to the UI using admin@local and the password you set during deployment.
Depot Settings
The VCF Installer appliance is very lightweight, and the additional OVA files for vCenter, NSX Manager, VCF Operations, and Automation can be downloaded automatically from the Broadcom portal. This requires configuring the download token in the depot settings. If you have not generated the token yet, you can generate a new one by following the instructions documented here.
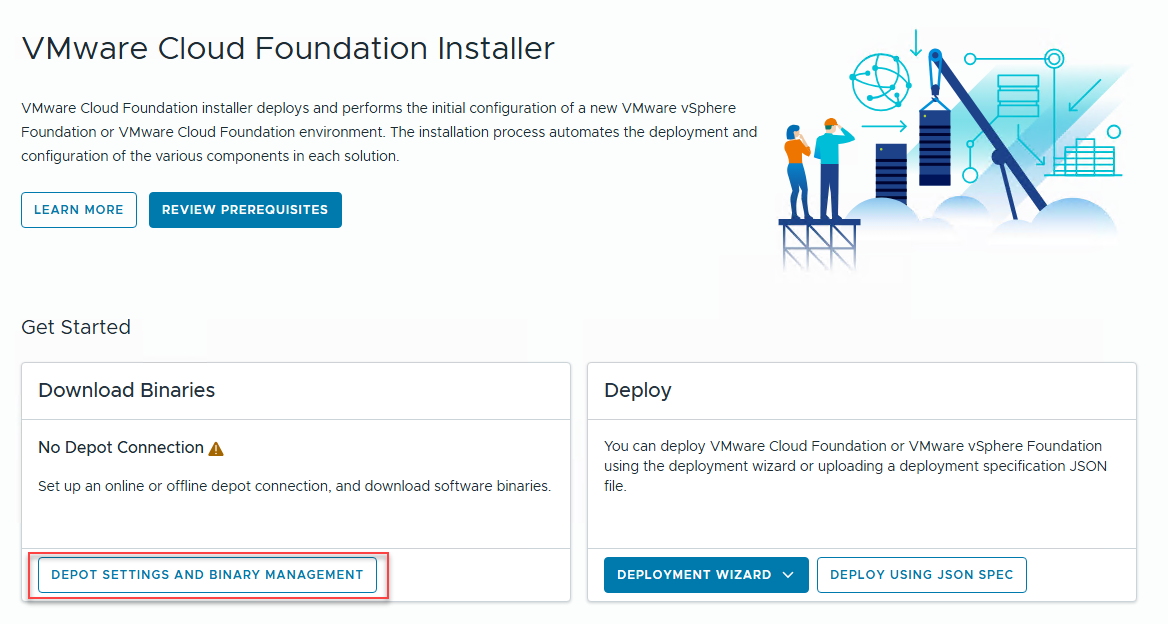
Click on Depot settings and Binary management to set up the automatic downloads.
You can choose to connect to the online depot or an offline depot. In my lab, I am connecting to the online depot. For offline depot, see William Lam’s blog post.
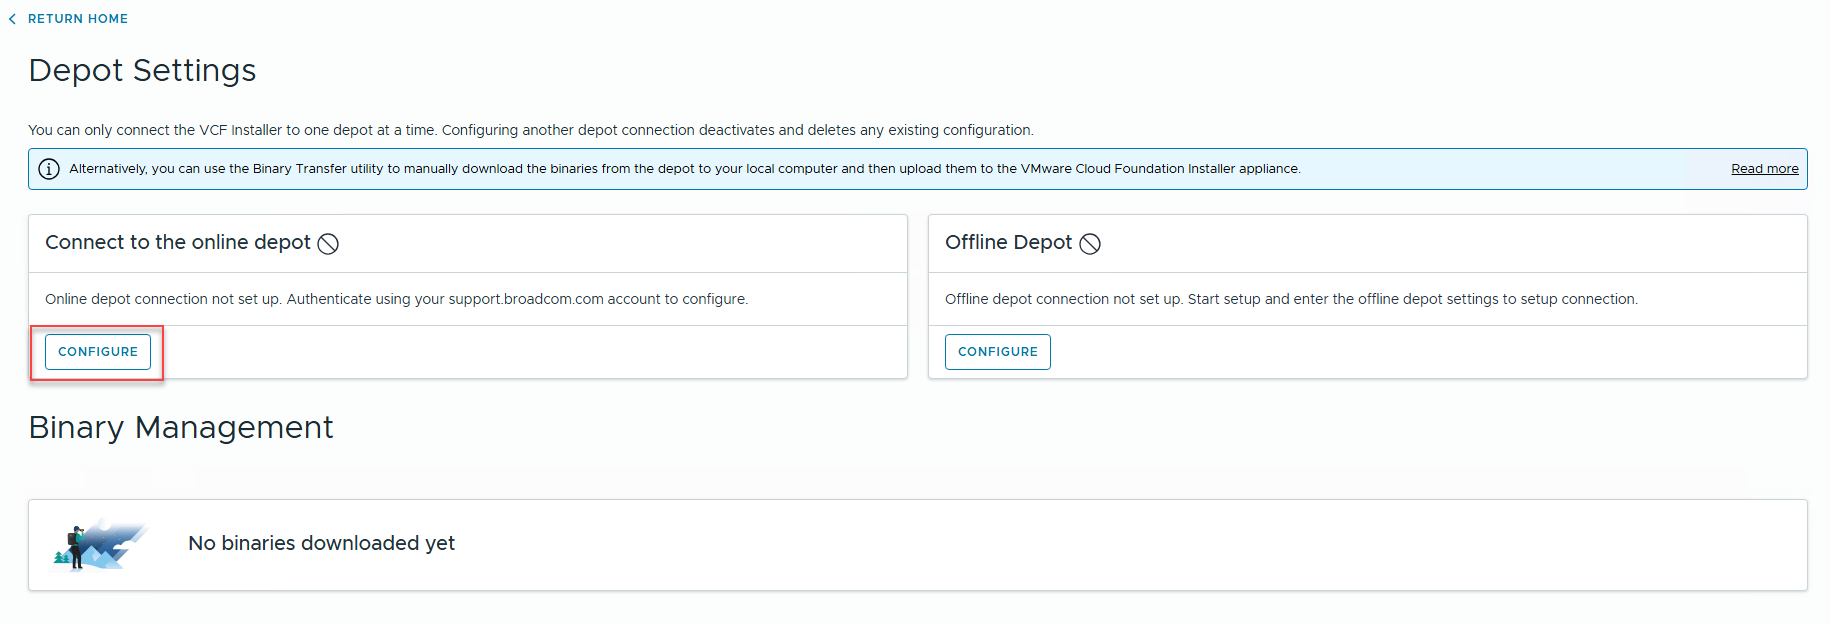
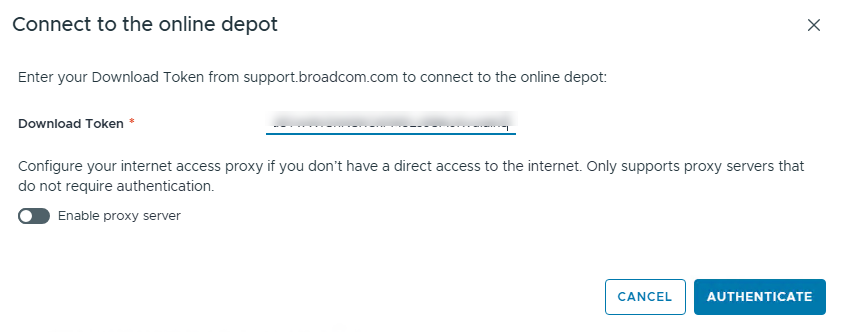
Click Configure under Online Depot and paste your download token, and click Authenticate.
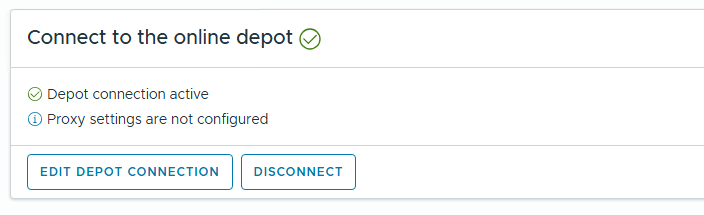
On successful authentication, you should see the “Depot connection active” message.
You should now see the version 9.0.0.0 binaries available for download.
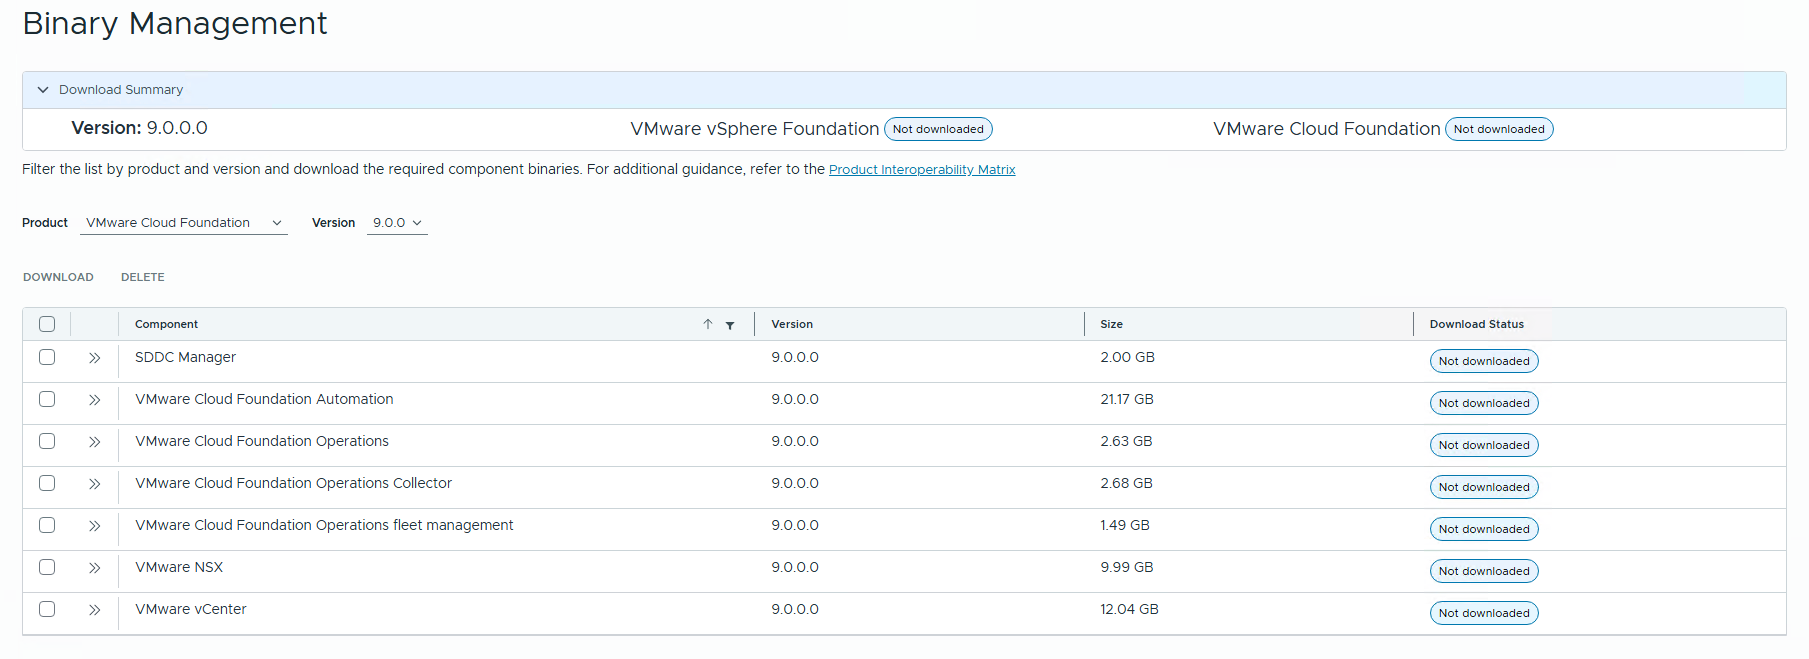
Select the binaries you want to download and click the Download button.
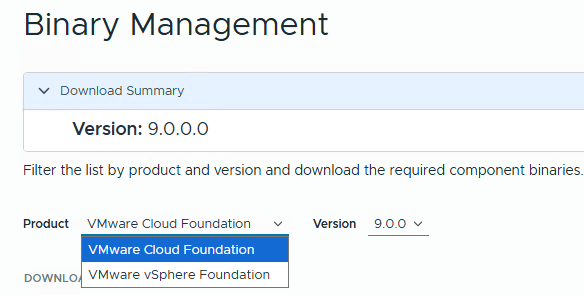
You can view the vSphere Foundation binaries by using the drop-down button for the product.
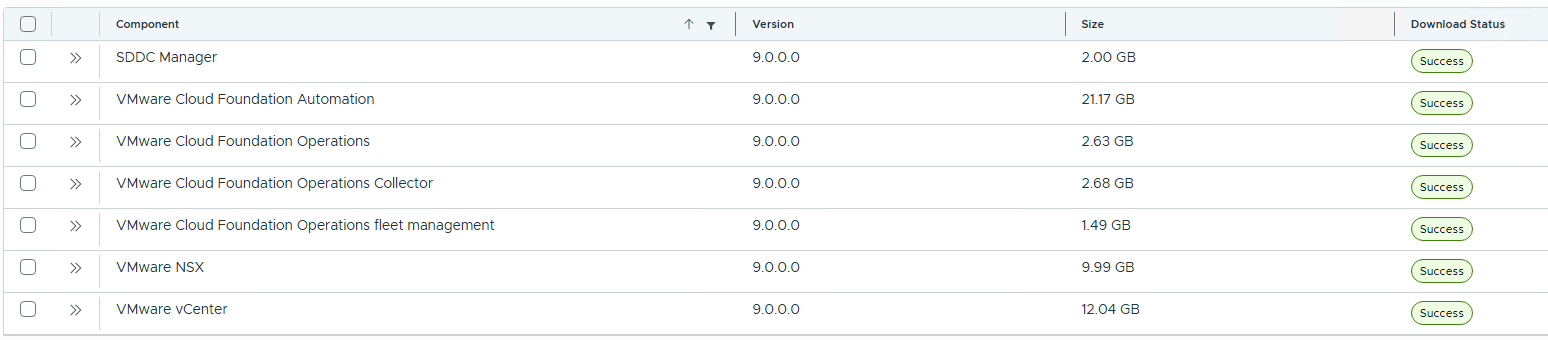
The download can take a while, depending on your internet speed. Once the binaries are downloaded, the download status should show successful. If a binary fails to download, you can retry the download button, and it should fix the issue.
Deployment Wizard
Navigate back to the home screen to launch the deployment wizard. Based on your use case, you can choose to deploy VMware Cloud Foundation or vSphere Foundation.
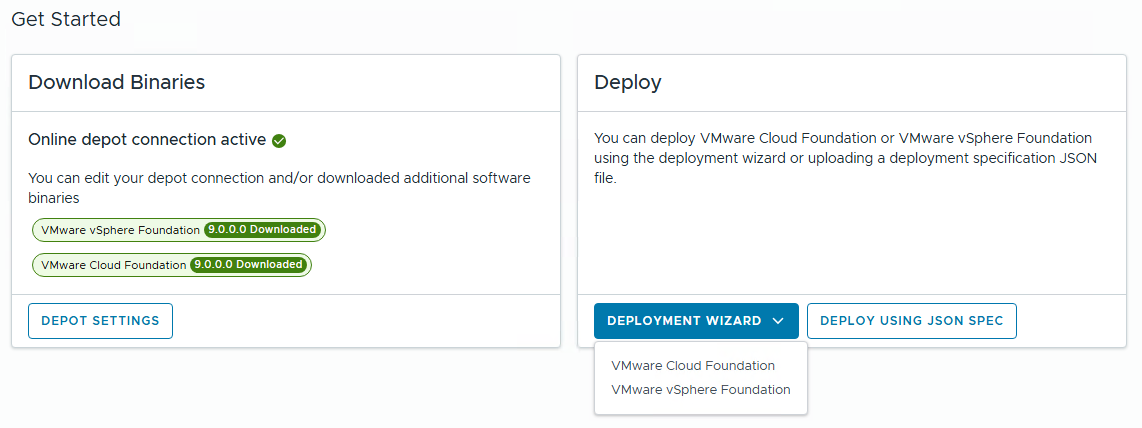
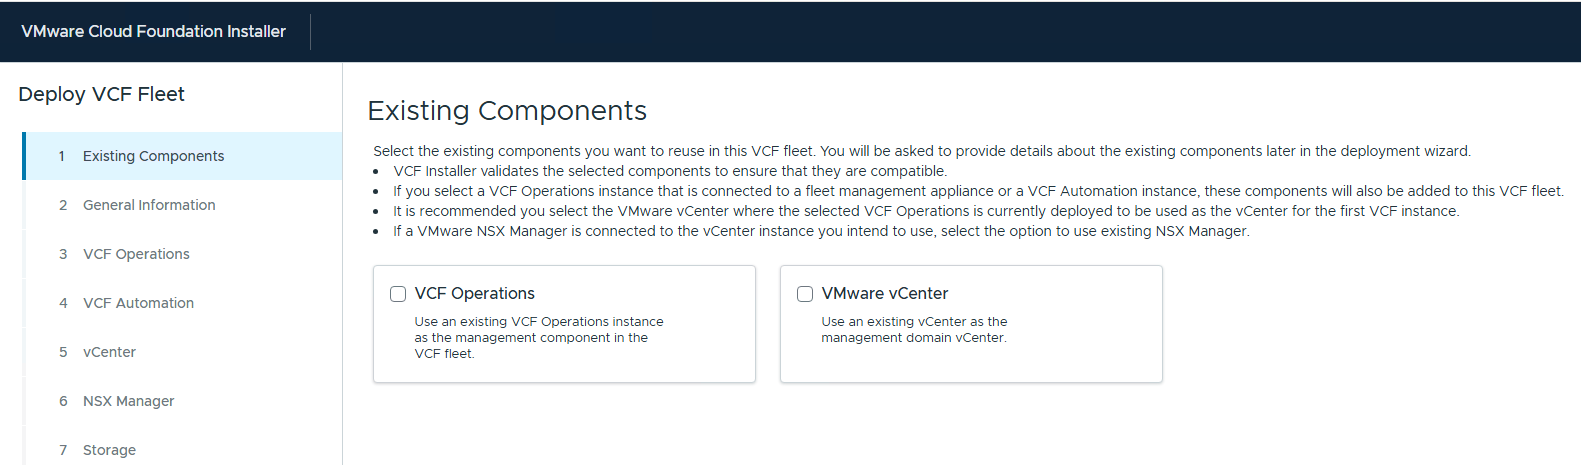
I am performing a greenfield deployment, so I selected the first option to deploy to a new VCF fleet. If you already have a VCF Fleet in your infrastructure and you want to scale the environment, select the second option, which will deploy the additional VCF instance in the existing VCF Fleet.
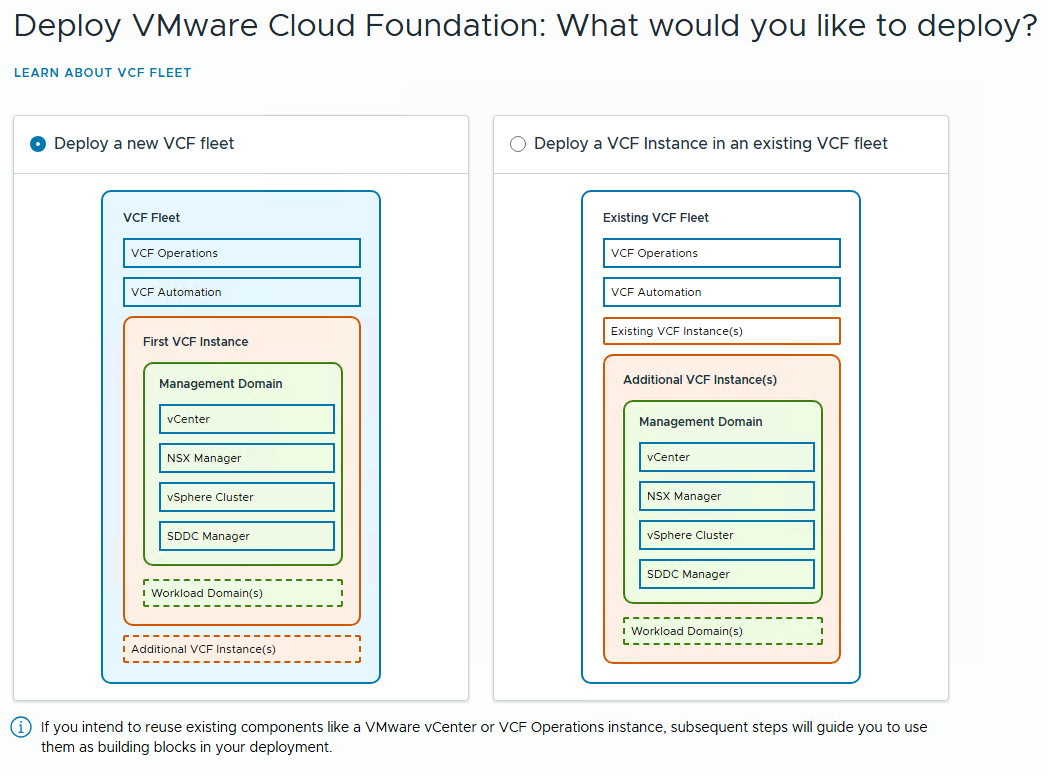
If your deployment is brownfield and you need to import VCF Operation or VMware vCenter, select the appropriate option.
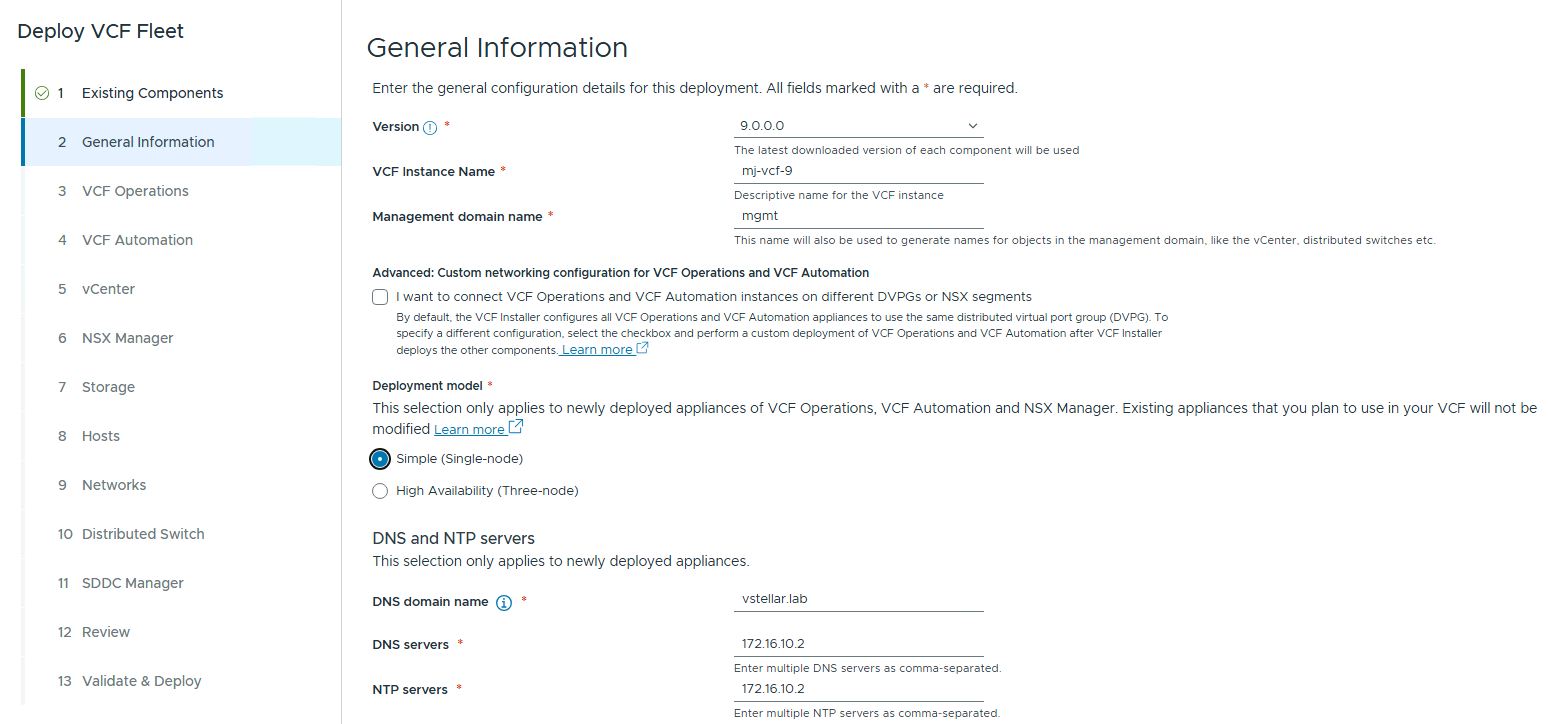
Enter the following information:
- VCF Version
- VCF Instance Name
- Management domain name
- Deployment model – Single or High Availability. Since this is a lab, I selected Single.
- DNS domain name
- DNS servers
- NTP servers
Enter the values for the VCF Operations appliance:
- Operations Appliance Size
- Administrator & Root Password
- Fleet Management Appliance FQDN
- Operations Collector Appliance FQDN
You can choose the use the same password as the operations appliance for the fleet management and the collector appliance.
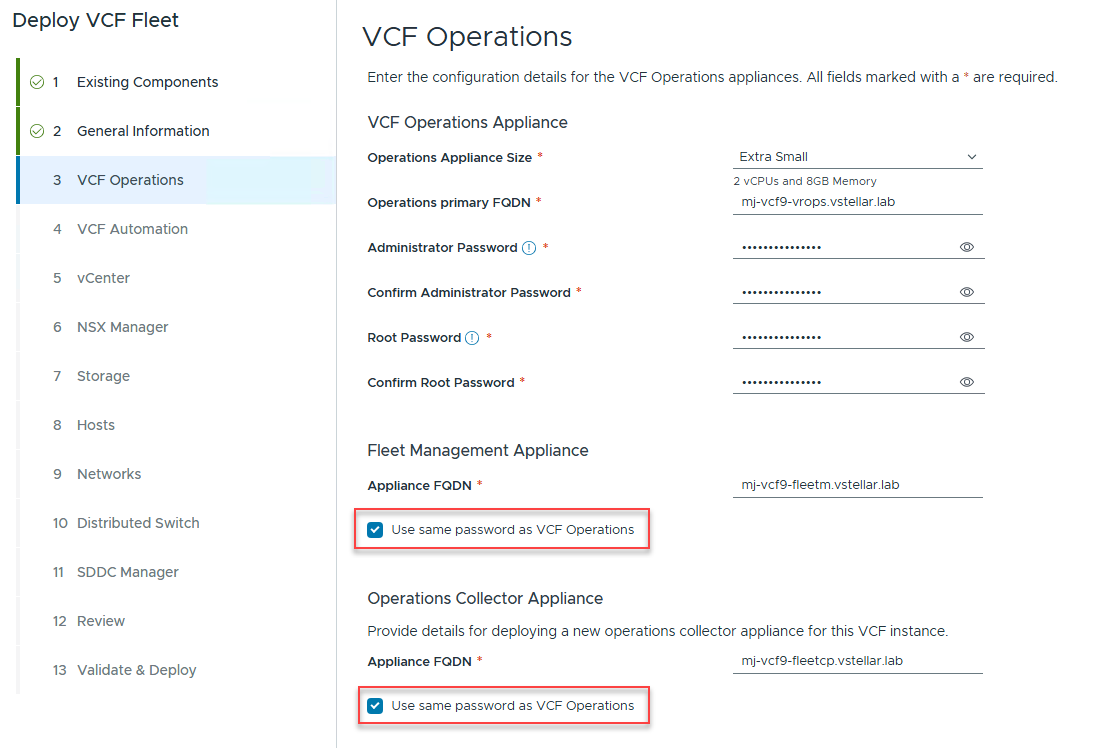
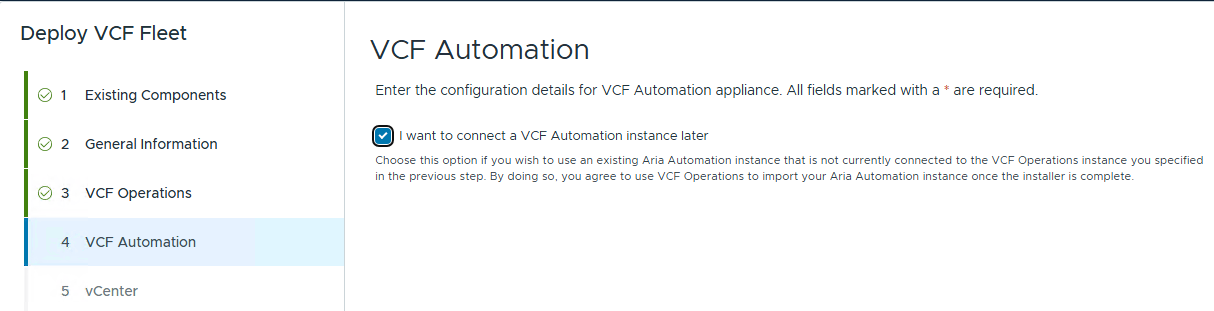
I have skipped the deployment of the VCF automation appliance as I need that later as part of day-1.
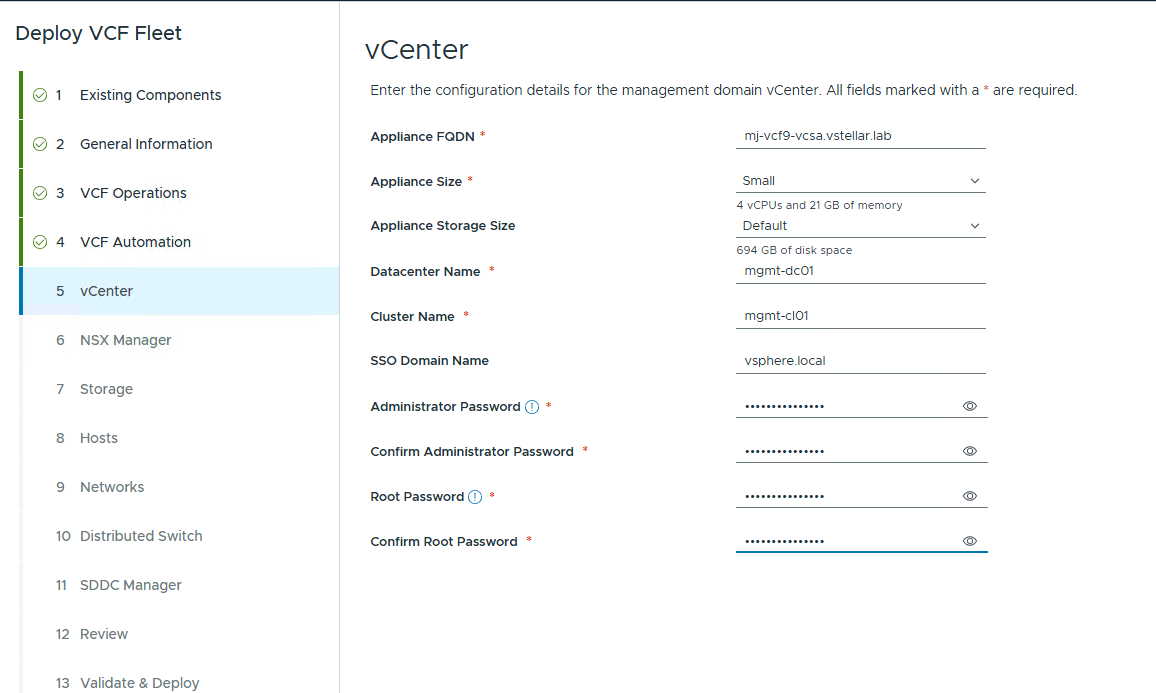
Specify the vCenter server details and proceed to the next screen.
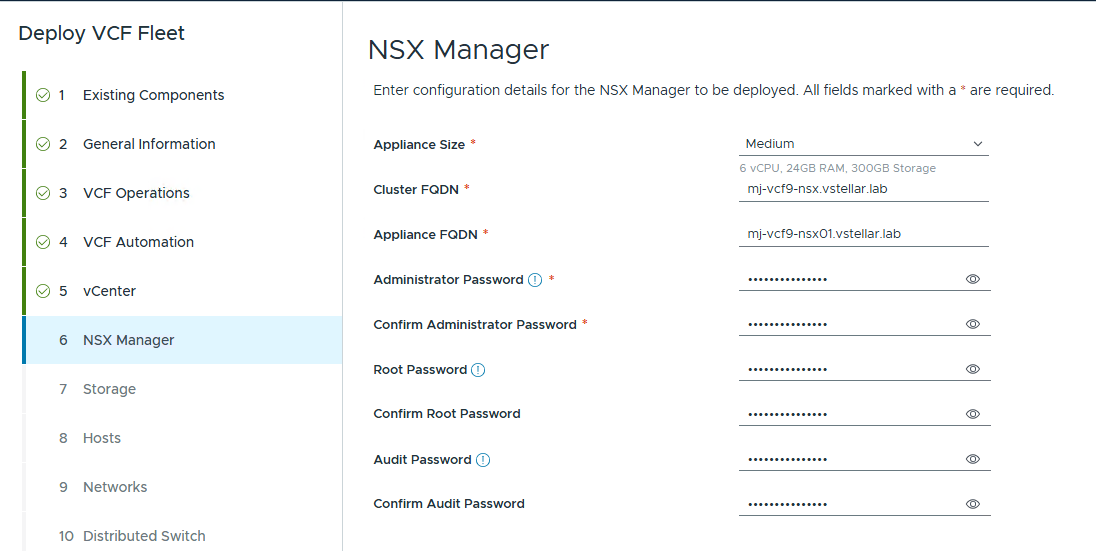
Specify the NSX manager details and proceed to the next screen.
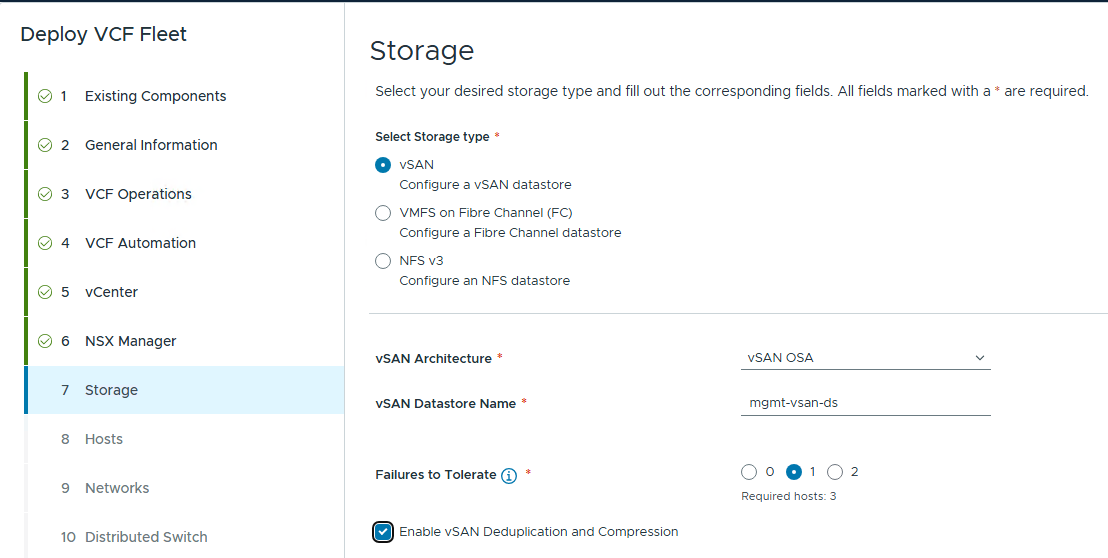
Enter the Storage configuration values:
- Select Storage type: vSAN, VMFS on Fibre Channel, or NFS v3.
If you select vSAN, enter the following
- vSAN Architecture
- vSAN Datastore Name
- Failures to Tolerate
Select whether you want to enable Deduplication and Compression. Your storage should support this.
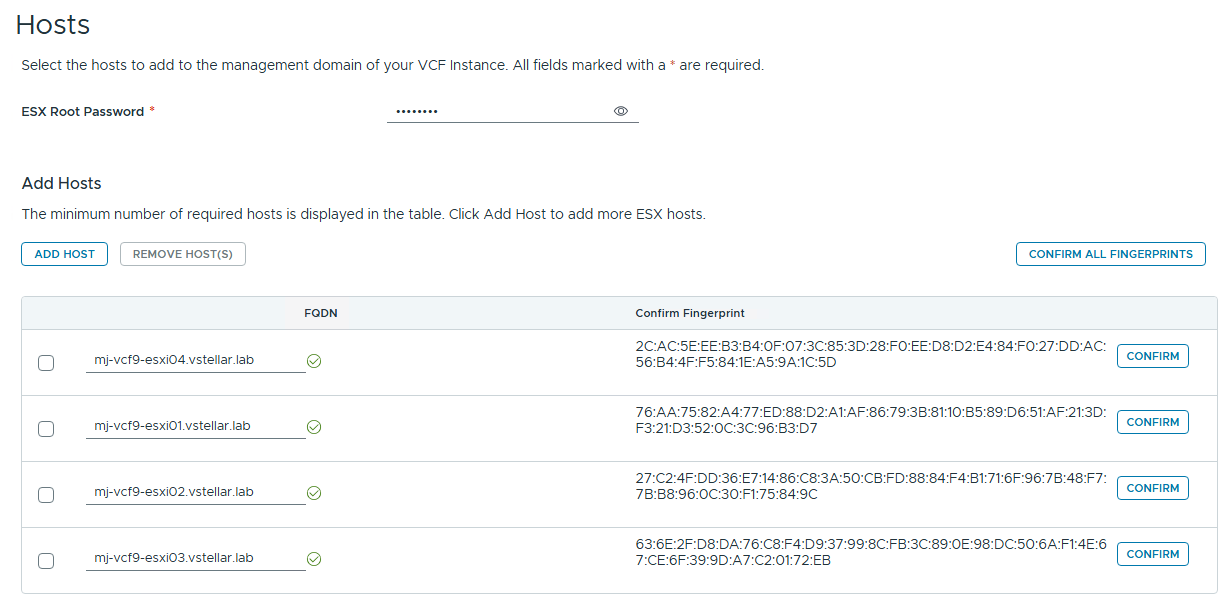
Enter the ESXi Hosts root password and FQDN for each of the management domain hosts.
After adding the ESXi hosts, click Confirm all fingerprints to validate the SSH thumbprint.
Configure the networking settings as per the VLANs in your infrastructure.

Configure the distributed switch. The default profile is suitable for environments where the hosts have 2 pNICs and all traffic (VLAN + Overlay) will be traversing over these 2 NICs. If your hosts have more than 2 NICs, you can select the custom switch configuration option. To see the supported topologies, click the View Topologies option.
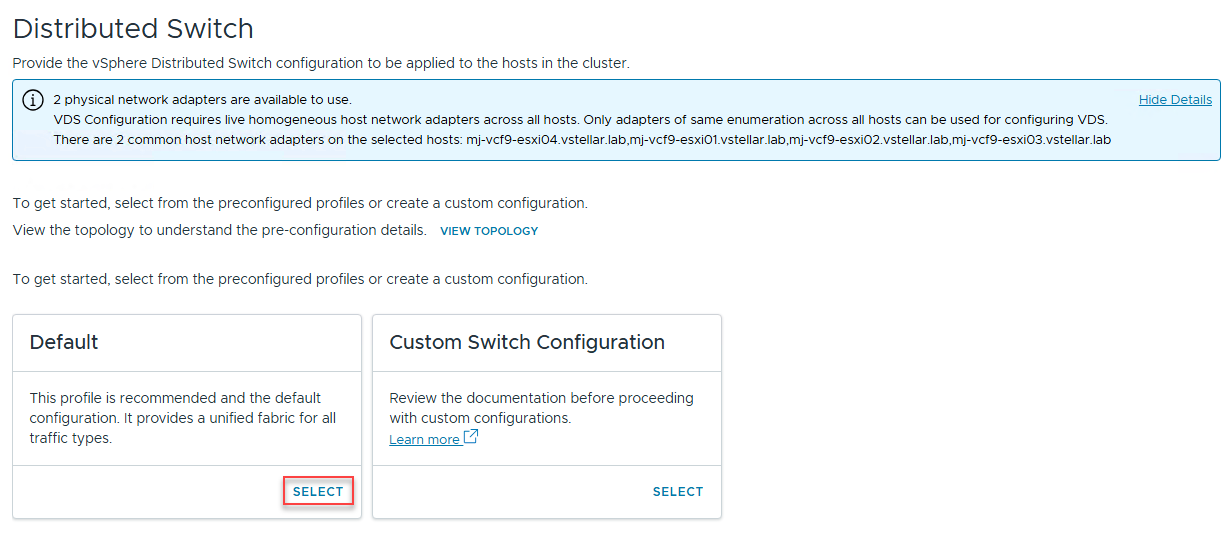
In my lab, my nested hosts are equipped with just 2 NICs, so I selected the default distributed virtual switch topology.
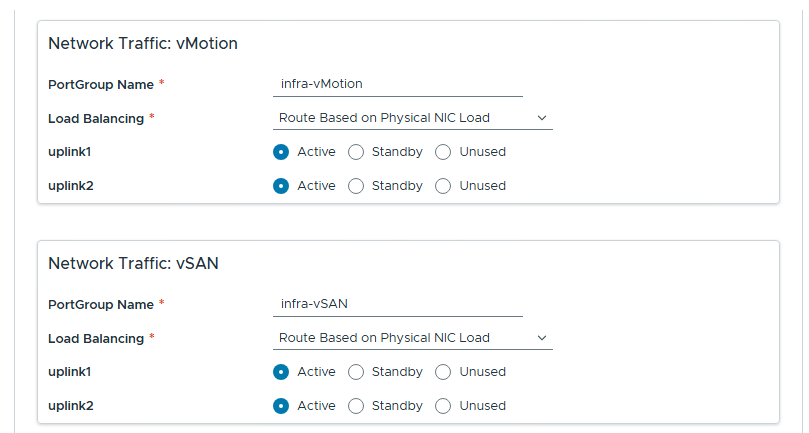
The next step is to expand the VDS and configure the required properties. Specify the VDS name, set the MTU, and select the load balancing policy for the traffic.
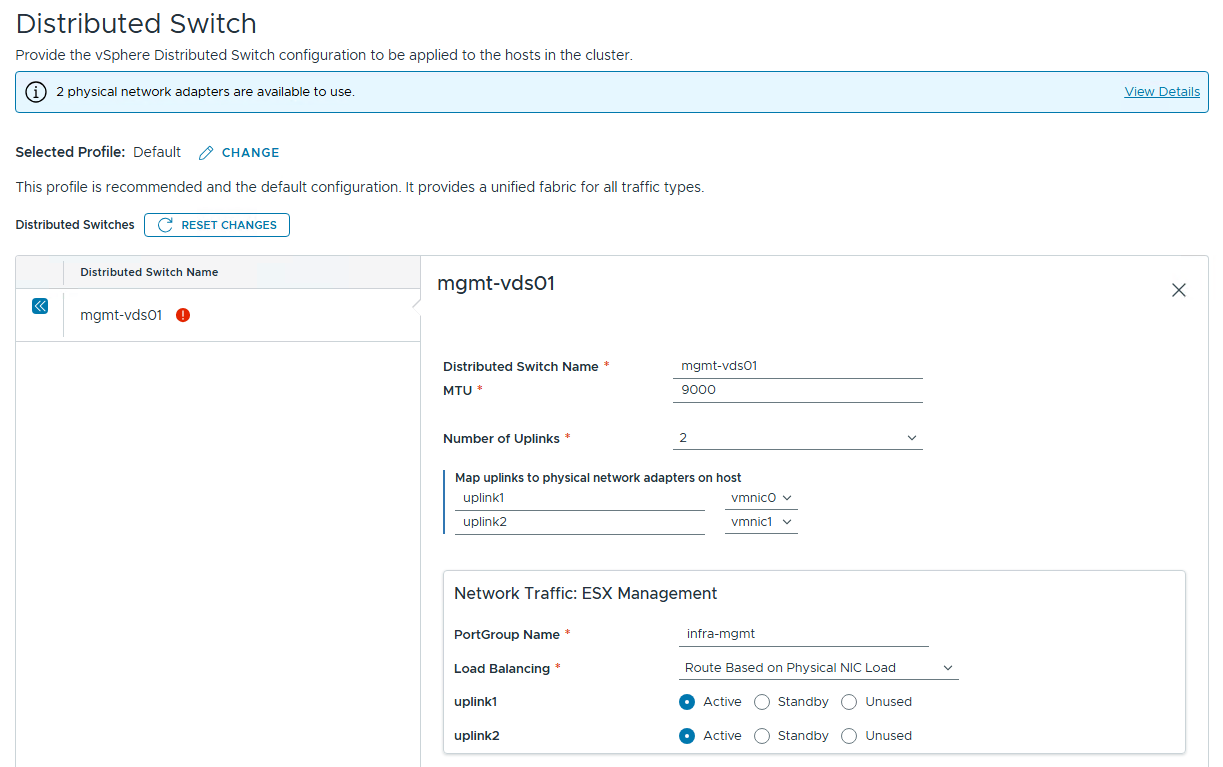
Configure the vMotion & vSAN network and proceed to the next configuration settings.
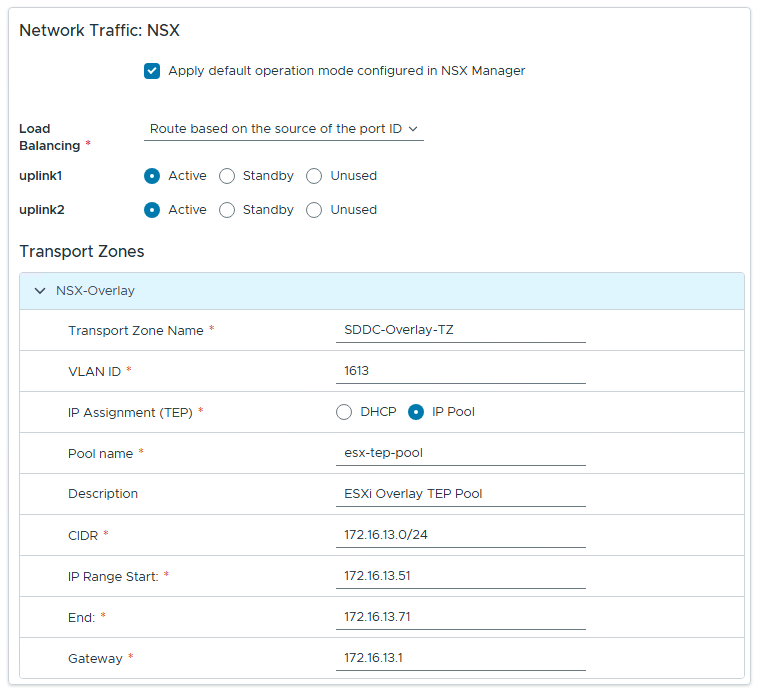
Configure the NSX overlay network as per the IP scheme of your infrastructure.
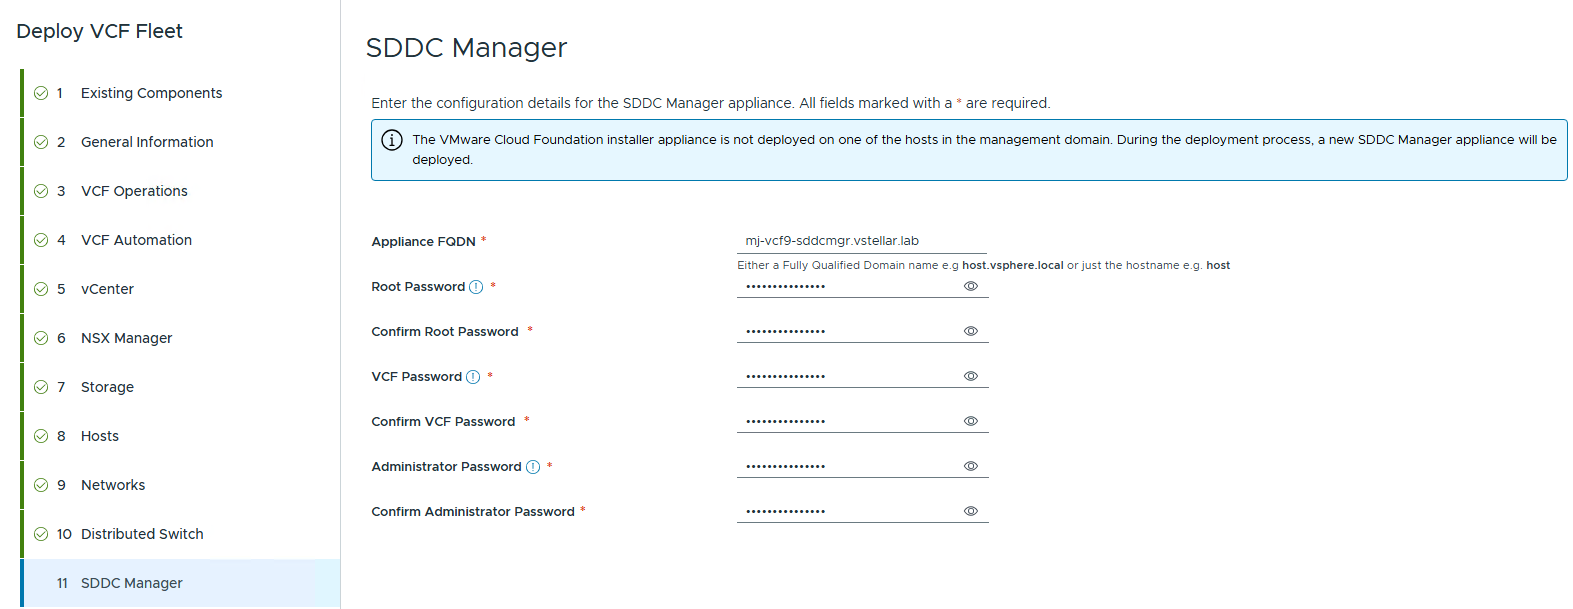
Enter the values for the SDDC manager appliance:
- Appliance FQDN
- Administrator, Root, and VCF user Password
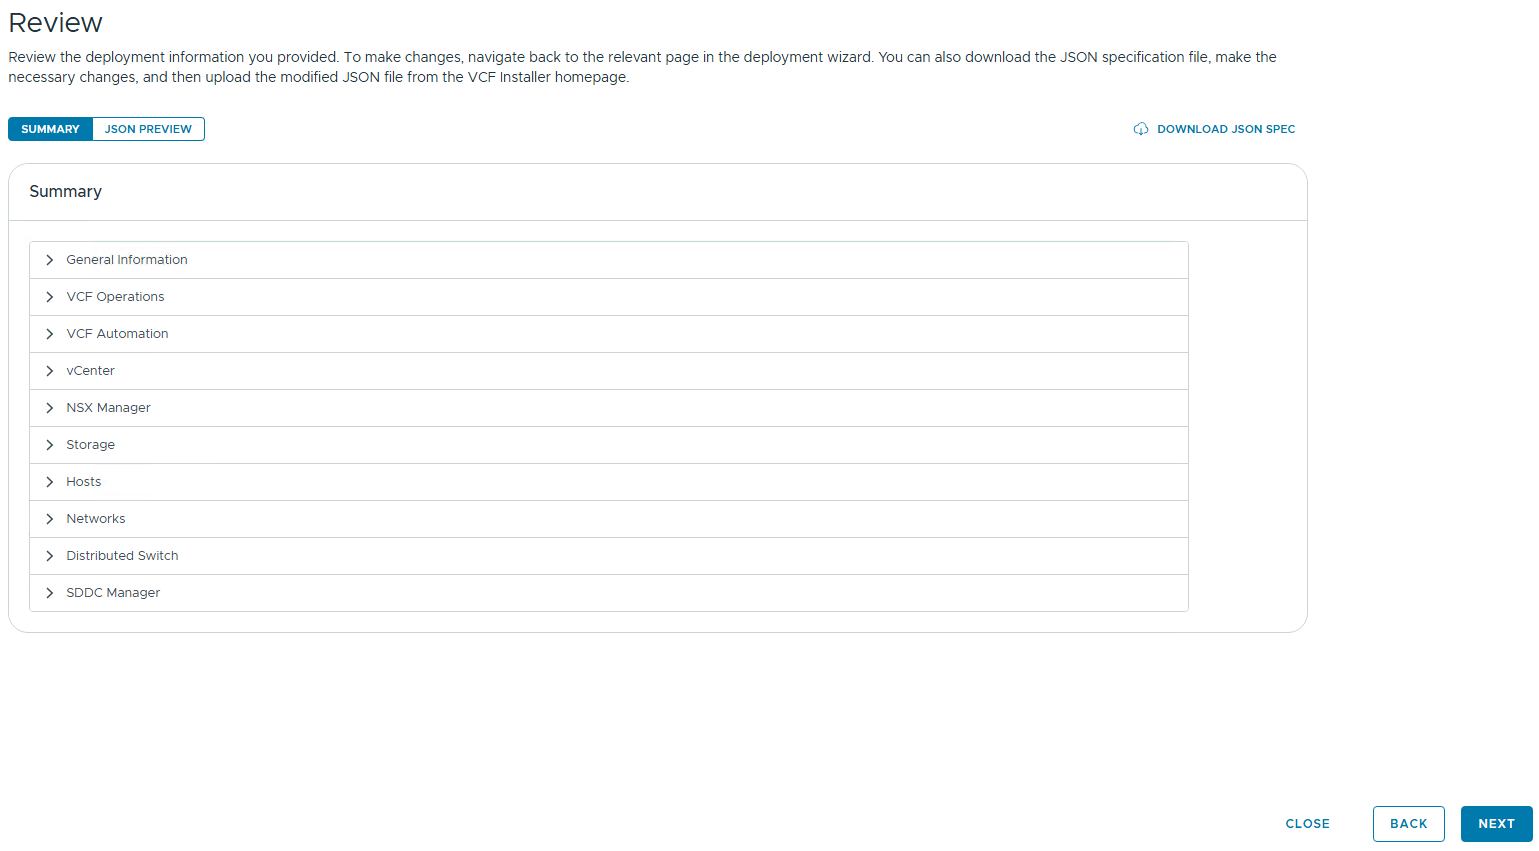
Review the settings and download the JSON spec. Downloading the JSON will help you to quickly redeploy the VCF instance if, for some reason, the installation fails and you need to redeploy.
Warning: The JSON spec saves all credentials in plain text. In your production environment, store the file at a secure location.
Click next to start the input validation.
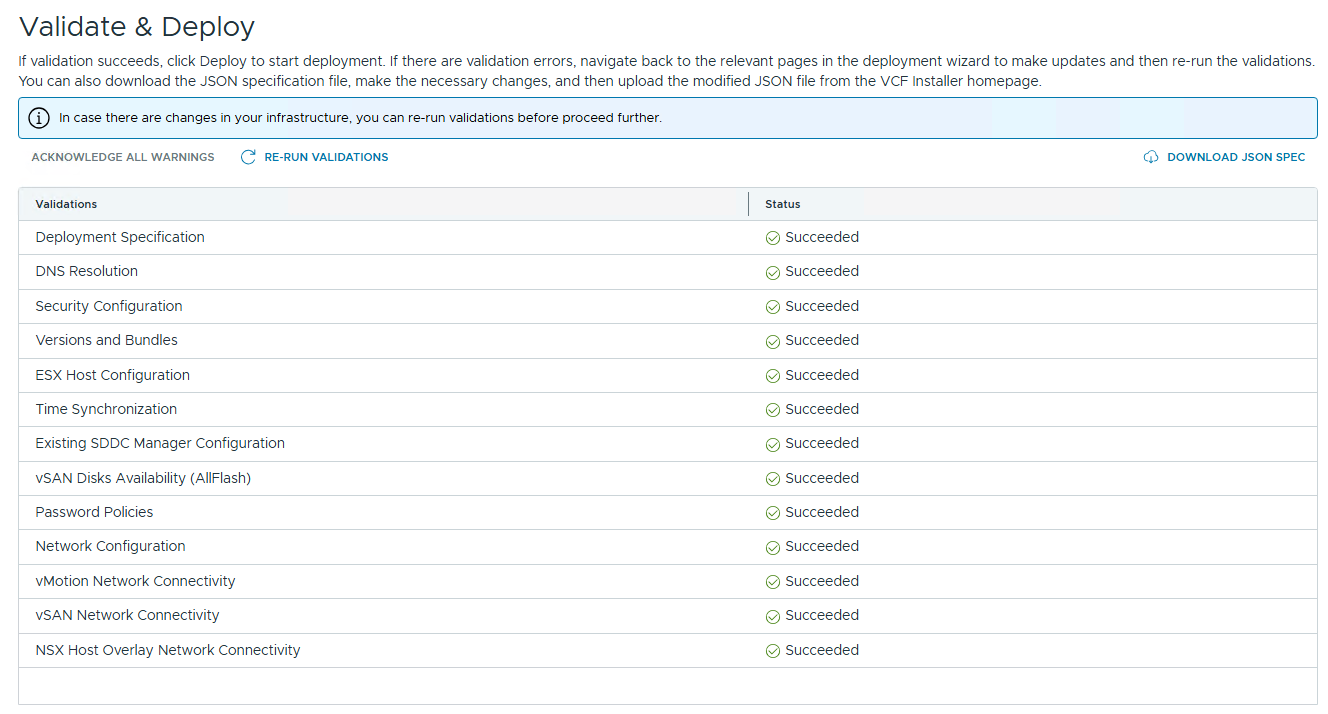
After successful validation. Click Deploy to start the deployment.
Monitor the deployment. It takes a while to stand up a new VCF instance, especially if you are running the deployment in a nested setup.
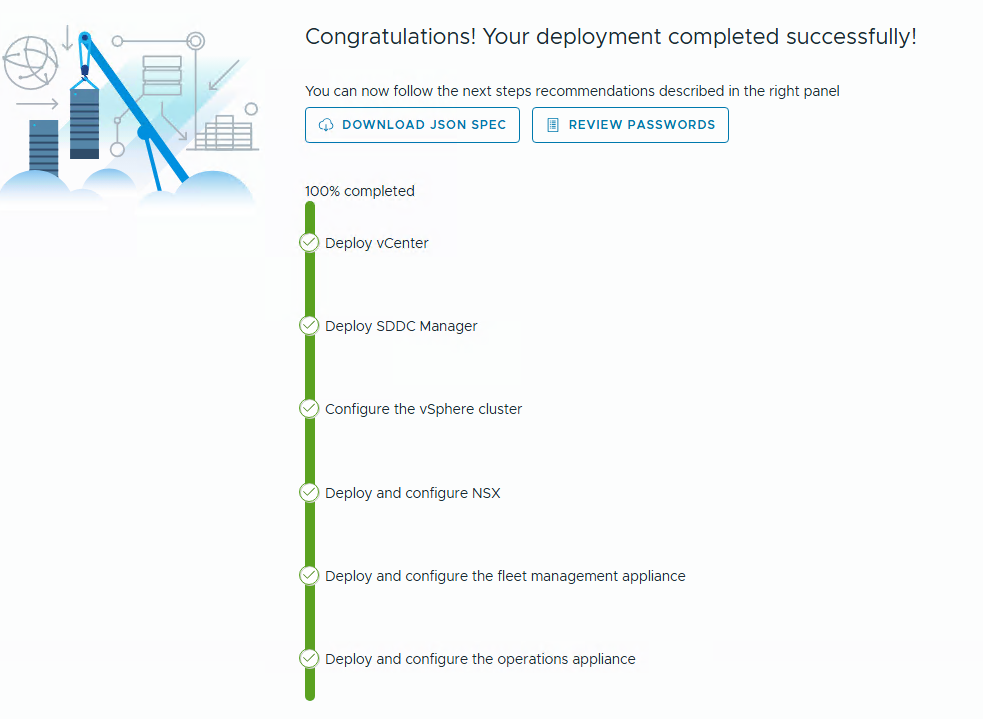
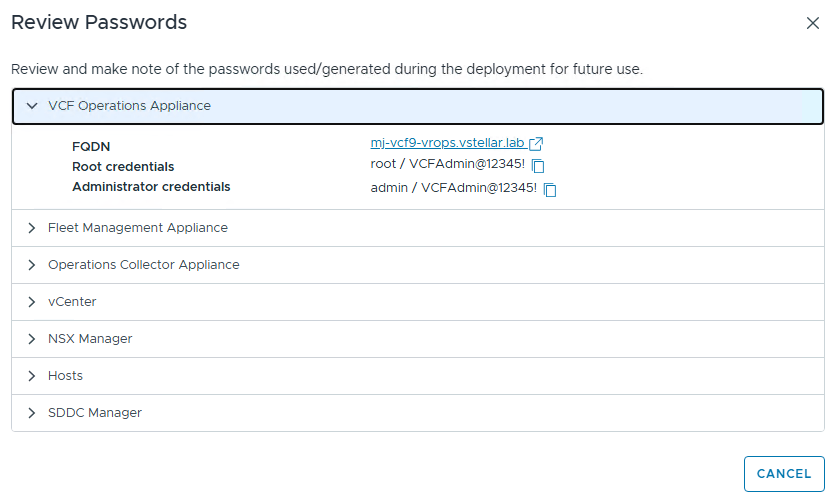
Click Review Passwords to see the configured FQDN and the passwords.
And that’s it for this post. In the next post of this series, I will discuss VCF 9 network configuration.
I hope you enjoyed reading this post. Feel free to share this on social media if it is worth sharing.