
Welcome to the 4th part of the VMware vDefend SSP series. In the previous post, I discussed NSX Manager onboarding in SSP and activating platform features.
This post focuses on demonstrating how to integrate SSP with core infrastructure services, such as Syslog, LDAP, and SFTP.
If you are not following along with this series, I encourage you to read the earlier parts of this series from the links below:
1: Introduction to VMware vDefend Security Services Platform
2: Deploy & Configure SSP Instance
3: Onboard NSX Manager & Activate Platform Features
SSP Integration with Syslog
To integrate the vDefend Security Services Platform (SSP) with a syslog server, you must configure the SSP to forward its log messages to the remote server through its web interface.
Log in to the SSP web interface using admin credentials and navigate to the System > Server Configurations > Syslog Server Configuration tab. Click Add Server.

- Enter the FQDN or IP address of your syslog server.
- Select the desired protocol from the drop-down menu (TCP, TLS, or UDP).
- Enter the port number configured on your syslog server to receive these logs.
Click Save to apply the settings.

The SSP will now begin transmitting log messages to the specified remote syslog server, which aids in identifying and resolving errors and provides centralized logging for forensic analysis.
Configure SSP Backup Settings
To integrate SSP with a backup server, you must configure the built-in backup and restore feature to use an SFTP server. The SSP itself manages the backup process and securely transfers configuration data to your designated backup server. The data can be restored in the event of data corruption or accidental deletion.
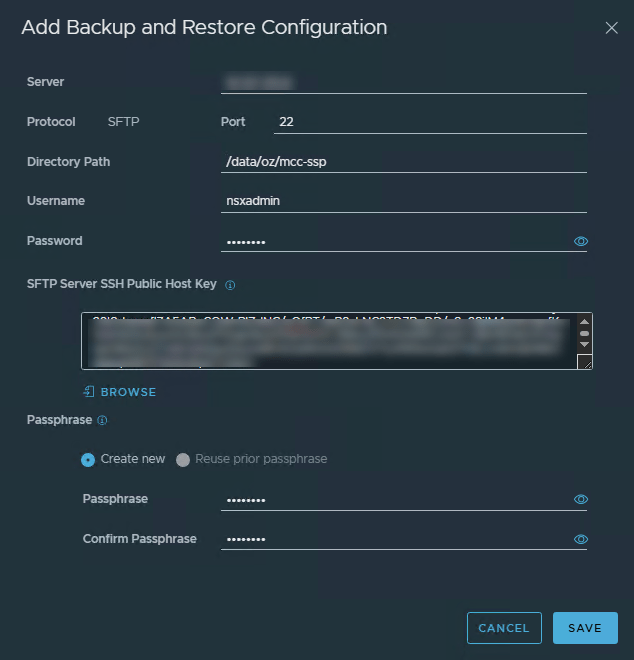
To configure Backup & Restore settings, navigate to System > Backup and Restore. Click Add Backup and Restore Configuration.

- Server: Enter the IP address or FQDN of your SFTP server.
- Protocol and Port: Confirm that the protocol is set to SFTP (default port 22).
- Directory Path: Enter the specific file path on the backup server where the data will be stored.
- Username and Password: Provide the credentials for the SFTP server login. The password is only used for the initial connection.
- SSH Public Key: Browse to and upload the SFTP server’s SSH public key or copy/paste it manually into the field. Key-based authentication will be used for all future secure connections.
- Passphrase: Create a strong, unique passphrase. This is used to encrypt and decrypt the backup data, ensuring confidentiality.
Click Save to complete the configuration.
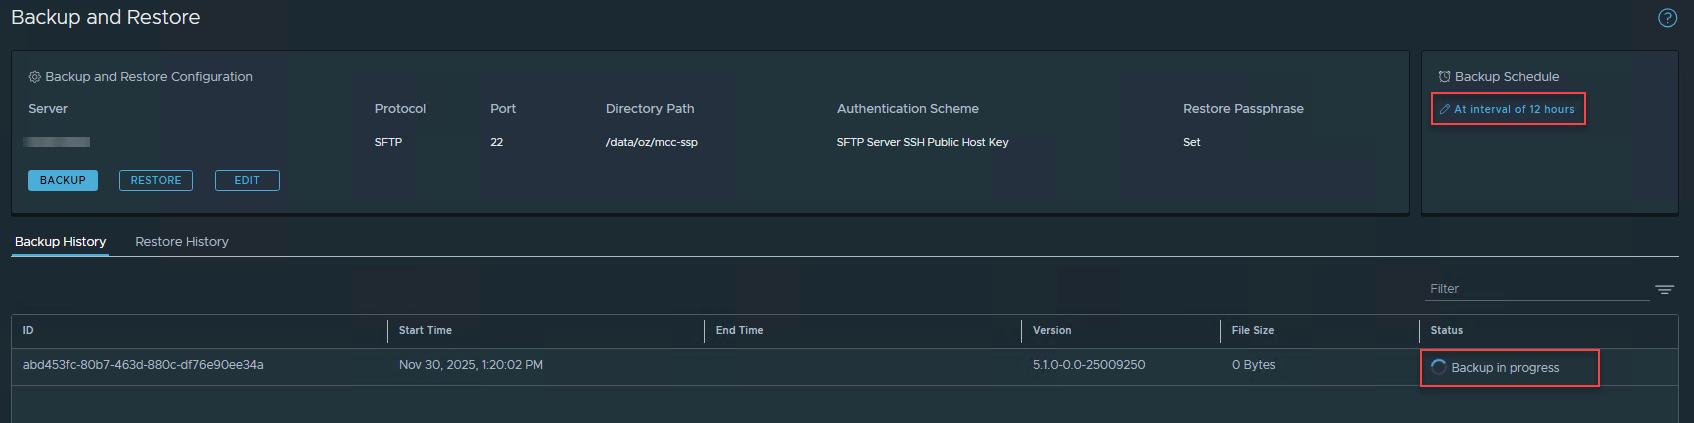
Once configured, the SSP will use the credentials and key to connect to your backup server and store automated, scheduled backups of its configuration data.
You can configure the backup schedule by editing the Recurrence settings.

Configure the backup interval and click Save.

A backup is immediately triggered after the backup schedule is configured.
Integrate SSP with LDAP
You can configure SSP to authenticate users using a directory service such as Active Directory over LDAP or OpenLDAP. You can only configure one identity source at a time.
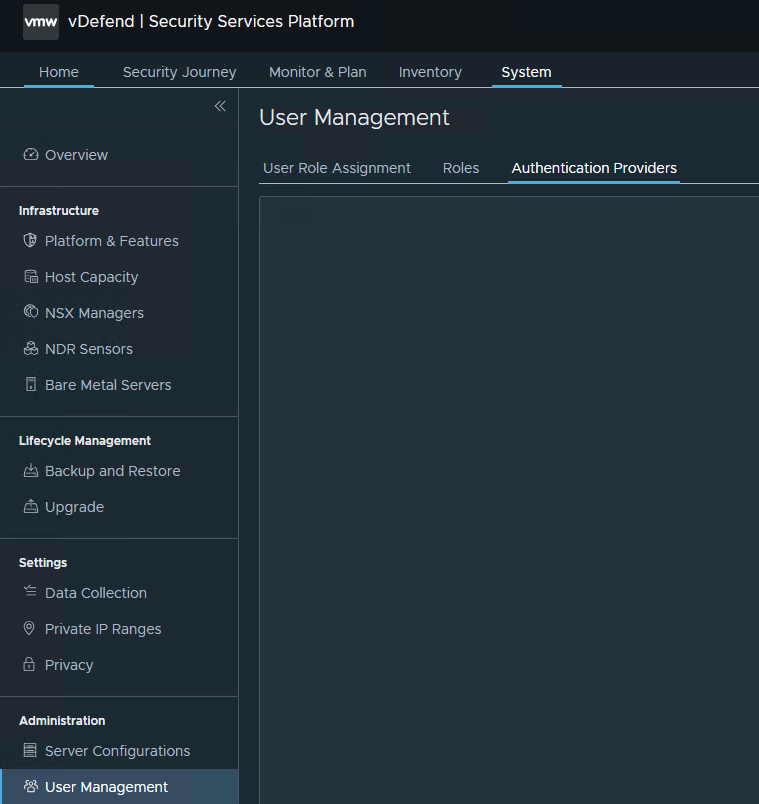
To configure SSP with LDAP, navigate to the System > User Management page. Select Authentication Providers.
- Enter your Active Directory domain name.
- From the drop-down menu, select the Active Directory over LDAP or OpenLDAP.
- Enter the Base DN of your domain.
- Click Set to configure LDAP servers.

- URL: Enter the LDAP server hostname or IP address in the ldaps://<ldap-fqdn/ldap-ip>:port format.
- LDAP Certificate: To retrieve the LDAP certificate, you can use the following OpenSSL command
|
1 |
openssl s_client -showcerts -connect <ldap-fqdn>:636 -showcerts </dev/null | sed -n '/-BEGIN CERTIFICATE-/,/-END CERTIFICATE-/p' > ldaps_certificate.pem |
- Enabled: Yes
- Bind Identity: Enter the username in the format username@domain
- Password: Enter the password of the LDAP server Bind Identity user.

Click the Check Status button to validate the input.

On successful validation, click Save.
Validate that the connection status shows “successful.”

Assign User Role
Navigate to the User Role Assignment tab and click Add Assignment. Select the user/group from the LDAP server and map it to the available roles.

Repeat the process for adding additional users/groups.

Logout from the SSP web interface and login using your LDAP ID, and ensure login is successful.
And that’s it for this post.
In the next post of this series, I will discuss the SSP Rule Analysis feature. Stay tuned!!!
I hope you enjoyed reading this post. Feel free to share this post on social media if it’s worth sharing.