
Welcome to part 8 of the VCF-9 series. The previous post in this series discussed how to deploy VCF Operations for Logs and configure log forwarding for vSphere and NSX components.
In this post, I will discuss the creation of Virtual Private Clouds (VPCs) with centralized network connectivity.
If you are not following along, I encourage you to read the earlier parts of this series from the links below:
1: VCF-9 Architecture & Deployment Models
4: NSX Edge Cluster Deployment
5: ESXi Host Commission in VCF
6: Deploying a Workload Domain
7: Deploy VCF Operations for Logs
The NSX VPC feature is not new and was first introduced in NSX 4.0. NSX VPCs provide multi-tenancy capabilities, as they offer networking and security services to multiple tenants that are completely isolated from one another. Access to networking constructs (T1 gateways, segments, etc.) is controlled via RBAC policies, and limits are enforced by assigning quotas to the objects that can be created inside a tenant.
In earlier versions of VCF (<9.0), the creation of VPCs was performed through the NSX UI. The enterprise admin has to create NSX projects first and then assign RBAC policies before the tenants can start creating VPCs on their own. In VCF 9.0, along with other enhancements, the user experience for operating VPCs is also enhanced, and this feature is now baked into the vCenter server.
This shift enables a balance between user-driven agility and the control enterprise IT needs. By empowering VI admins and development teams to handle network setup, they can operate more efficiently and independently, accelerating their workflows. At the same time, network and security teams maintain oversight and enforce essential security policies, supporting a more efficient cloud model that greatly reduces the time needed to deploy applications.
If you’re new to the NSX VPC world, feel free to check out my NSX multi-tenancy series to build a basic understanding of this topic.
Before you create a VPC with centralized connectivity, ensure that you have deployed the edge clusters and that the provider gateway is created. A VPC inherits the connectivity strategy (centralized/distributed) from the edge cluster. Also, the external IP block is defined at the edge cluster level. For more information, see the VCF-9 edge cluster deployment blog post of this series.
When a VPC is created, a VPC gateway is created automatically. The VPC gateway acts as a dedicated logical router for the VPC that handles north-south traffic routing to and from the Transit Gateway. It also manages east-west traffic routing between all subnets within the VPCs.

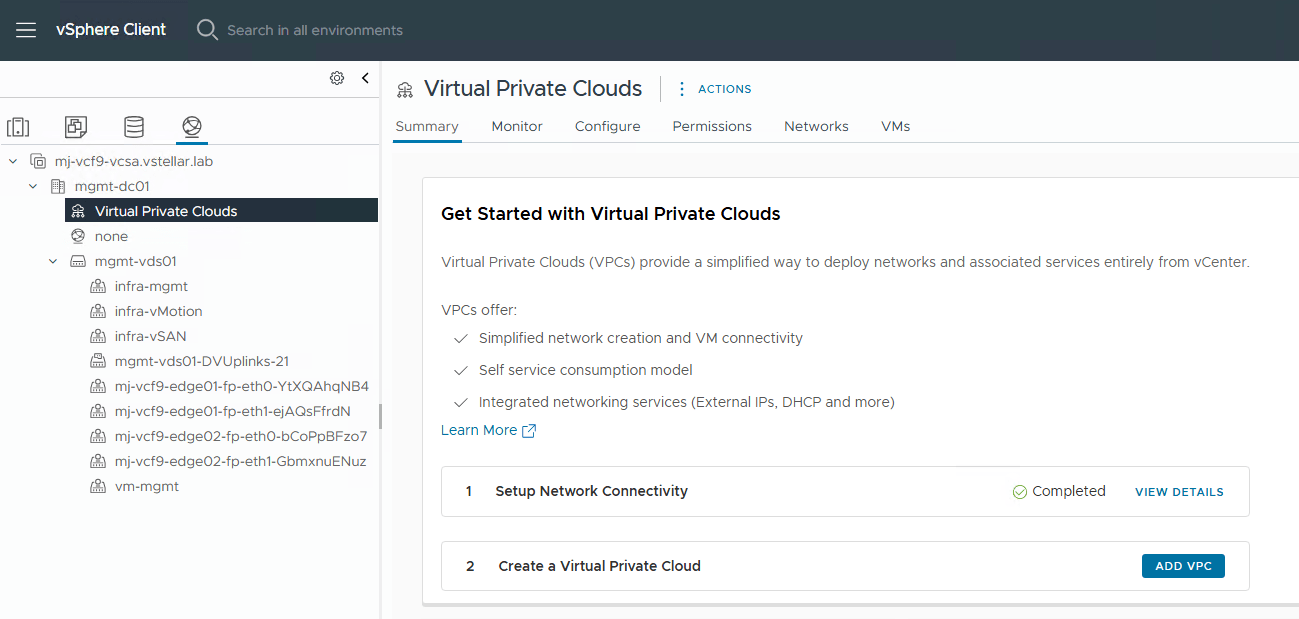
Create a VPC from vCenter UI
To create a new VPC, navigate to the networking tab and select Virtual Private Clouds. Click Add VPC.
Specify the VPC name and provide the private subnet details.
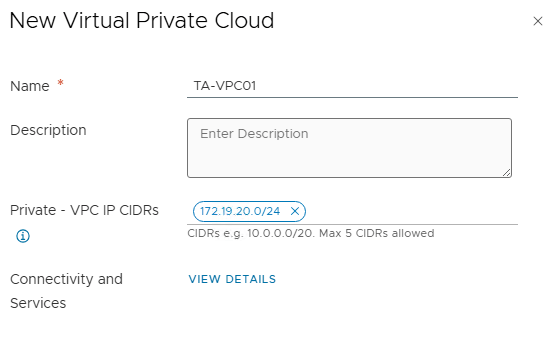
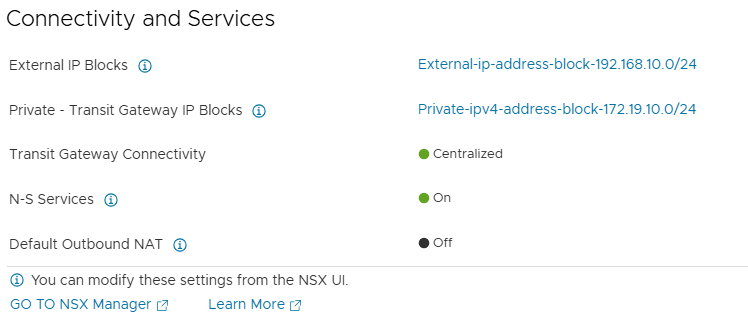
Click on the View Details to see the connectivity strategy for the VPC and the external IP address block.
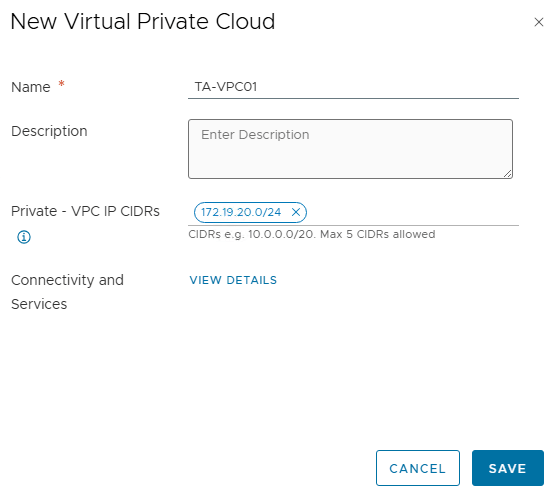
Return to the VPC creation wizard and click Save.
The VPC is now created. The next step is to specify subnets for the workloads that will be deployed in the VPC.
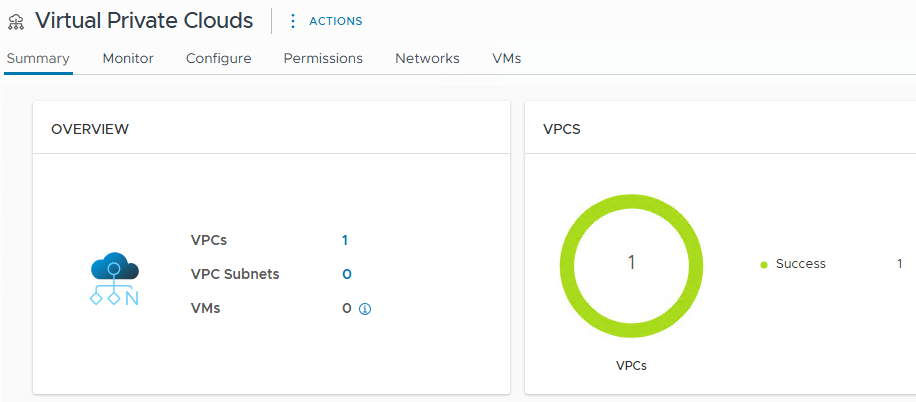
Select the newly created VPC to view the VPC details. The external IP block is auto-mapped to this VPC.

Create VPC Subnets
A subnet is a logical segment with an IP address range within a VPC where virtual machine networks can be connected without the need to configure the physical environment.
Subnets offer three connectivity options, each determining how the subnet can communicate within and outside the network.
- Public: Subnets configured with Public Access Mode are externally advertised, allowing workloads to be connected with physical networks. Public subnets enable direct connectivity without requiring Network Address Translation (NAT).
- Private VPC: Private subnets are confined to the boundaries of the VPC, meaning their connectivity is limited to other subnets within the same VPC. Virtual machines (VMs) connected to these subnets can communicate directly only with peers in the same network. To enable access from outside the VPC, NAT can be configured using an external IP address.
- Private Transit Gateway: The Transit Gateway subnets are designed to route traffic through a Transit Gateway, enabling connectivity with other VPCs linked to the same TGW. A typical use case involves accessing shared services hosted in those connected VPCs. To allow inbound communication from external sources, NAT can be configured using an external IP address.
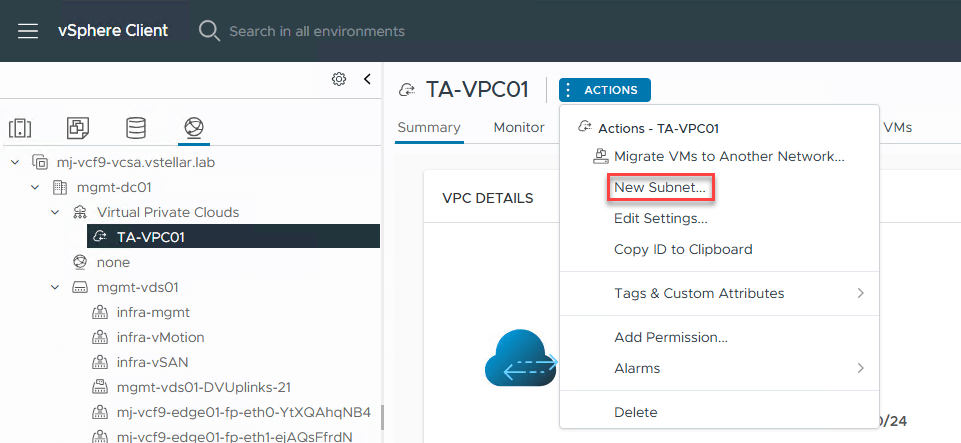
To create subnets for the VPC, click the Actions tab and select “New Subnet.”
Specify the subnet name and select the access mode (public/private). If you want to auto-allocate CIDR to this subnet, turn on “Auto-allocate Subnet CIDR.”
Optionally, you can turn on DHCP for auto-allocation of IPs from this subnet to the workloads.
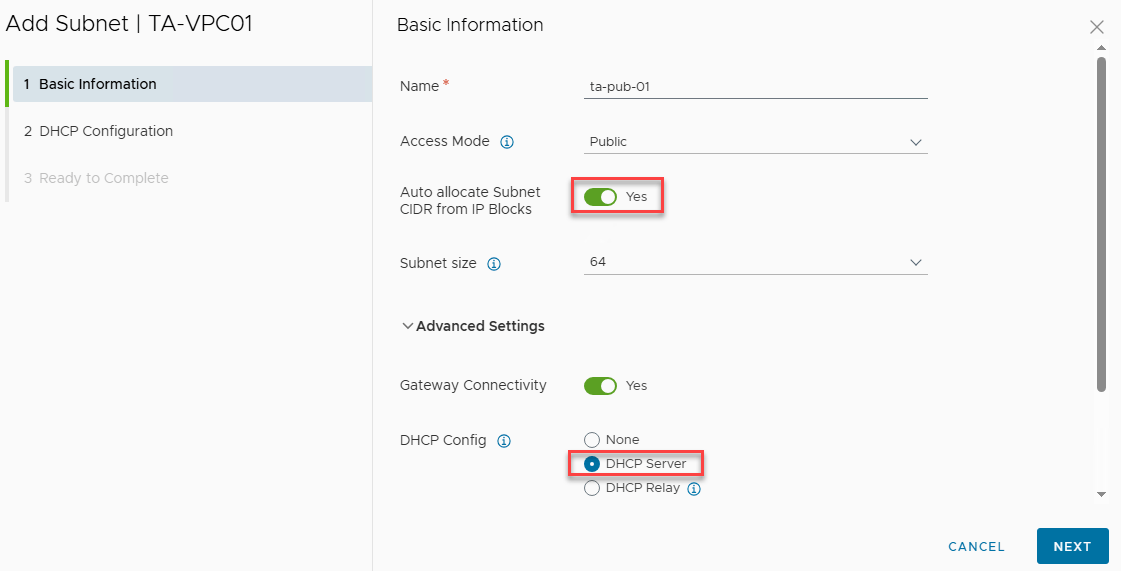
If you have turned on DHCP Server settings, you can specify additional DHCP settings such as reserved IP ranges or static bindings.
To add any generic DHCP options, click Set.

Add the generic options that you want to include in the DHCP settings and click Save.

Click Finish to complete the subnet creation wizard.

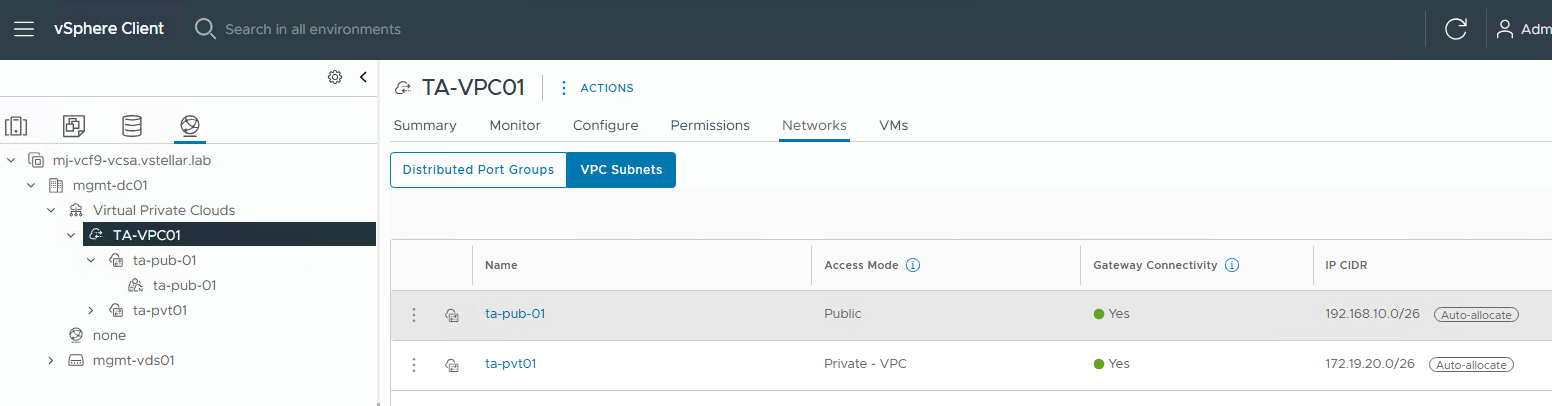
The subnet list can be retrieved by navigating to Virtual Private Clouds > VPC Name > Networks > VPC Subnets.
VPC View from NSX UI
To see VPC details from the NSX perspective, login to the NSX UI and navigate to VPCs > Virtual Private Clouds > VPC.

Additional VPC configurations, such as configuring the north-south firewall and assigning quotas, etc., can be configured from the NSX UI.
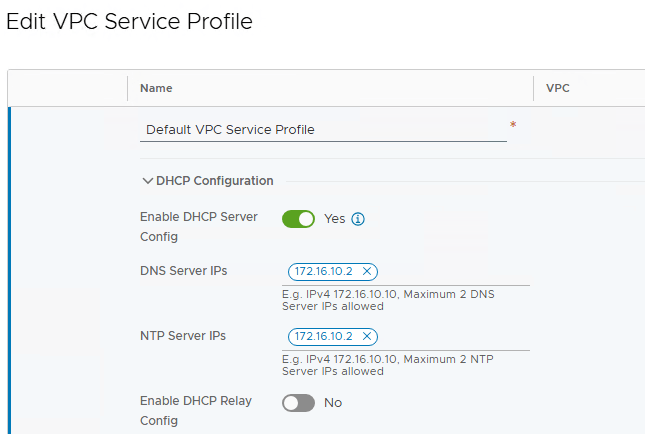
It’s possible to edit the VPC service profile that is assigned by default to any newly created VPC to configure additional settings.
Note: The vCenter Admin can create additional service profiles based on use cases.
To edit a VPC service profile, navigate to the VPC view in the vCenter server and edit the VPC. Select the attached service profile and click Edit.

Add the infrastructure DNS and NTP server IPs.
And that’s it for this post. In the next post of this series, I will discuss VPC networking in greater detail. Stay tuned!!!
I hope you enjoyed reading this post. Feel free to share this on social media if it is worth sharing.