Welcome to part-2 of the NSX IDFW series. The last post of this series discussed the overview and architecture of NSX IDFW and the logon detection method.
This post discusses how to implement NSX IDFW using Active Directory Event Scraping.
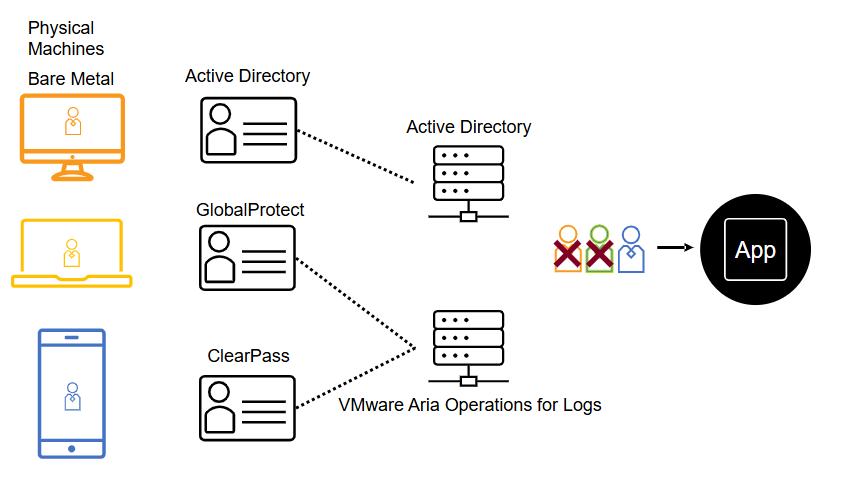
Event Log Scraping provides the logging information from different sources to the NSX Manager. This information is used in the distributed firewall rule and extends IDFW support outside virtual workloads. Event Log Scraping supports the following logging sources:
- Active Directory
- PAN GlobalProtect
- Aruba ClearPass
- BYOD (custom attributes)
In an Active Directory environment, NSX reads the security event log for the user from the AD and, based on configured firewall rules, takes the appropriate action. To pull events from the AD security event log, the AD event log scraper is configured in the NSX Manager and points to an instance of the domain controller in the infrastructure.
For other types of logging sources, you need to deploy Aria Operations for Logs (vRLI) to aggregate logs in one place. You then integrate vRLI with NSX so that NSX can read the security event logs.
Requirements for Identity Firewall
Identity Firewall has the following requirements:
- Active Directory must be integrated with NSX Manager.
- The ESXi hosts must be prepared for NSX.
- IDFW must be enabled at the vSphere cluster level or on standalone ESXi hosts.
Note: The above requirements are the same for the event scraping and the guest introspection method.
Important Considerations
Before implementing IDFW using event scraping, the following must be taken into consideration:
1: IDFW processes the user identity at the source only in the firewall rules. Only traffic originating at the source where the user identity is processed will be subject to IDFW rules. Identity-based groups cannot be used as the destination in the firewall rules.
2: IDFW must know which virtual desktop an Active Directory user logs onto to apply firewall rules. If the virtual desktop is outside the NSX environment, the Applied-to field in the DFW is set to DFW. If the machine is inside an NSX environment, the Applied-to field should include the security group for that virtual machine.
3: If the Base DN or the User DN is misconfigured in the IDFW AD config, NSX won’t be able to see the AD groups.
4: IDFW rules are determined by membership in an Active Directory (AD) group. For IDFW rules to work, both the OU with an AD user and the OU with the user’s AD group must be added to the Organization Units to Sync.
Event Log Scraping Workflow
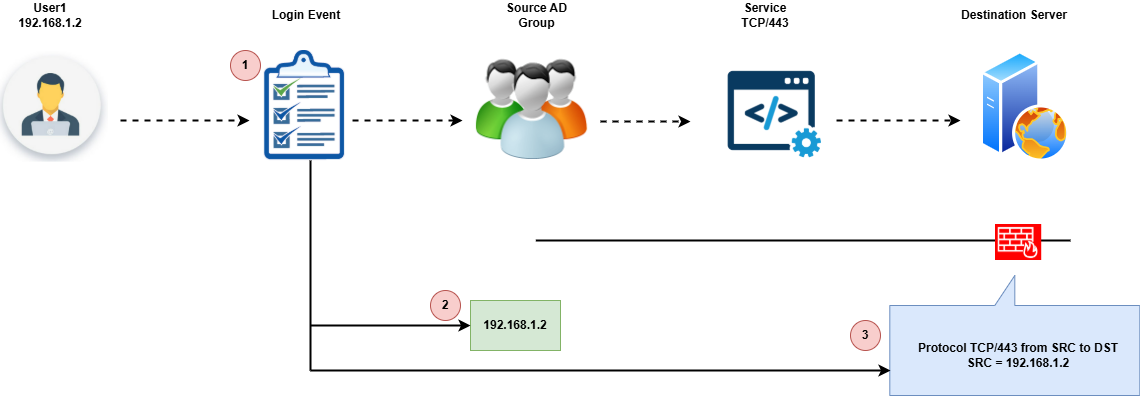
Event Log Scraping works as follows:
- User1 logs in from his laptop with an IP address of 192.168.1.2.
- The login event is scraped, and the IP address is extracted from the security event log.
- This IP address is sent to the data plane, where a distributed firewall rule allows User1 to access the destination app on port TCP/443 from the source IP address of 192.168.1.2.
Configuring IDFW
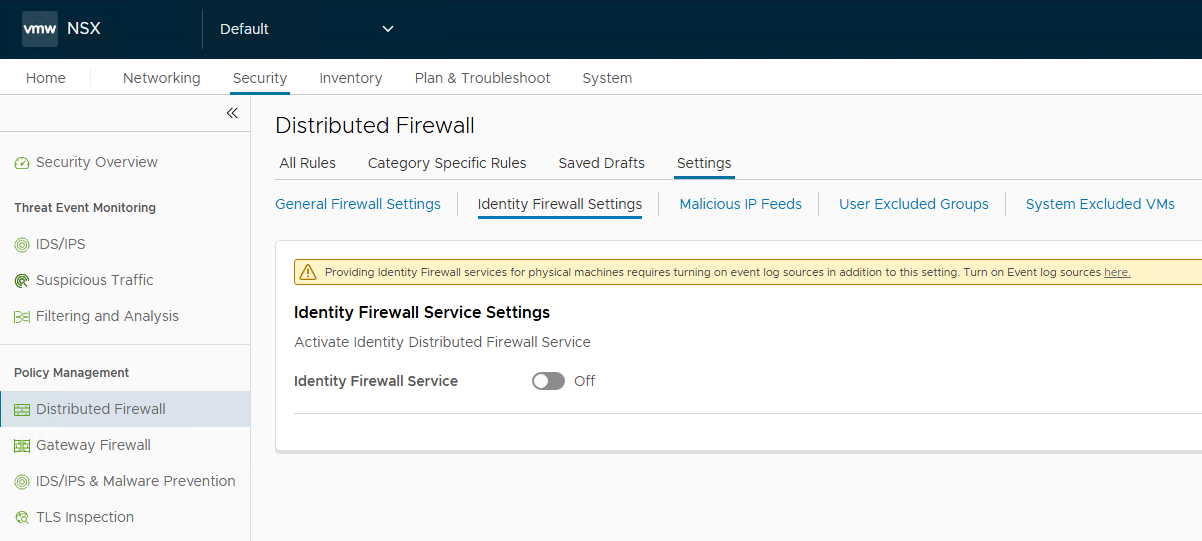
Step 1: Activate IDFW in NSX
To activate IDFW, login to the NSX Manager, navigate to Security > Distributed Firewall > Identity Firewall Settings, and enable the IDFW Service.
Select the vSphere clusters on which IDFW will be enabled.
Click Yes to confirm the IDFW activation on the selected cluster.
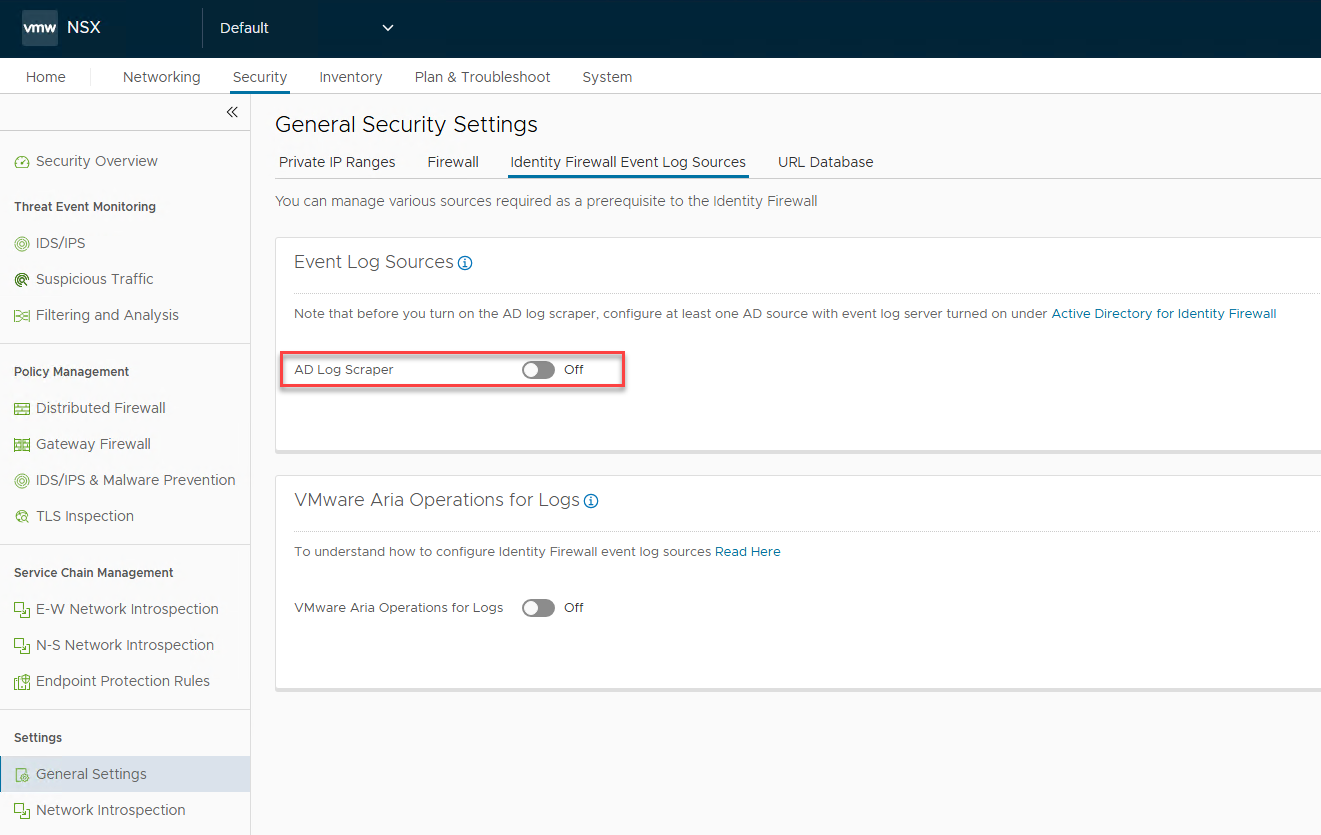
Step 2: Activate AD Log Scraper
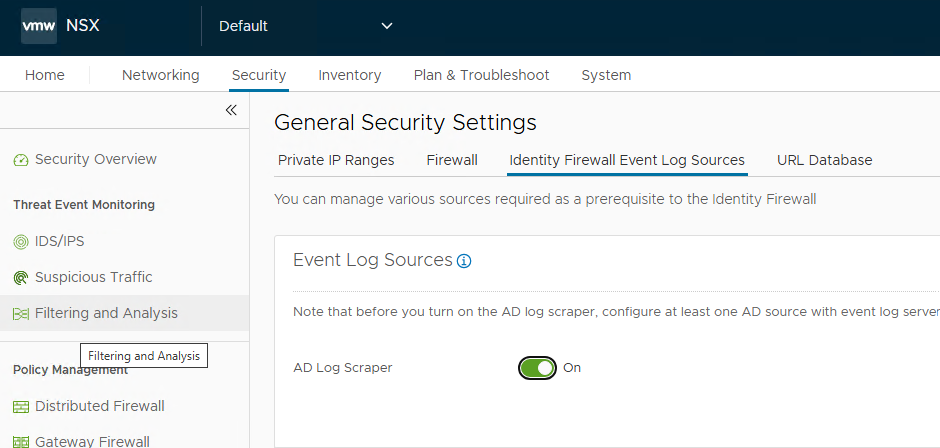
Navigate to the Security > General Settings > Identity Firewall Event Log Sources and activate the AD Log Scraper setting.
Log scraper is now enabled in NSX.
Step 3: Integrate IDFW with Active Directory
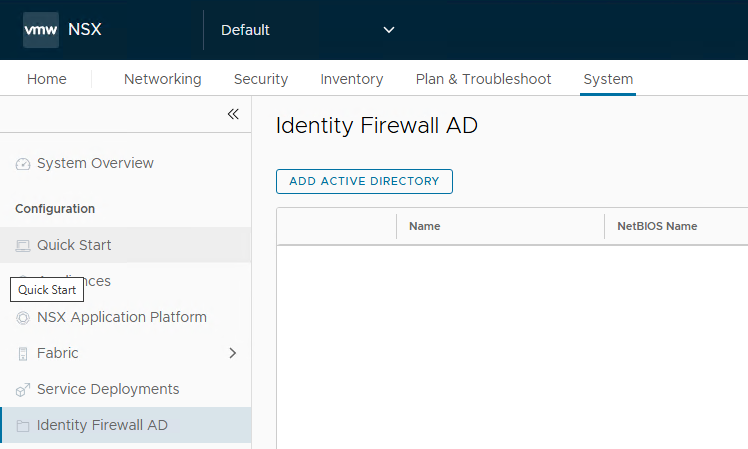
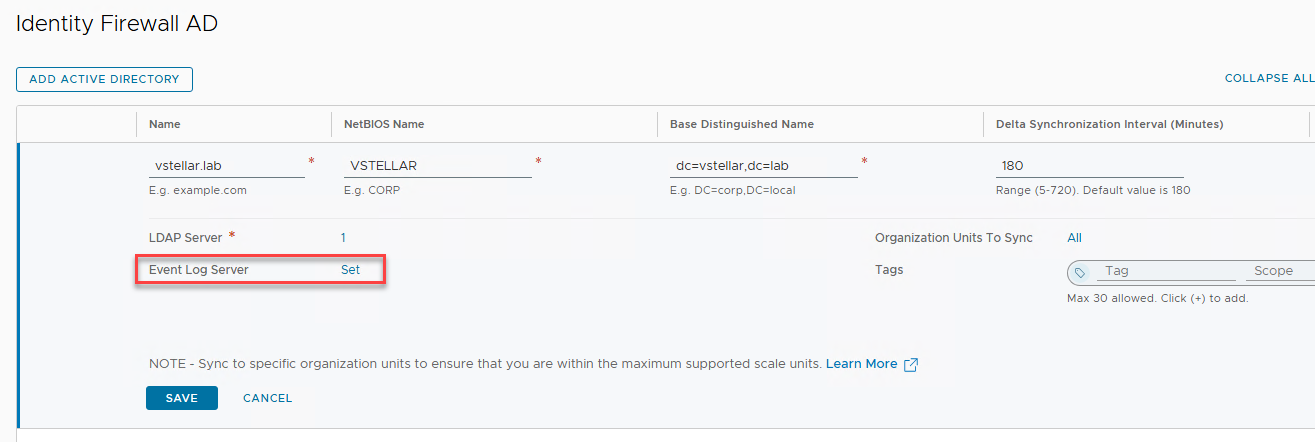
To integrate AD with IDFW, navigate to System > Identity Firewall AD and click the Add Active Directory button.
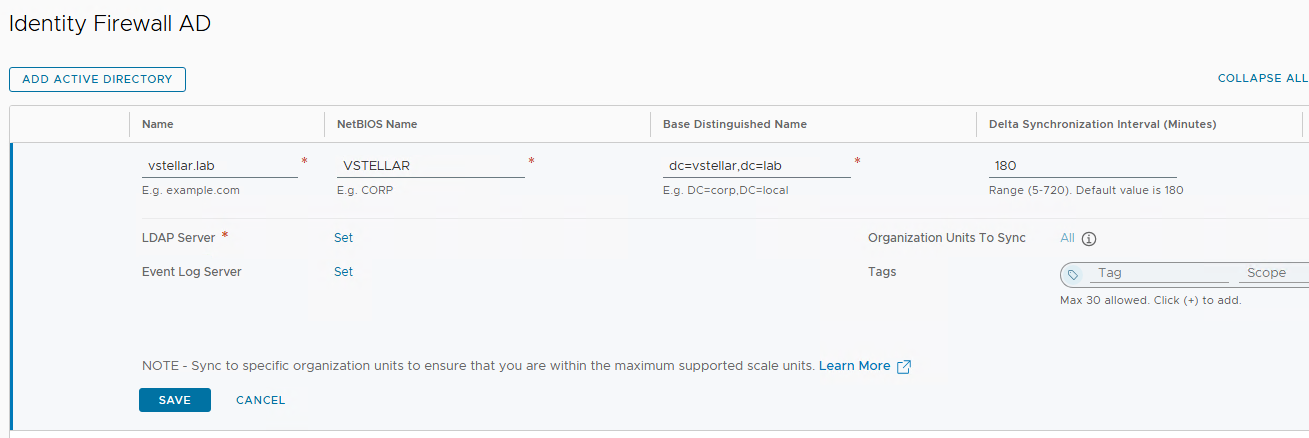
You can configure multiple domains in IDFW. The NSX Manager must be able to reach the domain controllers via LDAP or LDAPS.
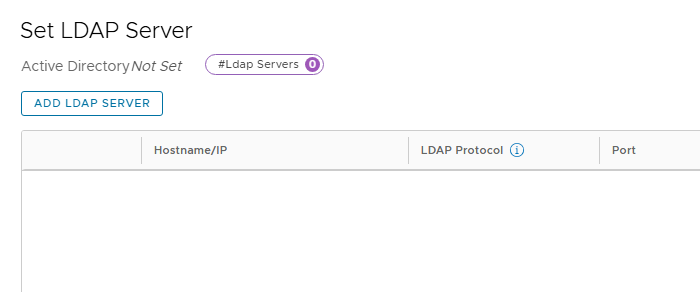
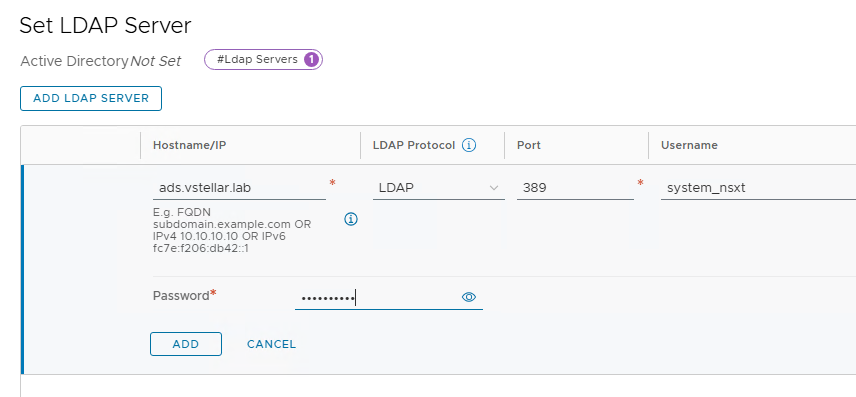
Enter your domain details and click the Set LDAP Server button to add a domain controller.
Click the Add LDAP Server button to add your domain controllers.
Enter the IP/FQDN of the domain controller and the LDAP controller. Enter the user details that NSX will use to communicate with the domain controller.
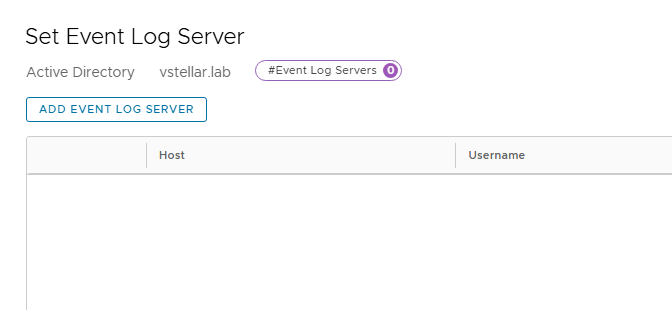
Click the Set Event Log Server to add the log source.
Click the Add Event Log Server button.
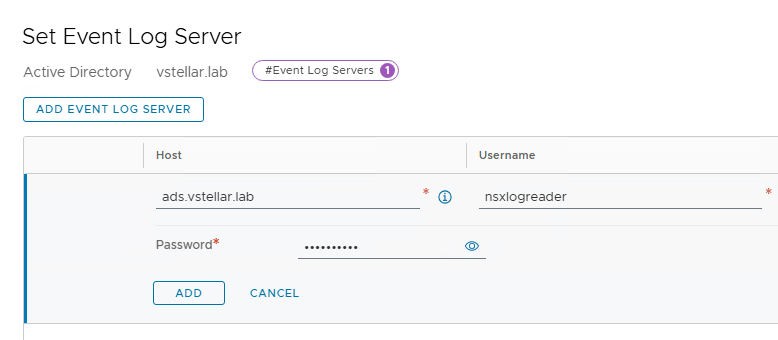
Enter the FQDN/IP of the Active Directory server and the user who has permission to scrape event logs.
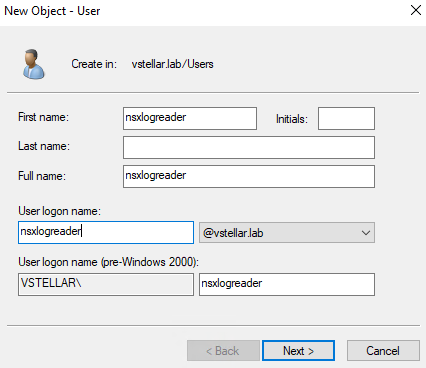
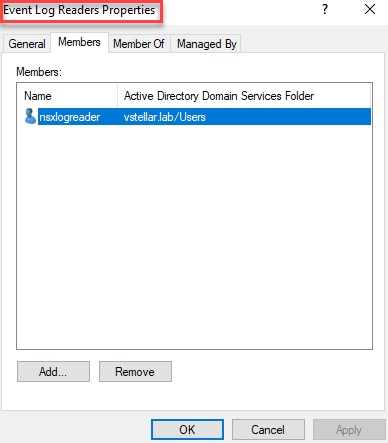
In my lab, I added a new user (nsxlogreader) and added it to the Active Directory Built-in group “Event Log Readers“
Ensure that the log server status reports as Up.
Step 4: Create AD Groups and Users
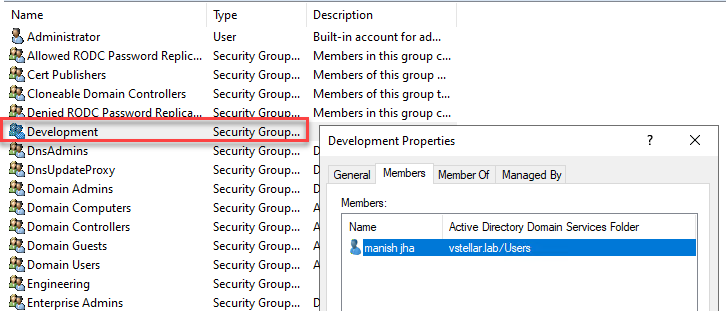
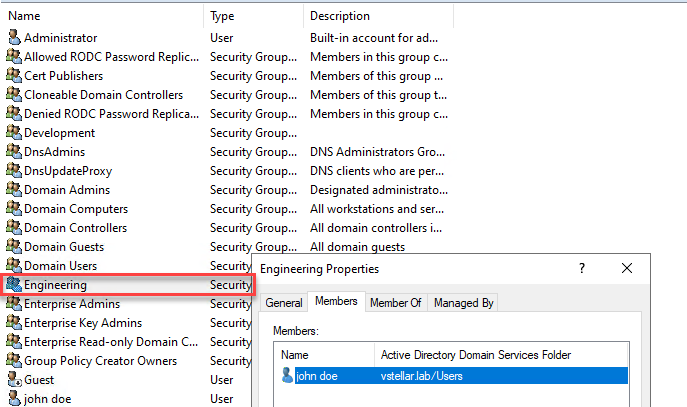
I created a couple of AD groups and added users to the groups.
Note: You can’t add users directly to NSX security groups.
The development group has manishj user and the Engineering group has John user.
Step 5: Create NSX Security Groups
Create security groups in NSX to leverage the AD groups and the associated users. These security groups will be used in DFW when specifying the source for an IDFW-based rule.
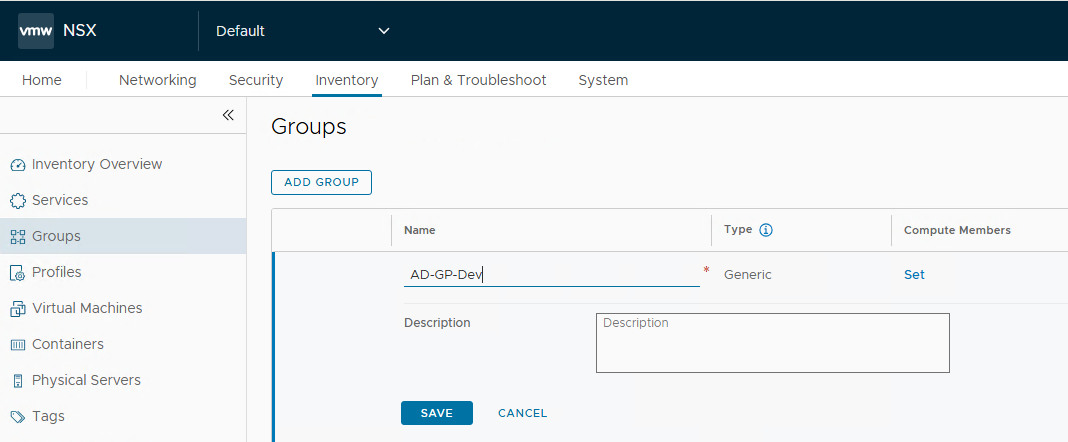
Navigate to the Inventory > Groups tab and click the Add Group button to create security groups.
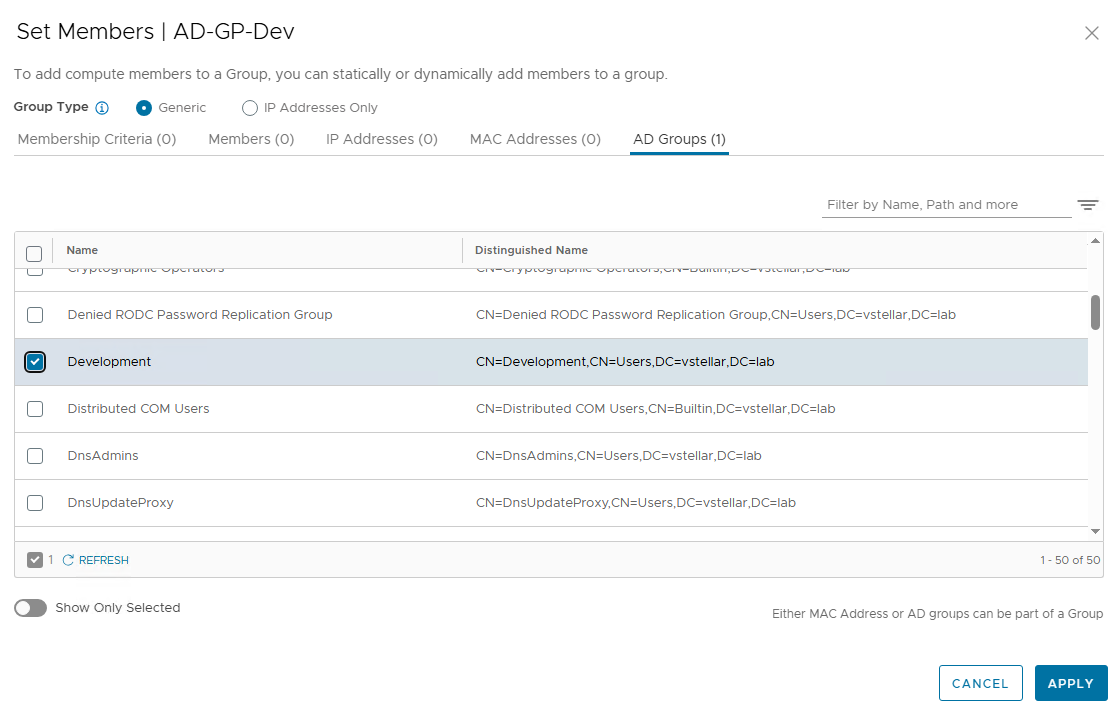
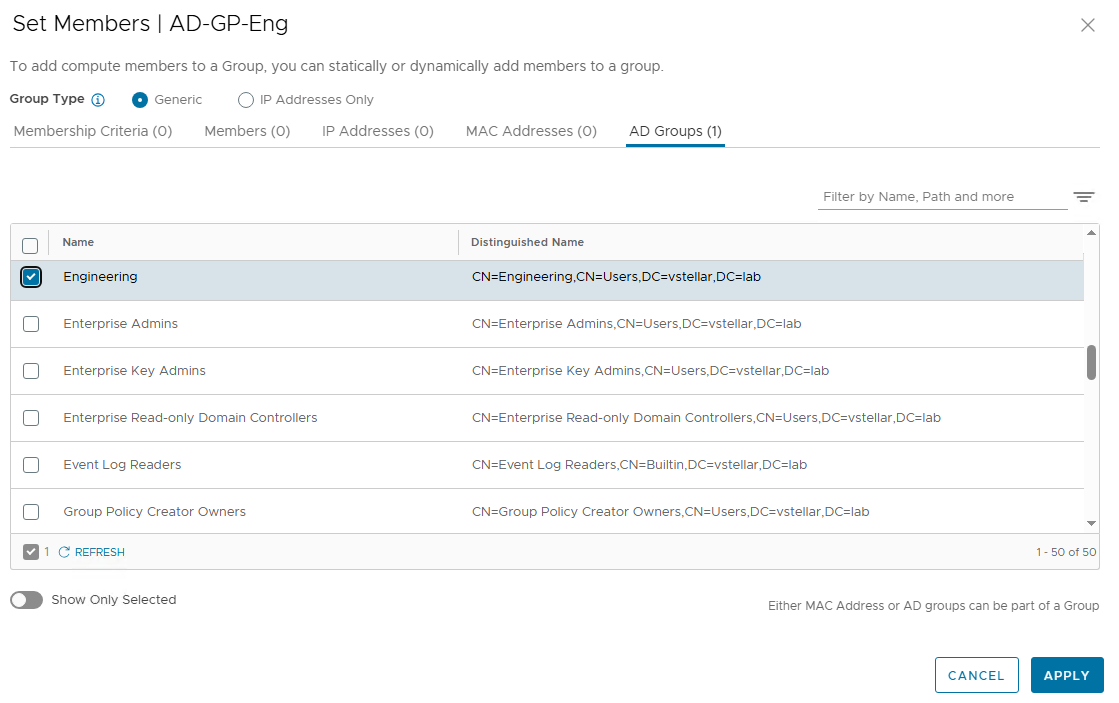
Set the group type to generic and select the AD group by navigating to the AD Groups tab.
I associated my development AD group with the AD-GP-Dev security group and the Engineering group with AD-GP-Eng.
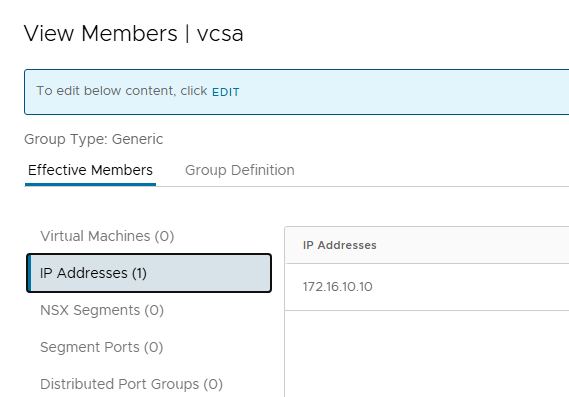
I created a security group for my destination server. I am leveraging my Center server as a destination server, as I don’t have a test server handy.
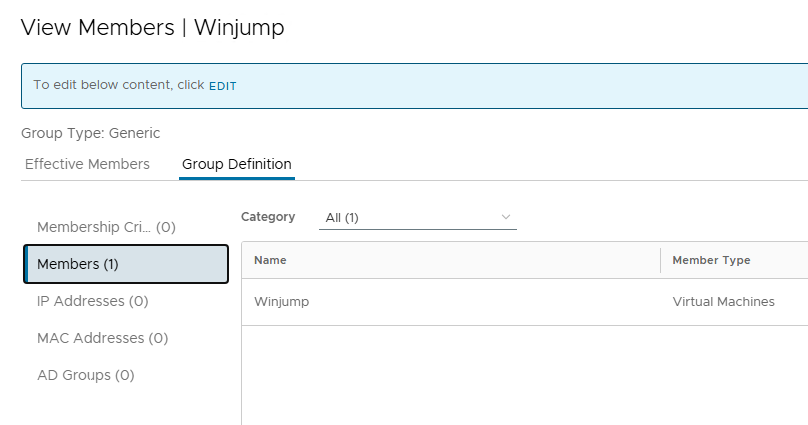
Also, since my jumpbox (where users will login) is inside the NSX environment, I created a security group with virtual machine membership criteria.
Step 6: Create an IDFW Policy
Let’s create a policy to block HTTPS traffic for users of the Development AD group and allow access to users of the Engineering group.
Rule Definition 1: If any user of the Engineering AD group accesses vCenter Server on port 443/HTTPS, it will be allowed.
Rule Definition 2: If any user of the Development AD group accesses vCenter Server on port 443/HTTPS, it will be rejected.
Step 7: IDFW Validation
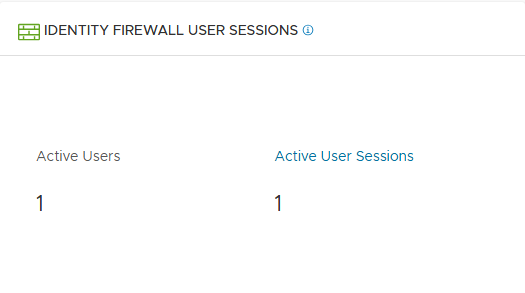
I logged in to the WinJump box as the manishj user. After a successful login, NSX IDFW will report that it has an active user session.
Clicking on the Active User Sessions provides details of the logged-in user and the session source.
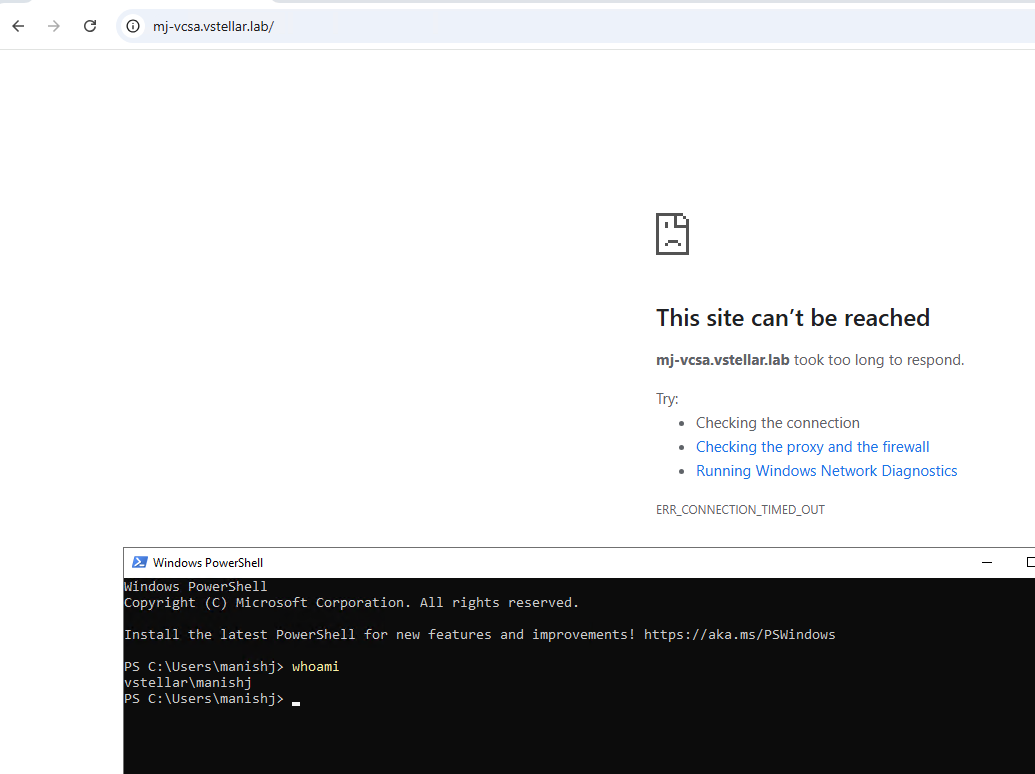
The user from the Development AD group can’t access the vCenter URL on port 443 from the jumpbox.
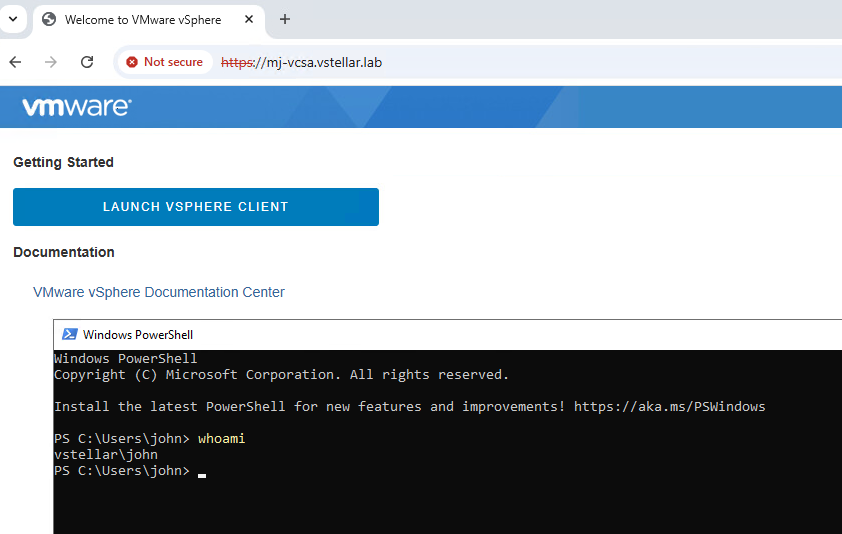
The user from the Engineering AD group can access the vCenter URL on port 443 from the jumpbox.
IDFW rule realization in the datapath (ESXi host)
Connect to the ESXi host where the Windows jumpbox is running and run the summarize-dvfilter command against the VM.
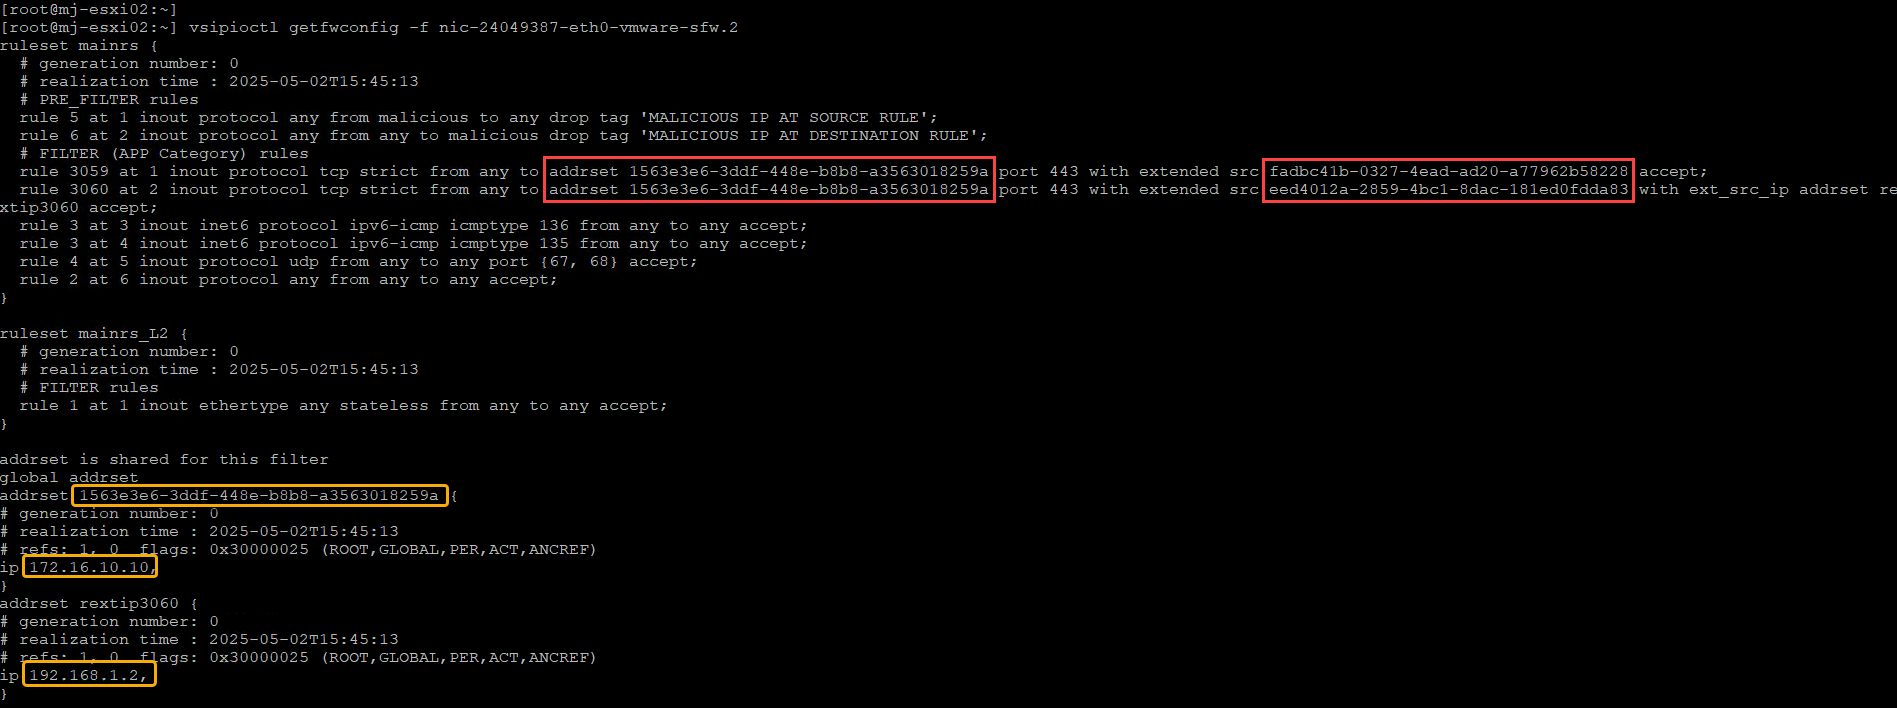
To see what firewall rules are applied at the vNIC level of the Winjump VM, run the command: vsipioctl getrules -f <dvfilter-name>
Rules 3059 & 3060 list the addrset UUID and the source UUID (which corresponds to the AD group).
The addrset (highlighted in yellow) shows the destination IP address 172.16.10.10 (vCenter IP) and the winjump IP 192.168.1.2
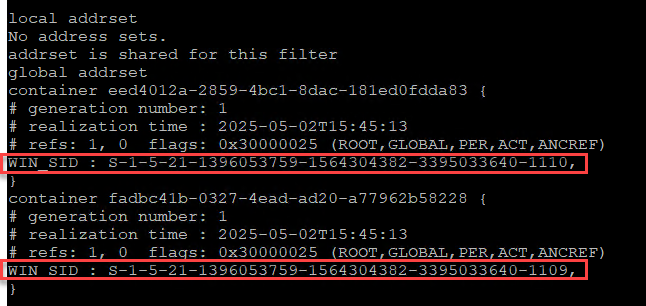
The vsipioctl command also displays the SSID of the Active Directory groups.
You can query the AD groups to match the SSID with the group name to validate that rules are enforced on the right AD groups.
Alternatively, you can also run the following command to list the AD group SID
And that’s it for this post. In the next post, I will discuss the IDFW Guest Introspection method. Stay tuned!!!
I hope you enjoyed reading this post. Feel free to share this on social media if it is worth sharing









One thought on “NSX Identity Based Firewall – Part 2: Implement IDFW using Event Log Scraping”