
Introduction
VMware Tanzu Mission Control is a centralized hub for simplified, multi-cloud, multi-cluster Kubernetes management. It helps platform teams take control of their Kubernetes clusters with visibility across environments by allowing users to group clusters and perform operations, such as applying policies, on these groupings.
VMware launched Tanzu Mission Control Self-Managed last year for customers running their Kubernetes (Tanzu) platform in an air-gapped environment. TMC Self-Managed is designed to support organizations that prefer to maintain complete control over their multi-cluster management hub for Kubernetes to take full advantage of advanced capabilities for cluster configuration, policy management, data protection, etc.
The first couple of releases of TMC Self-Managed only supported TKG clusters that were running on vSphere. Last month, VMware announced the release of the VMware Cloud Director Extension for Tanzu Mission Control, which allows installing TMC Self-Managed in a VCD environment to manage TKG clusters deployed through the VCD Container Service Extension (CSE). You can read the announcement here
The 4.1 release of CSE introduced support for installing TKG clusters in an airgap environment and allowed Sovereign Cloud Service providers to offer Kubernetes as a Service (KaaS) in a VCD airgap environment. VCD with CSE is a great solution, but the solution is not complete as there is no centralized pane of glass available for tenants to manage their container workloads. It is a real pain to manage and maintain a rapidly growing K8s footprint.
With the launch of the VCD extension for TMC, VMware has addressed this challenge. Using this extension, the CSPs can provide either a fully managed, compliant K8s service or enable self-service for VCD tenants.
Architecture
The overall solution can be summarized as shown in the below architecture diagram.

Software BOM
Ensure you have deployed compatible versions of all the necessary components before installing the VCD Extension for TMC. To ensure the software components are up-to-date, consult the VMware product interop matrix.
I have the following components deployed in my lab:
| Software Component | Version |
| VMware Cloud Director | 10.5.1 |
| Container Service Extension | 4.2.0 |
| Kubernetes Container Clusters UI plugin | 4.2.0 |
| VMware vSphere | 7.0 U3n |
| Vmware NSX | 4.1.1.0 |
| NSX Advanced Load Balancer | 22.1.4 Patch 2p3 |
| Tanzu Kubernetes Grid | 2.4.0 |
| VMware Tanzu Mission Control Self-Managed | v1.0 |
Installation Prerequisites
Ensure the following components are in place for VMware Cloud Director Extension for VMware Tanzu Mission Control to operate successfully.
1: VCD 10.5.1 is installed and configured to host tenants.
2: A solution organization and Org VDC are created. The solution organization is used for the following:
- To deploy the CSE server.
- For configuring the Solution Add-On Landing Zone.
- To deploy a TKG cluster where TMC Self-Managed will be installed.
3: CSE 4.2.0 and the Kubernetes Container Clusters 4.2.0 UI plugin are installed. Ensure that CSE is configured to operate in an airgap environment. Please refer to my previous blog for instructions on how to deploy CSE in an airgap environment.
4: A harbor registry is deployed to host TMC Self-Managed and TKG installation images. You deploy this when you configure CSE in an airgap environment.
5: (Optional) VCD Object Storage Extension is installed and configured to backup the TKG cluster where TMC Self-Managed is installed.
Installation Steps
Create a Certificate for TMC Self-Managed
In a production environment, it is best to utilize a publicly signed CA certificate; in lab environments, self-signed certificates can be used instead. The user experience is made easier when publicly signed certificates are used.
If you already have an internal CA server (e.g., Microsoft CA) in your lab, you can use the CA certificate and its private key to generate self-signed certificates for TMC Self-Managed. If you don’t have a CA server or you want to use a different CA for TMC Self-Managed, you can do so.
Note: It is recommended to use the same certificate authority for VCD and TMC Self-Managed. If you choose to use a different CA for TMC Self-Managed than what you used for VCD, you have to update CSE server settings for TKG clusters to trust the CA certificate.
In my lab, for some reason, I was not able to use my Microsoft CA server’s certificate to sign the certificate for the TMC Self-Managed, so I used the openssl commands to create a CA and sign the certificate.
|
1 2 3 4 5 6 7 8 9 10 11 12 13 14 15 16 17 18 19 20 21 22 23 24 25 26 27 28 29 |
export DOMAIN="*.tmc.lab.vmw" export SUBJ="/C=IN/ST=Karnataka/L=Bengaluru/O=VMware, Inc./OU=Tanzu/CN=${DOMAIN}" Create a CA certificate/key for signing the TMC-SM certificate. --------------------------------------------------------------- openssl genrsa -out root-ca.key 4096 openssl req -x509 -new -nodes -key root-ca.key -sha512 -days 3650 -out root-ca.crt -subj "$SUBJ" Create TMC-SM certificate signing request ----------------------------------------- openssl genrsa -out tmcsm-srv.key 4096 openssl req -sha512 -new -subj "$SUBJ" -key tmcsm-srv.key -out tmcsm-srv.csr cat > v3.ext <<-EOF authorityKeyIdentifier=keyid,issuer basicConstraints=CA:FALSE keyUsage = digitalSignature, nonRepudiation, keyEncipherment, dataEncipherment extendedKeyUsage = serverAuth subjectAltName = @alt_names [alt_names] DNS.1=${DOMAIN} EOF Sign TMC-SM certificate ----------------------- openssl x509 -req -sha512 -days 3650 -passin pass:1234 -extfile v3.ext -CA root-ca.crt -CAkey root-ca.key -CAcreateserial -in tmcsm-srv.csr -out tmcsm-srv.crt |
After generating the certificates, make a note of the content of the ‘root-ca.crt‘ file, as you need this to update CSE server settings.
Update CSE Server Settings
For TKG clusters to trust the custom CA certificates, you need to update the CSE Server settings and specify the contents of the certificate content in the section “Cluster Certificates.“
Login to VCD with system admin credentials and navigate to More > Kubernetes Container Clusters > CSE Management > Server Details, and click on the Update Server option.

Select the ‘Update Configuration’ option and click Next.

Under Cluster Certificates, paste the content of the root-ca.crt file that you created in step 1.

Restart the CSE server vApp after updating the CSE server settings for changes to take effect.
Deploy and Configure the TKG Cluster
1: Deploy a TKG cluster in the solutions organization (if you haven’t done so).
For instructions on how to deploy a TKG cluster, refer to the CSE product documentation and follow the Create a Tanzu Kubernetes Grid Cluster workflow.
Important Note: Do not activate “Auto Repair on Errors” and “Node Health Check” on the TKG cluster while deploying. CSE 4.2.0 has a bug where the TKG cluster doesn’t scale to more than one control plane/worker node post-deployment. I have already reported this to CSE Engineering, and this will be fixed in the upcoming release.
For a production-grade deployment, the TKG cluster must be deployed in the following form factor:
| Control Plane | |
| Number of Nodes | 3 |
| Sizing Policy | TKG Large |
| Worker Pool | |
| Number of Nodes | 3 |
| Sizing Policy | TKG Extra-Large |
| Kubernetes Storage | Configure the storage class to use the preferred storage policy for persistent volumes. |
In my lab, I chose TKG-Large for both the control plane and worker nodes, and the installation went through fine.

2: Connect to the newly created TKG cluster and ensure that the tanzu-standard package repository is created in the “kapp-controller-packaging-global” namespace.
|
1 2 3 4 |
# kubectl get pkgr -n kapp-controller-packaging-global NAME AGE DESCRIPTION tanzu-standard 5d21h Reconcile succeeded |
Note: If you are using a cluster that was created before CSE 4.2 with TKG 2.x to host TMC Self-Managed, refer to the section “Brownfield Deployment” in this blog.
3: Create Cluster Issuer
If you are using self-signed certificates for TMC Self-Managed and want to use cert-manager to automatically issue certificates to the TMC endpoints, create a ClusterIssuer resource in the TKG cluster.
If you do not want to use cert-manager, you can generate the certificates independently. The certificate can be a single certificate with Subject Alternative Names (SANs) for all DNS entries.
In my lab, I am using ClusterIssuer. The commands for creating the same are provided below:
|
1 2 3 4 5 6 7 8 9 10 11 12 13 14 15 16 17 18 19 20 21 22 23 24 25 26 27 28 29 30 31 32 |
Create a secret for the cert-manager. ------------------------------------- # kubectl create secret tls local-ca --key root-ca.key --cert root-ca.crt -n cert-manager List secrets in the cert-manager namespace. ------------------------------------------- # kubectl get secrets -n cert-manager NAME TYPE DATA AGE cert-manager-fetch-0 kubernetes.io/dockerconfigjson 1 51m local-ca kubernetes.io/tls 2 4s Create cluster issuer --------------------------- # vim local-issuer.yaml kind: ClusterIssuer metadata: name: local-issuer namespace: cert-manager spec: ca: secretName: local-ca # kubectl apply -f local-issuer.yaml List clusterIssuer and validate the status. ------------------------------------------- # kubectl get clusterissuer NAME READY AGE local-issuer True 5d1h |
Configure Harbor Repository
Create a public project in your harbor repository to host TMC Self-Managed artifacts that get pushed during the TMC configuration.
In my lab, I created a project named ‘tmcsm’ in the harbor repo.

Configure Solution Add-On Landing Zone
For configuring a Solution Add-on Landing Zone, login to the provider portal, navigate to More > Solution Add-On Management, and click on the Configure button.

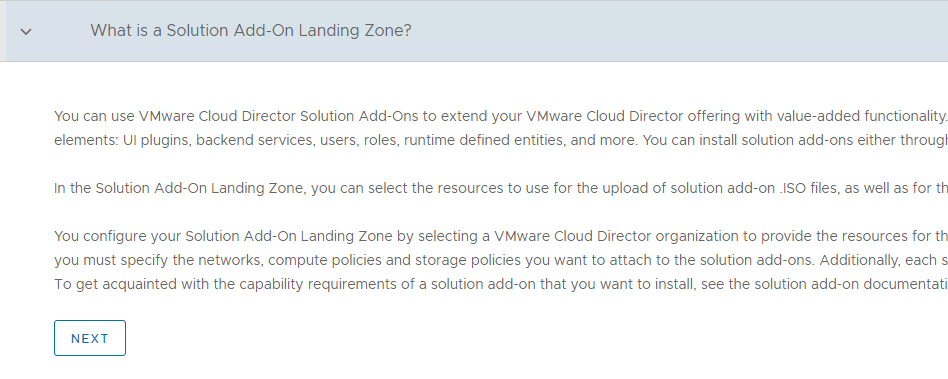
Familiarize yourself with the information about the Solution Add-On Landing Zone and click Next.
Select the Organization that will provide resources for the landing zone, and select the catalog to store ISO files for the solution add-ons that you will deploy.
Select the VDC where the solution will be deployed. If there are multiple VDCs in your environment, You can select more than one.
Note: You won’t be able to change the organization later.

Click the vertical ellipsis and click Configure.

Under the network tab, click on Add Network. Select an Org VDC network for the Add-On solution.
This is the network where the agent VMs are deployed when you install an Add-On solution.

Under the Compute Policies tab, select a compute policy for the solution add-ons.

Under the Storage Policies tab, select at least one storage policy for the solution add-ons and click on Save.

Click Next to save the settings.

Click on Finish to complete the landing zone configuration.

Note: If you have added multiple VDCs, you can make a VDC default by clicking on the vertical ellipsis and selecting “Make Default”.
Install VCD Extension for TMC
1: Download the VCD Extension for the Tanzu Mission Control ISO file from the VMware Customer Connect Portal.

3: Upload the Tanzu Mission Control ISO file by clicking on the upload button.

4: After the ISO file is uploaded, click on the Upload button.

5: Click on the Finish button to complete the upload process.

6: The Tanzu Mission Control Add-On is now installed.

7: Create a TMC Self-Managed instance by clicking on the New Instance button.
8: Accept the EULA by clicking on I agree.

9: Specify the installation parameters. For information regarding the parameters, refer to the product documentation.
The following screenshot shows the values for the reference.
Note: For the load balancer IP, pick one free IP address from the public IP address pool configured for the solution organization. You map the TMC Self-managed DNS records to this IP address on your DNS server.

10: If your registry solution uses self-signed certificates, specify the registry CA certificate by clicking on the upload arrow button.
Note: If the same CA server that signed the certificates of the VCD has signed the certificate of your registry, you can skip this step as the installer fetches the VCD CA certificate automatically during installation.

11: Specify the role name for TMC Admin and TMC Users. The installer will automatically create these roles in the VCD.
For more information on the roles and permissions, refer to the product documentation.
- If you are using cert-manager and ClusterIssuer, select the certificate provider as cluster-issuer. The cluster issuer name should match the name that you created in the TKG cluster.
- If you have manually generated the certificates, select the Certificate Provider parameter as import and configure the TLS Certificate and TLS Private Key parameters.
For the TLS CA Bundle parameter, upload the TMC-SM CA pem certificate. You need to convert the CRT file to PEM format first.

12: Click on the Finish button to initiate the TMC Self-Managed installation.

13: Monitor the deployment by clicking on the Tasks button. It roughly takes 45 minutes to finish the installation.

14: The installer will create the TMC Right Bundles during installation.

15: The installer also creates the required roles.

Publish TMC to Tenant Organizations
1: Navigate to More > Kubernetes Container Clusters > CSE Management > Tanzu Mission Control, and from the All Actions drop-down, click on Publish.

2: Clicking on the Publish button will take you to the Solution Add-On Management page.
Click on the three dots next to the Tanzu Mission Control Self-Managed, and click Publish.

3: Select the organizations you want to publish the Tanzu Mission Control add-on to, and click Save.

TMC Installation in Brownfield Environment
VMware KB-94799 explains the changes that you need to make in the TKG clusters that were deployed before the CSE configuration was updated. Refer to Step 3, “Update the configuration of existing clusters” for the required commands.
I hope you enjoyed reading this post. Feel free to share this on social media if it is worth sharing.
2 thoughts on “How to Integrate TMC Self-Managed 1.0 with VCD”
Comments are closed.