
In this post, I will walk through the steps of replacing NSX ALB self-signed certificates with a CA-signed certificate. For the purpose of this demonstration, I am using Active Directory Certificate Service in my lab. I have a windows server 2019 deployed and additional roles configured for AD integrated Certificate Service.
Please follow the below procedure for replacing NSX ALB certificates.
Step 1: Generate Certificate Signing Request (CSR)
CSR includes information such as domain name, organization name, locality, and country. The request also contains the public key/private key, which will be associated with the certificate generated. A CSR can be generated directly from the NSX ALB portal, but that requires configuring a Certificate Management Profile or using the OpenSSL utility.
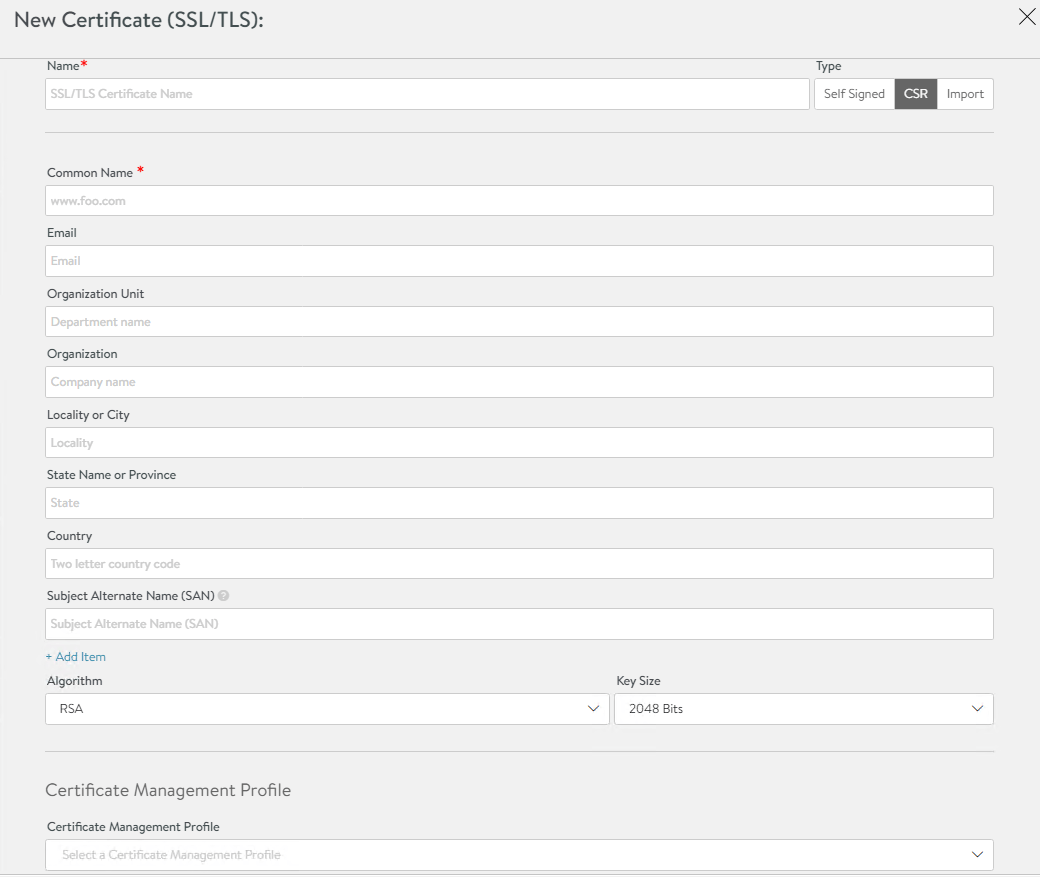
To generate a CSR via the NSX ALB portal, go to Templates > Security > SSL/TLS Certificates and click on the Create button, then select controller certificate from the drop-down menu. Select the CSR option, fill in the required information, and save the certificate.
I am using openssl in my lab for the demonstration. I will probably cover Certificate Management Profile in another post.
To generate CSR using openssl, please follow the below steps:
1.1 Create a conf file as shown below:
Note: Please change the DNS name and IP address as configured in your environment. If you haven’t deployed ALB in clustered mode, remove the DNS/IP references of the additional nodes from your conf file.
|
1 2 3 4 5 6 7 8 9 10 11 12 13 14 15 16 17 18 19 20 21 22 23 24 25 26 |
[ req ] default_bits = 2048 distinguished_name = req_distinguished_name encrypt_key = no prompt = no req_extensions = req_ext [ req_distinguished_name ] countryName = IN stateOrProvinceName = Karnataka localityName = Bangalore organizationName = VMware organizationalUnitName = Tanzu Solutions Engineering commonName = alb.vstellar.local [ req_ext ] subjectAltName = @alt_names [alt_names] DNS.1 = alb.vstellar.local DNS.2 = alb01.vstellar.local DNS.3 = alb02.vstellar.local DNS.4 = alb03.vstellar.local DNS.5 = 172.16.13.2 DNS.6 = 172.16.13.3 DNS.7 = 172.16.13.4 DNS.8 = 172.16.13.5 |
1.2: Generate CSR file
|
1 |
# openssl req -newkey rsa:2048 -nodes -keyout alb.key -config alb-csr.conf -out alb.csr |
1.3: Send the CSR to the CA server.
To sign the cert, paste the content of the alb.csr file into the saved request box and choose the ‘Web Server’ Certificate Template.

Choose the base64 encoded option and then select the ‘Download certificate chain’ option.

1.4: Convert the PKCS certificate into x509 format
By default, the downloaded certificate chain will be in p7b format. Before you can utilize this certificate in the NSX ALB, you must convert it to the x509 format. To convert the certificate, run the command below.
|
1 |
# openssl pkcs7 -print_certs -in alb-cert-chain.p7b -out alb-chain.cer |
Step 2: Upload the signed certificate to NSX ALB.
Login to the NSX ALB portal and navigate to the Templates > Security > SSL/TLS Certificates page and click on the Create button and choose controller certificate. Use the import option to upload the signed certificate.
Under Certificate, place the .cer file, and under Key, place the private key that you generated in step 1.2. If you used a passphrase when generating the CSR, include it in the Key Passphrase.
Click on the Validate button to verify that the signed certificate is valid.

If the certificate is valid, the certificate and Key fields, as well as the certificate information, are filled in. To save the certificate, click the save button.

Step 3: Replace NSX ALB Certificate
Navigate to the Administration > Settings > Access Settings page and choose the newly created signed certificate under SSL/TLS Certificate option.

If you have imported your CA Server root certificate into the ‘Trusted Root Certification Authorities Certificate Store’ of the machine from which you access the NSX ALB portal, the certificate status will show Valid, and you can examine the Issuing Authority by clicking on the certificate.

You can also check the Issued Certificates in your Certificate Authority store.

I hope you enjoyed reading this post. Feel free to share this on social media if it is worth sharing.