
Introduction
Kubernetes is frequently thought of as a platform for stateless workloads because the majority of its resources are ephemeral. However, as Kubernetes grows in popularity, enterprises are deploying more and more stateful apps. Because stateful workloads require permanent storage for application data, you can no longer simply reload them in the event of a disaster.
As businesses invest extensively in Kubernetes and deploy more and more containerized applications across multi-clouds, providing adequate data protection in a distributed environment becomes a challenge that must be addressed.
Data Protection in Tanzu Mission Control (TMC) is provided by Velero which is an open-source project. Velero backups typically include application and cluster data like config maps, custom resource definitions, secrets, and so on, which would then be re-applied to a cluster during restoration. The resources that are using a persistent volume, are backed up using Restic.
In this post, I’ll show how to backup and recover a stateful application running in a Tanzu Kubernetes cluster. I am using MinIO S3 storage for storing the backups.
The App
Before I jump into the lab, I want to give you an overview of the application that I will be using for demonstration. I am using the Acme Fitness demo app which is publically available on Github.
The below image shows the high-level overview of the application architecture.

There are various components that make this app. This page explains the components in detail.
App Deployment
The below steps provide the steps of deploying this app in a Tanzu Kubernetes cluster.
Step 1: Clone the repository
I have imported the application into my personal GitHub repository and made some changes to fit my environment. If you want to use my repo, clone the same on a jumpbox from where you can access your Tanzu Kubernetes clusters.
|
1 |
git clone git@github.com:manishjha86/K8-Apps.git |
Step 2: Create a namespace for deploying the app
Connect to your Tanzu Kubernetes cluster and create a namespace for the app
|
1 2 3 |
# kubectl create ns acme namespace/acme created |
Step 3: Create a registry secret
I have modified the deployment YAML and I am using a secret named regcred. Using this secret, the required pod images will be pulled from the docker repository. You need to create this secret under the namespace that you have created in the previous step.
|
1 2 3 4 5 6 7 |
# kubectl config set-context --current --namespace=acme Context "mj-tkgs-wld01" modified. # kubectl create secret docker-registry regcred --docker-server=docker.io --docker-username=<your-docker-id> --docker-password=<your-docker-passwd> --docker-email=<your-email-id> secret/regcred created |
Replace the docker-username, docker-password, and docker-email with your values.
Verify that you can see the secret in the namespace by running the command: kubectl get secrets
Step 4: Deploy the application
To deploy the application, go to the acme-fitness/kubernetes-manifests folder and execute the deployacme.sh file with the execute permission set. When you run the file, you’ll notice that pods, services, and pvcs, among other things, are generated.
|
1 2 3 4 5 6 7 8 9 10 11 12 13 14 15 16 17 18 19 20 21 22 23 24 25 26 27 28 29 30 31 32 33 34 35 36 37 38 39 40 41 42 43 44 45 46 47 48 49 50 51 52 53 54 55 56 57 58 59 60 61 62 63 64 65 66 67 68 69 |
# ./deployacme.sh ====Creating Required PVC's persistentvolumeclaim/redis-cart-claim created persistentvolumeclaim/mongodata-claim-catalog created persistentvolumeclaim/postgredb-claim created persistentvolumeclaim/mongodata-claim-users created persistentvolumeclaim/users-cart-redis-claim created =====Creating Secret for Redis===== secret/cart-redis-pass created ======Creating cart service====== service/cart-redis created deployment.apps/cart-redis created service/cart created deployment.apps/cart created =====Creating Secret for Catalog Mongo===== secret/catalog-mongo-pass created =====Creating ConfigMap for catalot service===== configmap/catalog-initdb-config created =====Creating Catalog Service===== service/catalog-mongo created deployment.apps/catalog-mongo created service/catalog created deployment.apps/catalog created =====Creating Payment Service===== service/payment created deployment.apps/payment created =====Creating Order Secret===== secret/order-postgres-pass created =====Creating Order Service===== service/order-postgres created deployment.apps/order-postgres created service/order created deployment.apps/order created =====Creating users secret===== secret/users-mongo-pass created secret/users-redis-pass created =====Creating ConfigMap for Users===== configmap/users-initdb-config created =====Creating users service===== service/users-mongo created deployment.apps/users-mongo created service/users-redis created deployment.apps/users-redis created service/users created deployment.apps/users created =====Creating Frontend Service===== service/frontend created deployment.apps/frontend created NAME TYPE CLUSTER-IP EXTERNAL-IP PORT(S) AGE frontend LoadBalancer 10.96.243.9 <pending> 80:32635/TCP 1s ====Creating Point-of-Sales Service==== service/pos created deployment.apps/pos created NAME TYPE CLUSTER-IP EXTERNAL-IP PORT(S) AGE pos NodePort 10.96.139.254 <none> 7777:31896/TCP 0s |
Step 5: List Deployment Items
List PVC’s

List Pods

List Services

The ‘frontend‘ service has an external IP address for accessing the application. You should be able to view the below portal if you go to the frontend service’s external IP.

You can login to the application using the credentials eric/vmware1!
Step 6: Add data into the application
You can do some practice shopping and place an order after logging into the app. The order details are kept in the order-postgres pod, which has a physical volume attached.

User manish has placed an order as shown below.

When the order is placed, you will see an order id ‘8d33—‘. This order is stored in the database which we will examine in the next step.

To go inside the order-postgres pod, execute the below commands:
|
1 2 3 4 5 |
# kubectl -n acme exec -it order-postgres-5c969dfcf8-n6zln -- bash # psql --user pgbench # \c postgres |
verify the order details by executing the command as shown below:

When a backup and restore of the acmefitness app is performed, you should be able to see the same data in the restored app.
Step 7: Annotate the order-postgres pod.
In order for Restic to perform the backup of the stateful application, the pods need to be annotated using the key backup.velero.io/backup-volumes. Currently, TMC doesn’t have this functionality.
You should be knowing the name of the volume which is tied to the pod that you are annotating. To find the name of the volume, do a kubectl describe on the pod and search at the section ‘Volumes’. The existing annotations for the pod can also be seen in the same output.
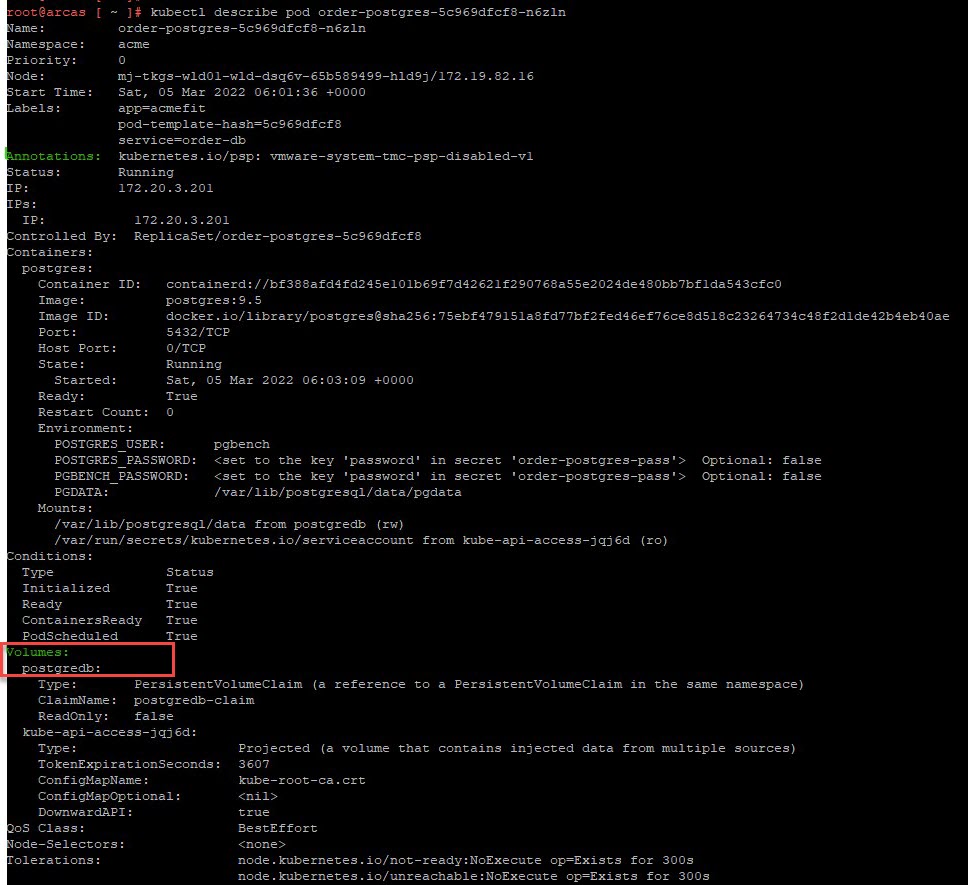
Once the volume name is discovered, the pod can be annotated using the command shown below:
|
1 2 3 |
# kubectl -n acme annotate pod/order-postgres-5c969dfcf8-n6zln backup.velero.io/backup-volumes=postgredb pod/order-postgres-5c969dfcf8-n6zln annotated |
Now the application is ready for backup/restore. It is assumed that Data protection is already enabled on the Tanzu Kubernetes cluster where the application is running.
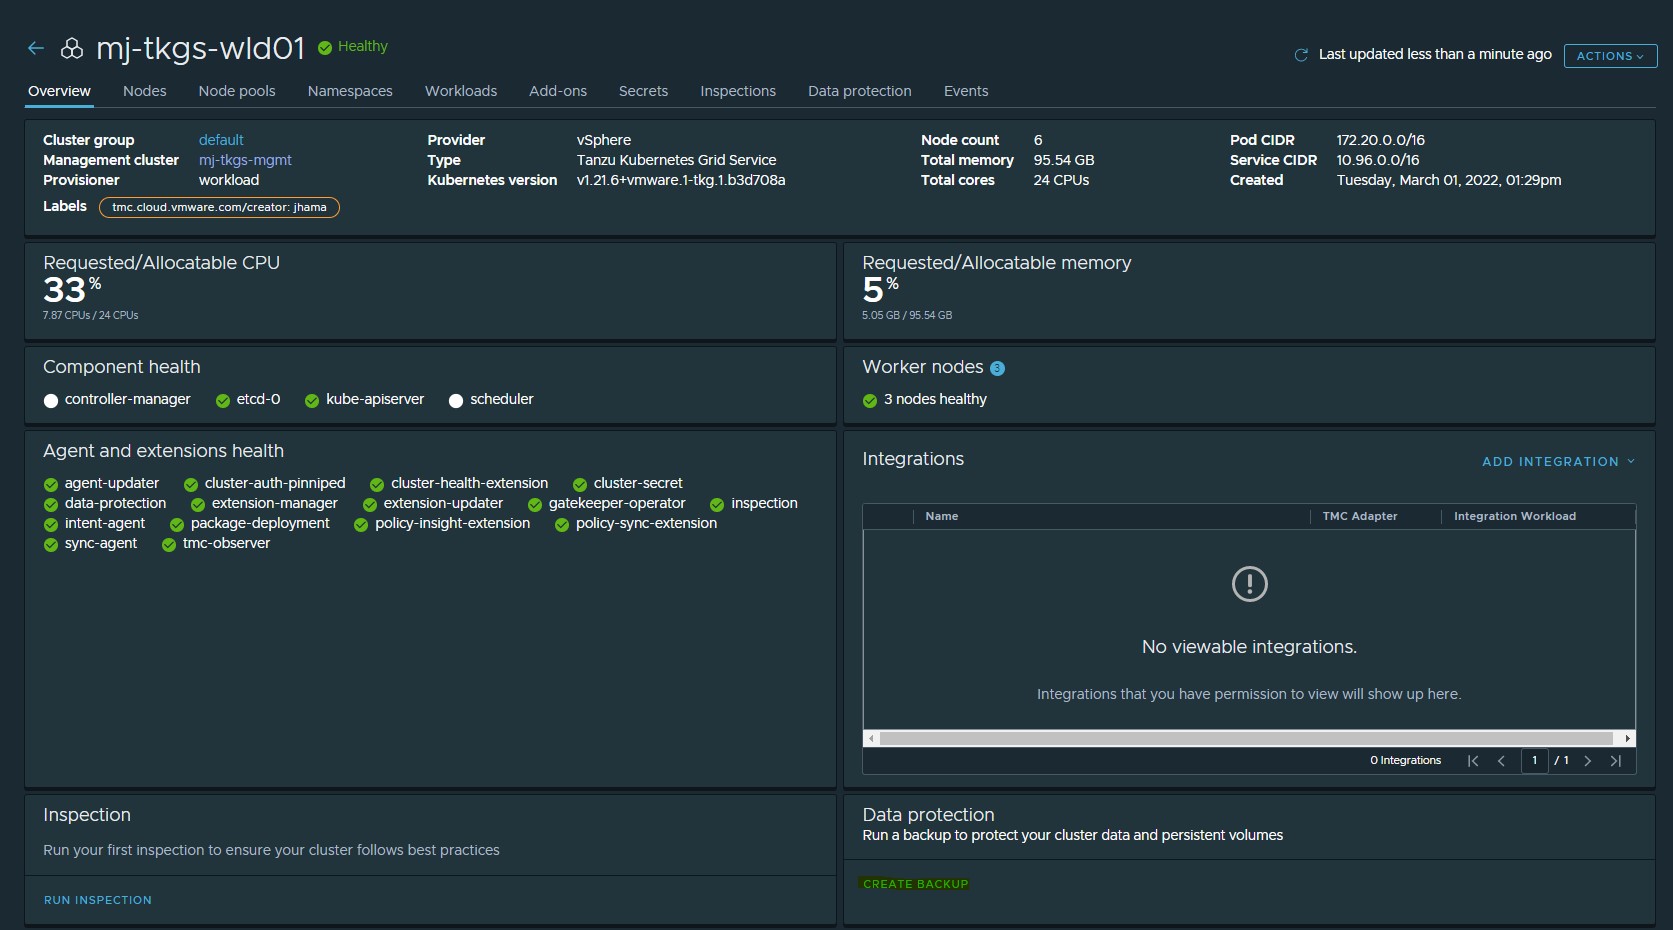
Perform Application Backup
Locate your Tanzu Kubernetes cluster by logging into the Tanzu Mission control portal. When data protection is enabled on the cluster, the Create Backup button appears.
Select the ‘acme’ namespace for backup.

Select the location where the backup will be stored. I am using the location which I configured in my on-prem.
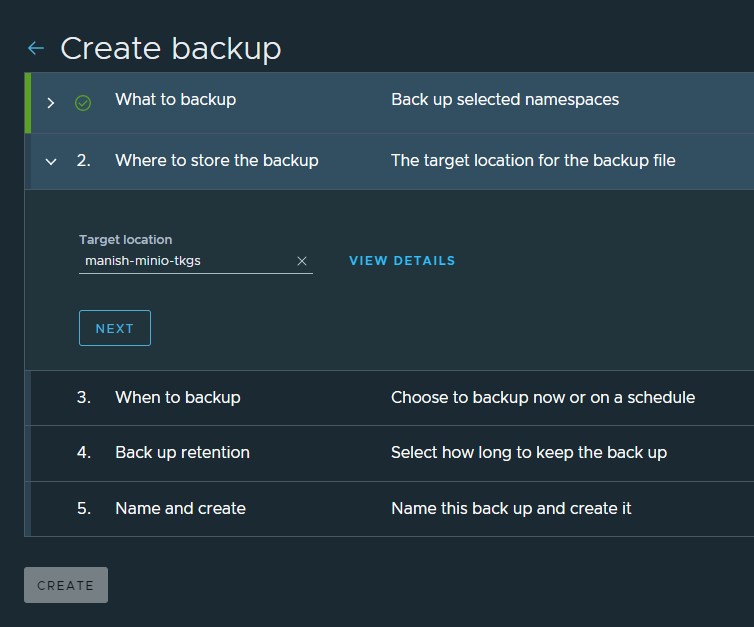
Continue through the create backup wizard and at the last step, provide a name for the backup.

Allow some time for the backup process status to change to complete.
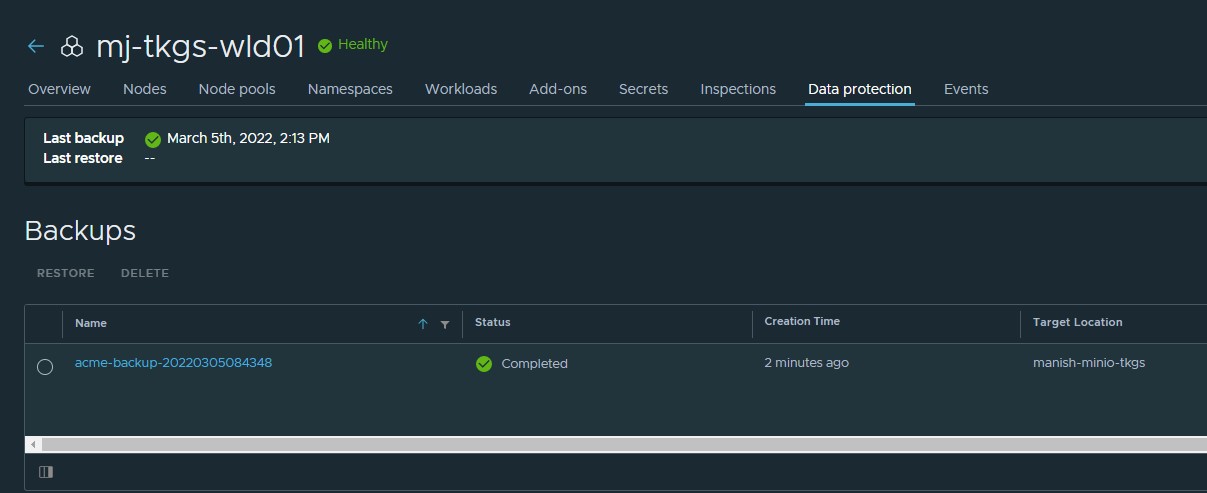
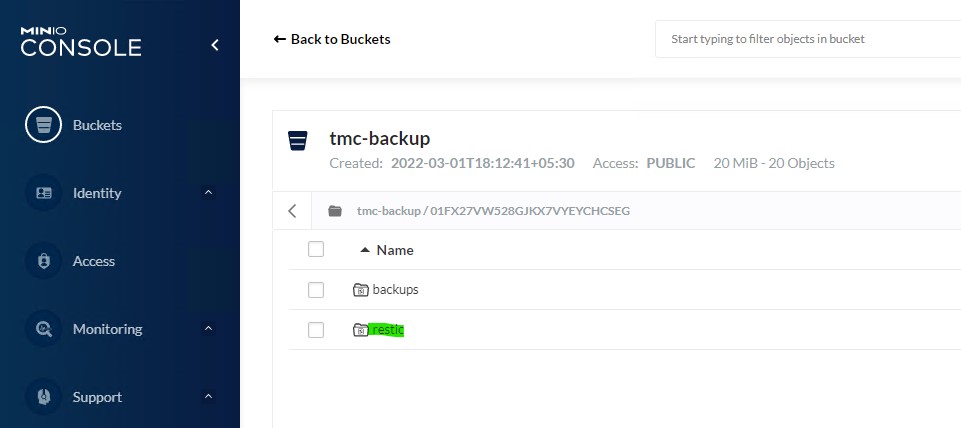
When the backup is finished, you’ll notice that a restic folder has been created on the S3 storage you chose for backup.
If you have velero installed on your jumpbox, you may use the velero get backups command to receive information about the backups. To get information about the restic backup, use the velero backups describe command as shown below:
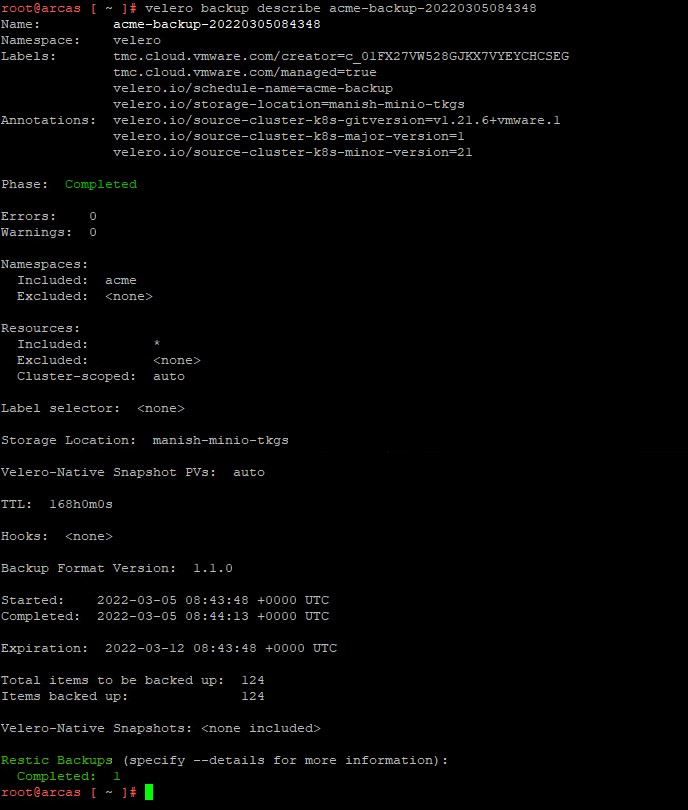
If you pass the –details argument to the above command, the output provides you the name of the pod’s backed up by restic.

Perform Application Restore
To restore the application, return to the Tanzu Mission Control portal and select the backup which you want to restore.

Choose the namespace you want to restore and then click the pencil icon under Target Namespace. The target namespace can be the same as the source namespace, however, because my source namespace is healthy, I am restoring to a new namespace in my lab.

Provide the name for the namespace where you want to restore.

Give the restore a name and then click the Restore button.

Wait for the restore task to complete.

A new namespace is created in the Tanzu Kubernetes cluster.

Verify that the pods in the acme-restore namespace are in running state

Execute the commands provided in Step-6 to login to the order-postgres pod. Check that the order-related data is visible in the database.

And that’s it for this post. I hope you enjoyed reading this post. Feel free to share this on social media if it is worth sharing.