Prior to Replication Assisted vMotion (RAV) feature, VMware HCX offered three distinct migration methodologies:
- HCX Bulk Migration
- HCX Cross-Cloud vMotion
- HCX Cold Migration
I have explained about these methods in this blog post. Also working of these migration techniques are documented here and here.
Before jumping into what is Replication Assisted vMotion, let’s discuss about pros and cons of above mentioned techniques.
- Bulk migration is resilient over network latencies and also allows multiple VMs to migrated simultaneously, but VM’s do incur a small downtime during final switchover.
- HCX VMotion migration on the other hand, keeps the application workloads live during entire migration window; but is sensitive to network latencies and jitter. Also we have limitation of 2 vMotion migration per ESXi host at a time.
RAV feature brings best of both these options in the form of cloud vMotion with vSphere Replication.
What is HCX Replication Assisted vMotion?
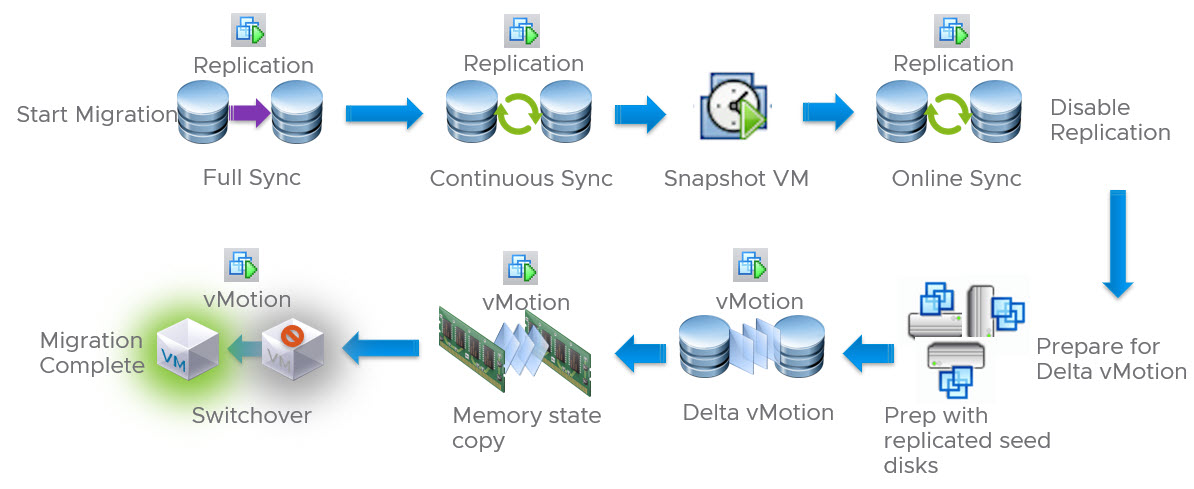
RAV migration is a new type of migration offering from HCX. Its a highly scalable workload migration solution leveraging best of vSphere replication and vMotion migration techniques. RAV migration leverages vSphere Replication to move over most of the VM disks content by virtue of initial sync and RPO cycles and then eventually invoking vMotion during switchover phase.
This type of migration is best suited for business critical monster virtual machines. Using RAV, petabytes of data can be moved online.
Since RAV leverages vSphere Replication to drive initial (most) disks movement, it is possible to achieve higher parallelism (hundreds to thousands of VMs/disks) and thus you can reduce number of migration waves. Also RAV migration provides you resume & pause abilities for migration.
Note: RAV is HCX Enterprise feature and is only available when HCX is activated via Enterprise key in both source and cloud site.
RAV Workflow
Below diagram shows high level workflow of RAV working.
Graphic thanks to vmware.com
RAV Use Cases
- Bulk migration with quick live switchover.
- Bulk migration with scheduled live switchover.
- Schedule live switchover DR protected VM.
- Quick live switchover DR protected VM.
- It can be used for the planned Datacenter evacuation
Note: There are some caveats associated with RAV. These are very well documented in HCX official documentation. So plan your migration carefully before using RAV migrations.
Alright now we have some background about RAV migration, let’s jump into lab and see things in action.
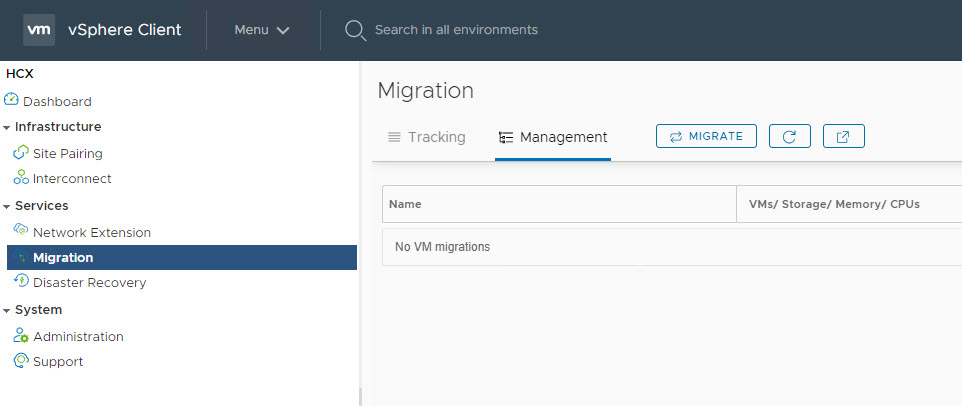
Login to on-prem vSphere Client and switch to HCX context from main menu and navigate to Migrations page and click on Migrate to start configuring migration.
Select the vm which you want to migrate and click on Add.
Also provide a group name (this is a new HCX feature called mobility groups and I will talk about this in my next post)
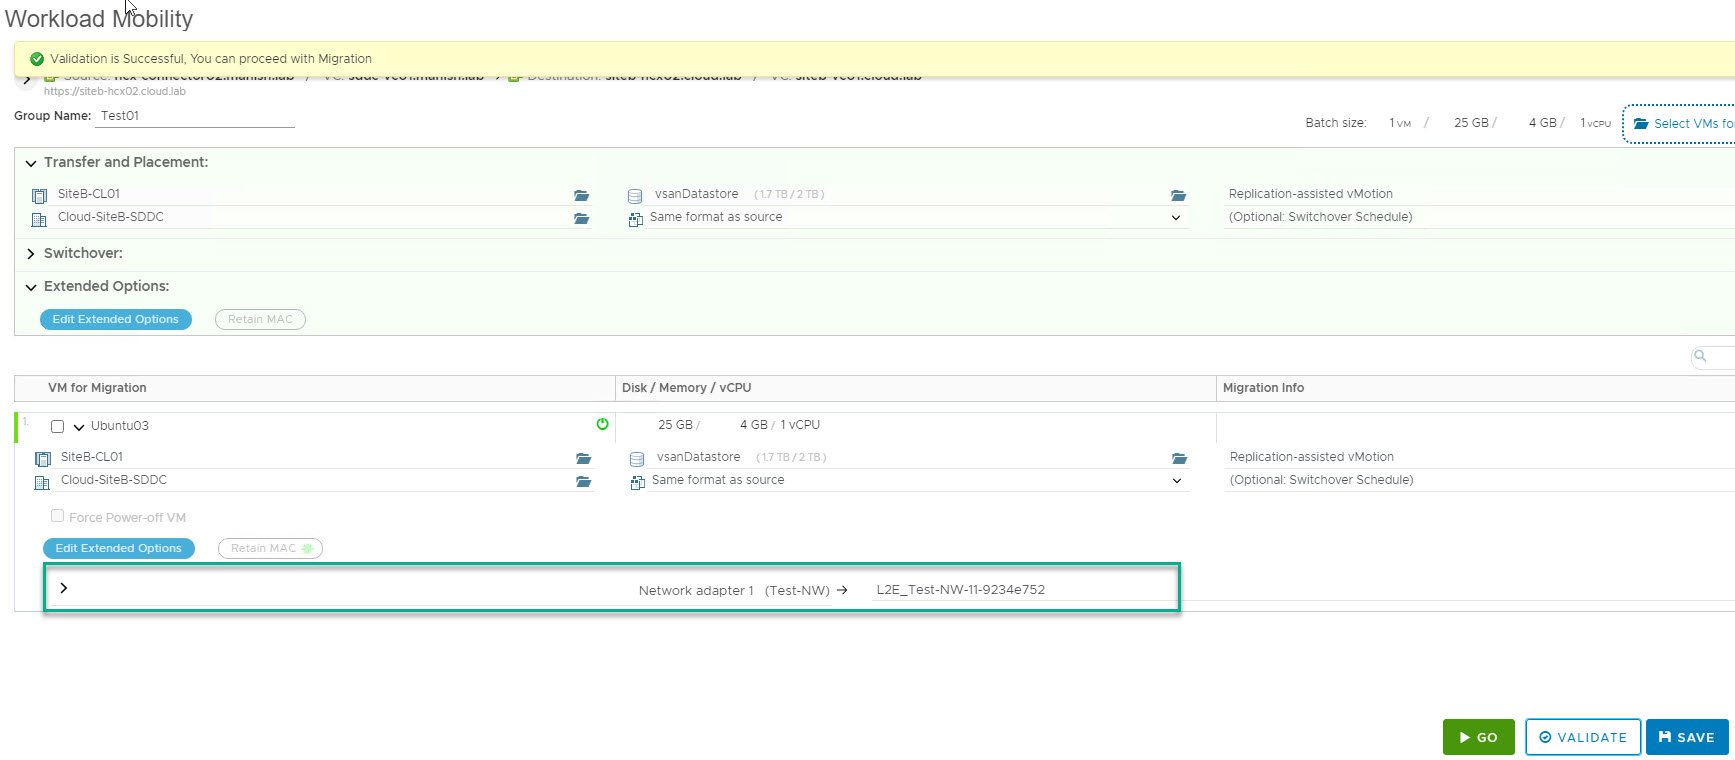
Note: The vm I selected in my lab is placed on a network which has been stretched to HCX cloud site using Network Extension feature.
Select the type of migration which you want to perform from Migration profile dropdown menu. I am gonna demonstrate RAV migration here.
Also select the Transfer and Placement option for the selected vm.
Ensure that network mapping for the selected vm is configured and then click on validate to ensure vm can be successfully migrated to cloud site.
Once the validation has passed, you can either initiate migration immediately by clicking on Go button or you can save this profile so that you can initiate migration at a later time.
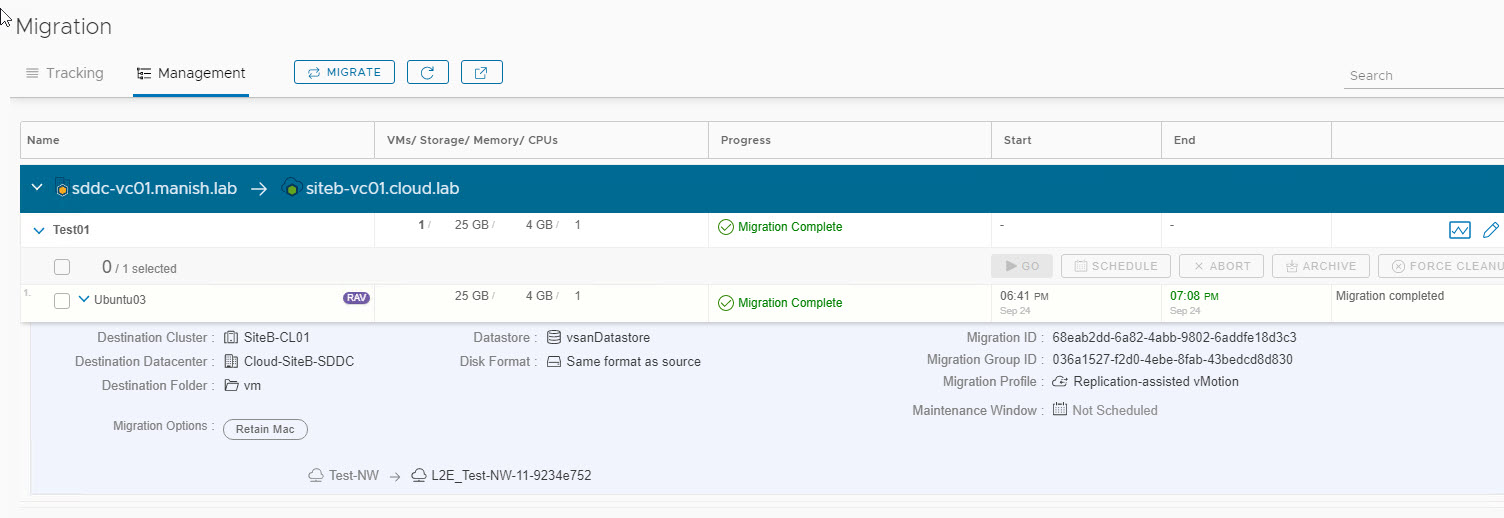
Migration can take a bit of time depending on how big a vm is. You have an option to schedule switchover for the migrating vm. If you don’t specify a switchover window, it is done as soon as initial sync of vm completes.
Note: If a RAV migration has failed because of any reason, you have an option to force cleanup migration from both source and destination site. Also you can abort a running migration if you wish to do so for any reason.
RAV Migration Troubleshooting Tips
If you are debugging/troubleshooting a failed RAV migration, then you can consult app.log file on HCX manager appliance. This log file is located in /common/logs/admin folder. Various keywords which will show you RAV related log messages are
- ReplicationTransferService_SvcThread
- RAVService_SvcThread
- VmotionService_SvcThread
Logs associated with phase where RAV has invoked vMotion, can be viewed on VC, ESXi, IX using id for the RAV migration present in UI.
Final Thoughts: If you are upgrading license key of an existing HCX instance from advance to enterprise, then you have to edit your existing service mesh and compute profile etc to include the features (RAV, SRM Integration, OSAM etc) unlocked by HCX Enterprise key.
And that’s it for this post.
I hope you enjoyed reading this post. Feel free to share this on social media if it is worth sharing 🙂


Thanks for sharing the information !!