VMware HCX is ultimate choice when it comes to migrating workloads to VMware SDDC running in cloud or a secondary site. Various migration techniques available with HCX makes life easy when it comes to planning migration for different kind of workloads. There are workloads which can incur some downtime while migration, on the other hand there are critical business applications which needs to be functional during entire duration of migration.
Current Challenges With Workload Migration
The most difficult part in any migration technology is Planning and Scheduling Migration Waves (which workloads should be migrated and when). Divergence of workloads (legacy, cloud native, microservices) have made datacenters more complex than ever. On top of that lack of clear and current documentation detailing the application landscape adds greater anxiety with every scheduled migration wave.
Architects spends a fair amount of time to understand application dependencies and correlation by conducting exhaustive interviews with application owners. A lot of time is spent in creating pre/post migration checklists and performing dry runs.
HCX Mobility Groups has solved this problem and it has made migration process a lot simpler than ever.
What is HCX Mobility Group?
Mobility Groups is an HCX Enterprise license feature which allows you to structure your migration waves based on your business requirements. You can then execute those waves without service disruption. VM’s selected for migration can be grouped together on basis of functionalities like application, network etc.
Below table lists key differences which mobility group feature brought with itself. I will discuss about these features one by one.
1: Simplifying logical grouping of VM’s to build migration waves
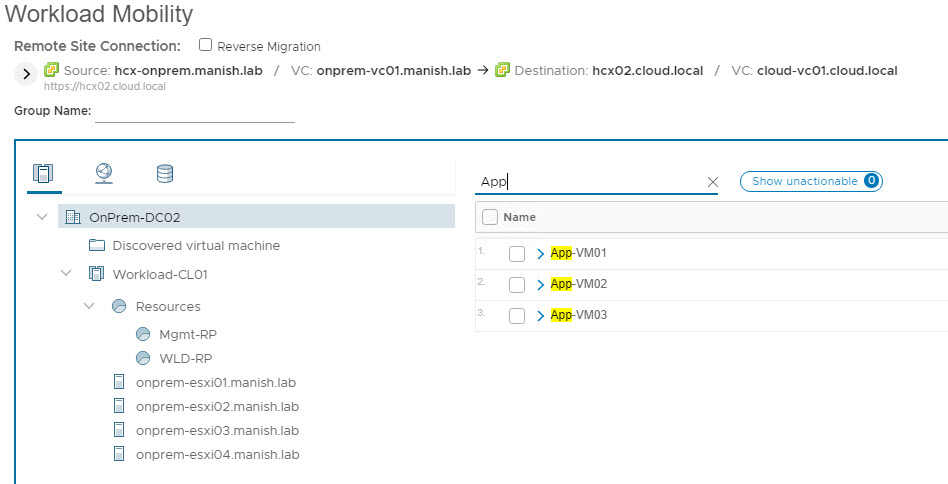
Workloads can be easily selected on the basis of name. Naming convention used in datacenter, provides info about type and function of workloads/applications.
For e.g all application servers of a particular type can be prefixed with keyword App and using this keyword in search filter of Mobility Groups, you can list and select specific type of workload and group them together in a migration group.
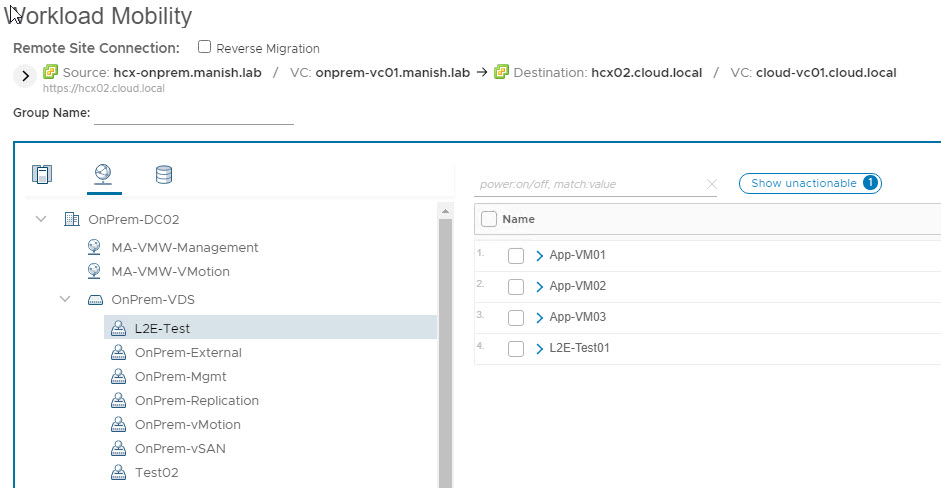
Another example of grouping is to select all workloads that are connected to a given network.
Segregating workloads using resource pools is a very common practice in datacenter and you can leverage this while creating mobility group by adding all vm’s present in a given resource pool in one group and migrating them all at once.
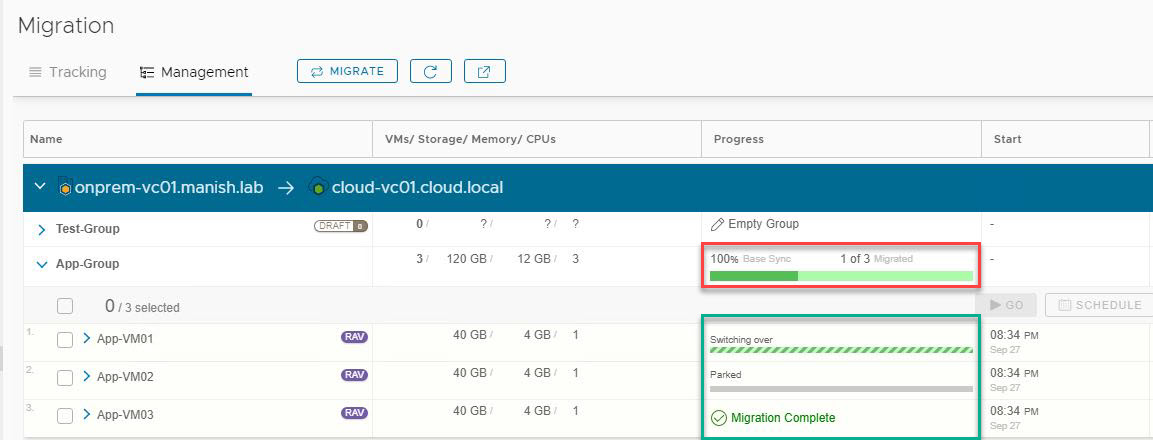
2: Consolidated Migration Report
A consolidated report of overall progress of a migration wave along with details of individual wave members is now visible under Migration > Management page.
Let’s dive into lab now and see migration waves based on mobility groups in action.
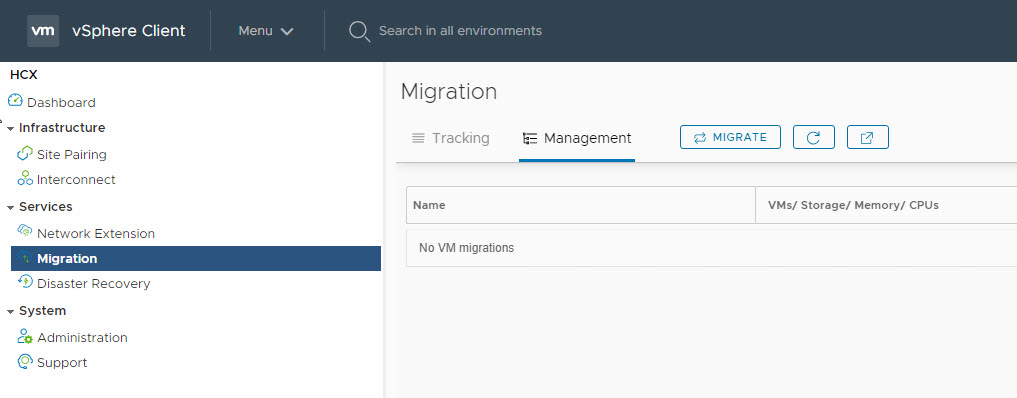
To create mobility groups, login to vSphere Client and switch to HCX context from main menu and navigate to Migration page.
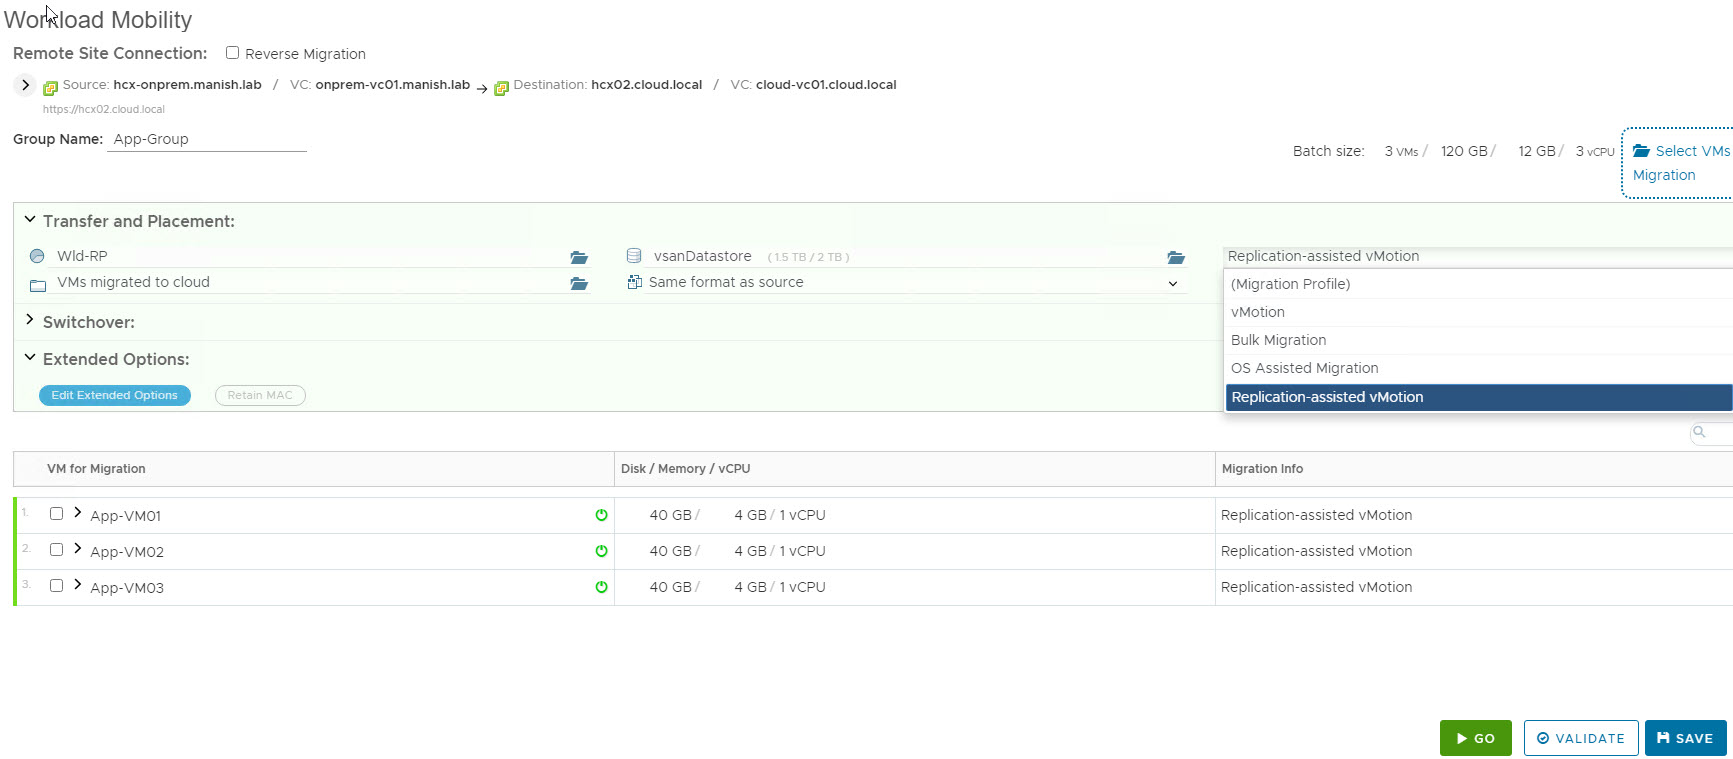
1: Name your migration wave: Provide a name for the mobility group. Name helps in keeping track of the various migration waves within your infra.
2: Choose migration wave members: Select your workloads based on name, network, resource or a combination of these.
3: Adding members to your wave: Upon selecting wave members, click on ADD button to include them in the migration wave.
4: Choose migration type and schedule: HCX offers a variety of migration techniques to accommodate different business needs. Mobility Groups lets you select a migration profile for the whole wave.
Note: You can override migration profile for individual wave members if you wish to.
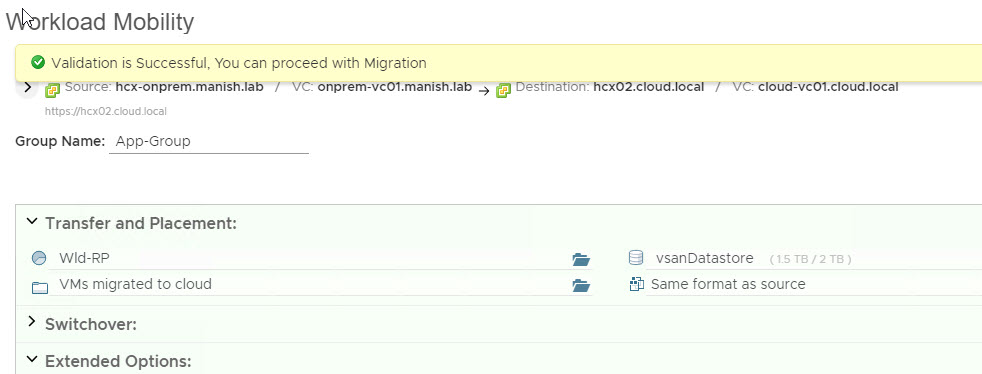
5: Validate Migration: Validate the selection prior to migration to confirm that target site can accommodate the planned wave.
Aborting & Scheduling Migration for Wave members
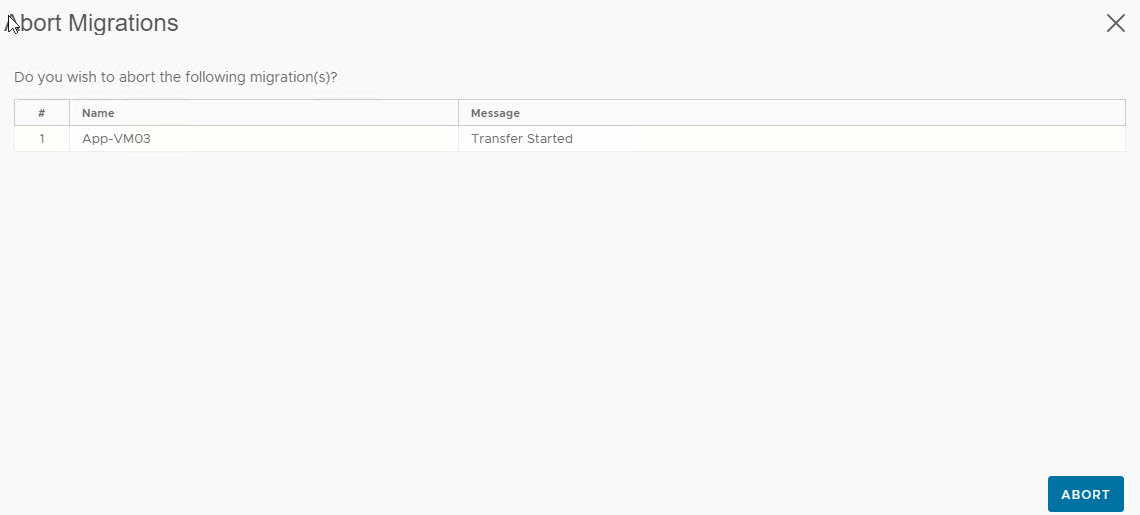
One other advantage of using Mobility Group is that you can abort migration of individual wave member.
To Abort migration for individual wave member, select the member and click on Abort. Click on Abort button in Abort Migrations wizard.
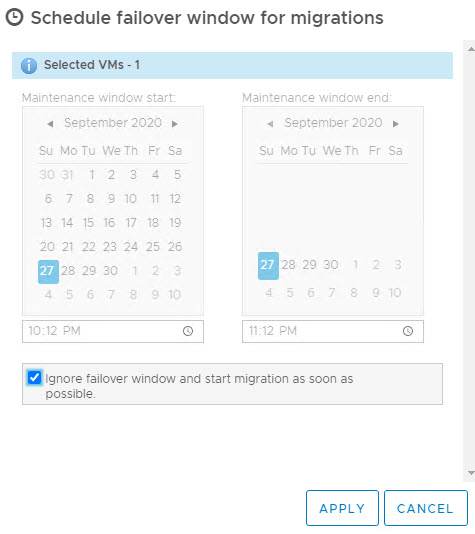
To schedule a different switch over for individual wave member, select the member and click on schedule. You can either change schedule or chose to ignore failover window and perform switchover as soon as full sync of wave member completes.
And that’s it for this post.
I hope you enjoyed reading this post. Feel free to share this on social media if it is worth sharing 🙂


