In last post of this series, we learn how to install and integrate CSE plugin with VCD for easier management of Kubernetes container. In this post we will learn how tenants can leverage CSE plugin to deploy K8 clusters.
If you have landed directly on this post by mistake, I would recommend reading previous articles from this series.
1: Container Service Extension Introduction & Architecture
3: CSE Plugin Integration With VCD
Onboarding Tenants
Before a tenant can start provisioning K8 cluster from CLI or UI (via CSE plugin), we need to enable the tenant to do so. This can be done directly from CSE server or login to any machine where vcd-cli utility is installed. To onboard a tenant, use following commands:
Note: These commands needs to be run as VCD system admin.
# vcd login vcd.vstellar.local system admin -iw
# vcd right add -o <org-name> “{cse}:CSE NATIVE DEPLOY RIGHT”
Example: # vcd right add -o cse_org “{cse}:CSE NATIVE DEPLOY RIGHT”
Rights added to the Org ‘cse_org’
Note: At this point of time, if we run command vcd cse ovdc list, it will show us no K8 provider has been configured for the tenants.
|
1 2 3 4 |
[root@vcd-cse ~]# vcd cse ovdc list name org k8s provider --------- ------- -------------- CSE-VDC01 cse_org none |
To enable an OrgVDC for K8 cluster provisioning, use below commands:
# vcd org use cse_org
now using org: ‘cse_org’, vdc: ‘CSE-VDC01’, vApp: ”.
# vcd cse ovdc enable CSE-VDC01 -o cse_org –k8s-provider native
metadataUpdate: Updating metadata for Virtual Datacenter CSE-VDC01(8b9966f3-dcfa-4c63-b382-4ac7ad608f20)
task: e671ac54-c496-41cb-9961-fb36e4341541, Updated metadata for Virtual Datacenter CSE-VDC01(8b9966f3-dcfa-4c63-b382-4ac7ad608f20), result: success
Now the tenant is ready to deploy kubernetes.
|
1 2 3 4 |
[root@vcd-cse ~]# vcd cse ovdc list name org k8s provider --------- ------- -------------- CSE-VDC01 cse_org native |
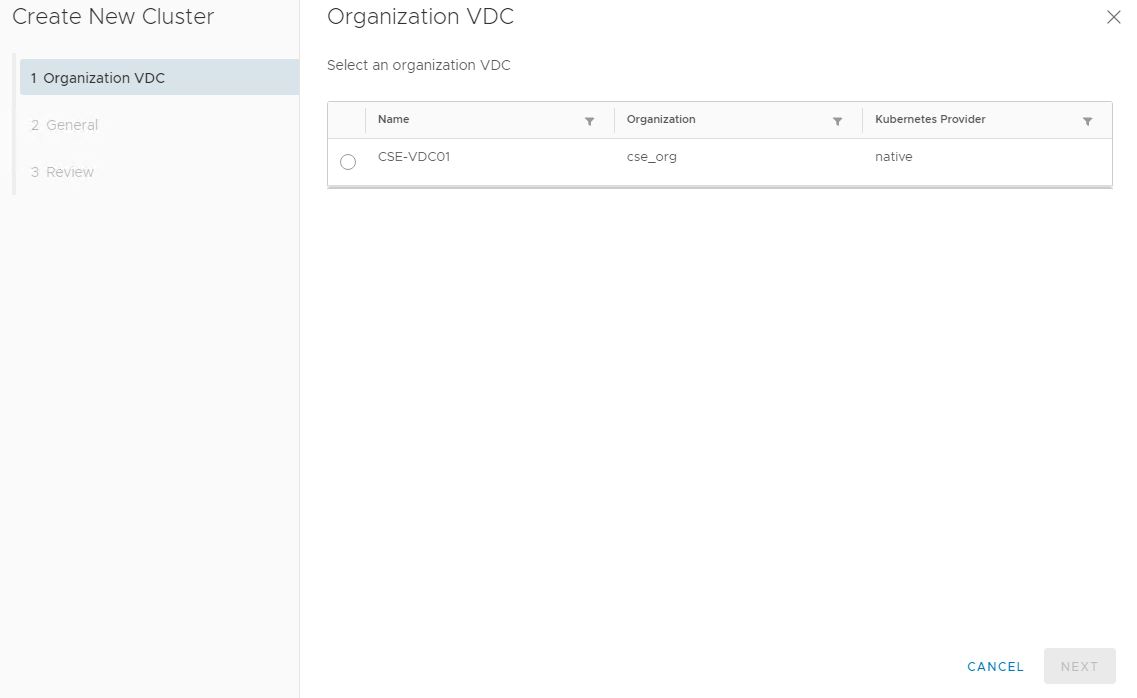
Once a tenant is onboarded, login to VCD as tenant user and navigate to Kubernetes Container Clusters page and click on Add button to start K8 cluster creation wizard.
Select the Org VDC and hit Next.
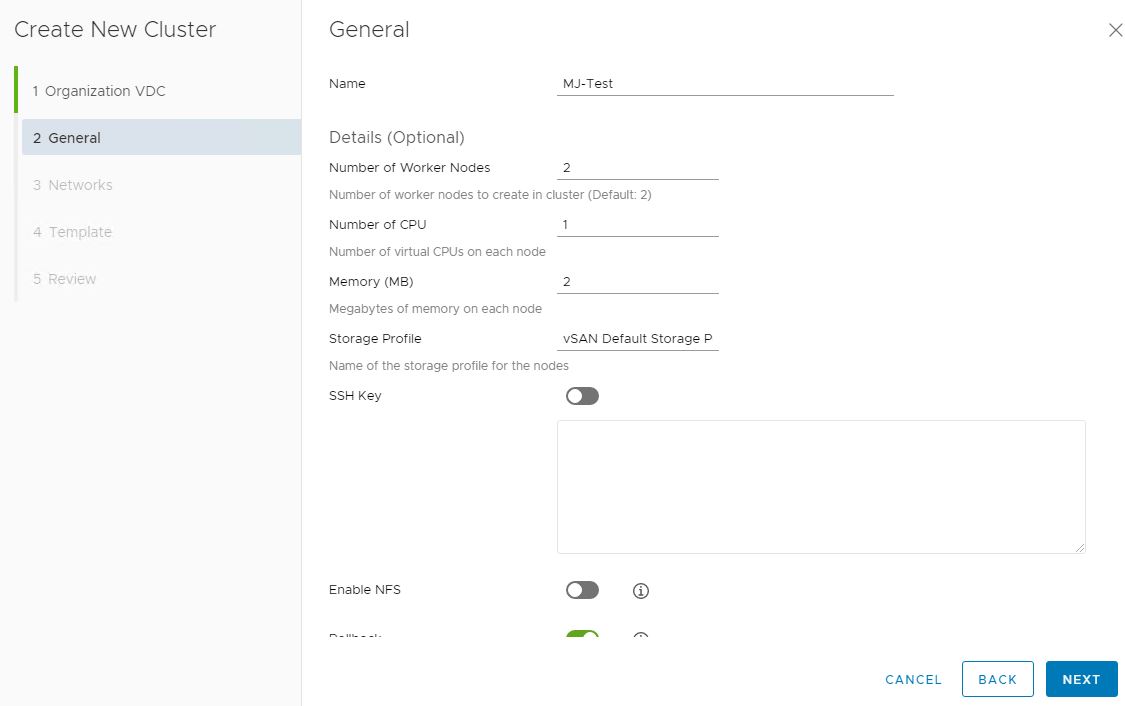
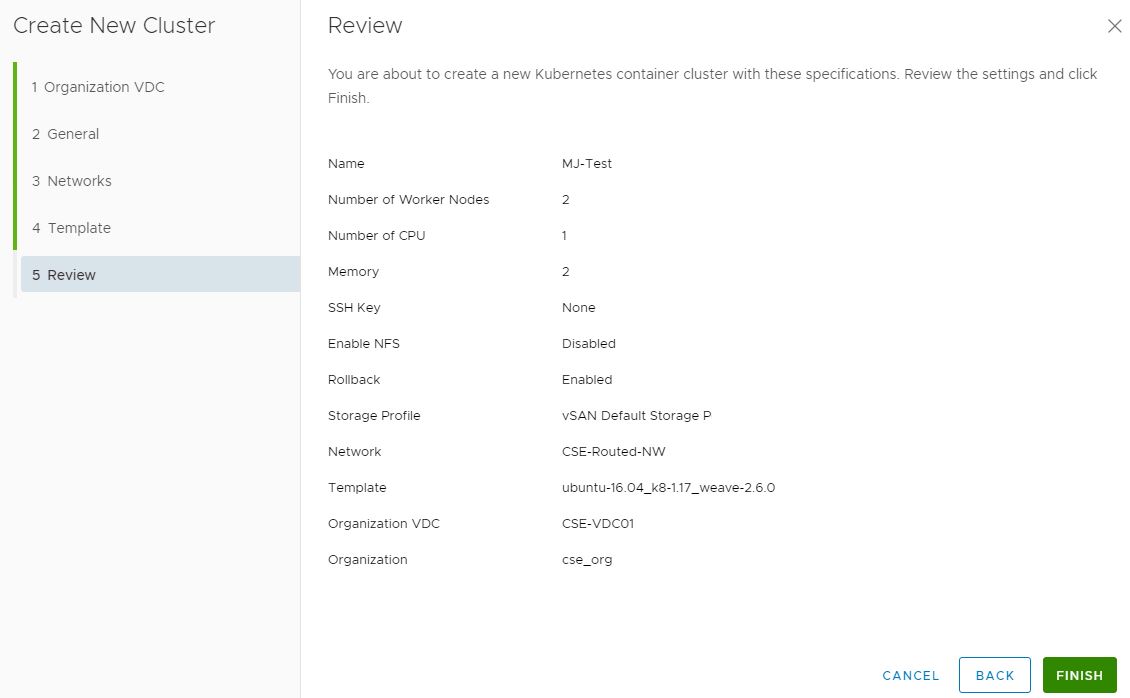
- Provide a name for your K8 cluster and select how many worker nodes will be deployed. Default value for worker nodes in 2.
- Specify CPU/Memory allocation for the worker nodes.
- You can also specify the SSH key if you want password less authentication for accessing K8 vm’s (master/worker nodes).
- If the Rollback option is selected, this will automatically delete the VMs that are provisioned (during cluster deployment) if the creation process fails:
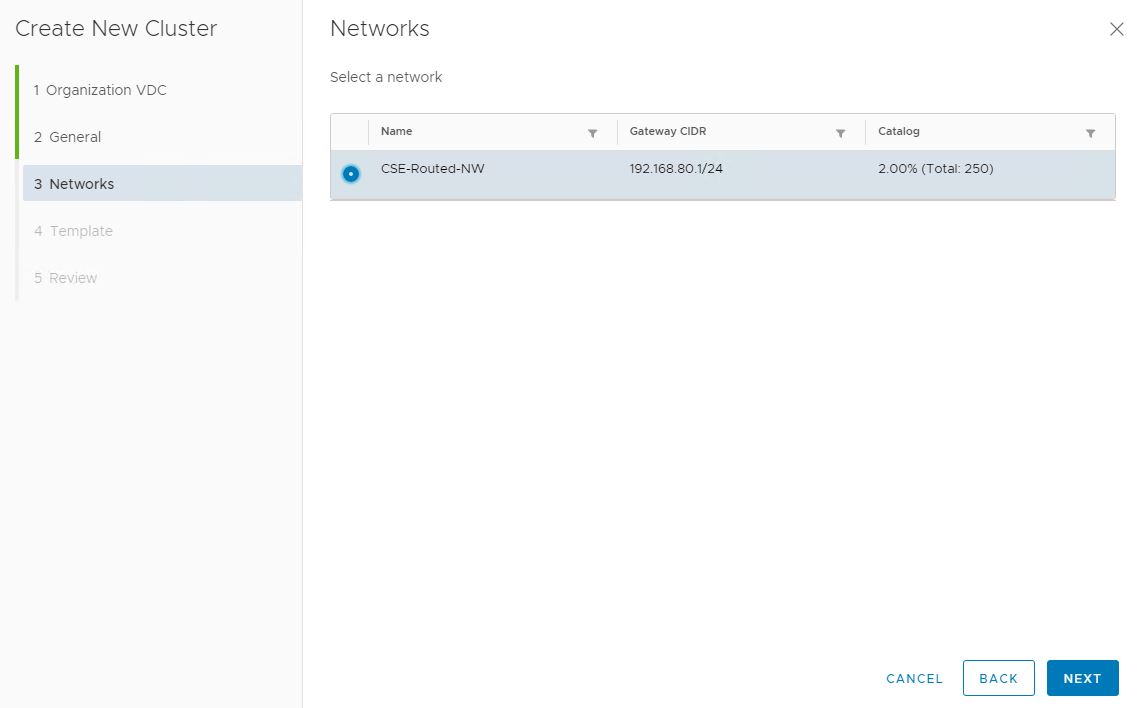
Select the network to which K8 vm’s will be attached post provisioning.
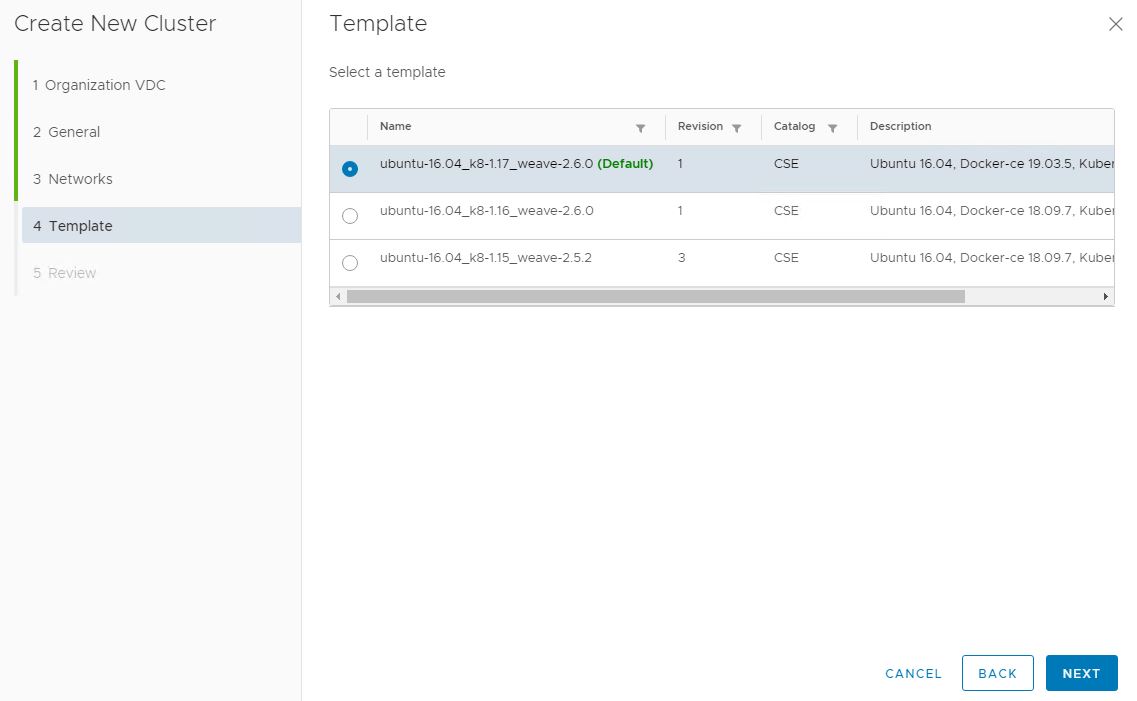
Select the template that will be used to provision K8 cluster. Each template have specific version of K8 and docker etc installed.
Hit finish to initiate the cluster creation process.
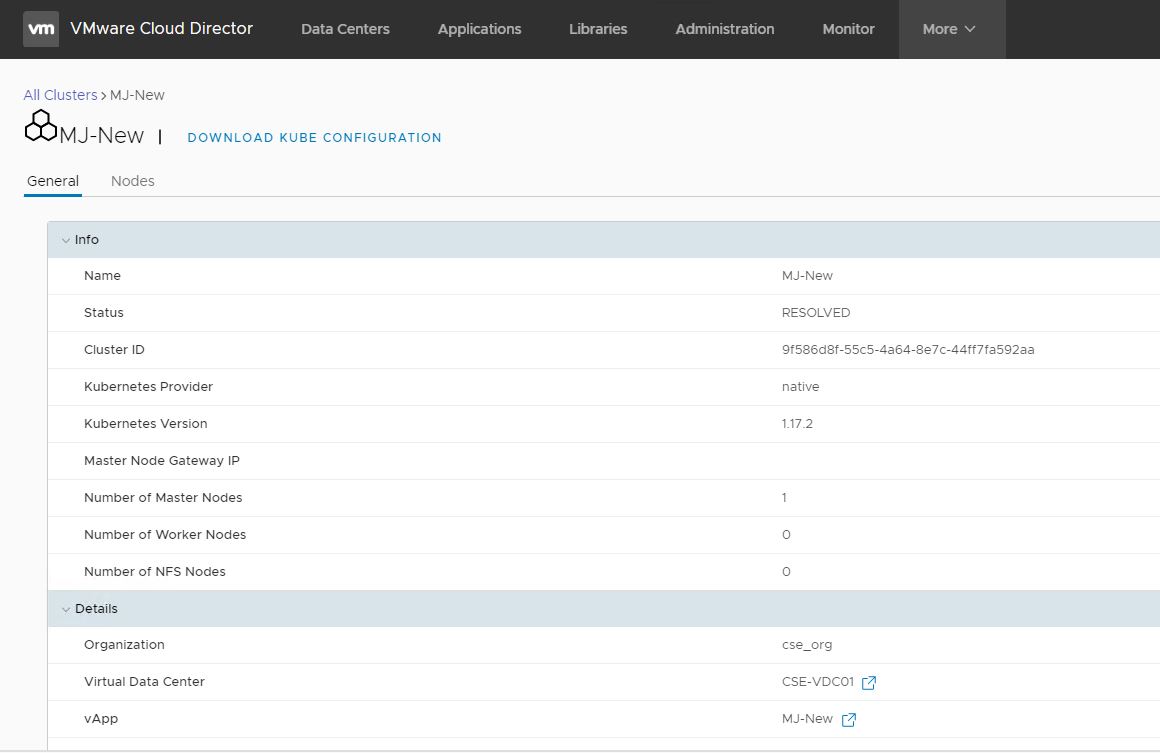
Once K8 cluster creation is completed, you will see status of cluster as Resolved.
Clicking on the cluster name, will provide you more details about the cluster and also allow you to download kubernetes configuration file which you can use to configure your applications.
And that’s it for this post.
I hope you enjoyed reading this post. Feel free to share this on social media if it is worth sharing 🙂


