In this post I will walk through how to deploy a Kubernetes cluster in a workload domain in VCF. This is a new feature that is introduced in VCF 4.0. vSphere with Kubernetes is also known as Project Pacific and Cormac Hogan did a great job in explaining nuances of Kubernetes in his Article
Before deploying a Kubernetes cluster, there are few prerequisites that must be met:
1: A NSX-T backed workload domain deployed.
2: Dedicated Edge Cluster deployed for workload domain. I have covered steps of deploying edge cluster Here
3: All Esxi hosts that are part of workload domain are licensed with “VMware vSphere 7 Enterprise Plus with Add-on for Kubernetes” license.
4: Subnets for Kubernetes cluster egress/ingress traffic created on your ToR.
Once above prerequisites, we are good to go with deployment. Let’s jump into lab and walk through deployment steps.
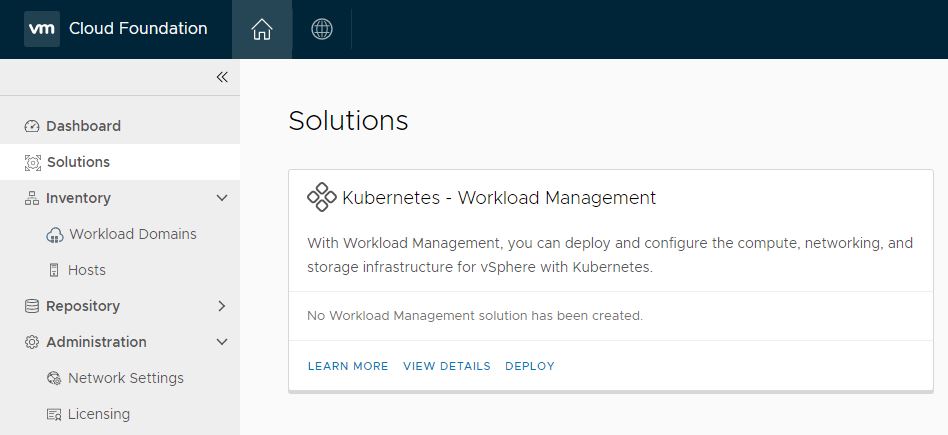
To deploy Kubernetes cluster, login to SDDC Manager and navigate to Home > Solutions. As of now, there is a single Solution called Kubernetes – Workload Management.
Click on Deploy button to start installation wizard.
A new window will pop-up which covers list of prerequisites that should be met prior to deployment. We already talked about this.
Click on Begin button to start.
Select appropriate workload domain and cluster where kubernetes will be deployed. I only have one cluster in my environment.
Clicking on next will invoke the validation workflow. Wait for all validation to pass and hit Next to continue.
In order to complete kubernetes deployment, we need to connect to vCenter server of workload domain. Click on Complete in vSphere button to launch workload management ui in vCenter.
Clicking on the ‘Complete in vSphere’ button takes us to vSphere H5 client. This is starting point to Enable Workload Management.
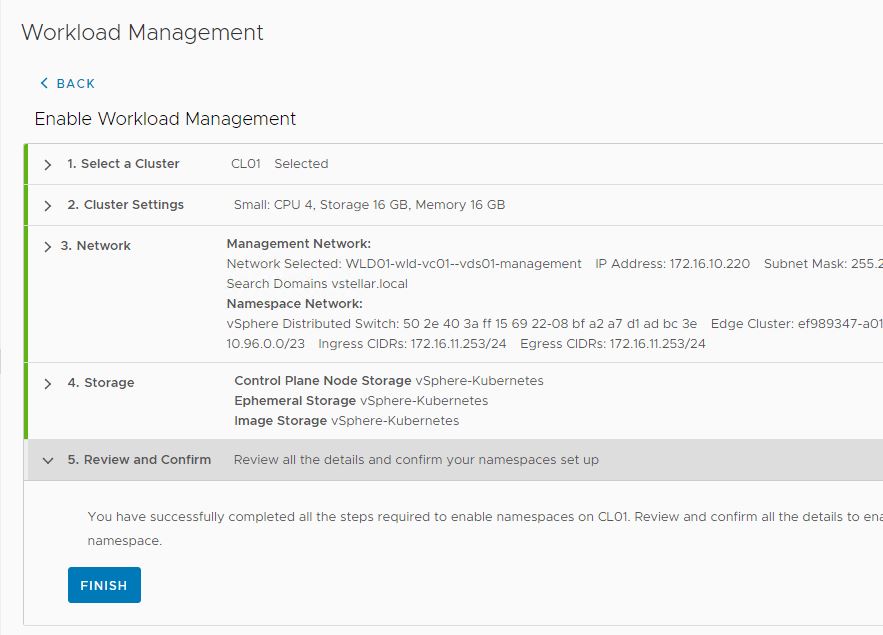
There are total of 5 steps that we need to complete.
The first step is to select a compatible vSphere cluster (there could be multiple clusters in your workload domain). In my environment I only have one cluster as shown in below screenshot.
Next step is to choose control plane size in Cluster Settings. Control plane size dictates how much resources will be allocated to Supervisor virtual machines when they are deployed during the Kubernetes Cluster installation.
Since this is my lab setup, I chose Tiny to start with.
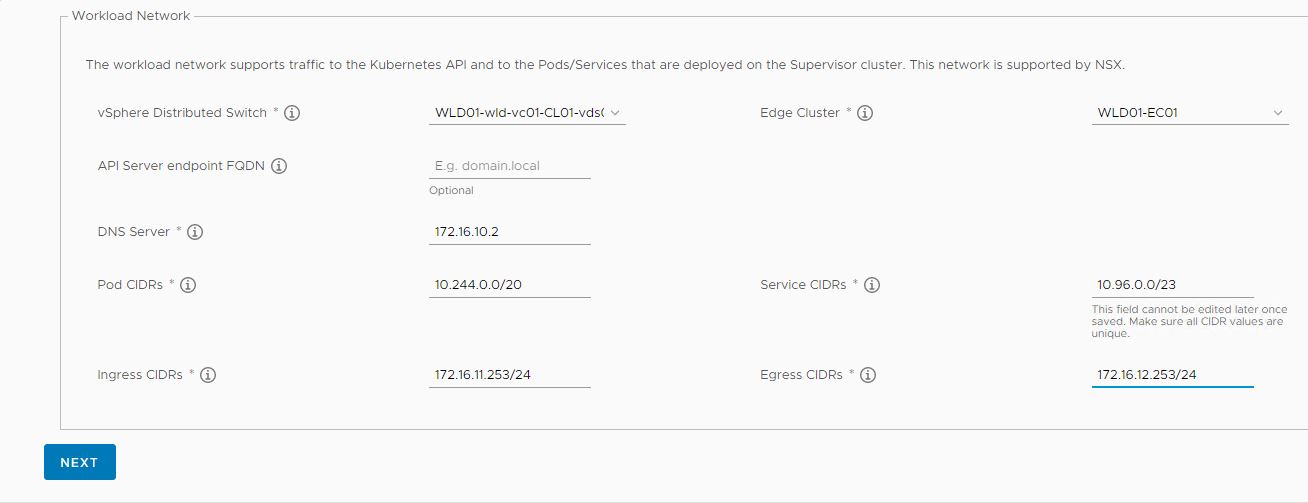
The next step is to configure Management Network and Workload Network for the supervisor vm’s. These networks forms the control plane and data plane of the kubernetes cluster.
For management network, you can have a dedicated logical segment created on NSX-T Tier-1 gateway or you can leverage a dvportgroup on vDS. I selected the management portgroup on my vDS and provided IP address details from management network subnet.
Note: The start address which you specify, should have consecutive 5 IP’s free as these IP’s are assigned to the 3 supervisor vm’s that are deployed.
For workload network configuration, I did not touched Pod CIDRs and Service CIDRs value and used system assigned values as these are only used for internal communication between the kubernetes cluster.
Ingress and Egress CIDRs needs to be a routable network and your ESXi hosts should be able to talk to these subnets. In my case I have 172.16.11.253/24 and 172.16.12.253/24 networks created on my ToR and these 2 subnets are distributed to NSX-T via BGP.
Hit Next post configuring workload network
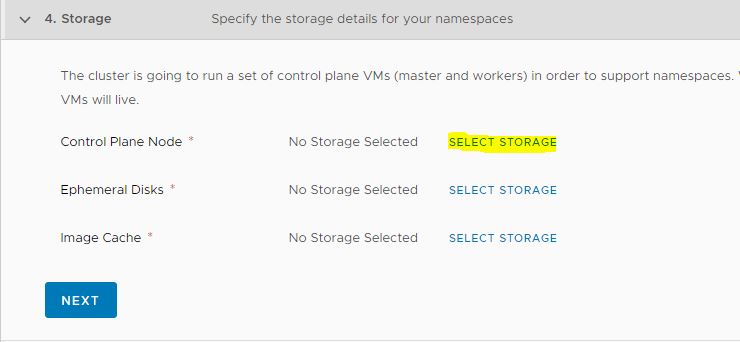
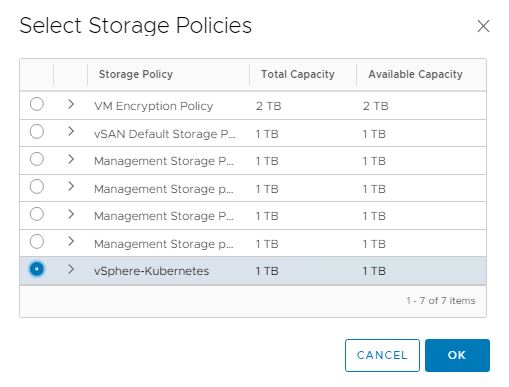
Next is to select appropriate storage policy. Although you can use default vSAN Storage Policy (If your WLD is vSAN backed), or you can create custom policy as per VCF Documentation
In my lab I created a new storage policy and tagged my datastore with new policy. To use this policy in your deployment click on Select Storage and chose your custom policy.
Click on Finish button to start the Kubernetes cluster deployment.
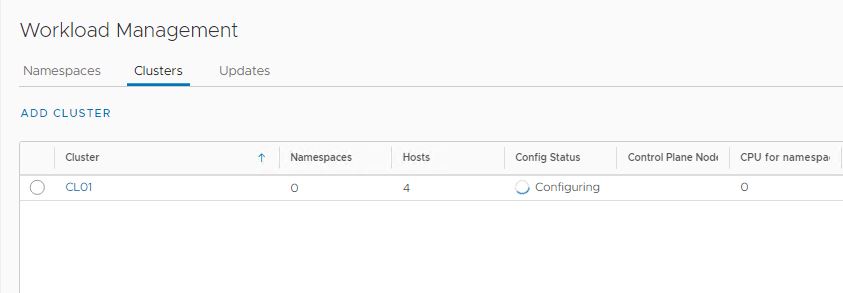
Kubernetes deployment takes a while to complete.
You can follow the progress by checking Recent Tasks pane.
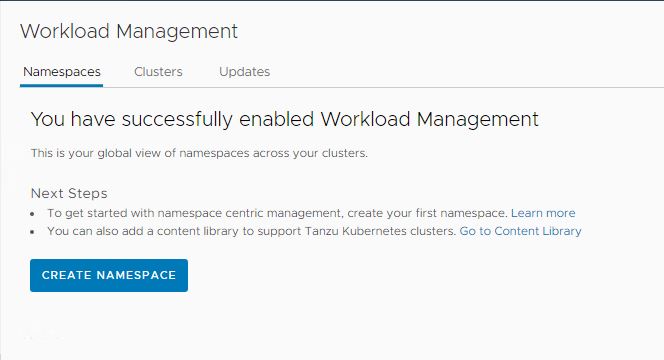
Mine took close to 30 minutes to complete. Once deployment is completed, you will see starts as Running.
Same is reported in SDDC Manager too.
Behind The Scene Tasks
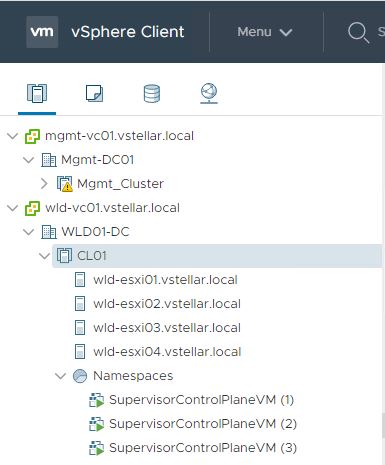
1: 3 Supervisors control plane vm’s are deployed.
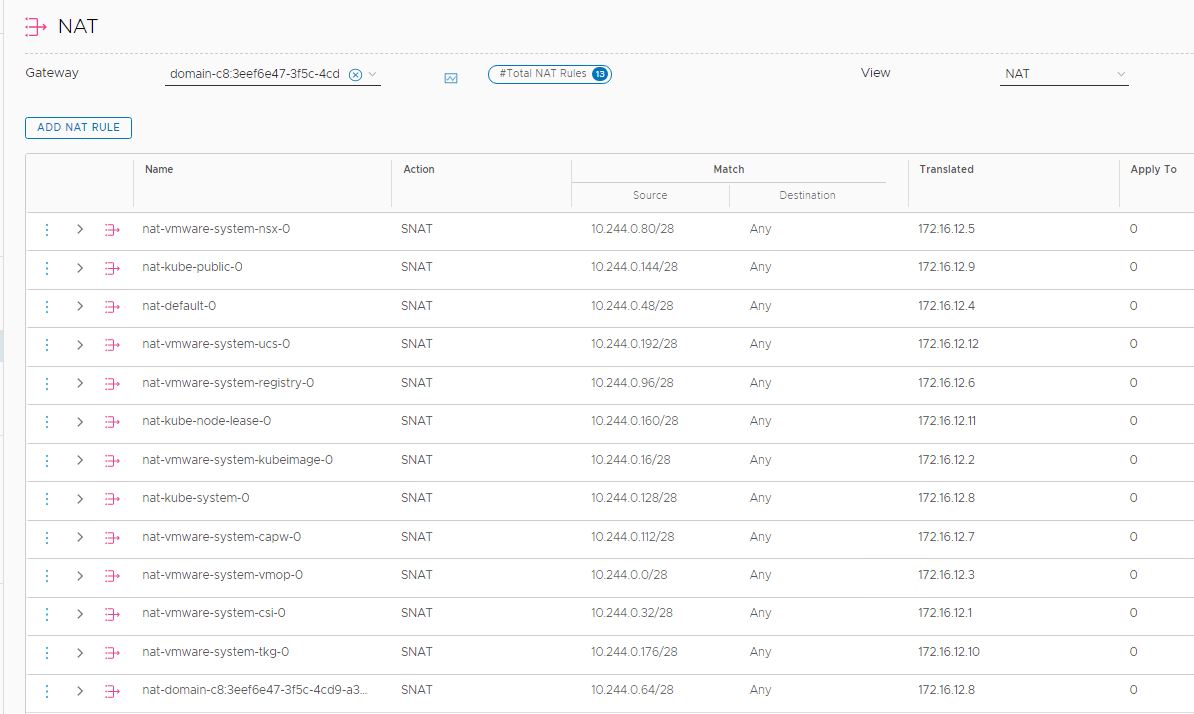
2: SNAT rules (12) are created in NSX-T for kubernetes service egress traffic
3: Load Balancer is configured in NSX-T for kubernetes control plane ingress traffic.
During the kubernetes deployment, Spherelet is installed on the ESXi hosts so that they behave as Kubernetes worker nodes
Now you are ready to create Namespaces in workload domain.
Troubleshooting Tip
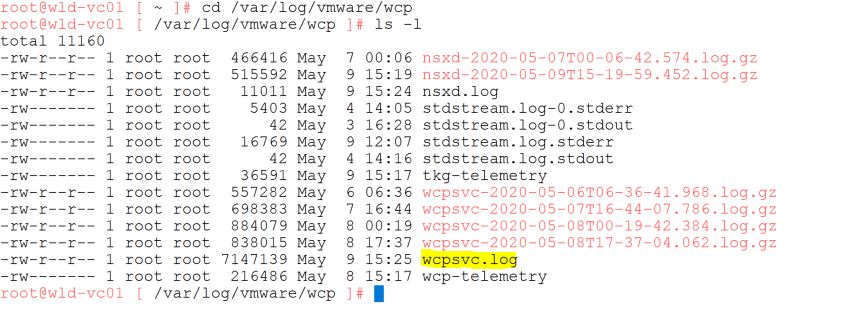
Kubernetes deployment activity/progress can be tracked via wcpsvc.log file which is located in directory /var/log/vmware/wcp
And that’s it for this post.
I hope you enjoyed reading this post. Feel free to share this on social media if it is worth sharing 🙂

