
Recently, I got the chance to work on setting up the vCloud Availability v3.x in my lab, and it was a great learning curve. I will share my experience through a series of blog posts.
I am not going to write an introduction post on what vCAV is and its architecture. It’s very well documented here
If you have worked on previous versions of vCAV (2.0 & 1.5), you might remember it was a pain setting up various appliances. With vCAV 3.0, installation & configuration have been simplified drastically. No more hanky-panky command-line stuff. You just need a couple of appliances for setting up the cloud and on-prem infrastructure.
In this post, I will cover the cloud (service provider) side deployment & configuration steps.
The screenshot below shows the steps of the vCAV appliance deployment.
Note: For lab deployment/POC, we can use a combined appliance deployment topology.

Once the appliance is deployed and boots up, you will get a login URL to run the configuration workflow.

To perform a vCloud Availability end-to-end configuration, we need to configure the following:
- vCloud Availability Replication Manager
- vCloud Availability vApp Replication Manager
- vCloud Availability Replicator and
- vCloud Availability Tunnel
Configure Replication Manager
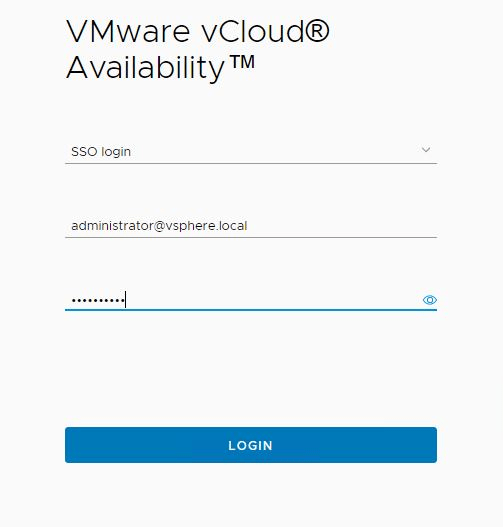
Login to https://<vcav-fqdn:8441>/ui/admin
Login via the root user and password set during deployment. You will be prompted to change your password on your first login.
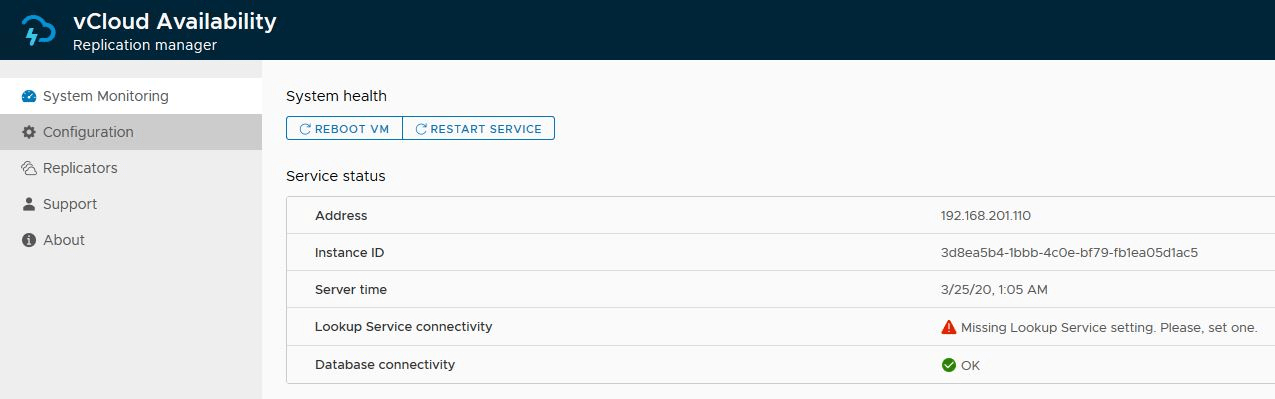
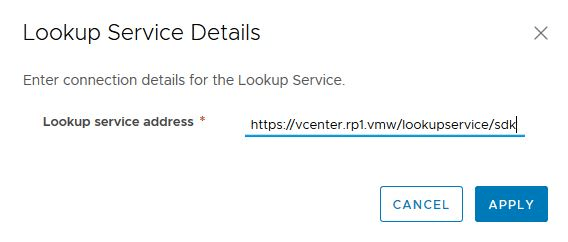
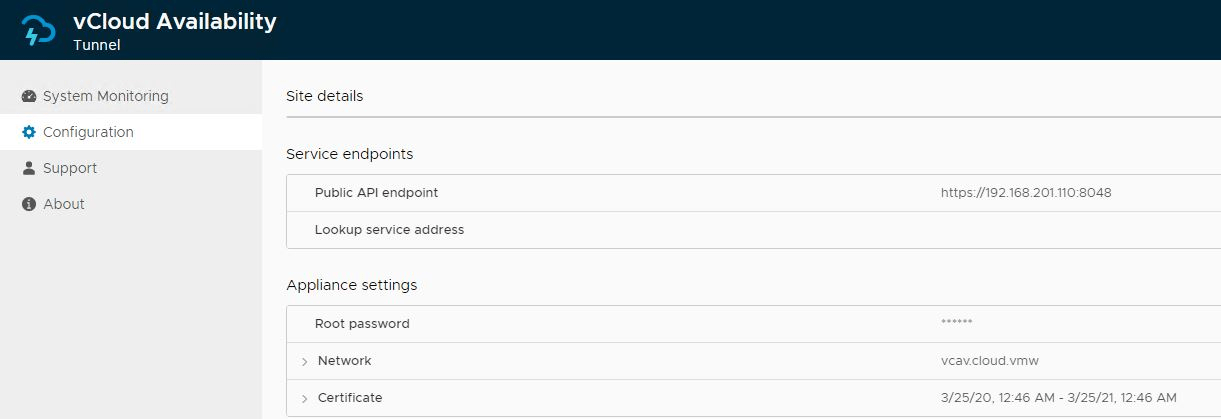
First, we have to configure the lookup service address under Configuration.
Select the “Lookup service address” option and click on edit.
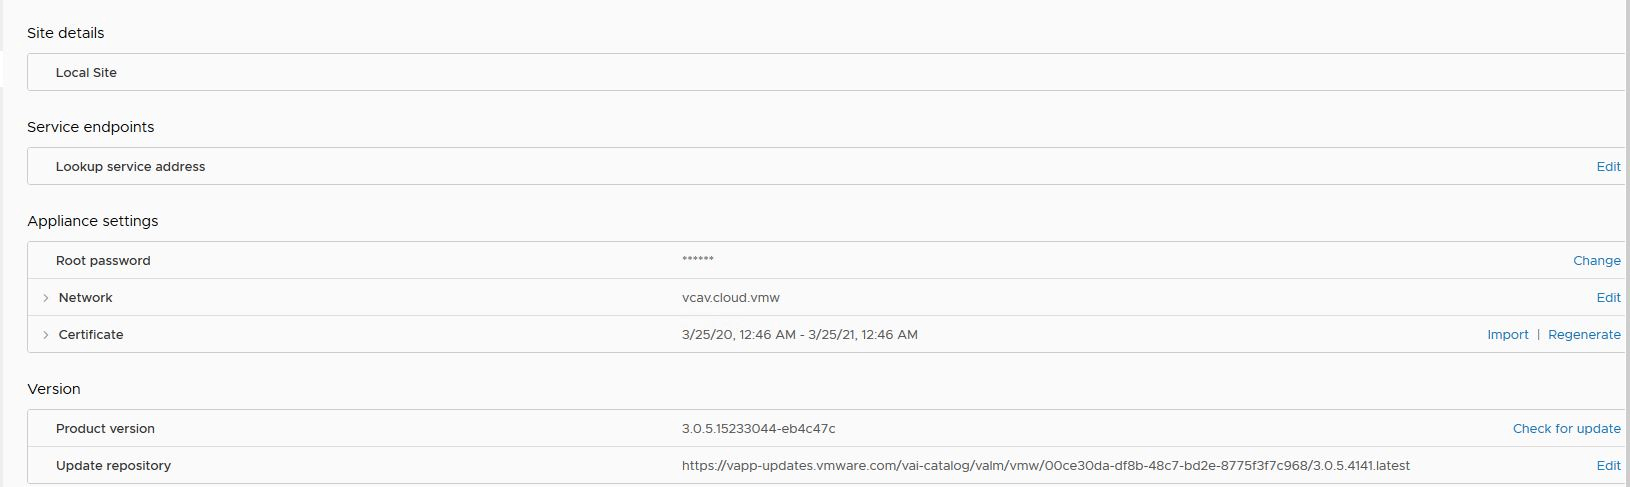
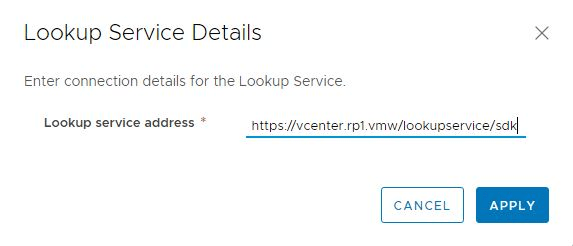
Enter the lookup service address and hit Apply.
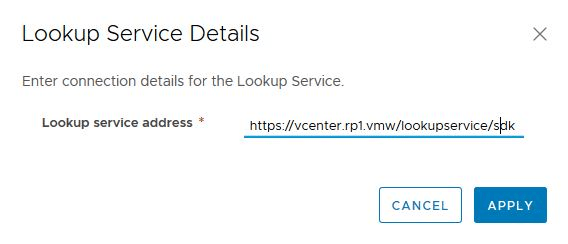
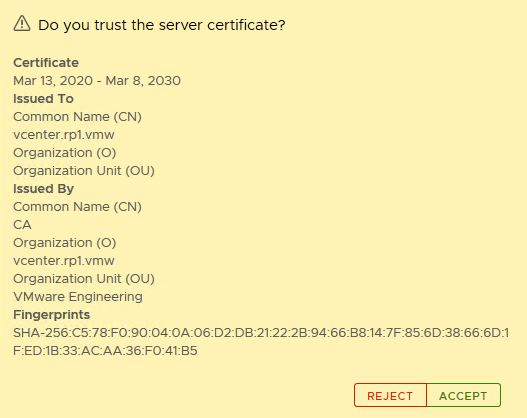
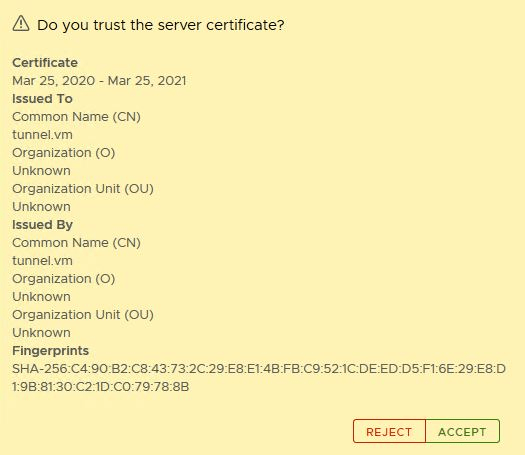
Accept the SSL certificate of the vCenter Server Lookup service.

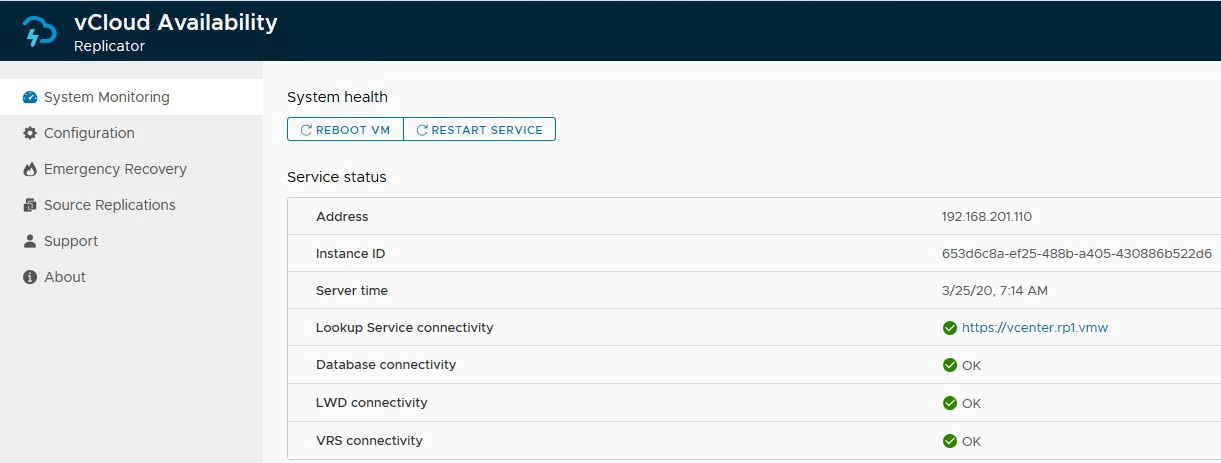
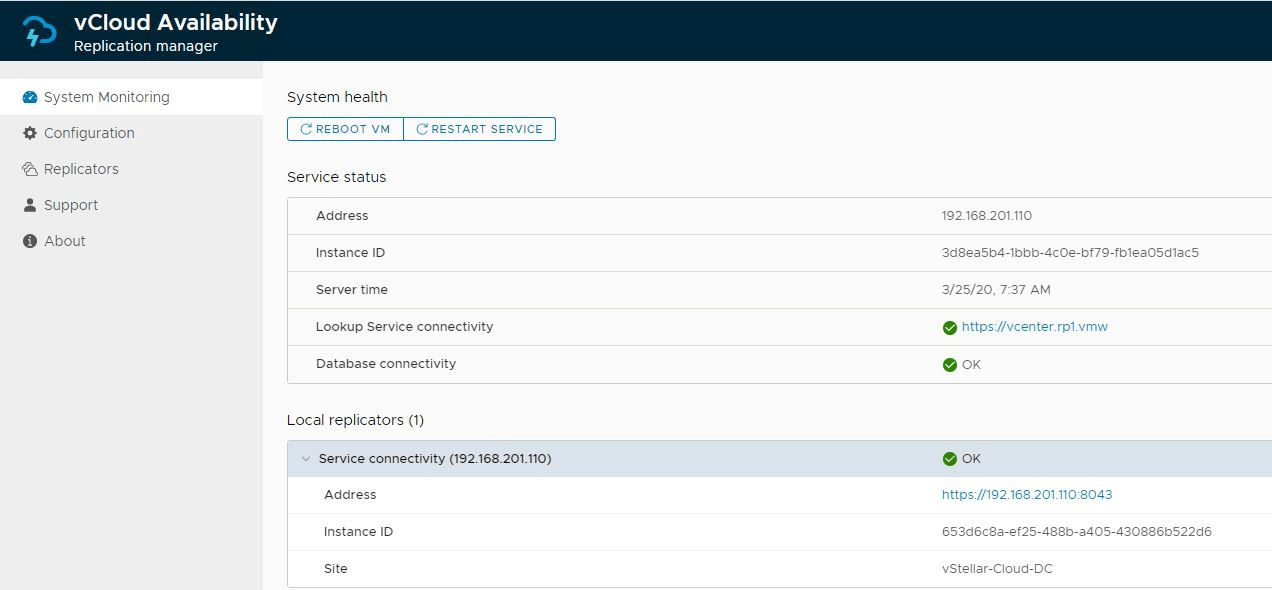
Verify that the lookup service connectivity is operational and the database connectivity shows OK.

Configure vApp Replication Manager
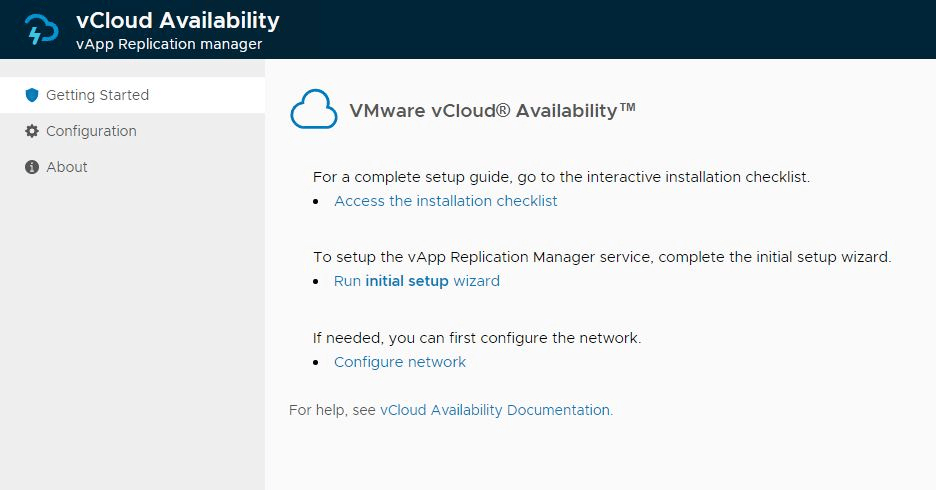
Connect to vApp Replication Manager by typing https://<vcav-fqdn>/ui/admin and login via the root user.
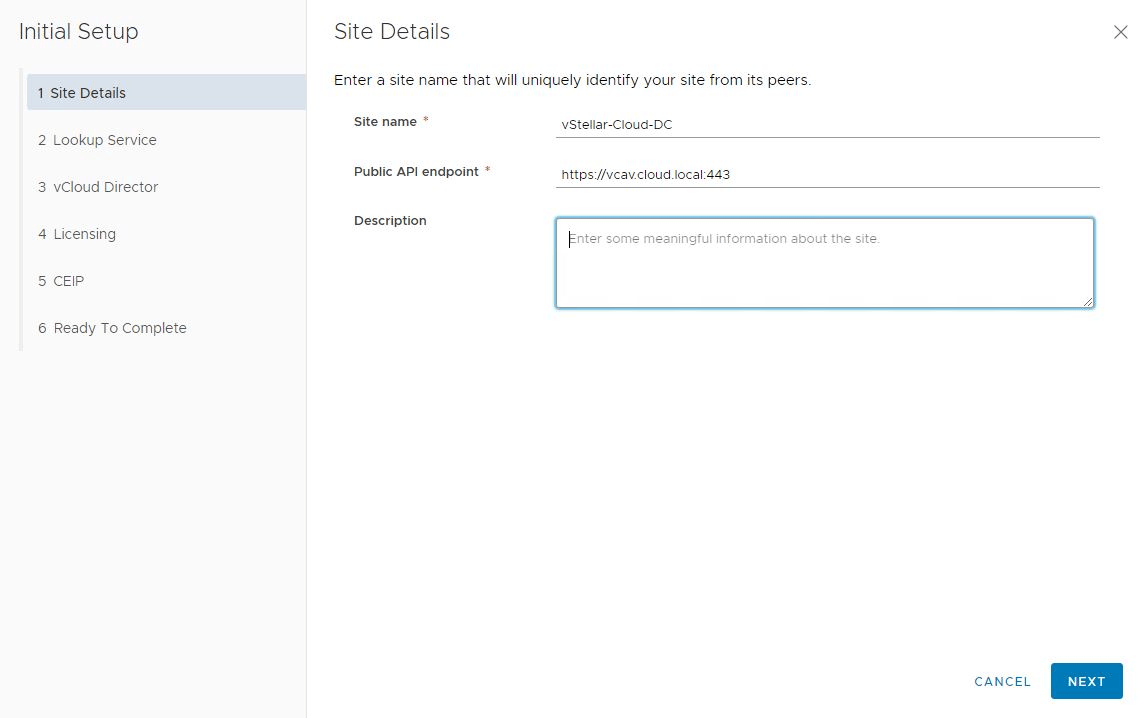
Click on “Run initial setup wizard.”
Enter a site name and public API endpoint tunnel address, and click Next.
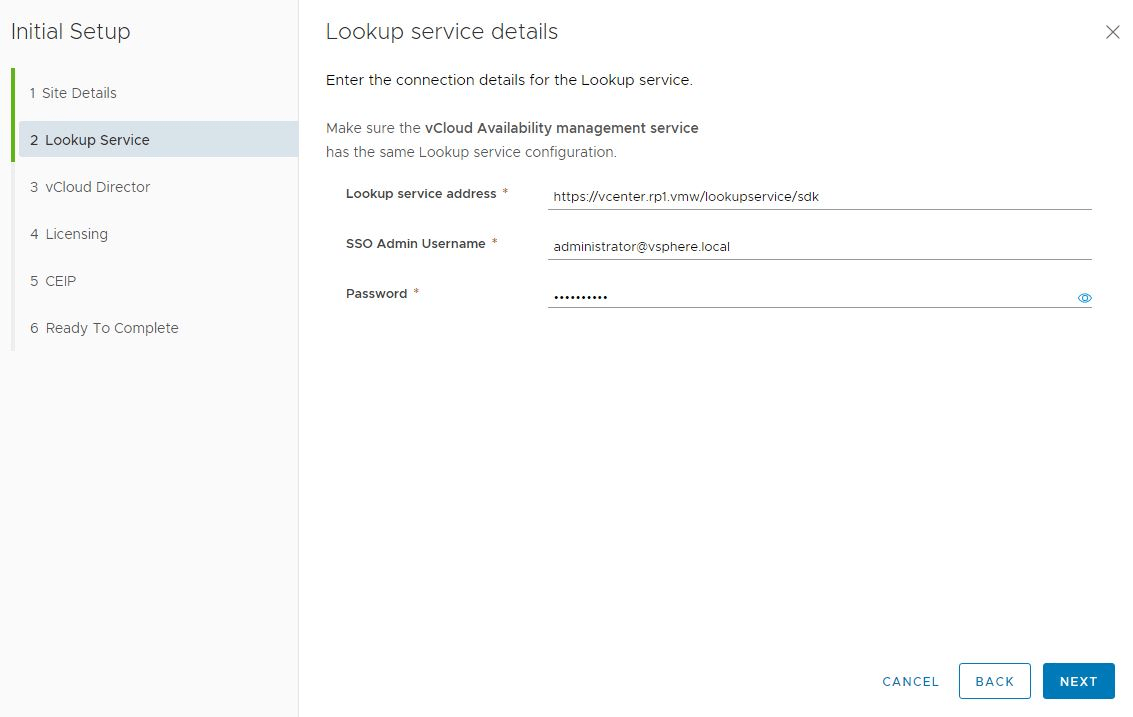
Enter the lookup service address and vCenter SSO credentials.
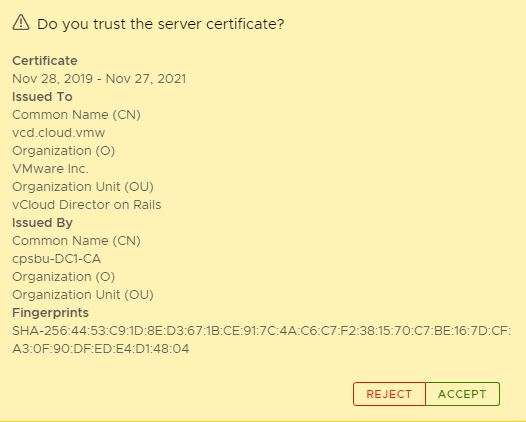
Accept the vCenter SSL certificate.
Specify vCloud Director details and hit Next.
Note: Append @system to the vCD admin username.

Accept the vCD SSL certificate.
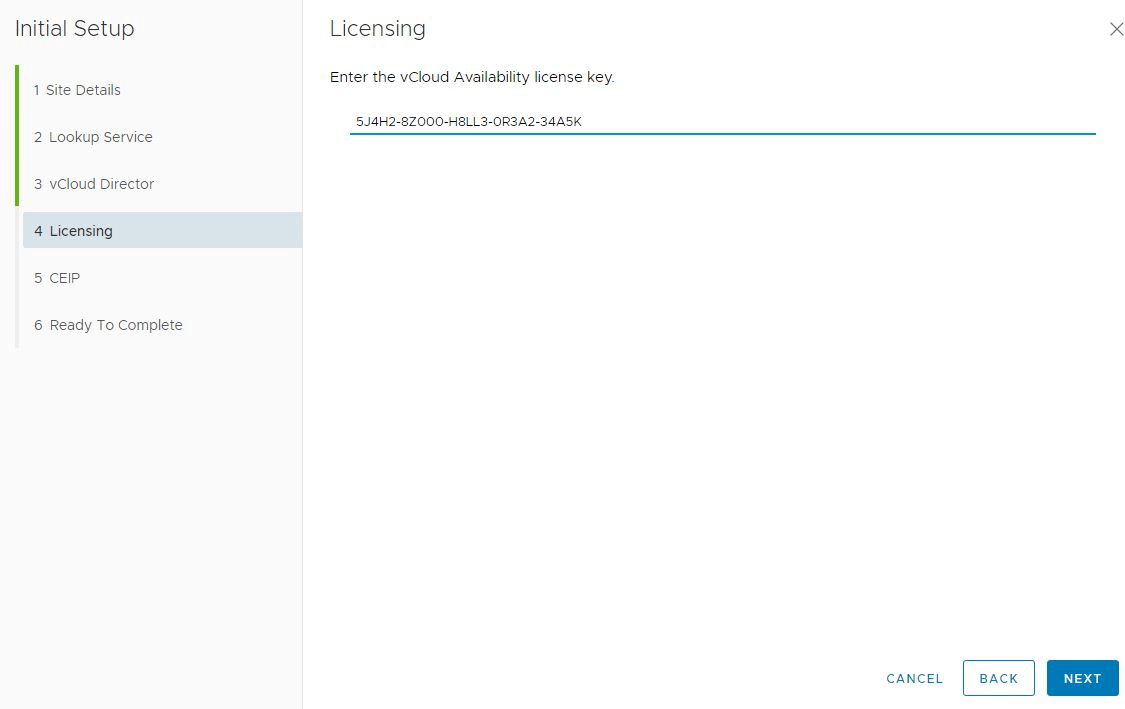
Enter the vCloud Availability license key and click Next.
CEIP configuration is optional. You can choose to opt out if you wish.
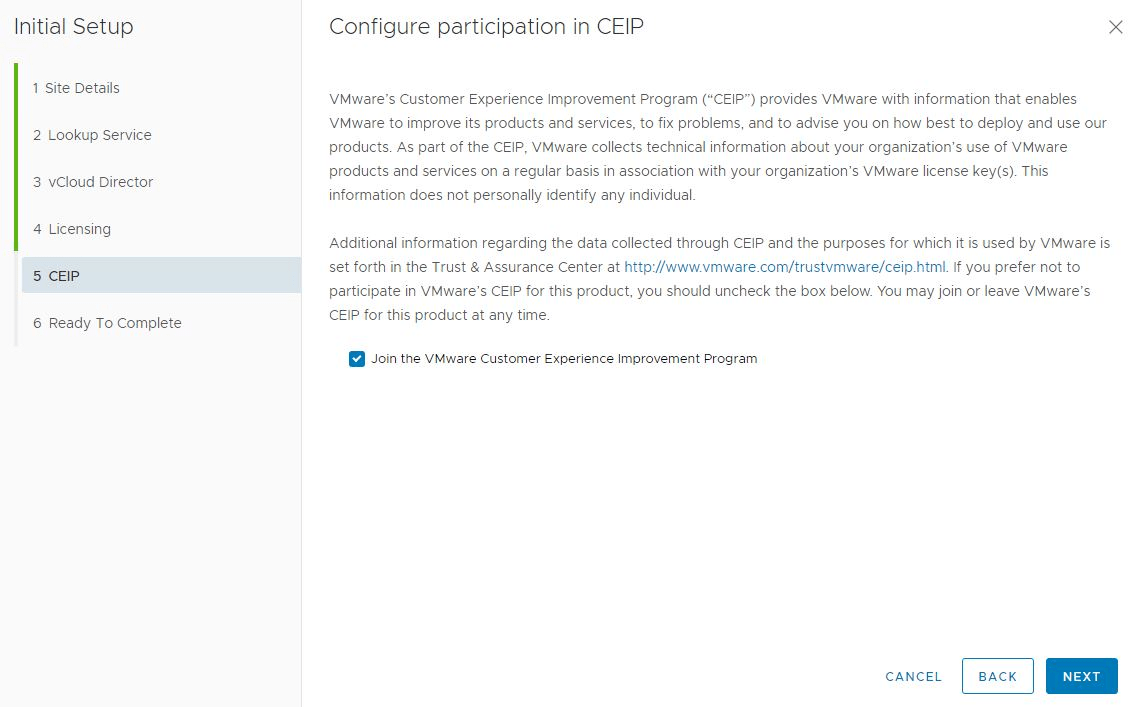
Review settings and click Finish.
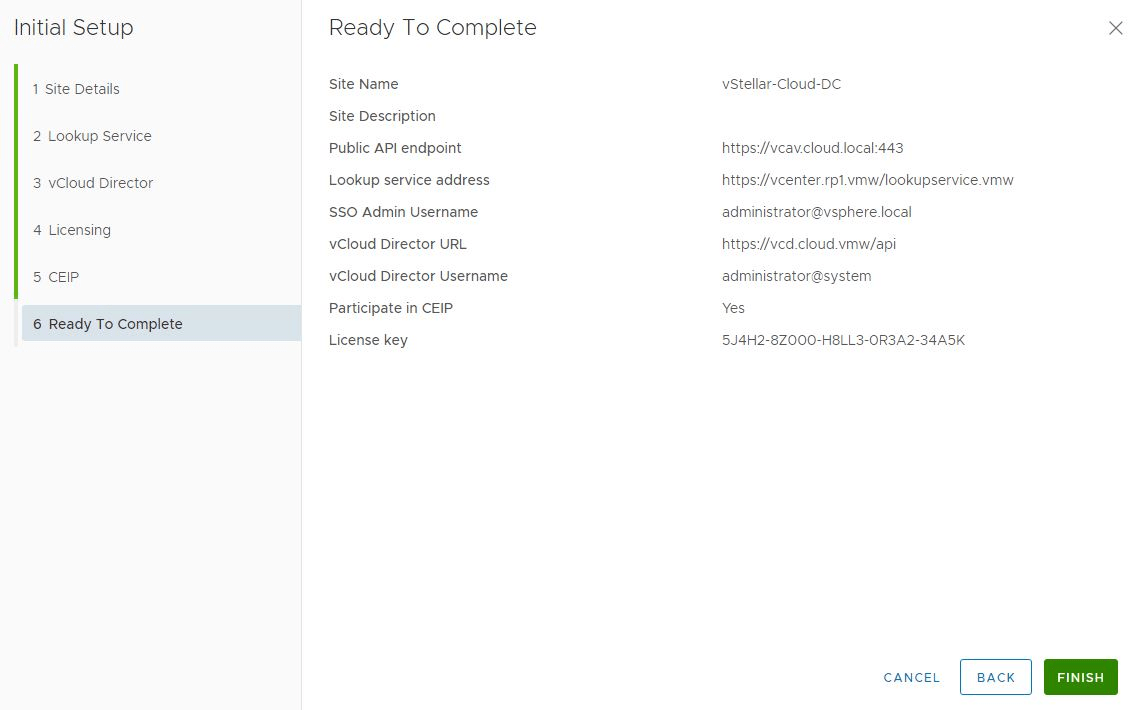
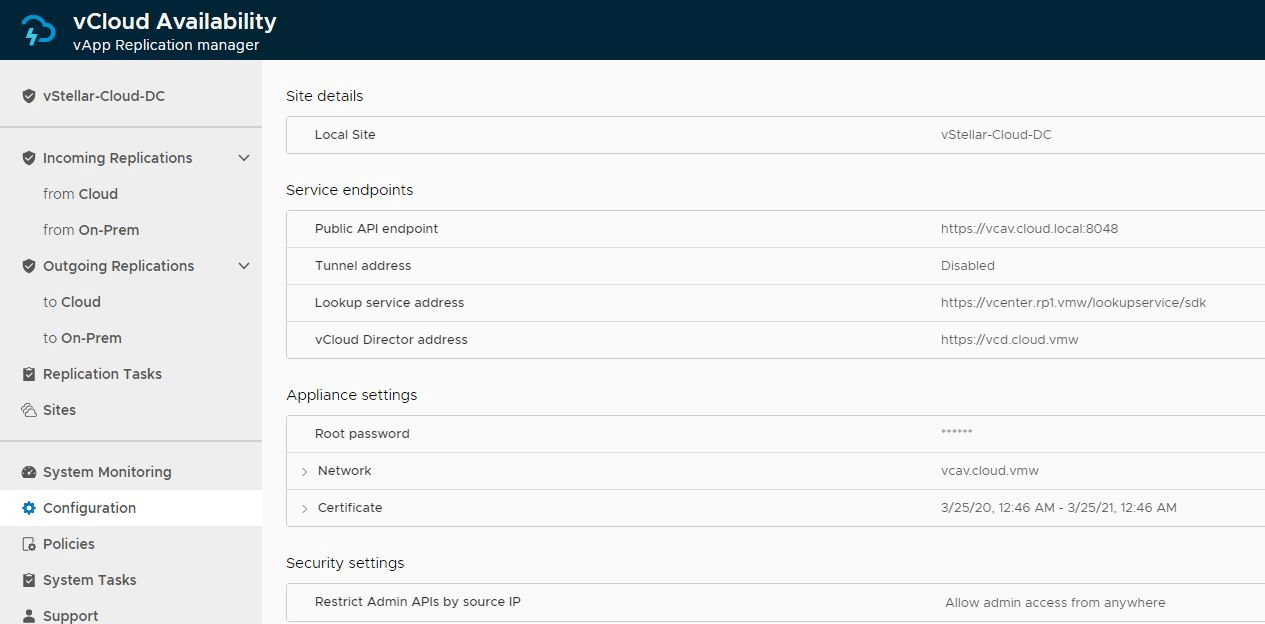
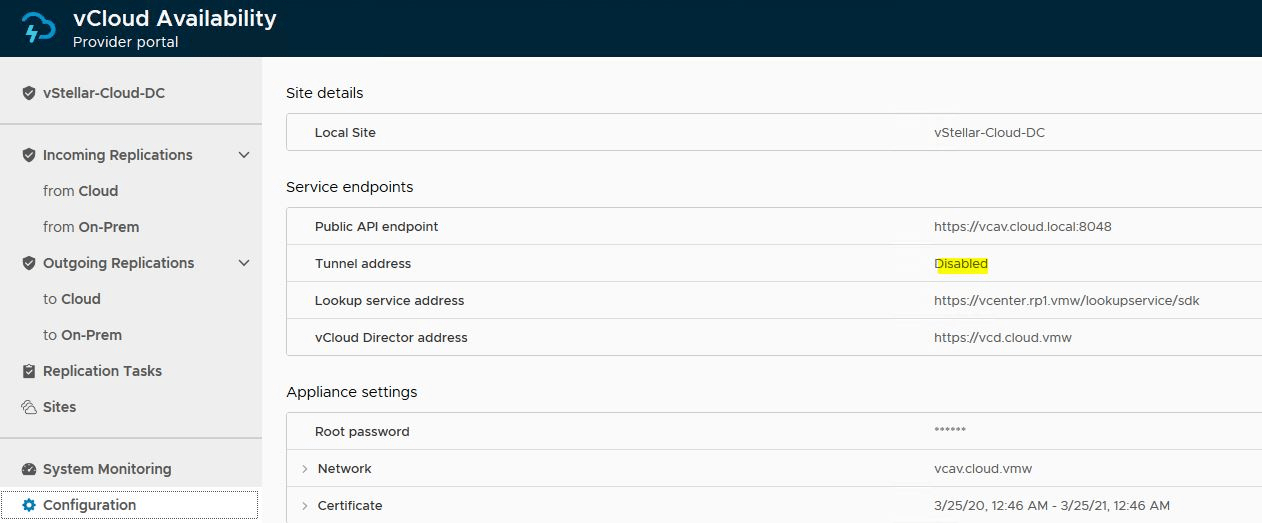
You can find the configuration settings under Home > Configuration
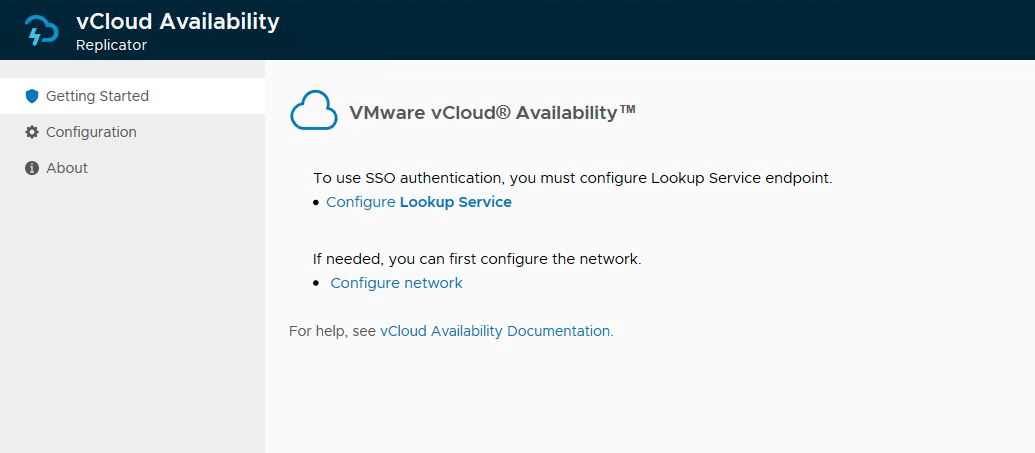
Configure vCloud Availability Replicator
Connect to the vCAV Replicator service management interface by typing https://<vcav-fqdn:8440>/ui/admin and login via the root user.
Click on “Configure Lookup Service.”
Enter the vCenter Lookup service address and click on Apply.
Accept the SSL certificate of the vCenter Server Lookup service.
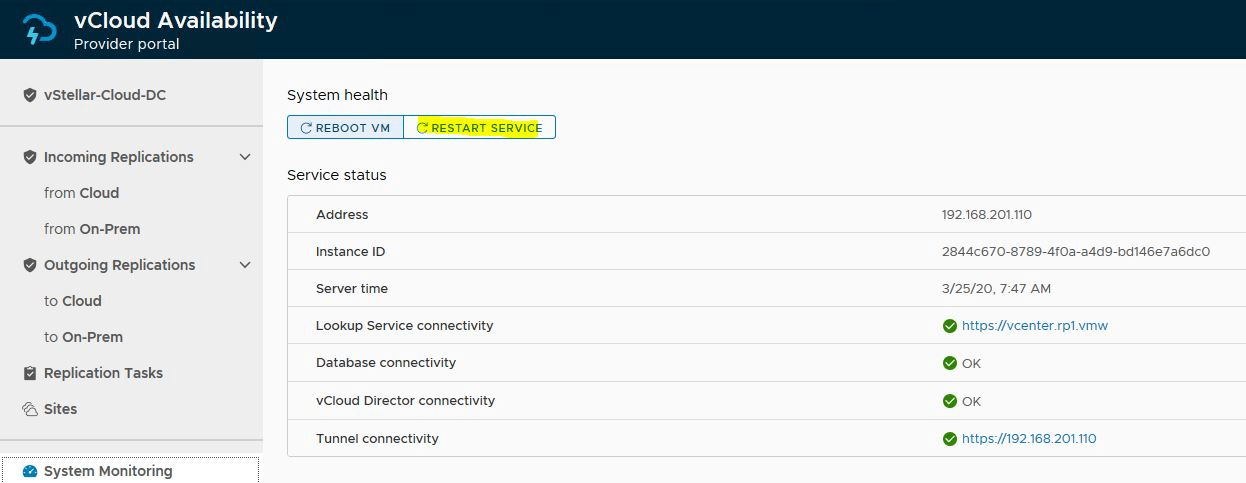
Verify that the lookup service connectivity status is showing green. Service status is available under Home > System Monitoring > System Health.
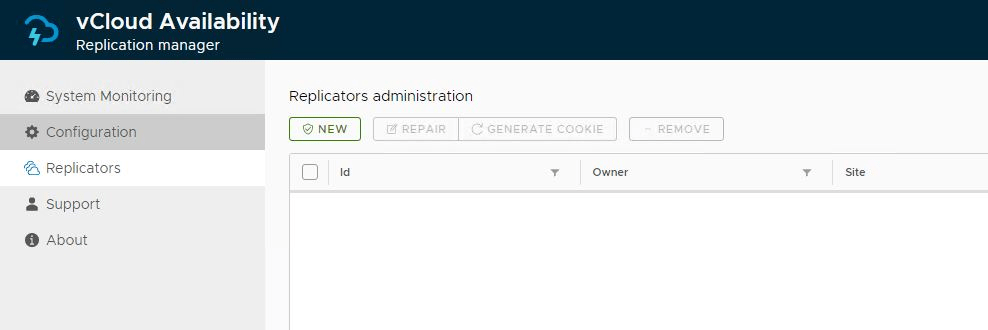
Register vCloud Replicator with Replication Manager
Log in to the vCAV Replication Manager service management interface by connecting to https://<vcav-fqdn:8441>/ui/admin
Since Replication Manager is registered with the vCenter lookup service, you will be able to login to the appliance using vCenter SSO credentials.
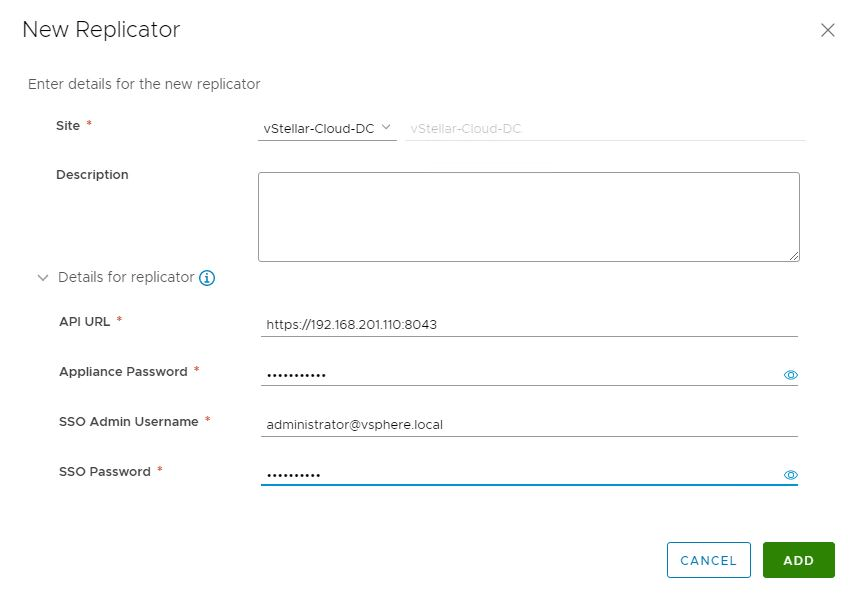
Under Home > Replicators, click on New to add a new replicator instance.
Enter the following details:
- Site: Select the site where the Replicator instance will be deployed.
- API URL: The vCAV Replicator instance API endpoint address.
- Appliance Password: The root user password for the vCAV Replicator appliance.
- SSO Admin Credentials: vCenter SSO credentials.
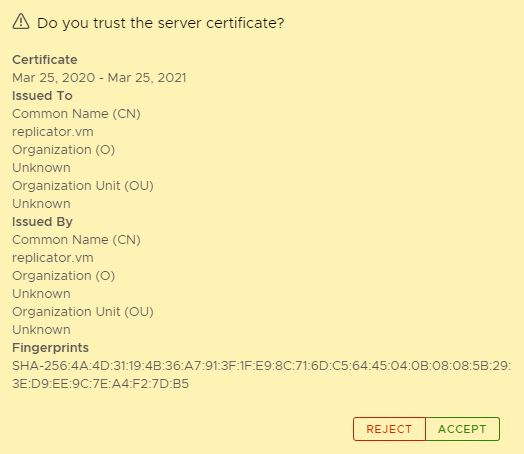
Accept the vCloud Availability Replicator SSL certificate.
Ensure the newly deployed Replicator instance status shows green before proceeding to the next step.
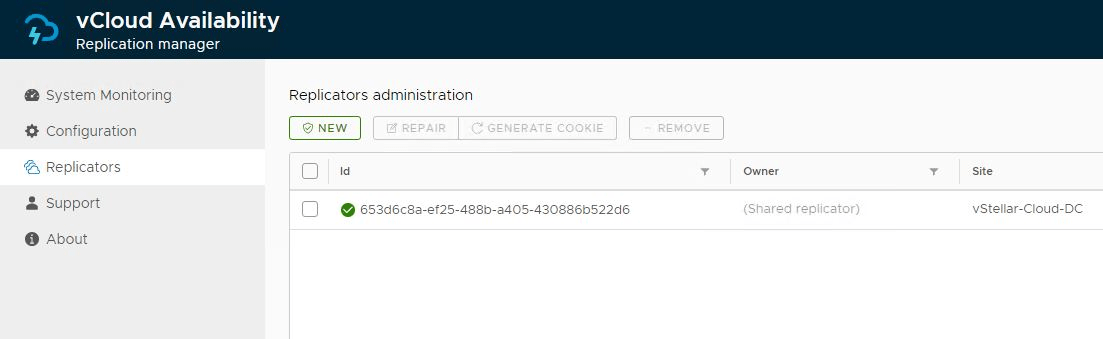
Verify that the vCloud Availability Replicator status is OK by navigating to Home > System Monitoring > Local replicators.
Configure vCloud Availability Tunnel Instance
vCloud Availability Tunnel service management interface https://<vcav-fqdn:8442>/ui/admin and login via root user.
Configure the lookup service address under the configuration tab by clicking Edit.
Enter the lookup service details and click on Apply.
Accept the lookup service SSL certificate.
Under System Monitoring, verify that the lookup service connectivity status is operational.
Enable vCloud Availability Tunnel Service
Login to the vApp Replication Manager service management interface by connecting to https://<vcav-fqdn>/ui/admin and login via SSO credentials.
Edit the tunnel address under the Configuration page.
Select the “Enable tunnelling” box, enter the tunnel address and vCAV root user credentials, and click the Apply button.
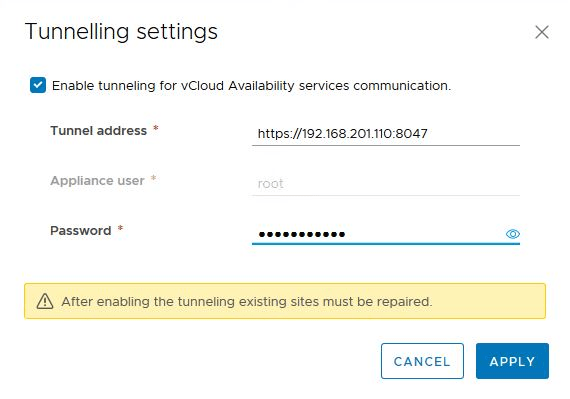
Accept the vCloud Availability Tunnel SSL certificate.
Note: If you are using vCAV 3.0, you need to restart the vCloud Availability Tunnel service.
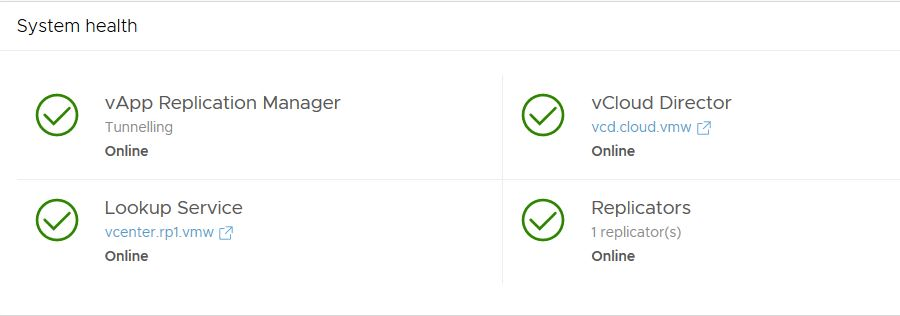
Under Home > System Monitoring, verify that the vCloud Availability Tunnel connectivity is operational and the status looks green.
Restart the vCloud Availability Services
In vCAV 3.0, we need to restart all vCloud Availability services once the tunnel configuration is completed. This can be done by clicking on the Restart Service button under the System Monitoring page.

On the system health page, ensure all services are in an OK state.
And that’s it for this post. In the next post of this series, we will create replication policies.
I hope you enjoyed reading this post. Feel free to share this on social media if it’s worth sharing.