This is in continuation with my last post where I discussed about what is service mesh feature of HCX and how it works. In this post we will learn how to create service mesh.
As we discussed earlier that we need to have compute/network profiles created on both on-prem and cloud side.
The compute profile describes the infrastructure at the source and destination site and provides the placement details (Resource Pool, Datastore) where the virtual appliances should be placed during deployment and the networks to which they should connect.
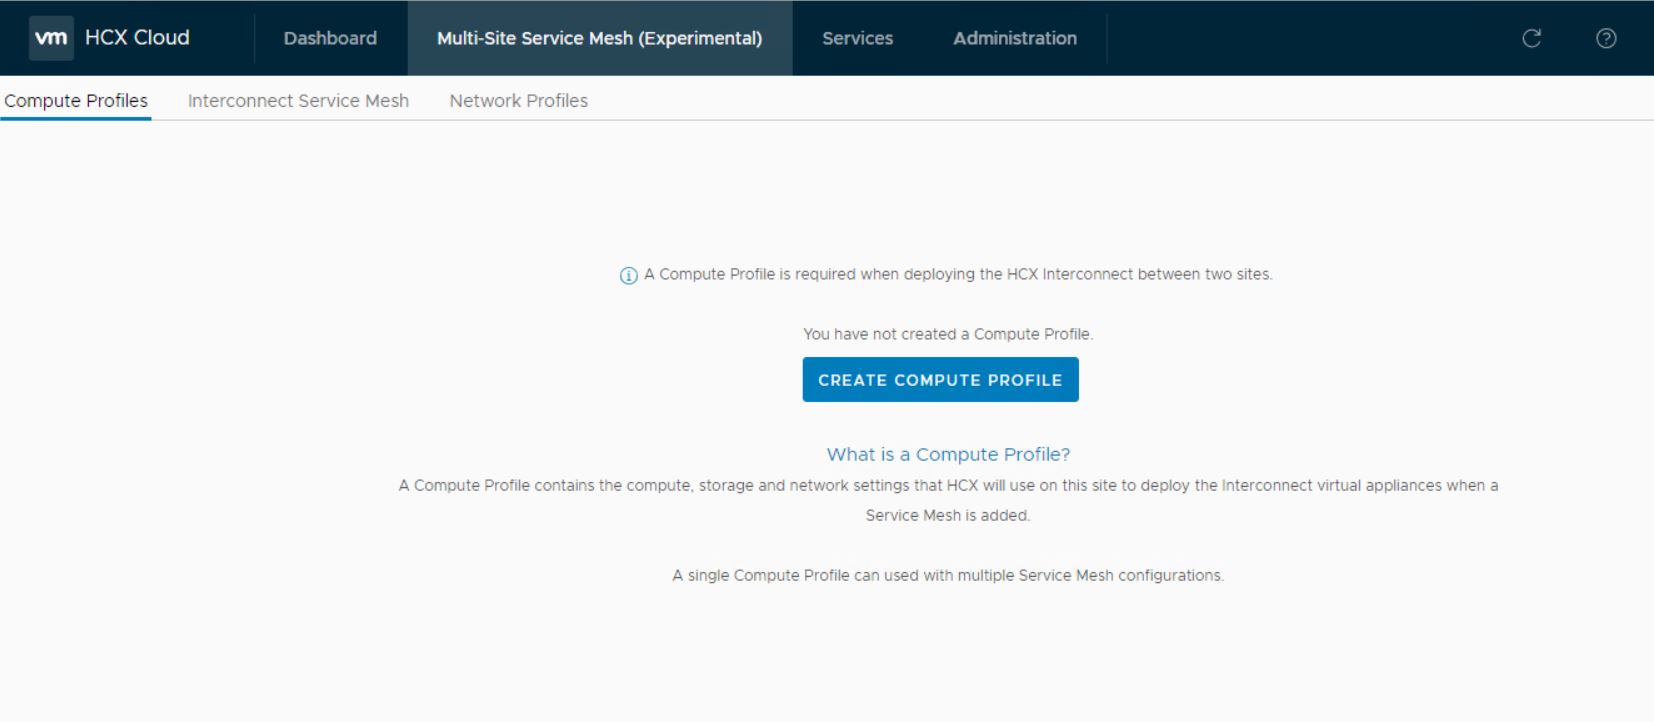
Login to HCX cloud appliance using your vSphere credentials (https://HCX-FQDN) and navigate to Multi-Site Service Mesh tab and click on create compute profile.
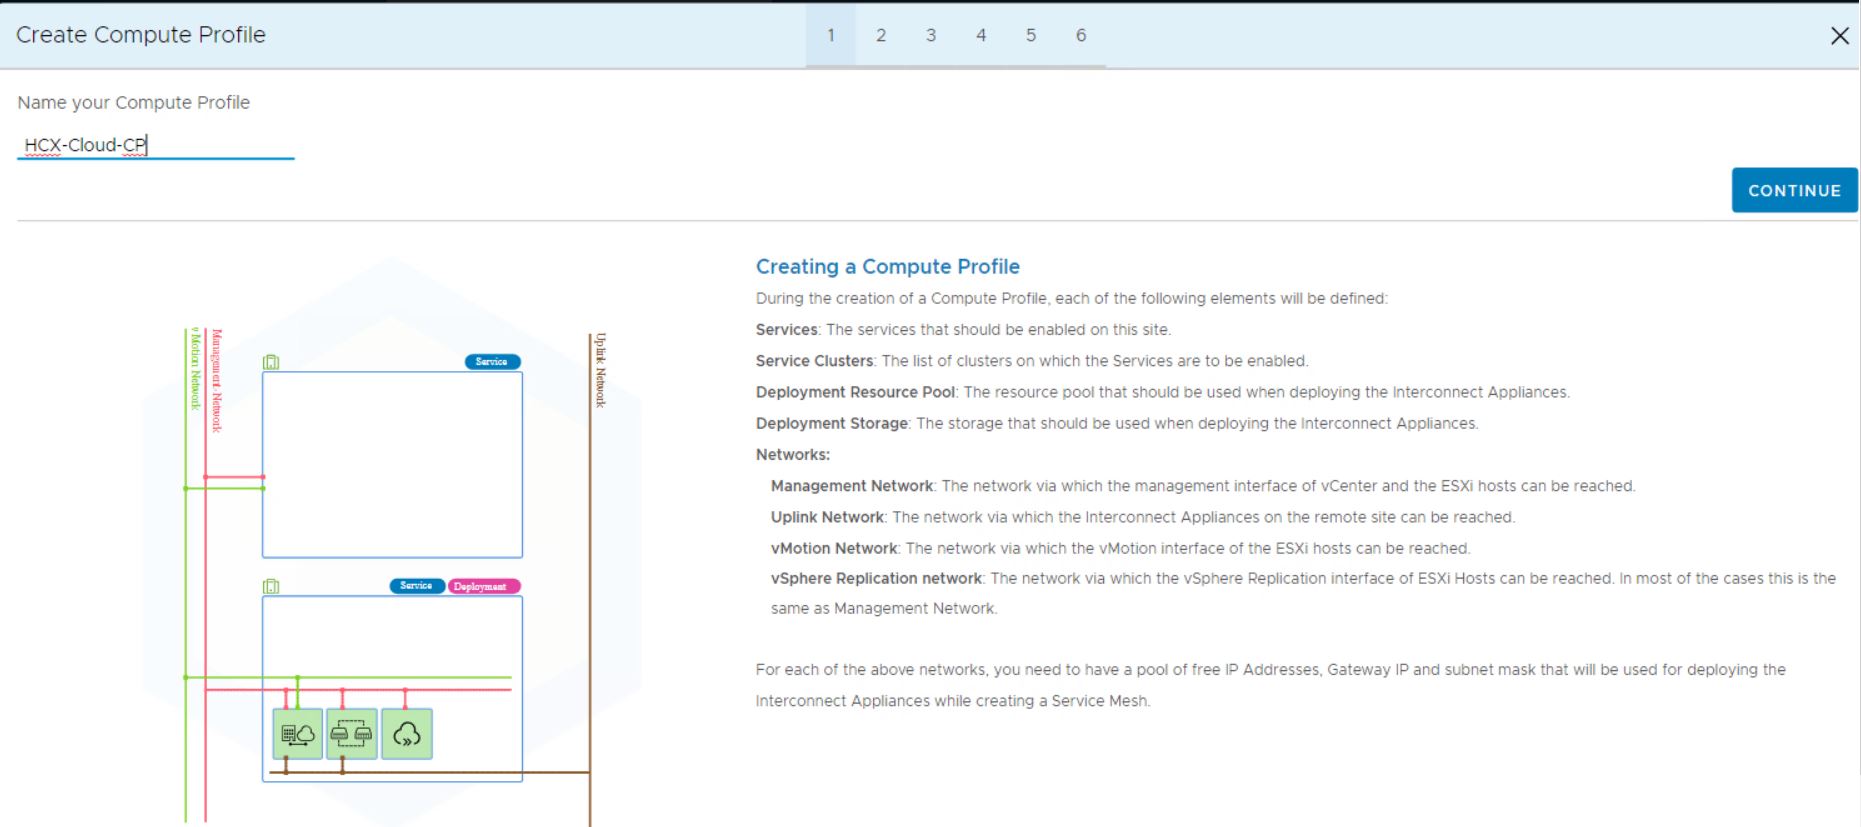
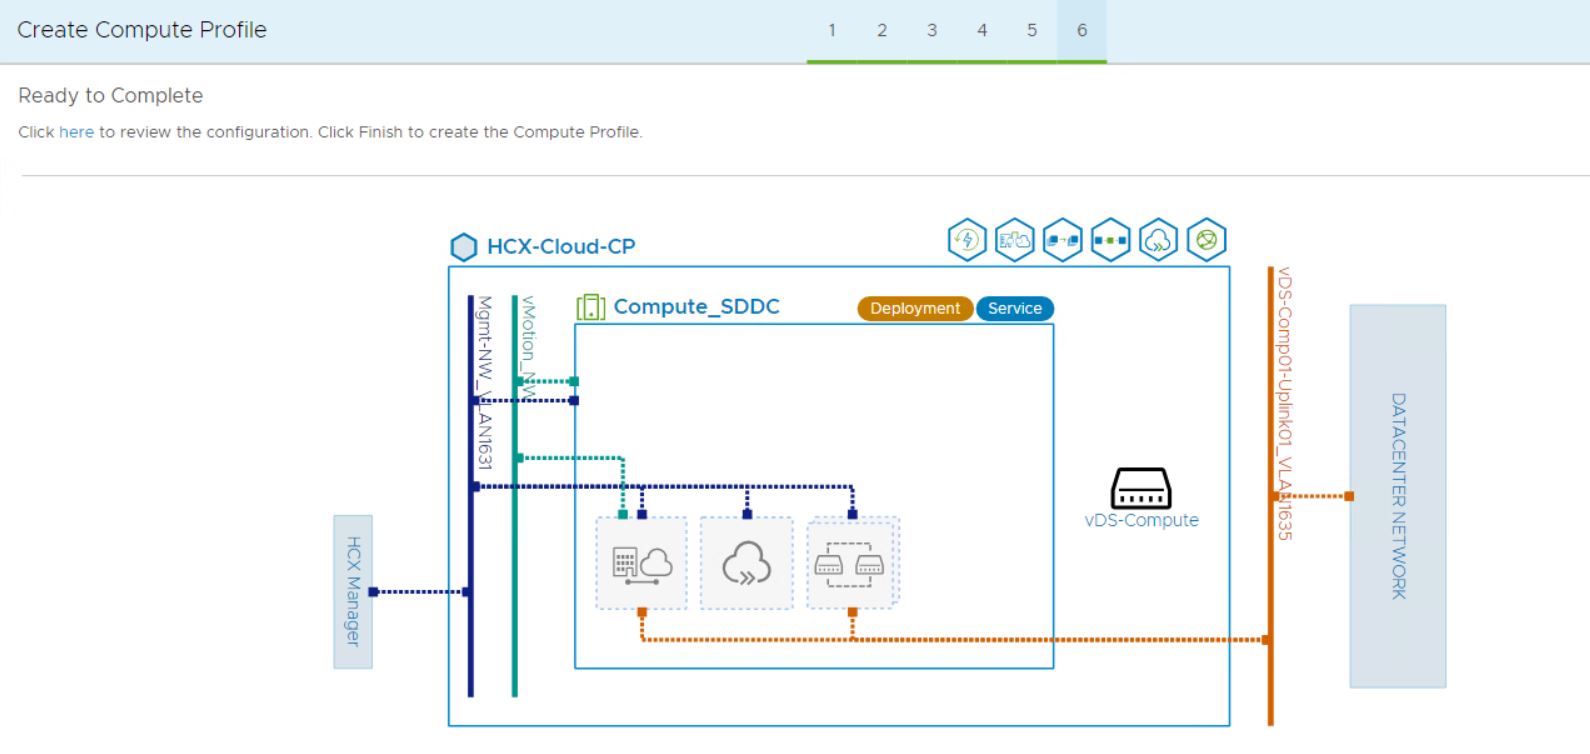
Create compute profile page gives you a fair idea on what a compute profile comprises of.
Provide a name for your profile and hit continue.
Select the HCX services to be enabled. I selected all services in my case.
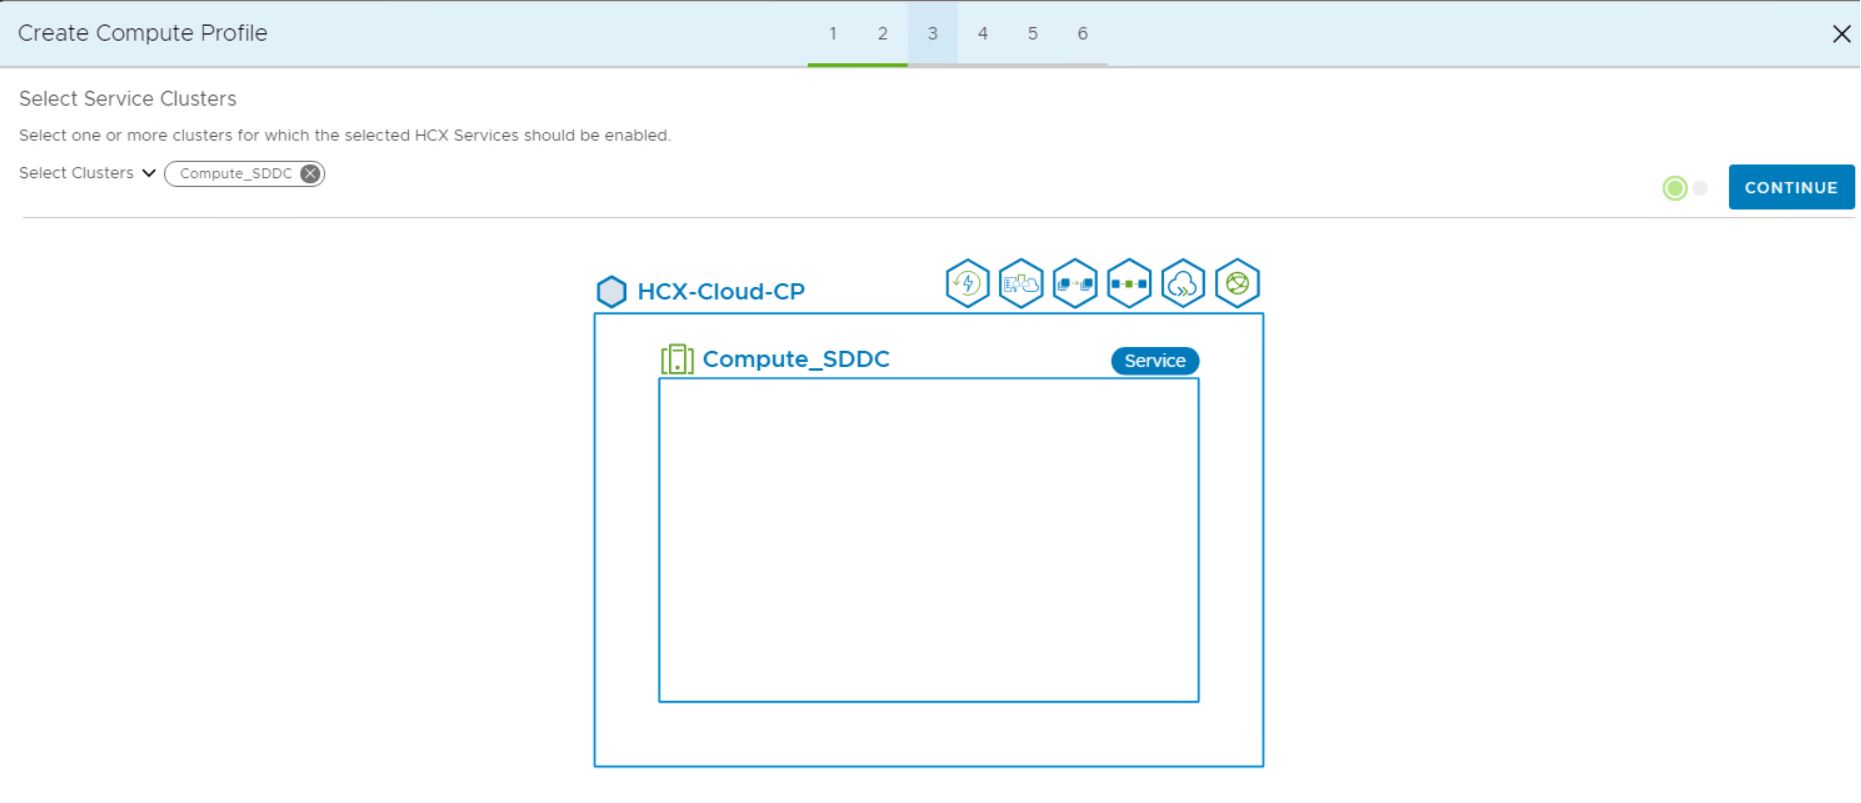
Select the placeholder vSphere Cluster for the HCX interconnect appliances.
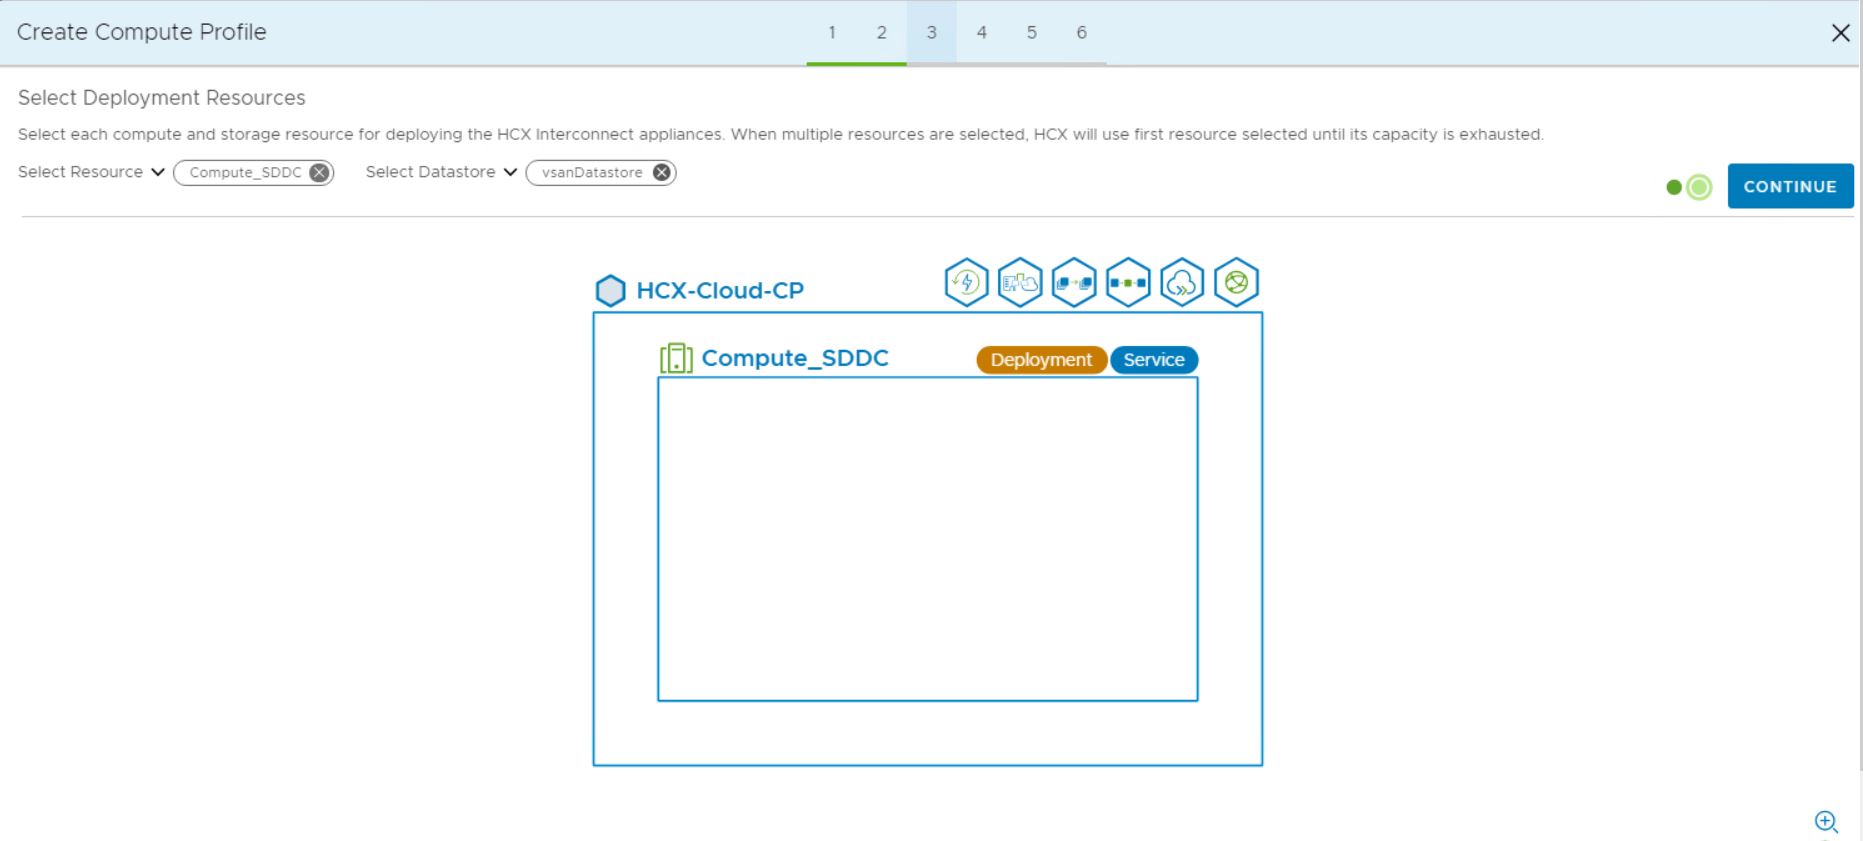
Select placeholder Resource Pool and Datastore.
Note: When multiple compute resources or datastores are selected, HCX uses the first selection until its capacity is exhausted.
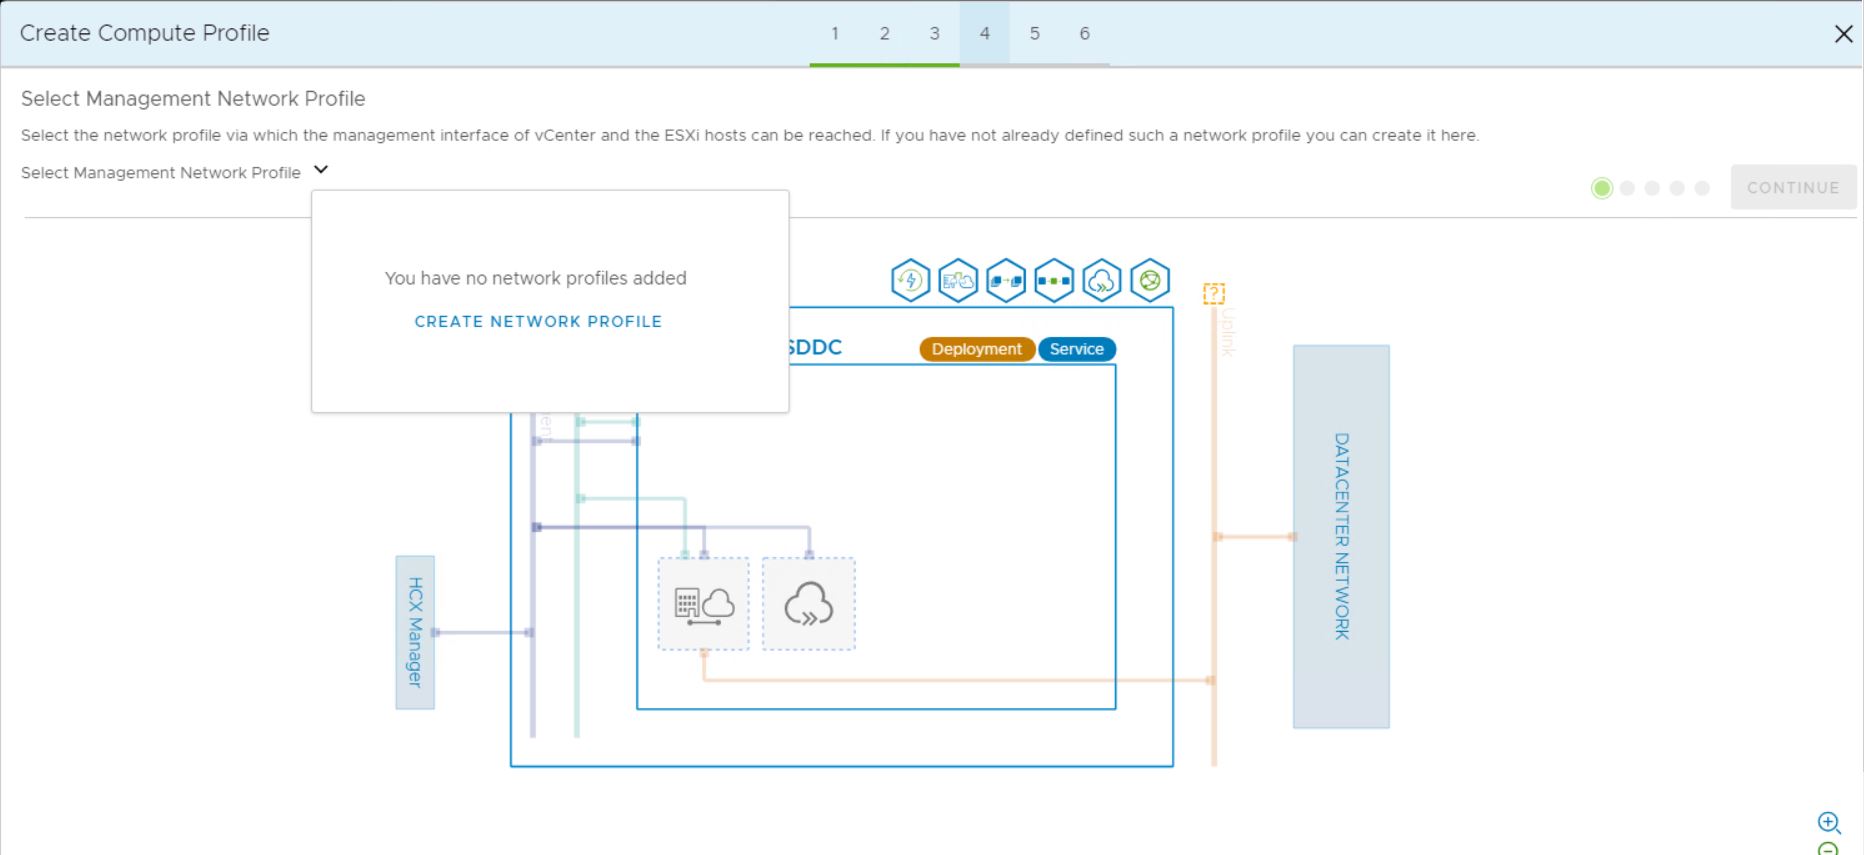
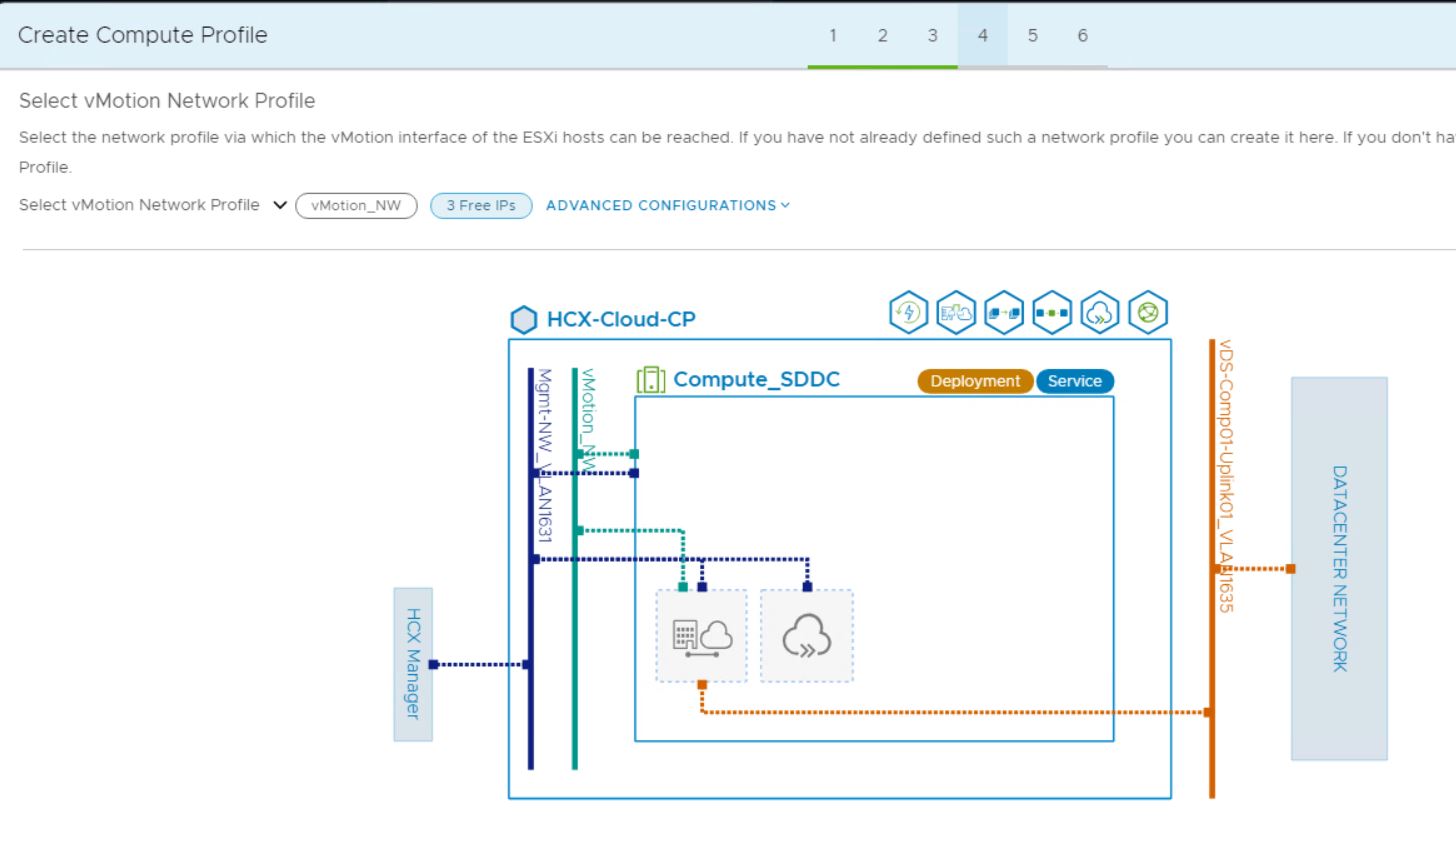
Next is to create the network profile. This comprises of creating a management network, Uplink and vMotion network profile.
Create Management Network Profile
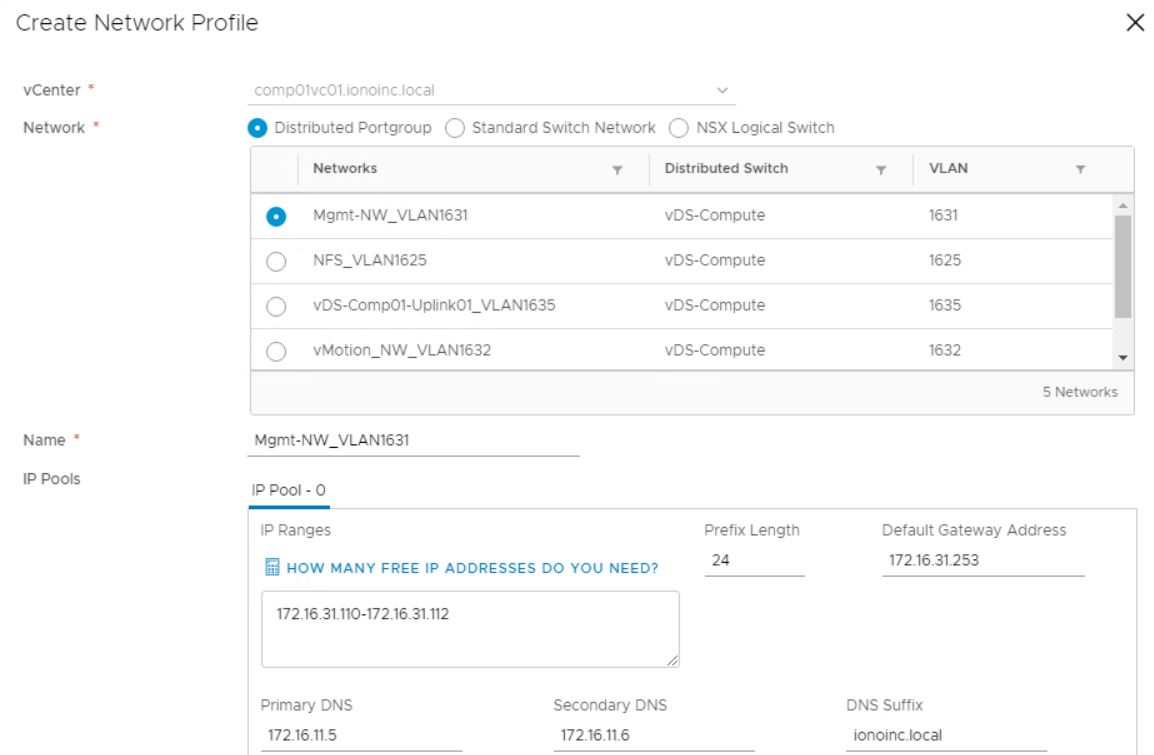
Select the appropriate portgroup which will serve as management network for the IX appliances.
Provide a friendly name for the profile and specify IP-Pool, Prefix length, Default GW and DNS etc.
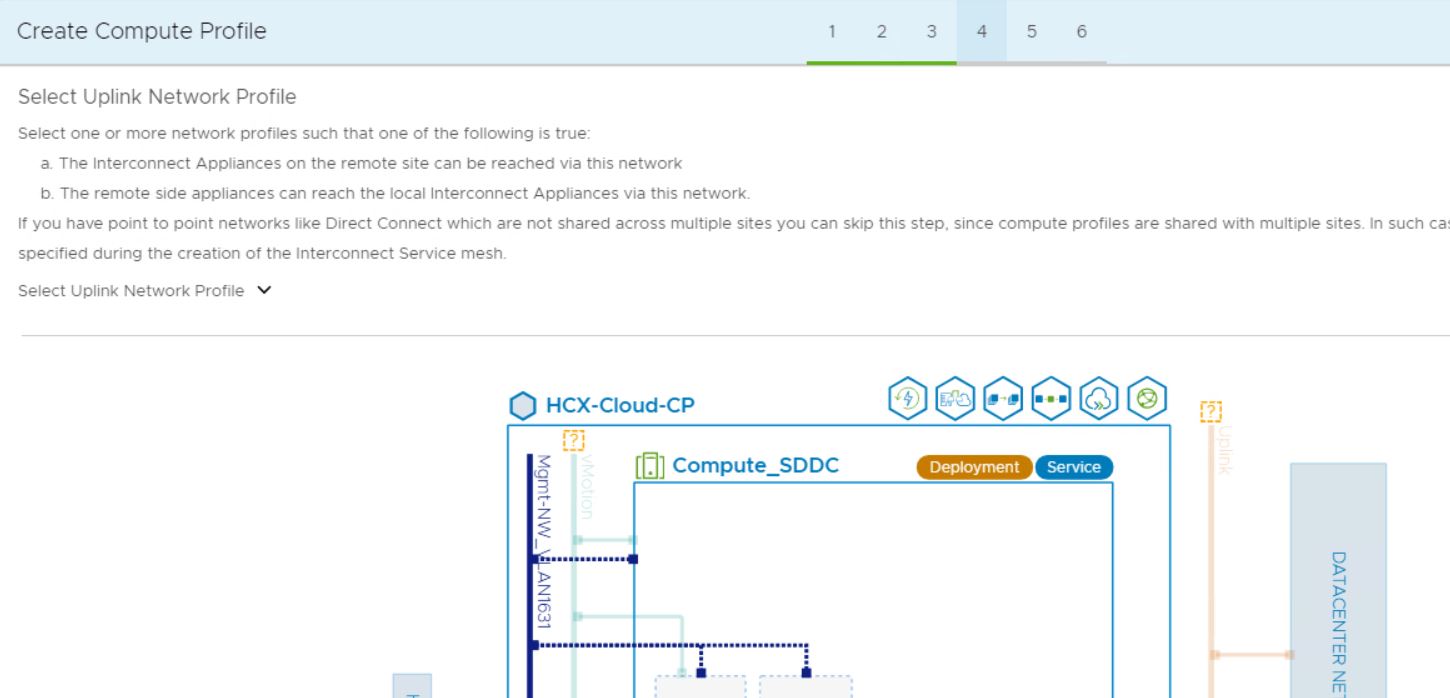
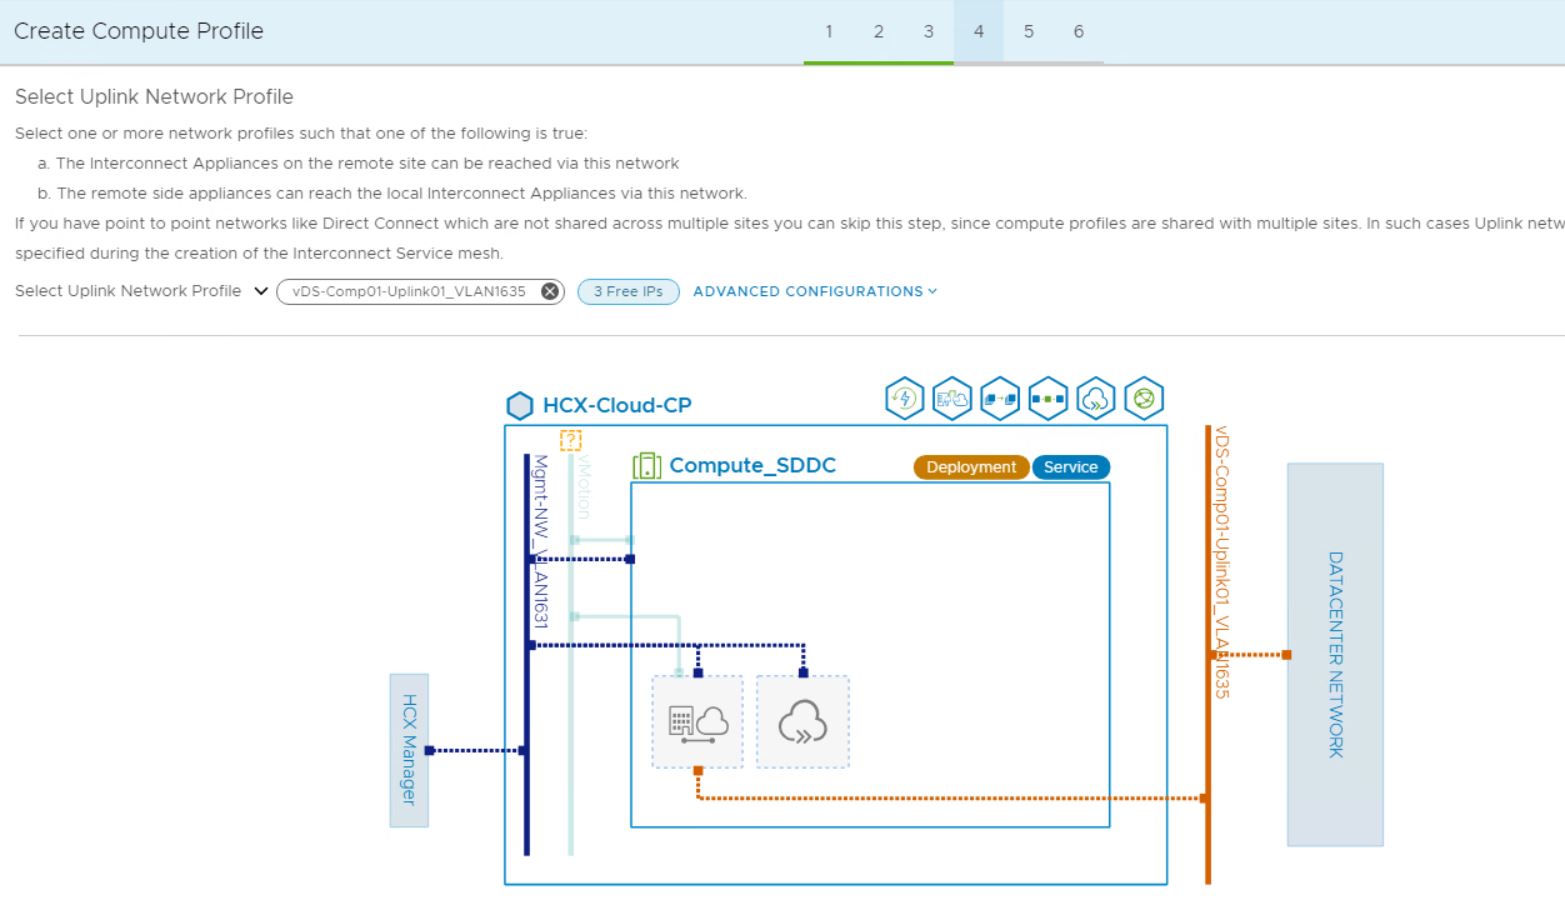
Create Uplink Network Profile
Create vMotion Network Profile
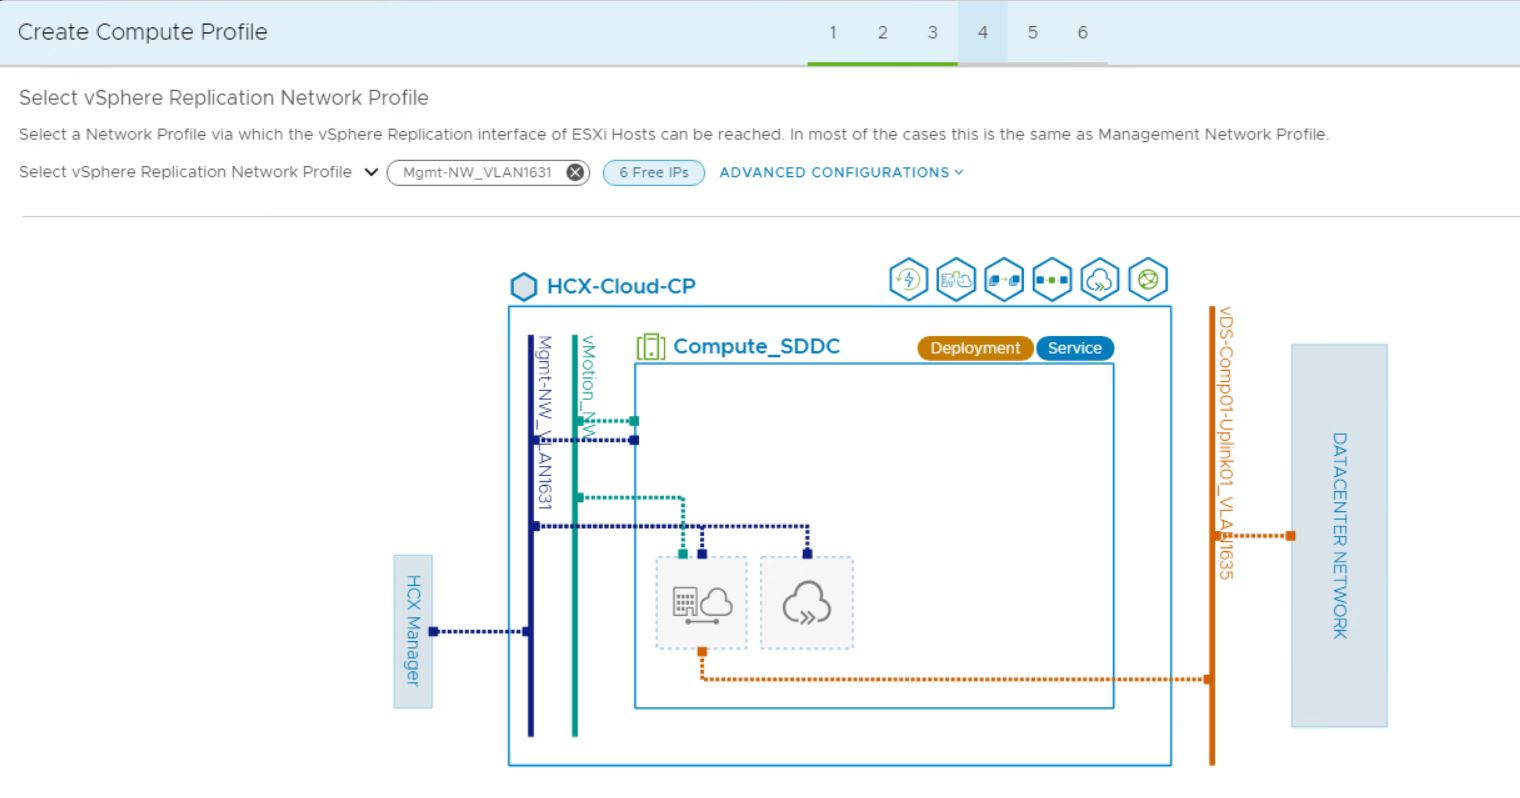
Create vSphere Replication Network Profile
Note: You can use same portgroup for multiple purpose. In my lab I don’t have a dedicated network for vSphere Replication, so I reused my management network profile here.
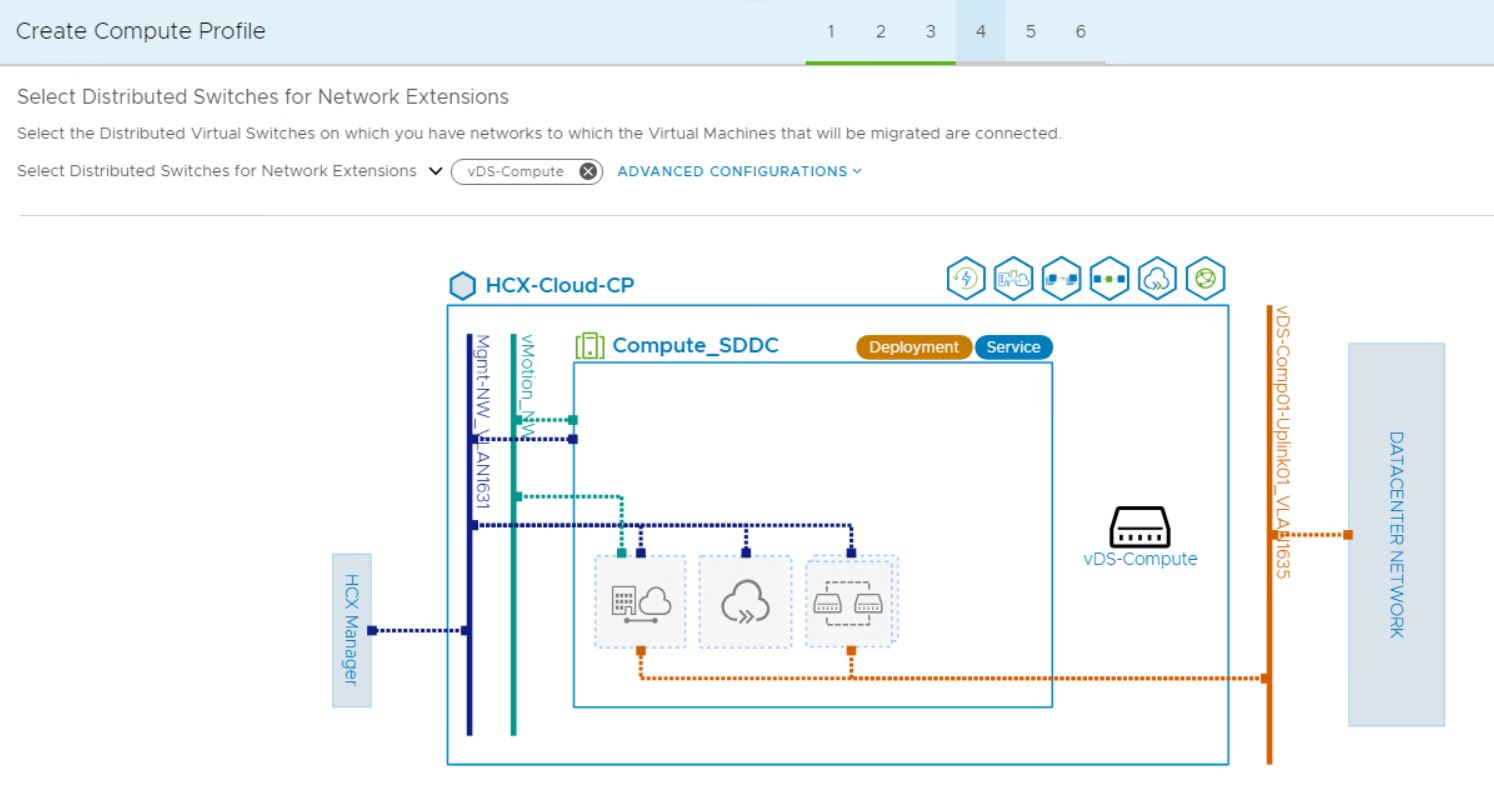
Note: During network profile creation, the topology view is dynamically updated, depicting how HCX Interconnect appliances will be connected with the selected networks.
Select the appropriate vDS and hit continue.
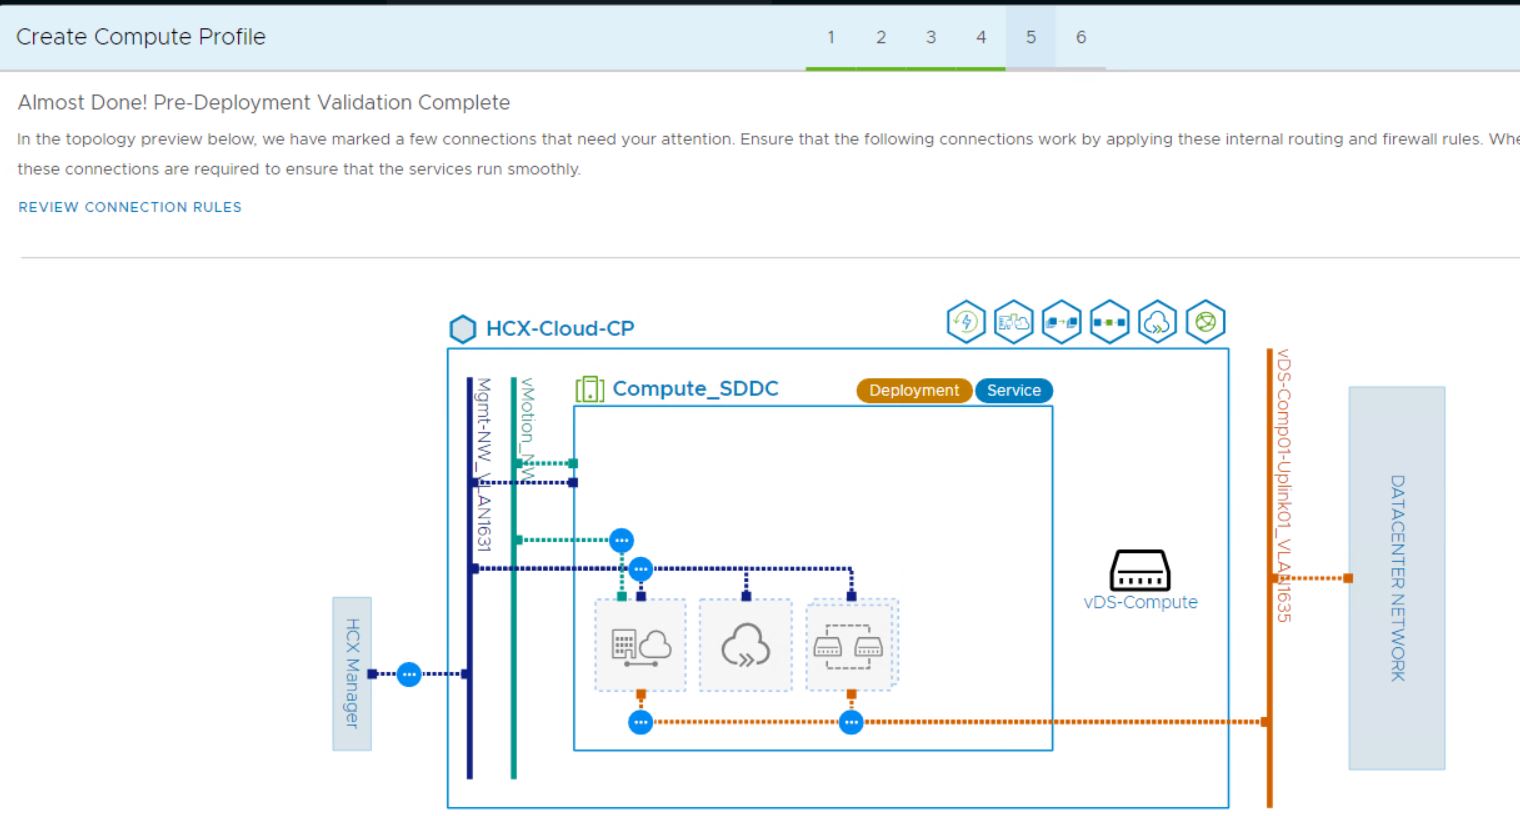
On Pre-Deployment Validation page, HCX will check the selected configurations are valid for interconnect deployments.
On clicking “Review Connection Rules” HCX will provide you with list of network rules that should be in place. You can review all ports that needs to be opened in your environment.
Click on finish button to finish the compute profile creation wizard.
Now our Compute Profile is created and is ready to be used when creating a service mesh.
Now we have to repeat the same process in on-prem HCX. Below slideshow shows the steps for the same.
Create Service Mesh
Adding a Service Mesh initiates the deployment of HCX Interconnect virtual appliances on both of the sites. An interconnect Service Mesh is always created at the source site.
To create a service mesh, following requirements should be met:
-
A connected Site Pair.
-
A valid compute profile at the HCX Enterprise (Source) site.
-
A valid compute profile at the HCX Cloud (Destination site.
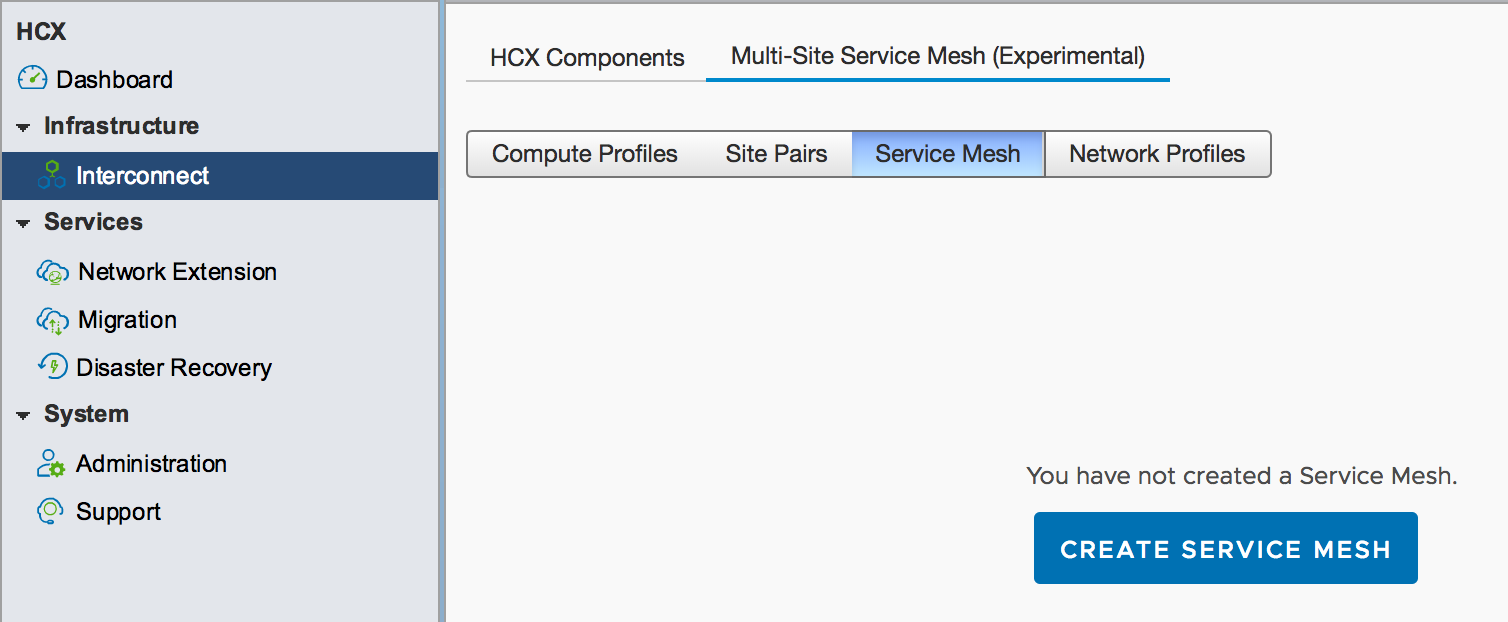
To create service mesh, login to On-prem vSphere Client and navigate to HCX > Interconnect > Multi-Site Service Mesh > Service Mesh tab and click on Create Service Mesh
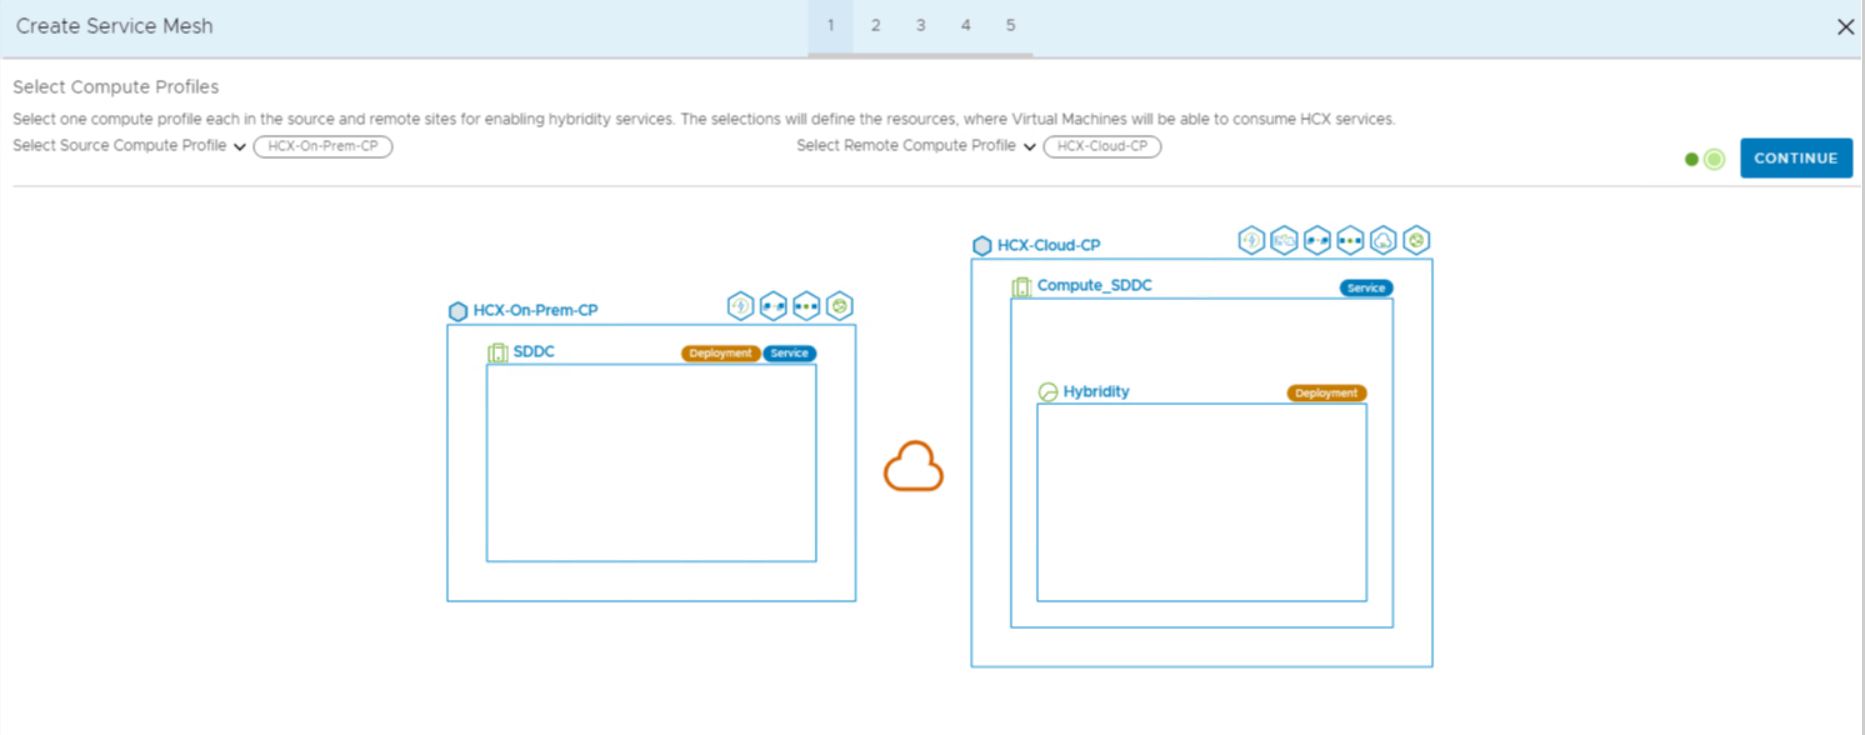
Select source and destination site between which mesh will be created.
Note: Only connected Site Pairs are displayed
Select the compute profile for both source and destination. If there is only one compute profile at both sites, it is automatically populated here.
Select the HCX services to be enabled and hit continue button.
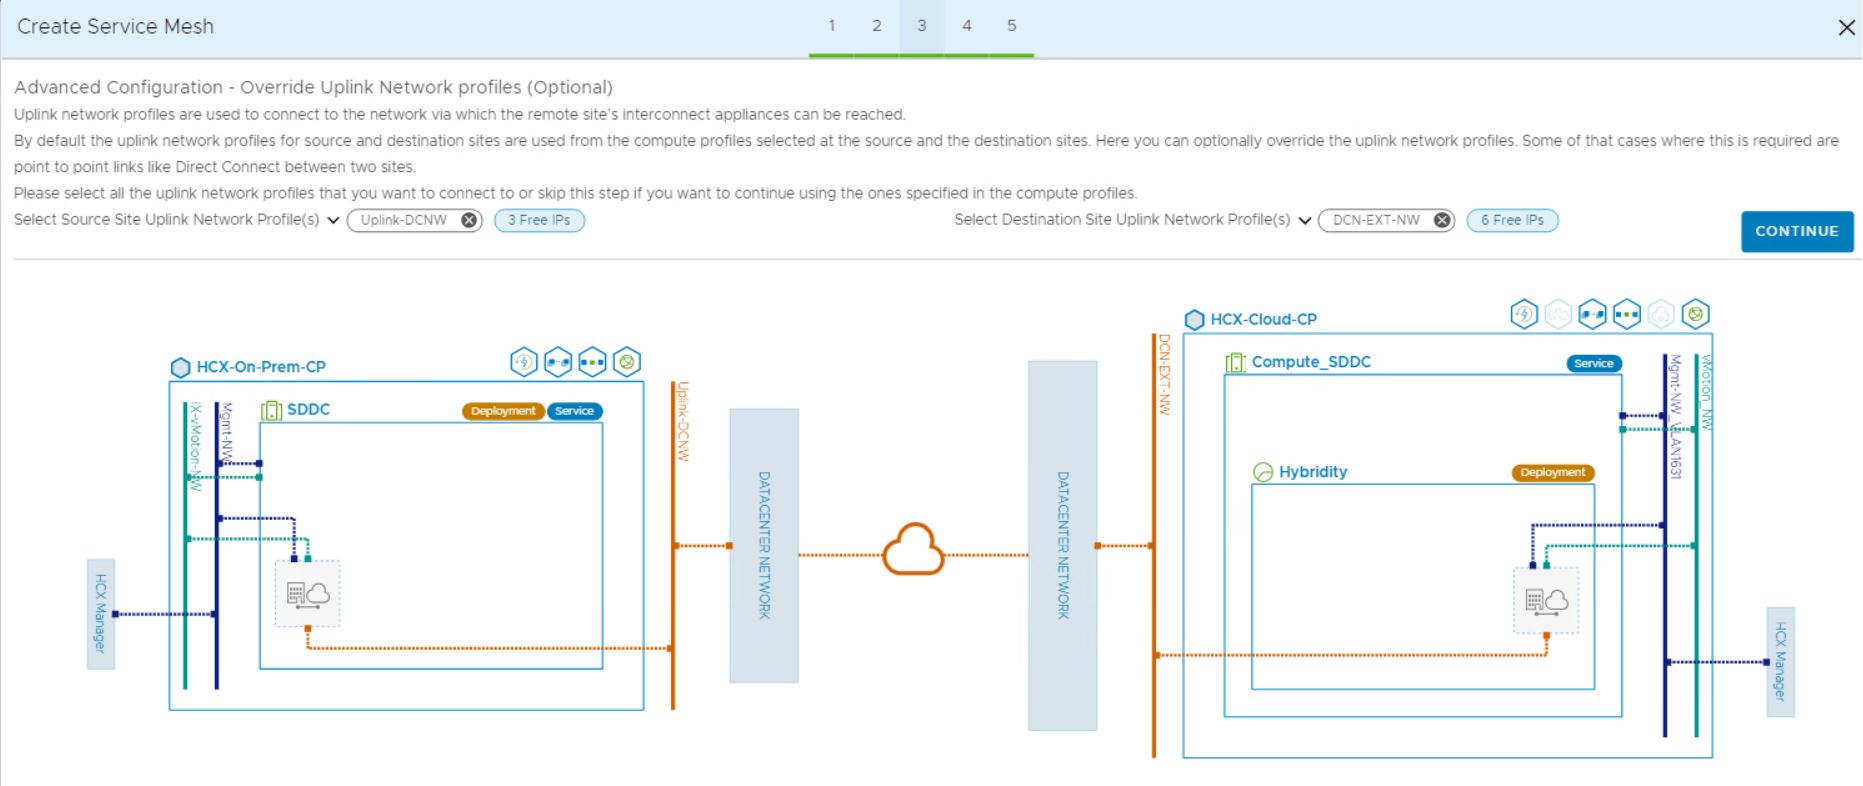
You can optionally override the uplink network profile under Advanced configuration if you wish.
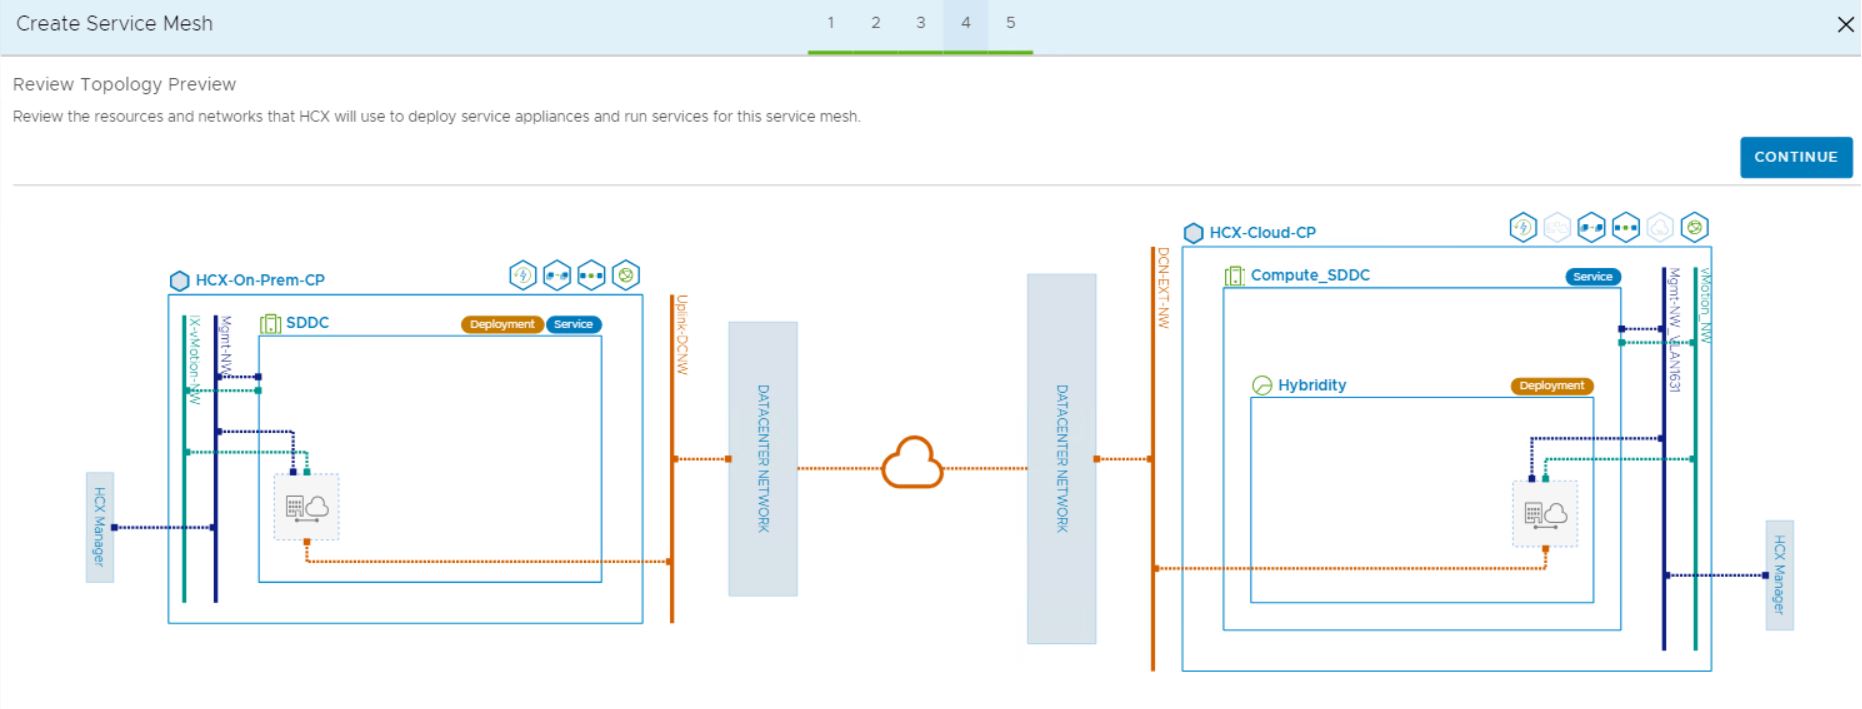
Review the selected clusters and resources and hit continue.
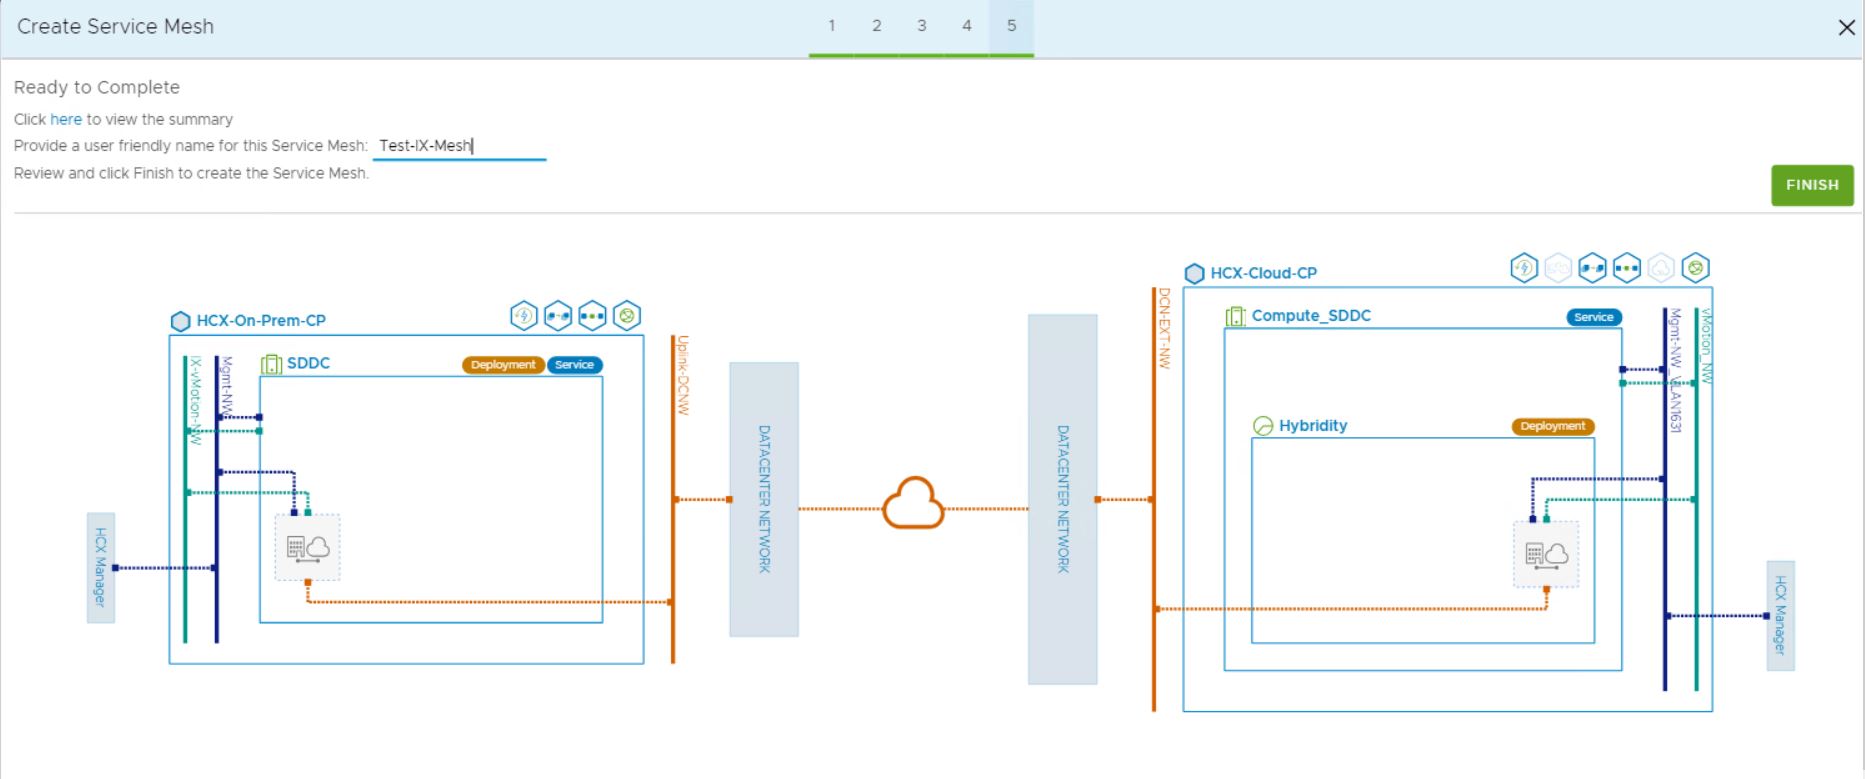
Provide a name for the service mesh and hit Finish button to complete the service mesh creation wizard.
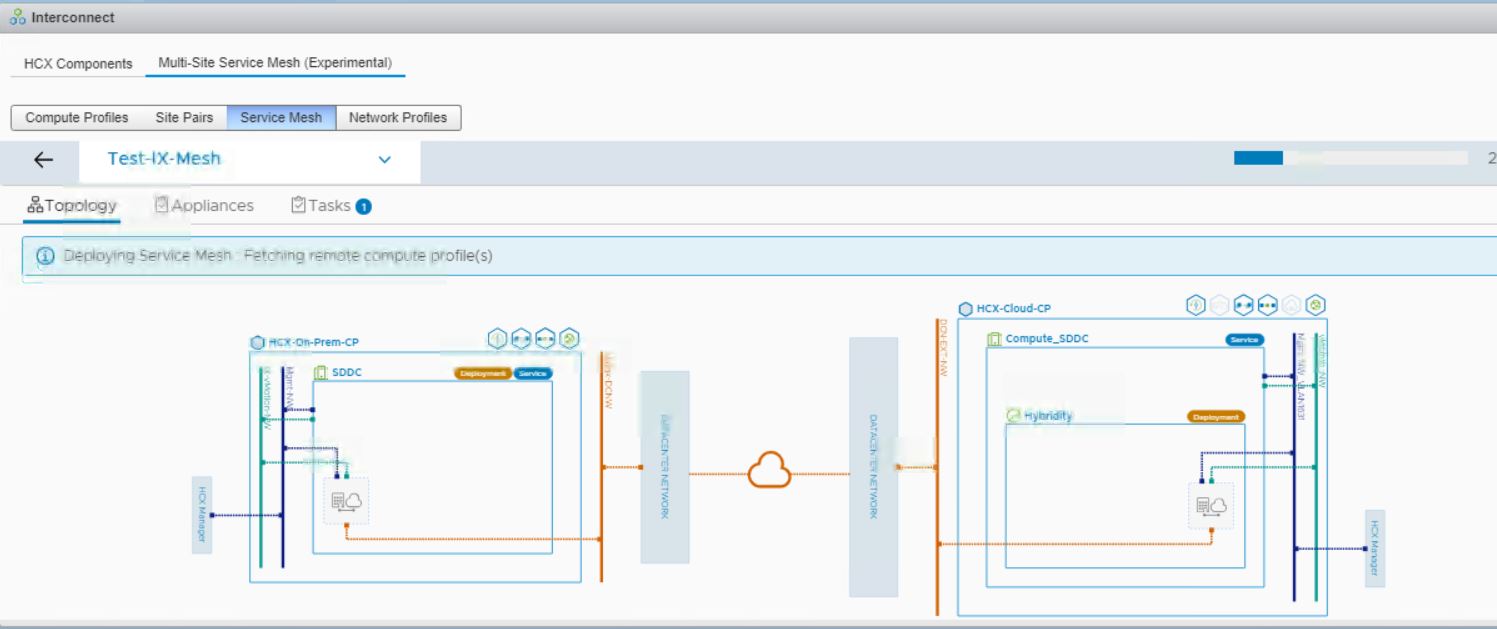
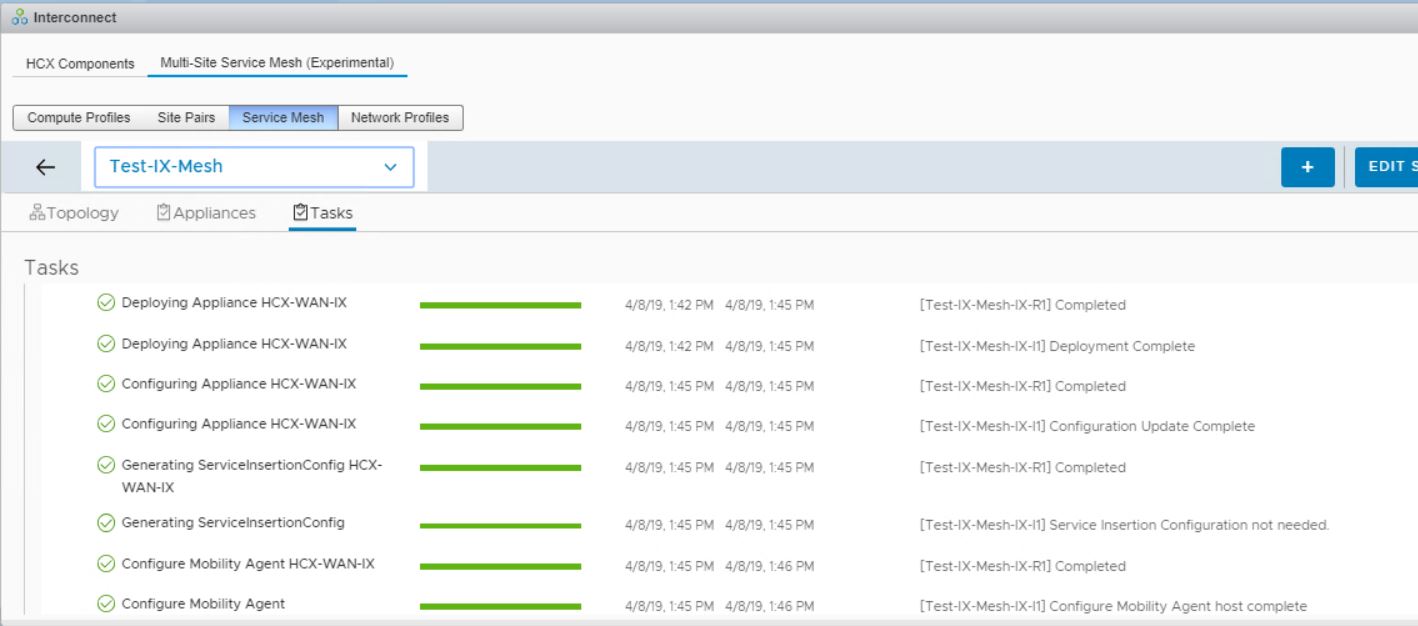
Service mesh deployment will start.
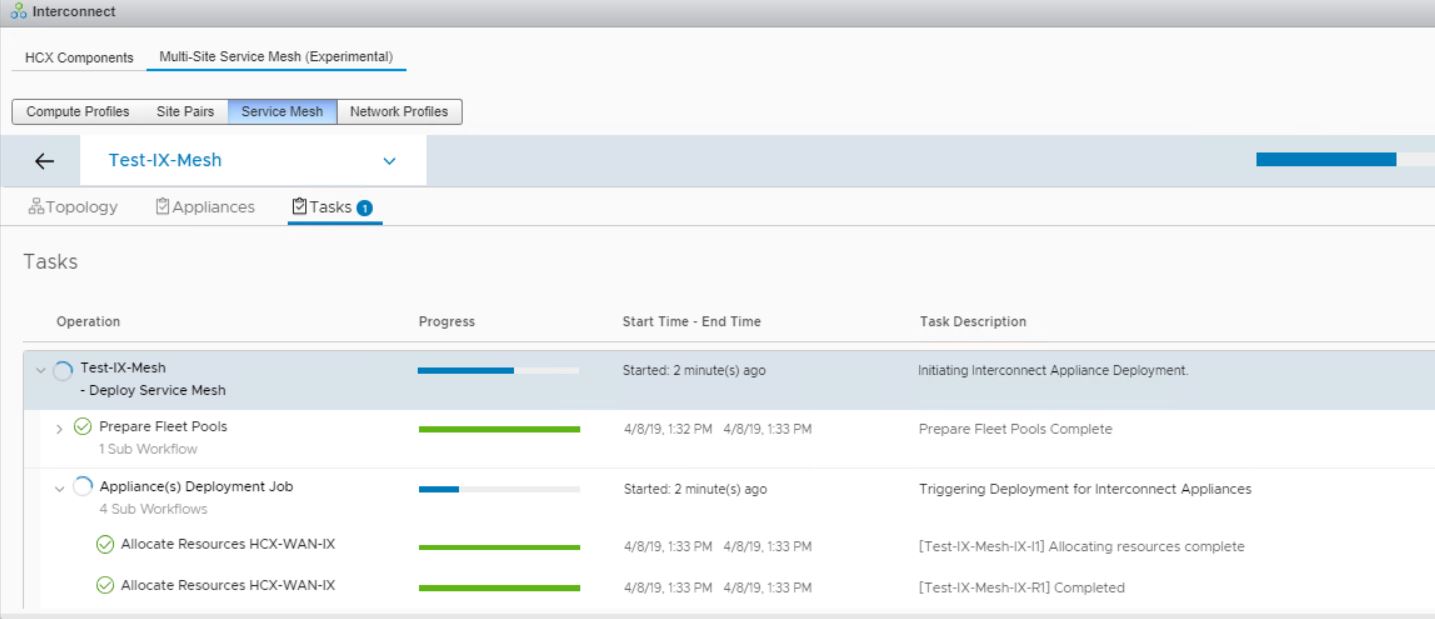
Interconnect appliances are deployed in both sites during the process.
Wait for 5-7 minutes for appliance deployment task to finish.
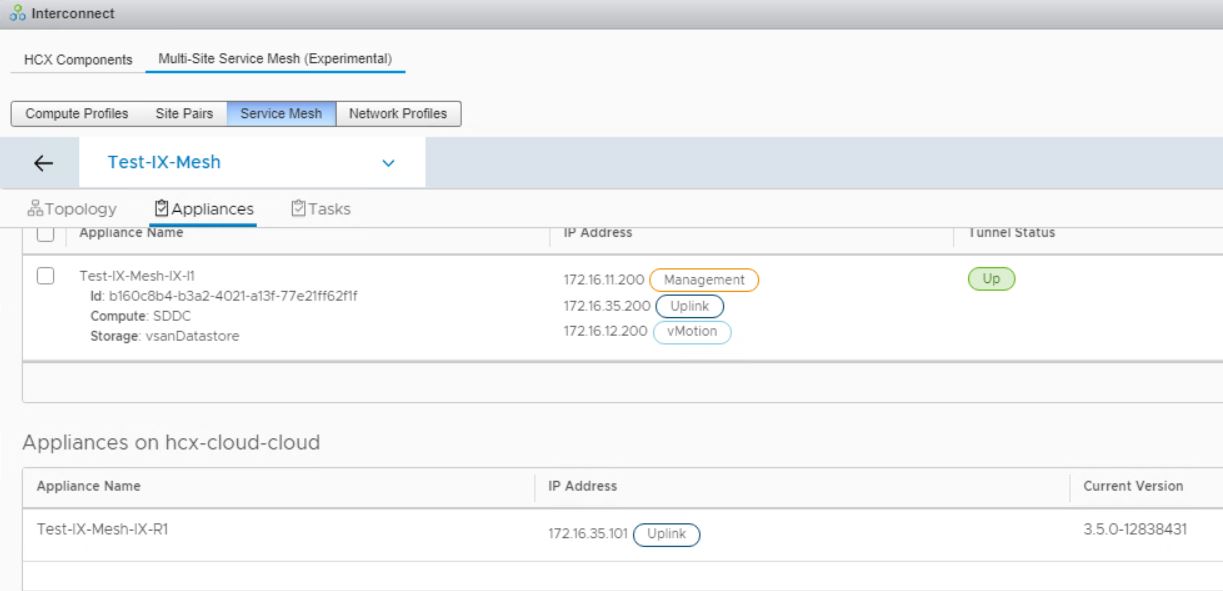
Under Service Mesh > Appliances tab, verify that Tunnel status reports as UP for the IX appliance.
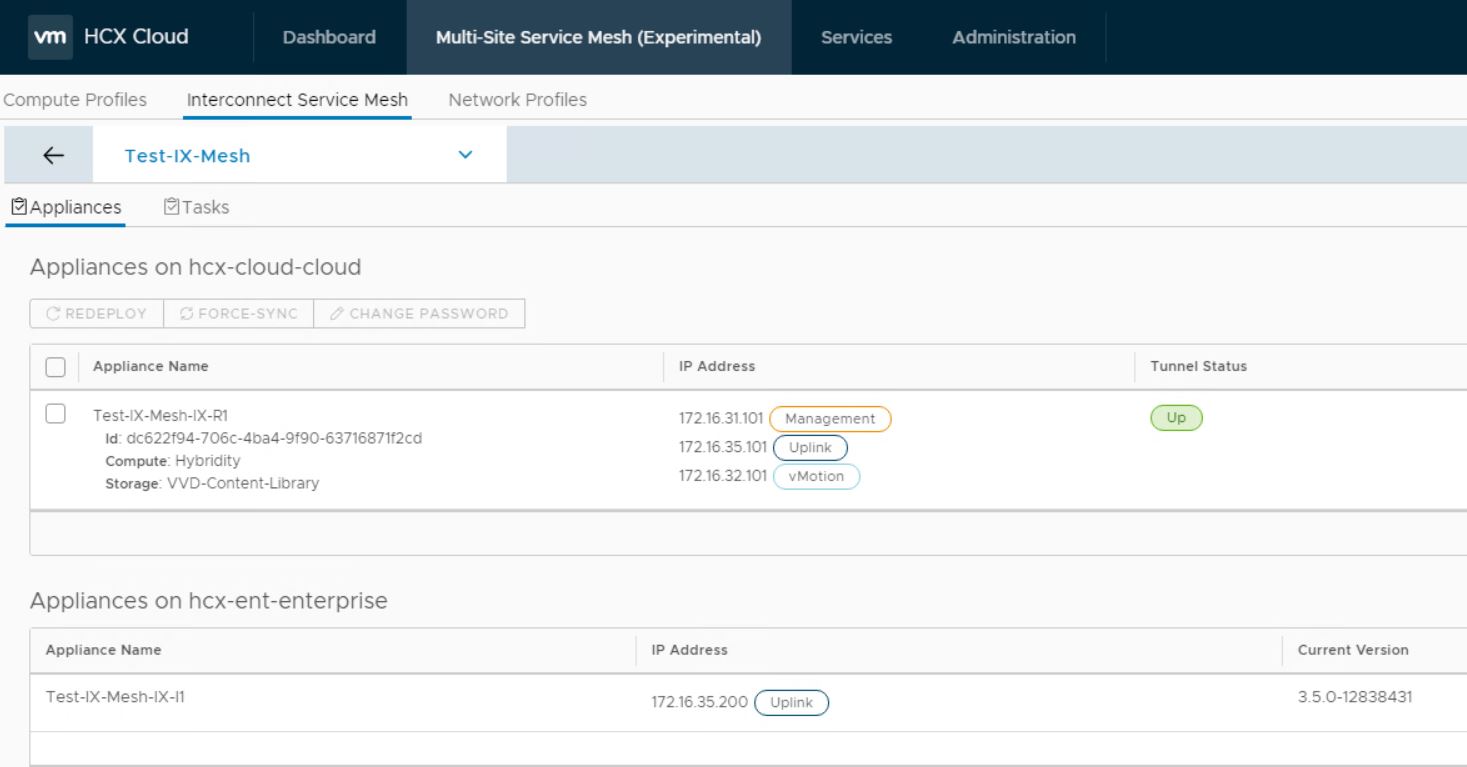
Optionally you can verify the same in HCX Cloud UI.
I hope you enjoyed reading this post. Feel free to share this on social media if it is worth sharing

