In the last post of this series, we learnt to change the default retention period for events in vRNI.
In this post, we will learn about user management.
If you are not following along this series, then I recommend reading earlier posts of this series from the links below:
1: Adding Data Sources in vRNI
2: Changing Default Data Management Policy
The default installation of vRNI allows you to login with the admin@local user, and this user can add new users (local and LDAP) and configure memberships and other settings of the existing users.
Adding Local User
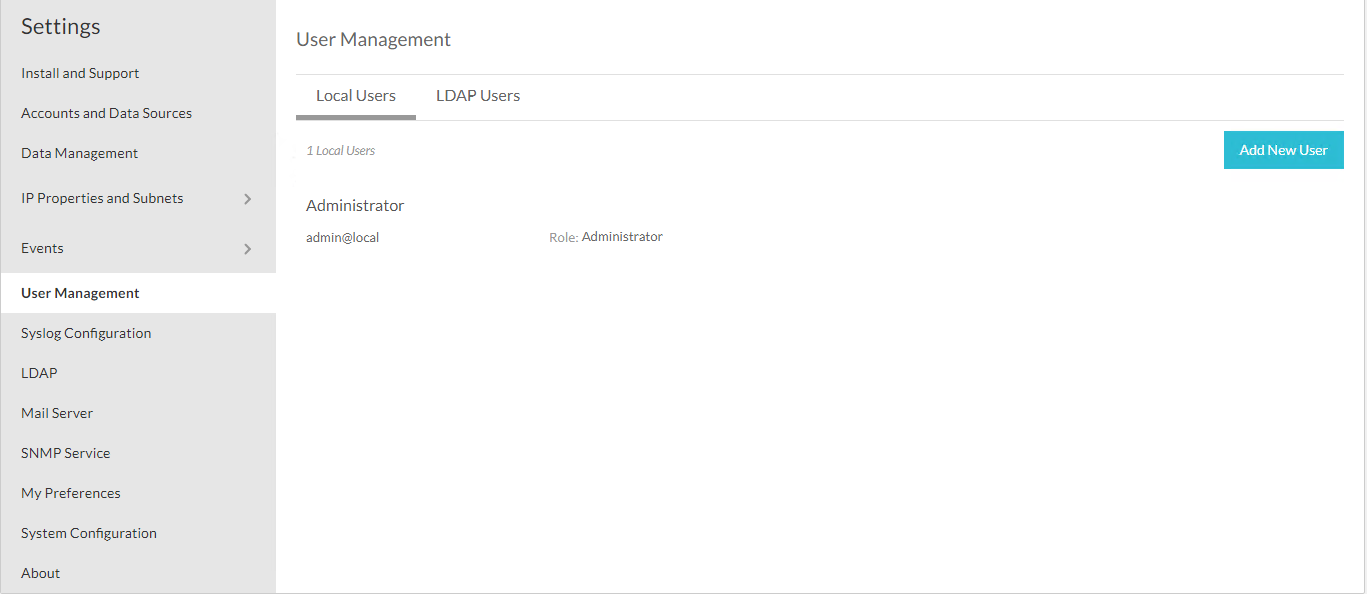
For security reasons, you might want to delete the default local user and create a new one as per your organization’s access standards. To add a new local user login to vRNI and navigate to Home > Settings > User Management > Local Users, and click on Add New User.
Provide a name for the new user and login ID (username@email format), and select an appropriate role for the user and a complex password.
Note: A user with administrator privileges can only view the User Management tab.
Wizard will prompt you to provide the password of the admin@local user. Enter the password and click the Authorize button.
The newly added user will appear in the list.
Logout the admin user and login with the newly created user.
Navigate to the User Management tab, and you will get an option to delete the default admin user.
Adding Domain users
To add domain users to vRNI, we need to integrate vRNI with AD. To do this, login to vRNI and navigate to Home > Settings > LDAP, then click Configure.
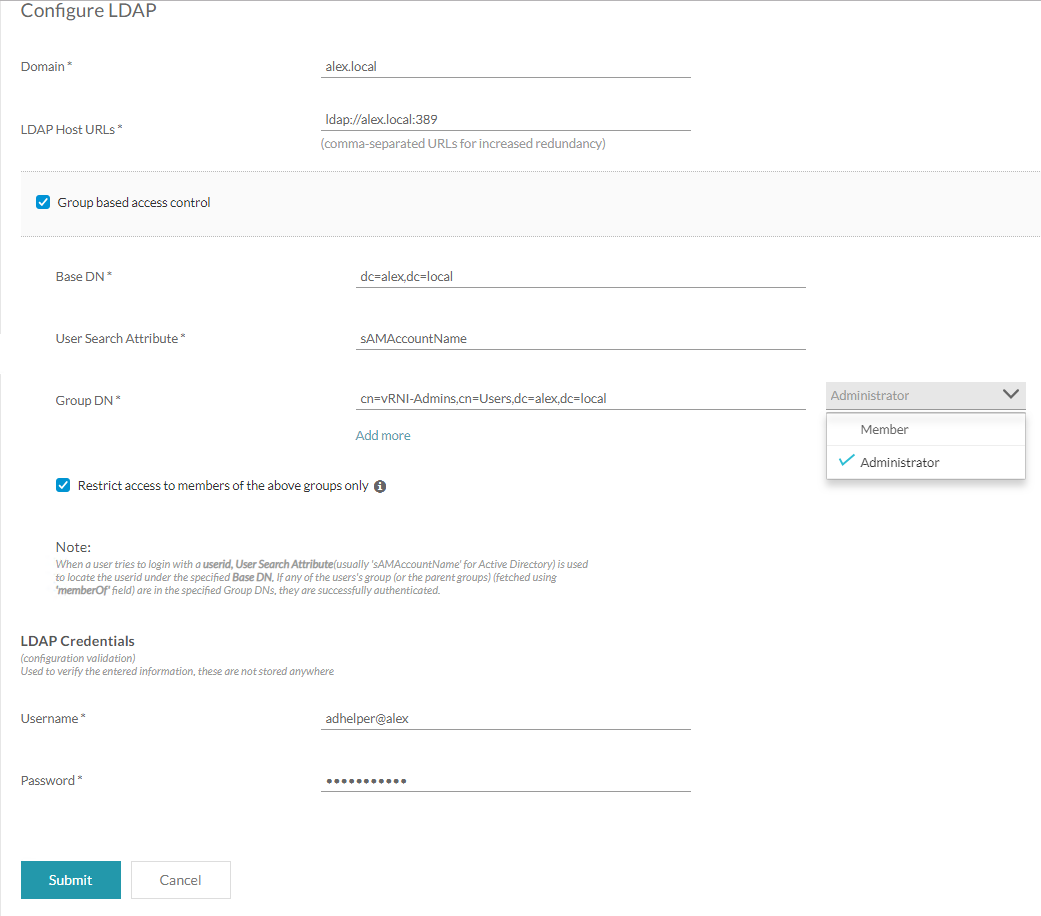
On the Configure LDAP page, type the domain name, LDAP Host URL, and LDAP credentials.
If you need to provide access to groups, then enable ‘Group-based access control’ and configure the group DN. You can add more than one group in vRNI.
If you select the administrator role for a particular group, then all members of that group will have the administrator privilege. To restrict the admin privileges, select the option “Restrict access to members of the above groups only”.
Under LDAP credentials, punch in the username/password of the user via which vRNI can query your Active Directory and hit Submit.
After the LDAP is configured, it will appear in the list.
To assign a role to an LDAP user, navigate to the LDAP Users tab and click on Assign Admin role.
Type the LDAP user name and click on Add user.
Enter the password for the admin@local user.
The newly added user will now appear in the list.
Note: In my opinion, manually adding users is not an efficient way of managing users. Instead, this page should list all users from the AD, and administrators should be able to select individual users and assign them appropriate rights.
Logout the admin@local user and login with the newly created user.
Note: After the LDAP configuration is successful, a new drop-down menu is available on the login screen where users can select whether they want to log in locally or using their LDAP credentials.
There are some considerations about Groups and Inheritance that you must be aware of. Below are excerpts from the VMware official doc talking about this:
I hope you enjoyed reading this post. Feel free to share this on social media if it’s worth sharing.


