In the last post of this series, I covered the steps needed to configure the on-prem environment to connect it to a cloud provider site.
In this post, I will demonstrate how to register a cloud provider and initiate vm migration using vCloud Extender.
If you are not following along with this series, then I recommend reading earlier posts of this series from the links below:
1: Introduction to vCloud Extender
2: vCloud Extender-Cloud Provider Setup
3: vCloud Extender-Tenant (On-Premise) Setup
Let’s start with Cloud Provider registration.
Login to the On-prem vCenter server webclient and click on the vCloud Extender plugin and navigate to the Provider Clouds tab. Click the Add a Provider Cloud button.
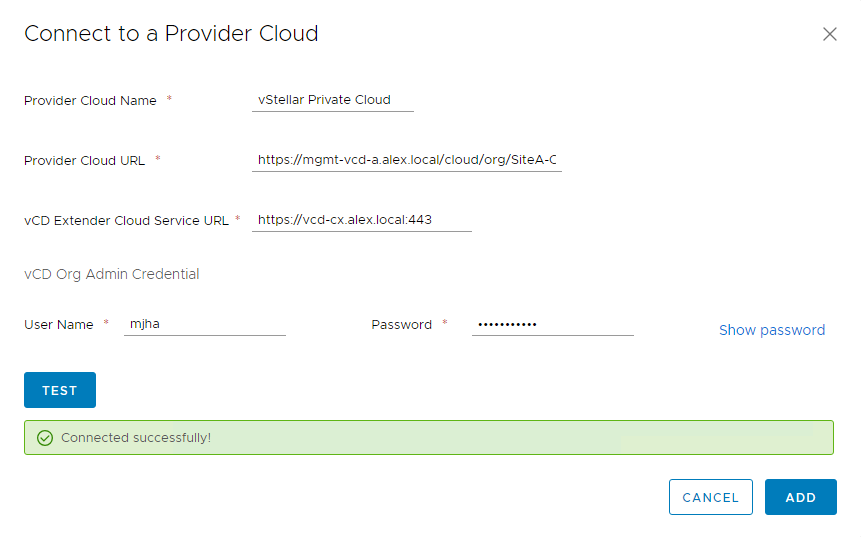
Specify Cloud Provider name and Provider Cloud URL. This should be in the format https://provider-url/cloud/org/tenant-org-name.
Also specify the vCD Extender cloud service URL.
Clicking the Test button verifies that the supplied info is correct and the on-prem vCenter can connect to the cloud environment successfully. After the test passes, click the Add button to save the configuration.
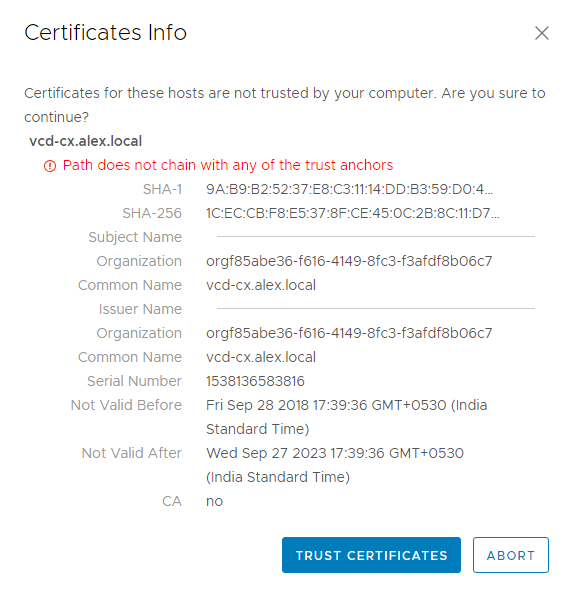
Accept the SSL certificate.
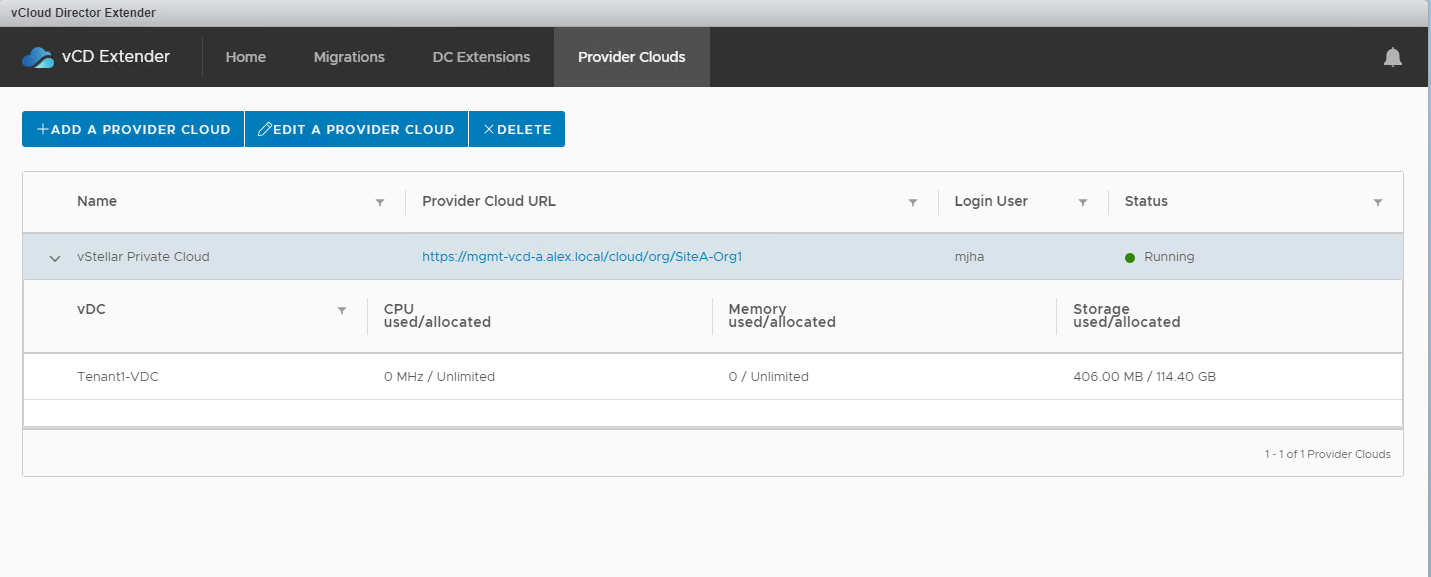
On successful connection to Cloud Provider, you will see the new provider cloud registered under the ‘Provider Clouds’ tab with a status of ‘Running’.
Also, you will see accessible VDCs to which you have access.
VM Migration
We are connected to a cloud provider; let’s start migrating a test VM from on-prem to a vCD-based cloud.
To start migrating workloads from on-prem, go to the Migration tab and click on New Migration.
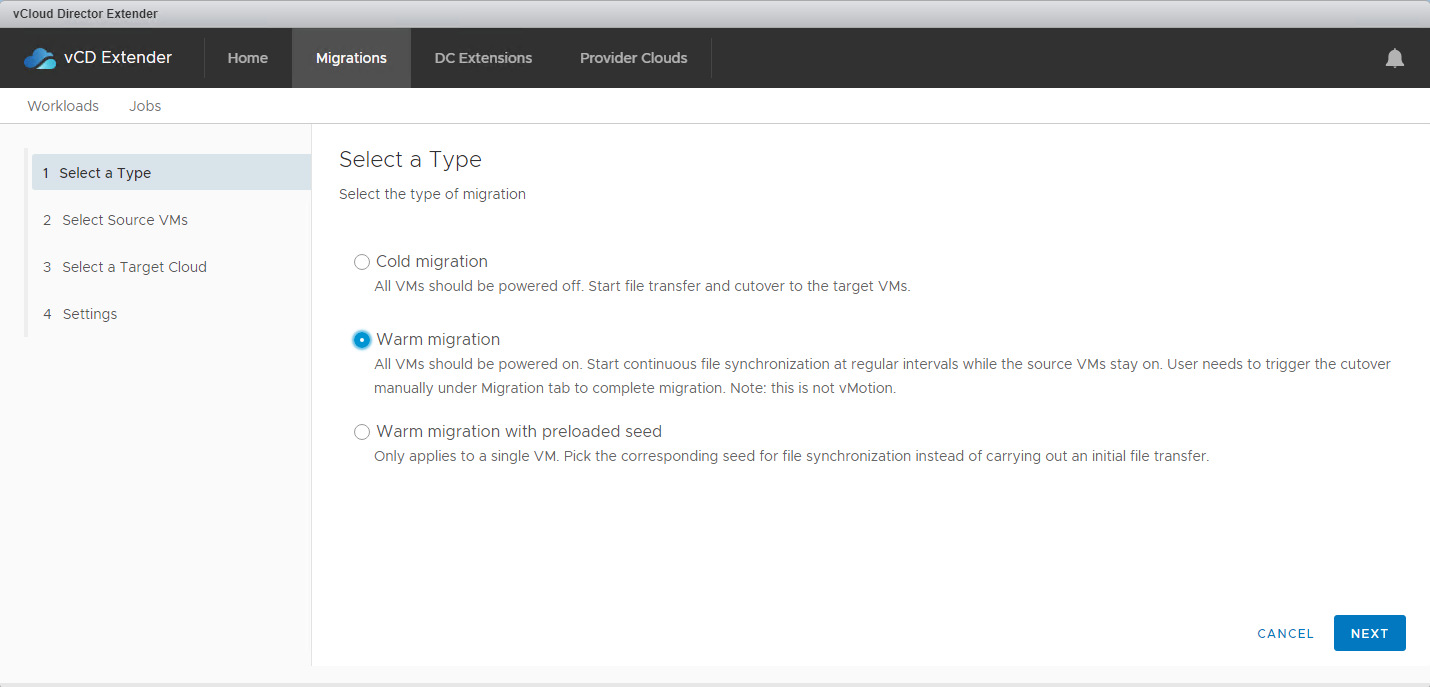
Select migration type from the list. With each type of migration, a description is associated to give you a high-level overview of that migration.
Let’s start with warm migration first.
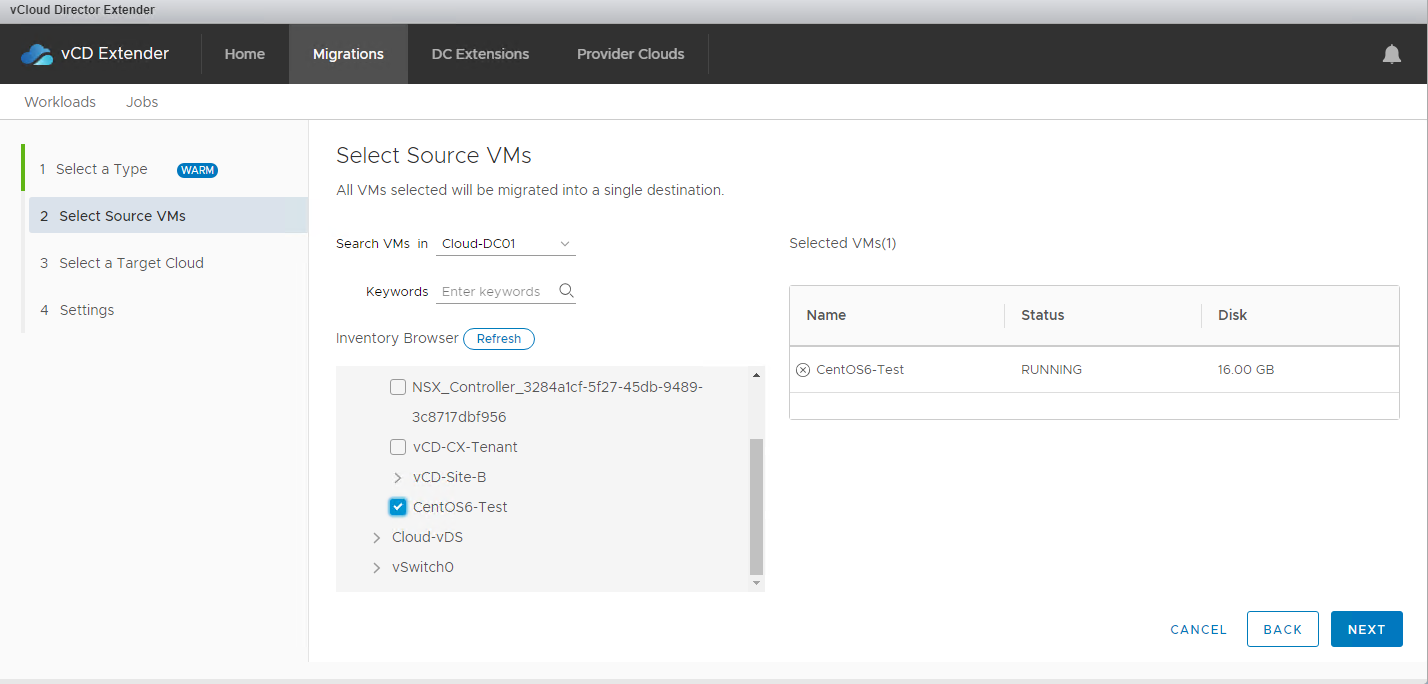
Select the source VM(s) to be migrated from the inventory. All the VMs will be listed under the folder “VM”, which can be expanded by clicking the > sign in front of the folder.
Once a VM is selected, its status and disk sizes are updated in the right-side panel.
Click Next after you have selected the VMs that you want to migrate.
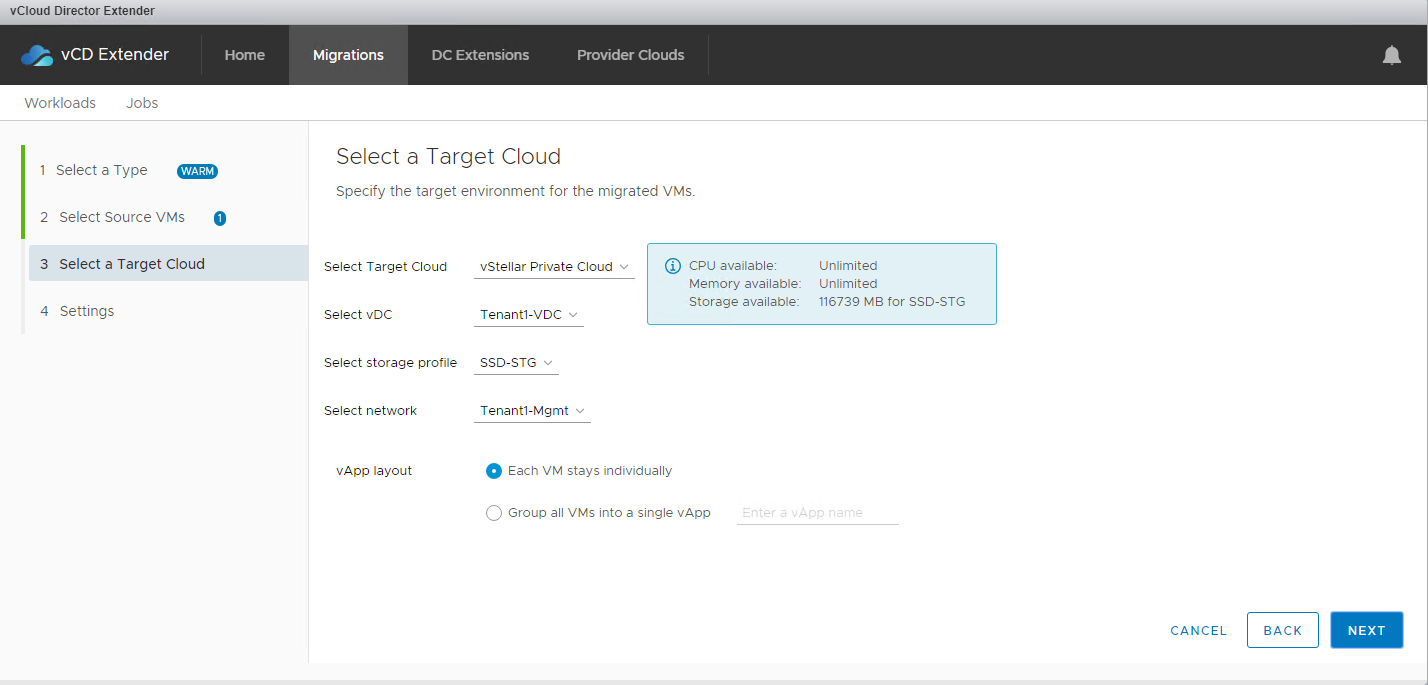
On the target cloud selection page, select the Cloud Provider, vDC, VM storage profile for the remote copy, and the network to which the migrated VM will connect on the Cloud Provider side.
If you are migrating more than one VM, you can place them together in a single vApp rather than creating a new vApp for each VM.
I am only migrating a single VM in this demonstration, so I selected the option “Each VM stays individually”.
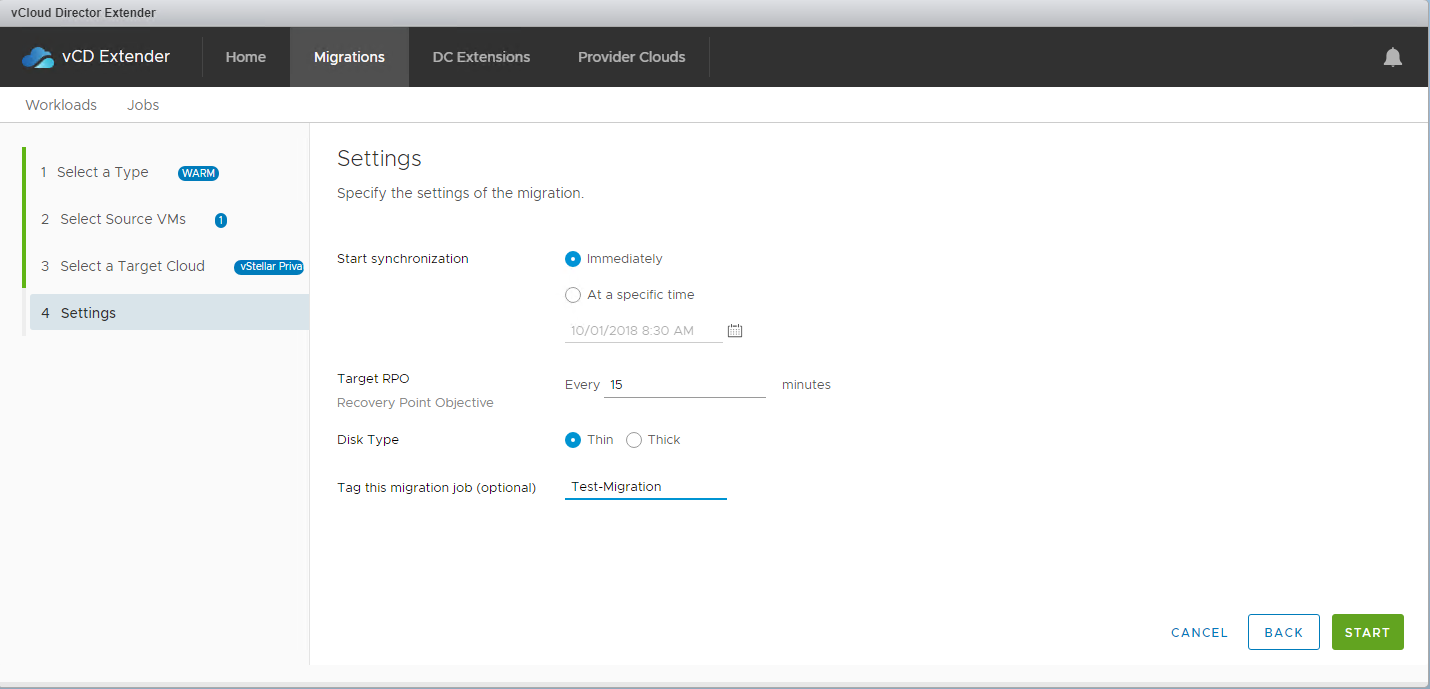
On the last page of the migration wizard, we can specify when the VM synchronization should start, Recovery Point Objective (in minutes), and whether to provision the destination disks as ‘Thin’ provisioned or ‘Thick’ provisioned.
Optionally, we can add a tag for this migration so that it’s easier to search for this job later from tasks and events.
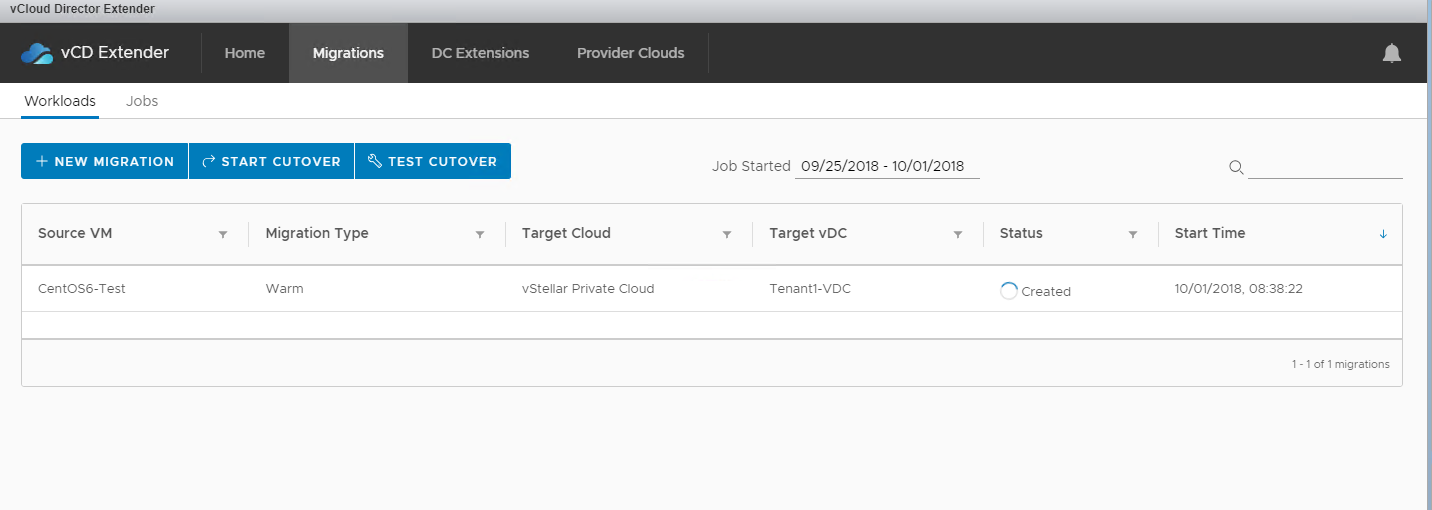
Once migration is started, you will see a progress indicator against the VM. Initially, the status will be ‘Created’.
Once the initial synchronization completes, you will see the VM status as ‘Cutover ready’, which means it’s staged and ready to be migrated to the cloud.
At this point, our VM has been registered in the cloud-side vCenter server but not in vCD.
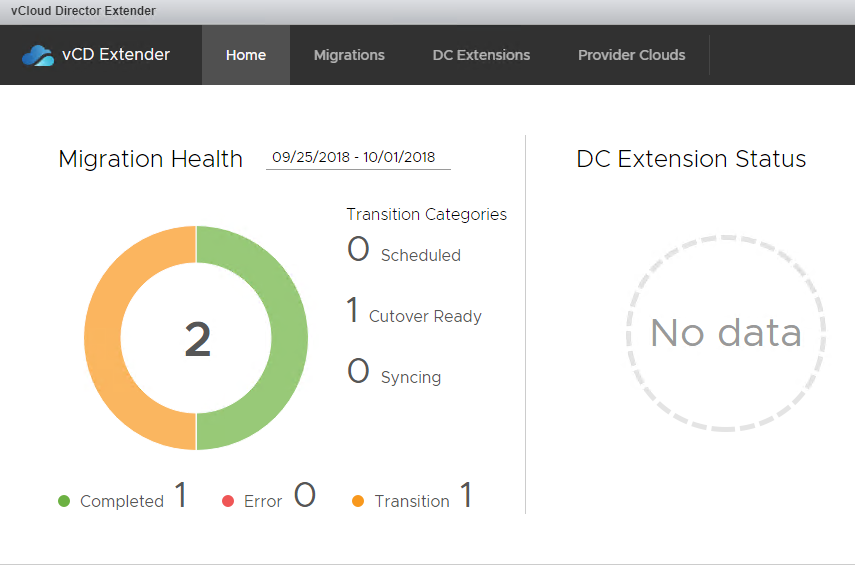
Under the ‘Home’ page, VM status is listed as ‘Transition’ state
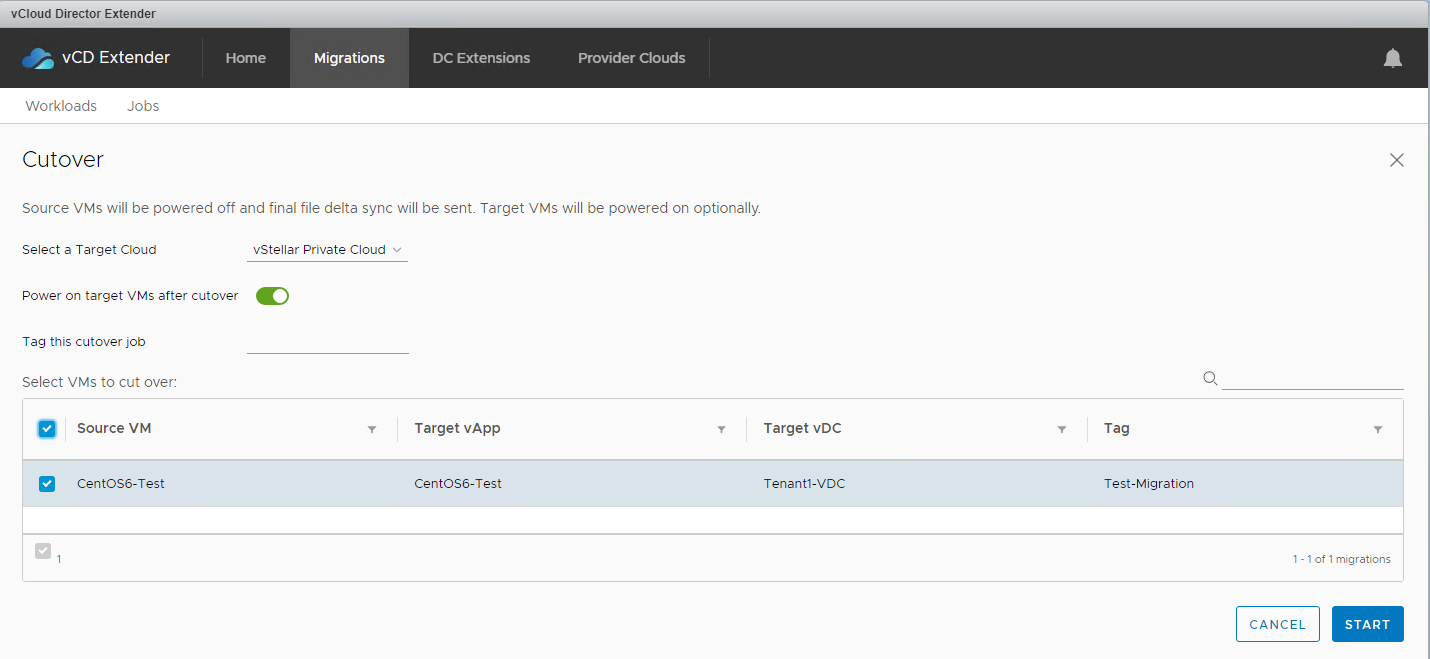
To migrate this VM permanently on the cloud provider side, click the Start cutover button, which opens the cutover wizard.
Select the VM from the list and click the Start button.
Click OK to confirm the cutover for the selected vm.
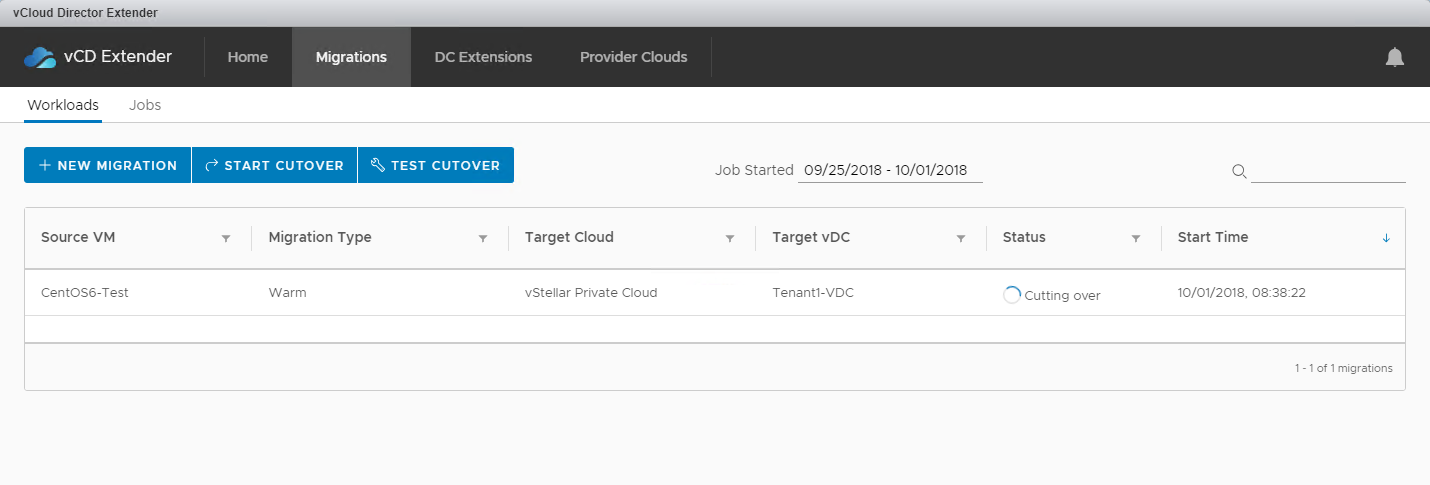
Keep an eye on the cutover process.
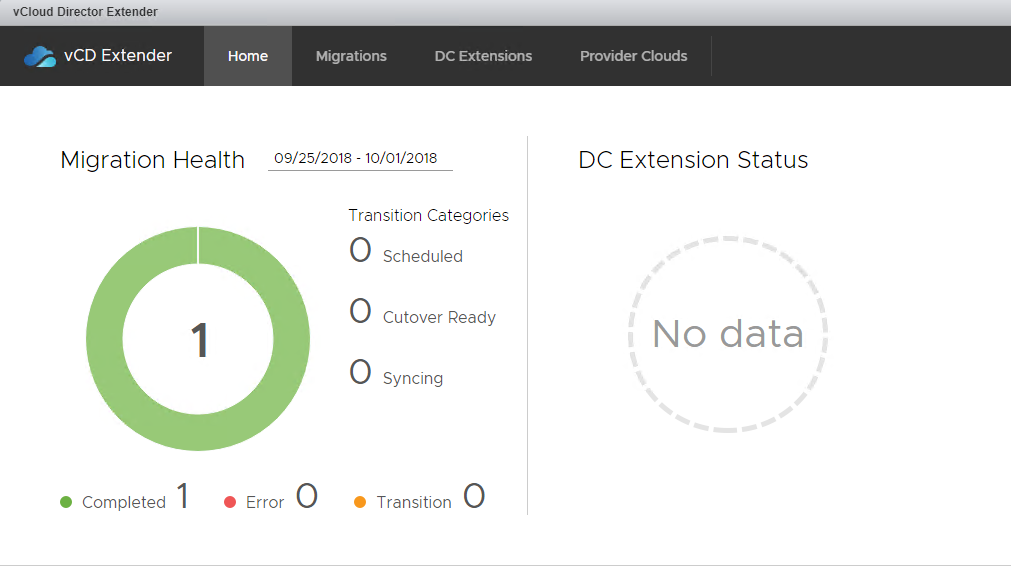
When the cutover is complete, the status changes to completed.
Under the home page, you can verify the same.
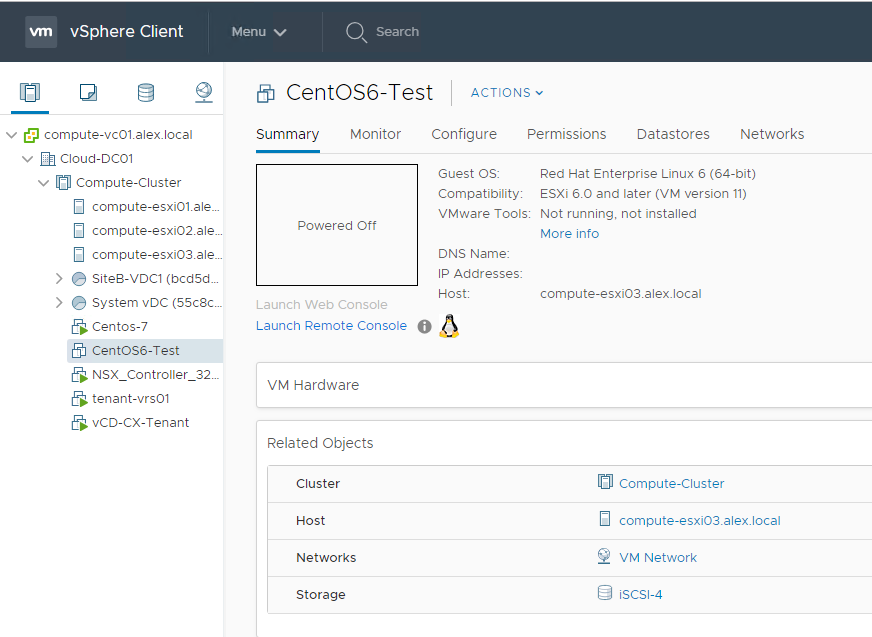
Post migration, the on-prem VM will be in a powered-off state in vCenter.
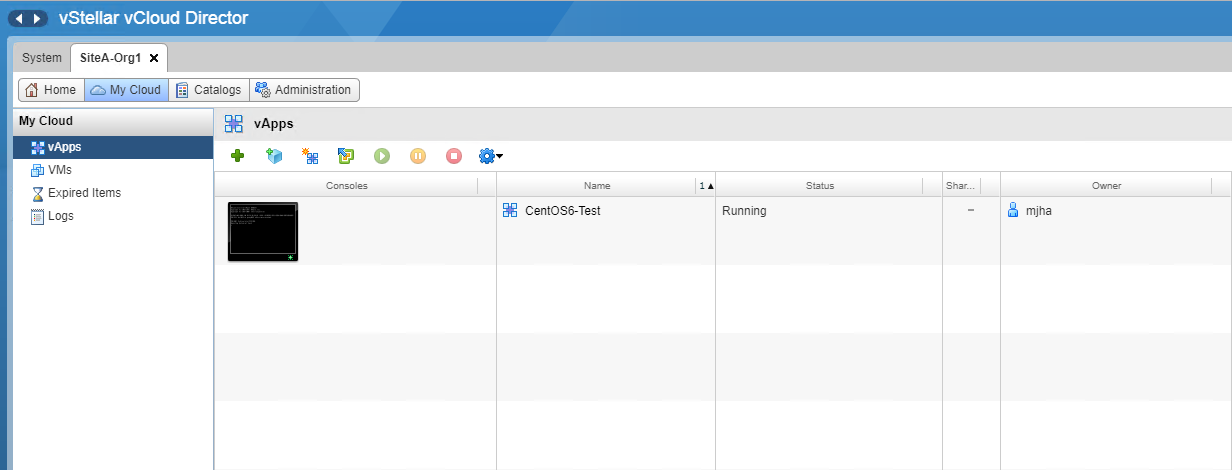
On the cloud provider site, the VM will be registered in vCD and will be running.
And that’s it for this post. In the next post of this series, I will demonstrate how to perform layer 2 extension using vCloud Extender.
I hope you enjoyed reading this post. Feel free to share this on social media if it’s worth sharing.


