In last post of this series, we learnt how to deploy NSX-T controllers automatically via NSX manager and we saw its pretty much same as deploying controllers in a NSX-V environment.
In this post we will learn how to deploy the NSX controllers manually.
If you are not following along this series, then I recommend reading earlier posts of this series from below links:
4: NSX Controllers Automated Deployment
Manual steps are a bit lengthy and complex so we have to be careful with the sequence of commands which we will be running to form controllers cluster. Before deploying the controller nodes, make sure following prerequisites are met:
- vCenter Server and ESXi hosts are deployed.
- Esxi hosts have been added to vCenter and networking and storage configuration on hosts are in place.
- NSX Manager is deployed.
- ESXi host must have enough CPU, memory, and hard disk resources to support controller deployment.
Manual deployment steps are as follows:
1: Deploy controller node.
This is the first controller node that will be deployed. Deployment is a straight forward ovf deployment task as shown in below slideshow.
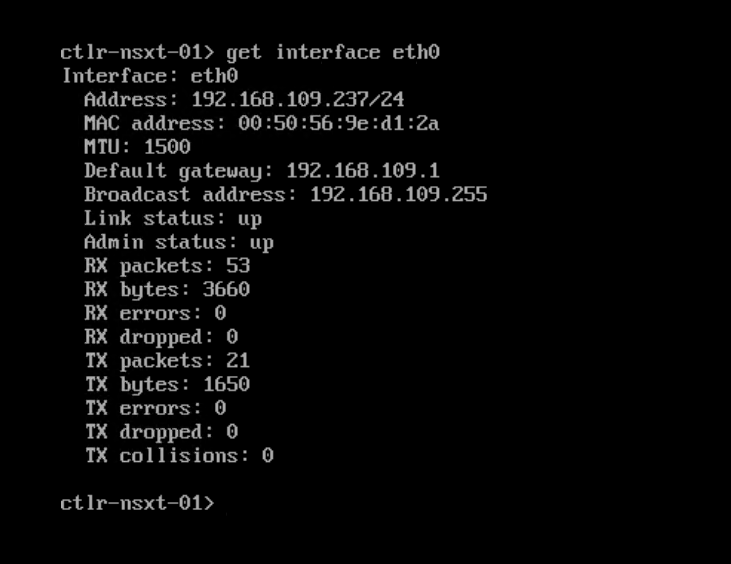
Once the first controller boots up, verify that it has got the correct IP address which was set during OVF deployment.

Step 2: Obtain NSX Manager API thumbprint.
We need this thumbprint in next step when we will be manually joining the first controller node to NSX Manager. To obtain this thumbprint, follow below steps:
- Login to NSX manager via SSH
- Run command : get certificate api thumbprint
|
1 2 |
nsxt-01> get certificate api thumbprint fd5a1bdd0fd6db09fdcf245b4d844da5ae8c61f7aaab2d48027367b536aef8e1 |
Step 3: Join NSX Controller with the NSX Manager.
Run below command on controller node to join it to NSX manager
# join management-plane NSX-Manager-IP-address username admin thumbprint <NSX-Manager-thumbprint>
Example:
|
1 2 3 4 |
ctlr-nsxt-01> join management-plane 192.168.109.29 username admin thumbprint fd5a1bdd0fd6db09fdcf245b4d844da5ae8c61f7aaab2d48027367b536aef8e1 Password for API user: Node successfully registered and controller restarted |
Step 4: Verify that controller has joined NSX Manager
|
1 2 |
ctlr-nsxt-01> get managers - 192.168.109.29 Connected |
Step 5: From NSX manager verify that the first controller is now listing.
Run the get management-cluster status command to do so.
|
1 2 3 4 5 6 7 8 |
nsxt-01> get management-cluster status Number of nodes in management cluster: 1 - 192.168.109.29 (UUID b6992142-32cd-b331-8a40-3303031d7a3b) Online Management cluster status: STABLE Number of nodes in control cluster: 1 - 192.168.109.237 (UUID 99a200ef-5921-4c35-b20b-b66f788f010a) |
Step 6: Initialize the Control Cluster to Create a Control Cluster Master.
Run following commands on the first controller to make it master of the cluster.
|
1 2 |
ctlr-nsxt-01> set control-cluster security-model shared-secret secret <Secret Passwd> Security secret successfully set on the node. |
b: Run the initialize control-cluster command to make the first controller the control cluster master.
|
1 2 |
ctlr-nsxt-01> initialize control-cluster Control cluster initialization successful. |
c: Verify that is master and in majority are true, the status is active, and the Zookeeper Server IP is reachable, ok.
|
1 2 3 4 5 6 7 8 9 10 11 12 13 14 15 16 17 18 19 20 21 22 23 24 25 26 27 28 29 |
ctlr-nsxt-01> get control-cluster status verbose NSX Controller Status: uuid: 99a200ef-5921-4c35-b20b-b66f788f010a is master: true in majority: true uuid address status 99a200ef-5921-4c35-b20b-b66f788f010a 192.168.109.237 active Cluster Management Server Status: uuid rpc address rpc port global id vpn address status a108e116-f3ba-4bf0-91b8-1c12e814b888 192.168.109.237 7777 1 169.254.1.1 connected Zookeeper Ensemble Status: Zookeeper Server IP: 169.254.1.1, reachable, ok Zookeeper version: 3.5.1-alpha--1, built on 05/15/2018 22:28 GMT Latency min/avg/max: 0/0/72 Received: 967 Sent: 992 Connections: 3 Outstanding: 0 Zxid: 0x1000000c3 Mode: leader Node count: 31 Connections: /169.254.1.1:36384[1](queued=0,recved=509,sent=526,sid=0x100006f11fa0002,lop=GETD,est=1532940432151,to=40000,lcxid=0x162,lzxid=0x1000000c3,lresp=9591565,llat=0,minlat=0,avglat=0,maxlat=21) /169.254.1.1:36640[0](queued=0,recved=1,sent=0) /169.254.1.1:36436[1](queued=0,recved=293,sent=302,sid=0x100006f11fa0006,lop=PING,est=1532940495485,to=40000,lcxid=0x7c,lzxid=0x1000000c2,lresp=9586618,llat=0,minlat=0,avglat=0,maxlat=4) |
Now if you login to NSX Manager, you will see the cluster and manager connectivity status as Up for the first controller node

Step 7: Deploy the 2nd and 3rd controller vm’s.
Step 8: Repeat Step-3 for both the newly deployed controller nodes and verify that they have joined the management plane.
Step 9: Join 2nd and 3rd controllers to controllers clusters by following below steps:
9a: Open an SSH session for 2nd and 3rd controller appliances.
9b: On the 2nd and 3rd controller nodes, run below command
# set control-cluster security-model shared-secret <Secret-Paassword>
Note: Use the same password used in Step 6. Example shown below:
|
1 2 3 |
ctlr-nsxt-02> set control-cluster security-model shared-secret Secret: Security secret successfully set on the node. |
9c: Get certificate thumbprint of controller 2 and 3 nodes.
|
1 2 |
ctlr-nsxt-02> get control-cluster certificate thumbprint b50423678624932a2b0bc5782f20b6d8c68286a4b26b94d54167fc216f997a64 |
9d: SSH to controller-1 (master node) and run below command to form cluster with controller-2 and 3
Important: Below command should always be run from master node and always use controller 2/3 IP address and not the hostname.
# join control-cluster <NSX-Controller2-IP> thumbprint <nsx-controller2’s-thumbprint>
Example:
|
1 2 3 |
ctlr-nsxt-01> join control-cluster 192.168.109.238 thumbprint b50423678624932a2b0bc5782f20b6d8c68286a4b26b94d54167fc216f997a64 Node 192.168.109.238 has successfully joined the control cluster. Please run 'activate control-cluster' command on the new node. |
Make sure that NSX-Controller 2 has joined the cluster by running the get control-cluster status command.
9e: On both NSX Controller 2 and 3 nodes run the command: activate control-cluster
|
1 2 |
ctlr-nsxt-02> activate control-cluster Control cluster activation successful. |
The second controller is now added to cluster and both manager and cluster connectivity is up.

