I am currently going through VCAP 6 objective 3.2 and the very firts task in this objective is to deploy a LAG and Migrate to LACP. Although I have read about this in past and we use this in our production environment, I never got a chance to configure this in my homelab because of hardware restrictions (this is true till date 🙁
Well before jumping into LACP configuration, lets discuss a bit about few networking terms here (networking was/is always a big headache for me).
- Link Aggregation Group (LAG): The simplest definition of LAG can be defined as bonding of ethernet links in order to achieve greater throughput.
- Link Aggregation Control Protocol (LACP): This is a protocol which is defined in the 802.1AX standard, and it provides a method for automating LAG configurations. LACP-capable devices discover each other by sending LACP packets (called LACPDUs) to the Slow_Protocols_Multicast address 01-80-c2-00-00-02. They then negotiate the forming/not forming of the LAG.
LAG/LACP in vSphere 6
LACP support is available since vSphere 5.1 and it helps connecting Esxi hosts to physical switches by using dynamic link aggregation. To aggregate the bandwidth of multiple physical NICs (that are connected to LACP port channels) on a host, LAG is created on vDS and use it to handle the traffic of distributed port groups. When you create a LAG, it should be the only Active uplink for a portgroup.
An Esxi host support up to 32 LAGs, but in actual the number of LAGs that can be used depends on the capabilities of the underlying physical switch. For example if the physical switch supports up to four ports in a LACP port channel you can connect up to four physical NICs per host to a LAG.
Below image from vmware, gives an overview of how LAG configuration looks like
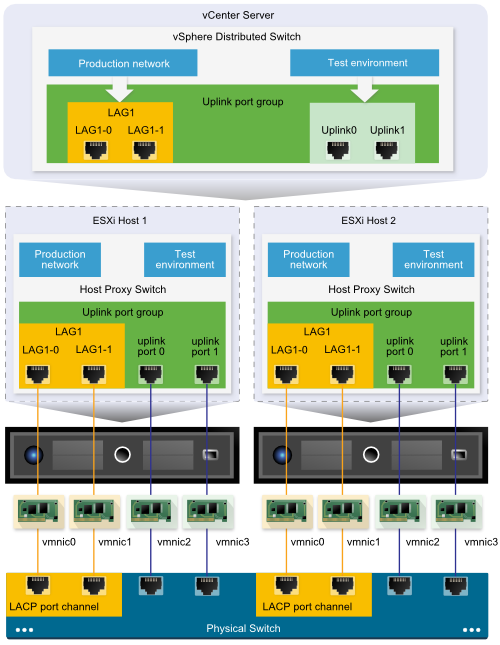
A LAG can be created with 2 or more ports and then connecting those ports to physical NIC. Network traffic between the ports is then load balanced via LACP hashing algorithm. When a LAG is created on the vDS, it creates a LAG object on the proxy switch of every Esxi host that is connected with that vDS.
At the Esxi host proxy switch level, only one physical NIC can be connected to one LAG port. However on the vDS, one LAG port can have multiple physical NICs from different hosts connected to it.
Important: The physical NICs on a host that connects to the LAG ports must be connected to links that participate in an LACP port channel on the physical switch.
Design considerations for Port Channel Configuration on the Physical Switch
- The number of ports in the LACP port channel must be equal to the number of physical NICs that will be grouped on the host.
- The hashing algorithm of the LACP port channel on the physical switch must match what is configured on the vDS LAG.
- All physical NICs that is connected to the LACP port channel must be configured with the same speed and duplex settings.
LACP limitations on a vDS
- LACP is not supported/compatible with software iSCSI mulitpathing.
- LACP support settings are not available in Host Profiles.
- LACP support is not possible between nested ESXi hosts.
- LACP support does not work with port mirroring.
- Team and failover health check does not work for LAG ports.
Does LAG really provides Load Balancing?
Answer to this question is NO. Load balance is actually a wrong term which we use with LAG. What LAG does is “Load Distribution” and there is significant difference in both terms. When we call load balancing, it means distributing equal amont of load on all links that are part of the LAG.
Say for e.g if a LAG has 4 uplinks, and each of them is carrying 40% of total traffic, we can say the load is balanced across all 4 links. But thats not true with LAG.
LAG does the load distribution where it algorithmically assign sessions to a given uplink based on a hash value that the algorithm has calculated, and then tries distribute the sessions as evenly as possible.
How to configure LAG in vSphere 6?
Unfortunately in my lab, I do not have a network device where I can create port channel prior to configuring LAG/LACP in vSphere. However I will show you the setps needed in vShere side, when you have a proper port channel setup on physical switch.
Login to vSphere Web Client and naviagte to Networking view. Select the vDS > Manage > Settings > LACP option and click on green + button to add a lag group.

Provide a name for the lag group and select number of ports that will participate in this lag. Number of ports should be equal to number of links that can be added to port channel on physical switch.
There are 2 modes available with lag configuration i.e active and passive.
An active device will actively seek out a peer device to form a LAG, while a passive device will only listen for requests. At least one of the two devices must be active, or else both will only listen. I have selected the default option here i.e passive.
Select any of the load balancing mode as per requirements of your environment.
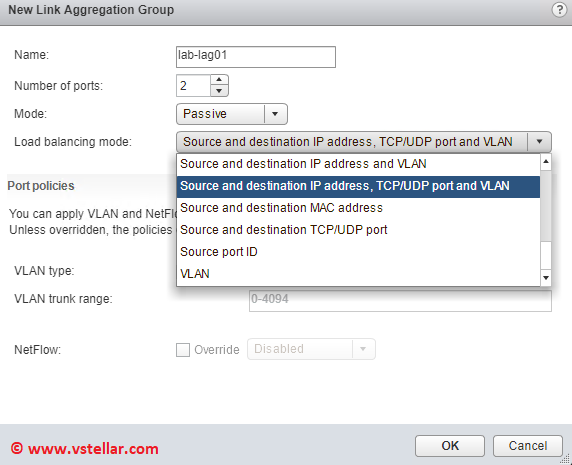
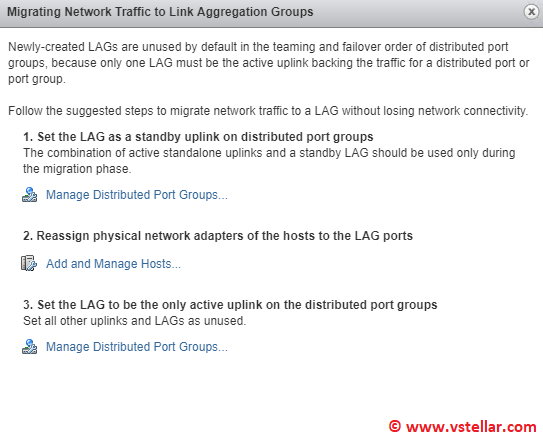
Once the lag is created, click on Managing network traffic to LAGs option.

It will open a 3 step wizard which shows the workflow for successfully configuring LACP.
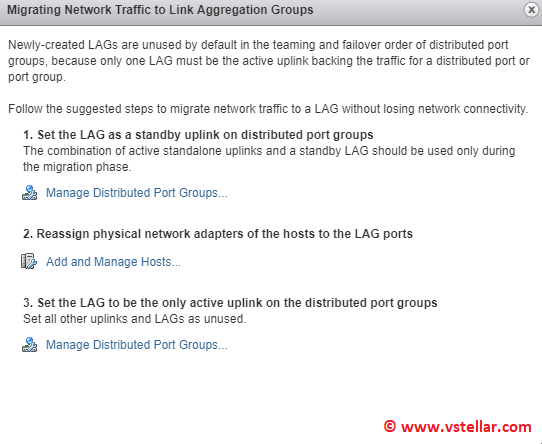
Click on Manage Distributed Port Groups and from the newly opened wizard select Teaming and failover.
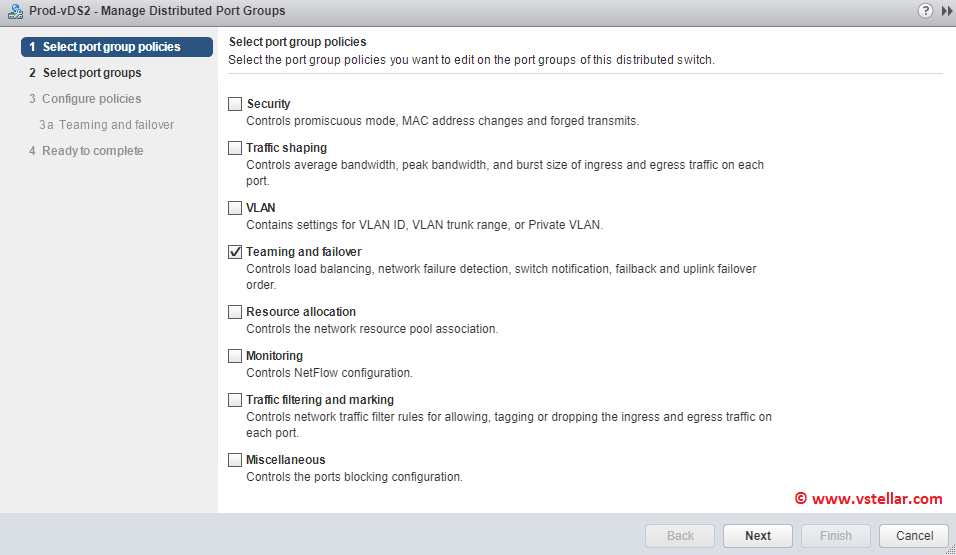
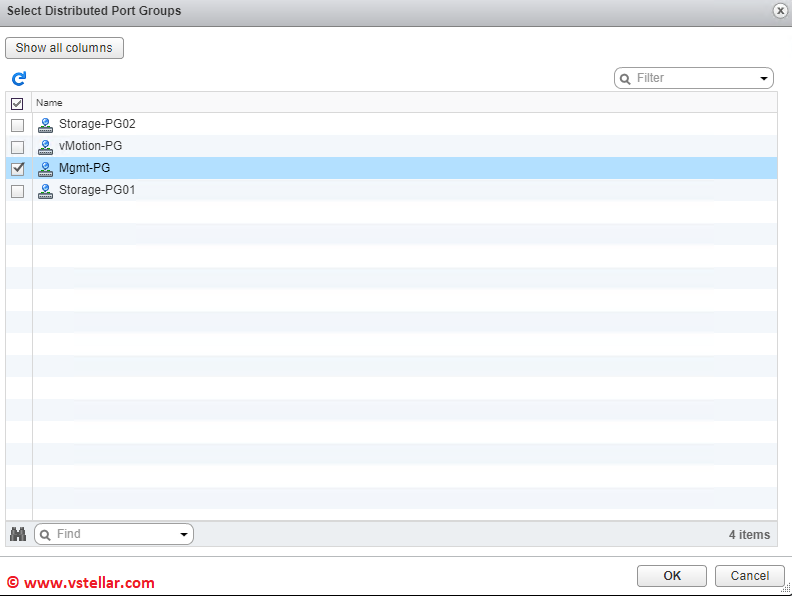
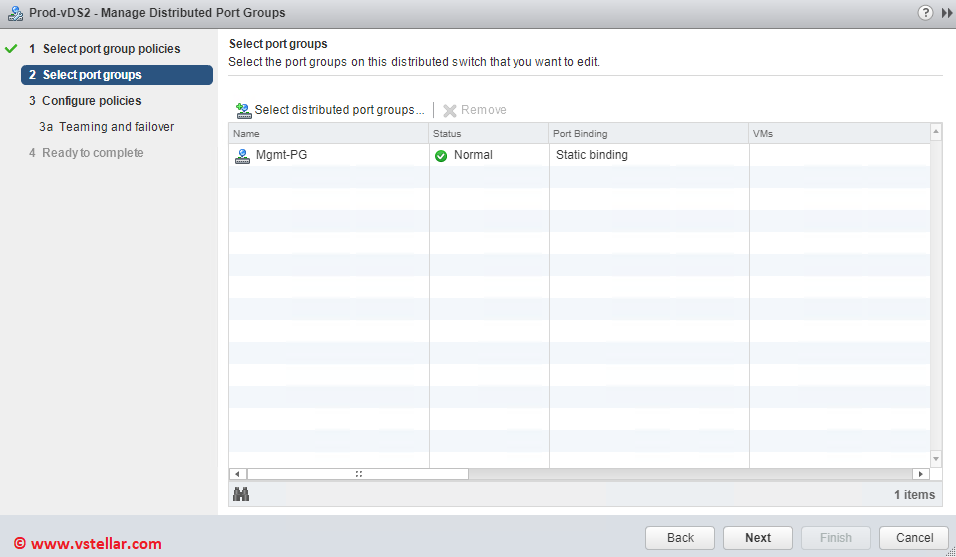
Select the port group from list which you want to add to LAG config.
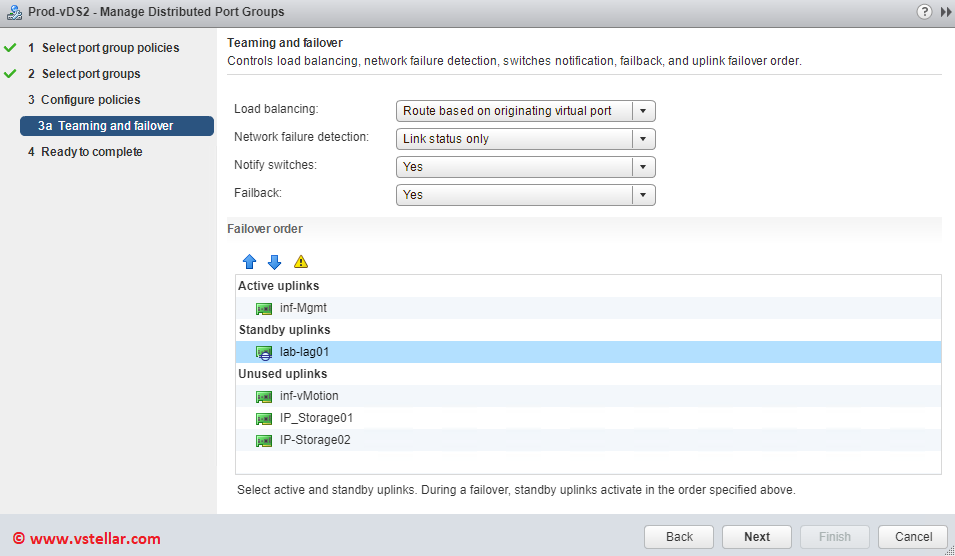
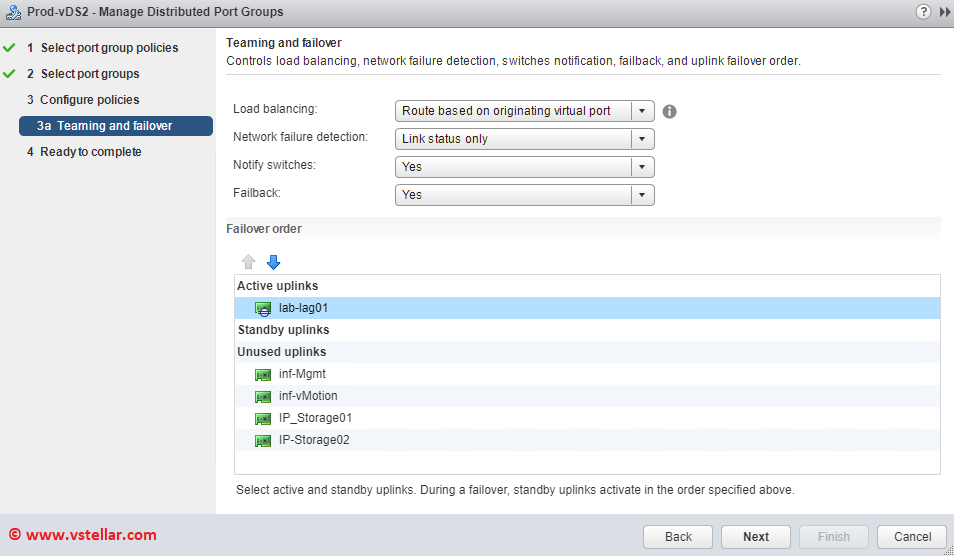
Make sure standalone uplink is Active and the newly created lag is in standby. This is just during migration of networking. Later we will come here again and will make LAG as Active uplink for the selected port group.
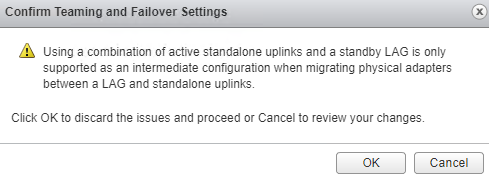
Click yes on the warning presented.
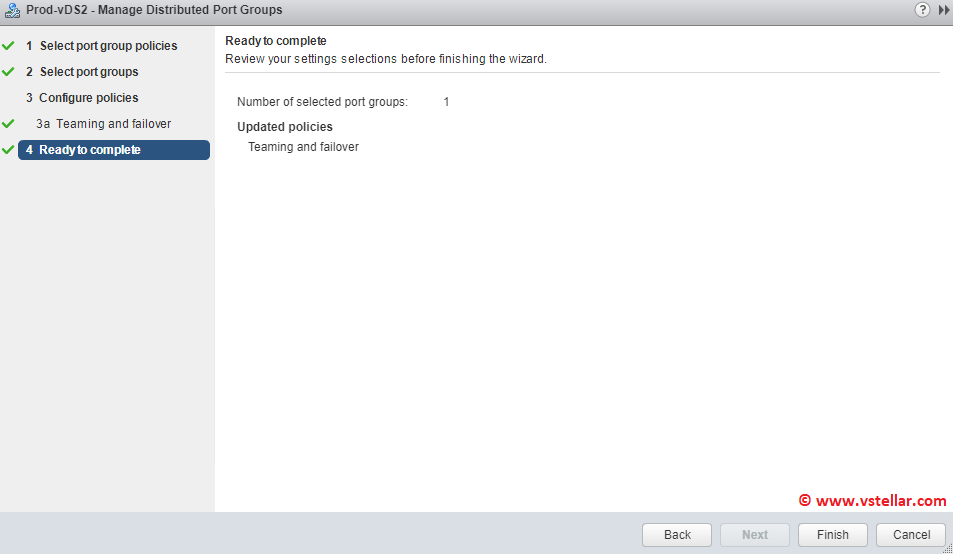
Review your settings and hit finish.
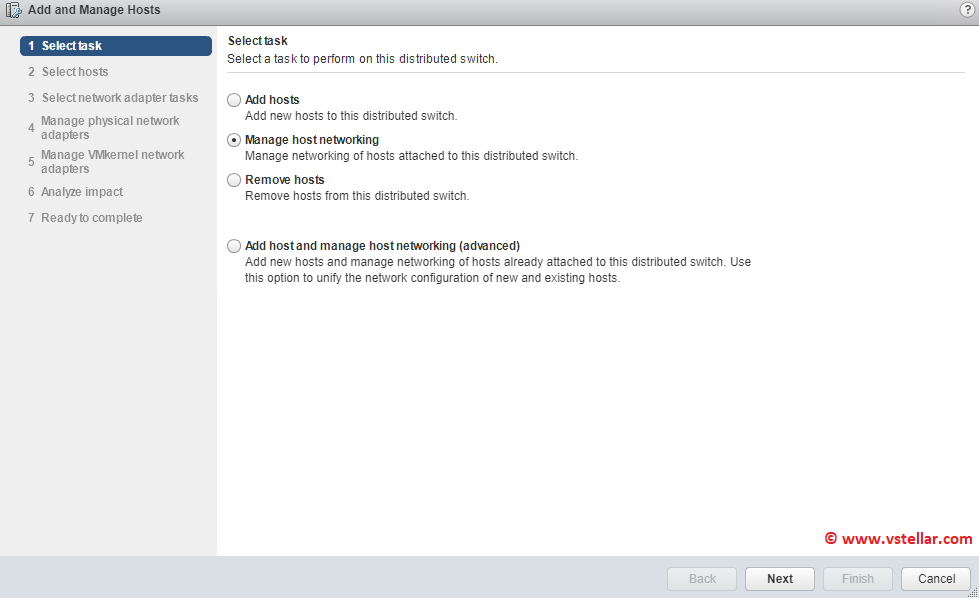
You will return back to the 3 step wizard. Now click on Add and Manage Hosts.
Select Manage host networking and hit next.
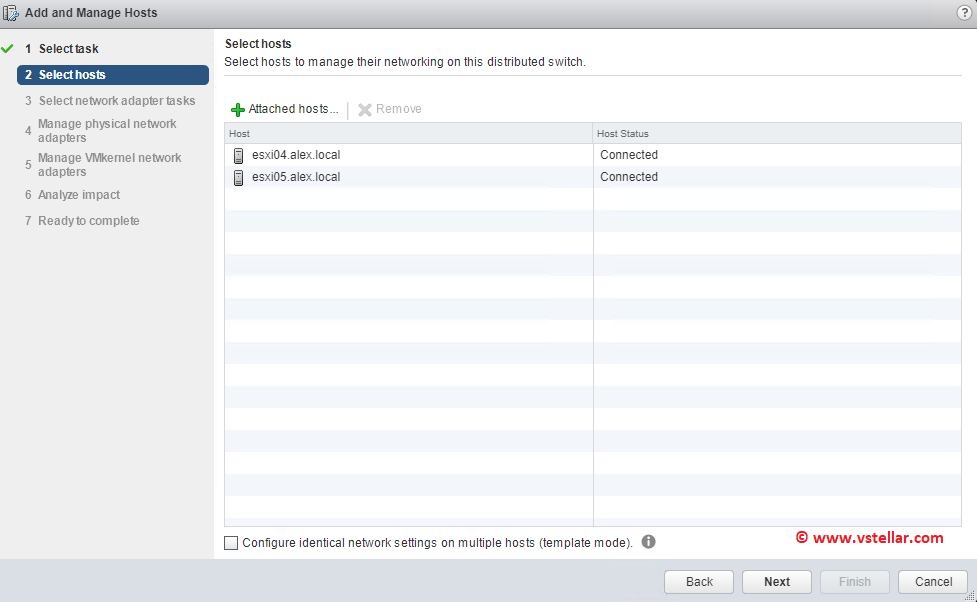
Attach the Esxi hosts that will participate in LAG config.
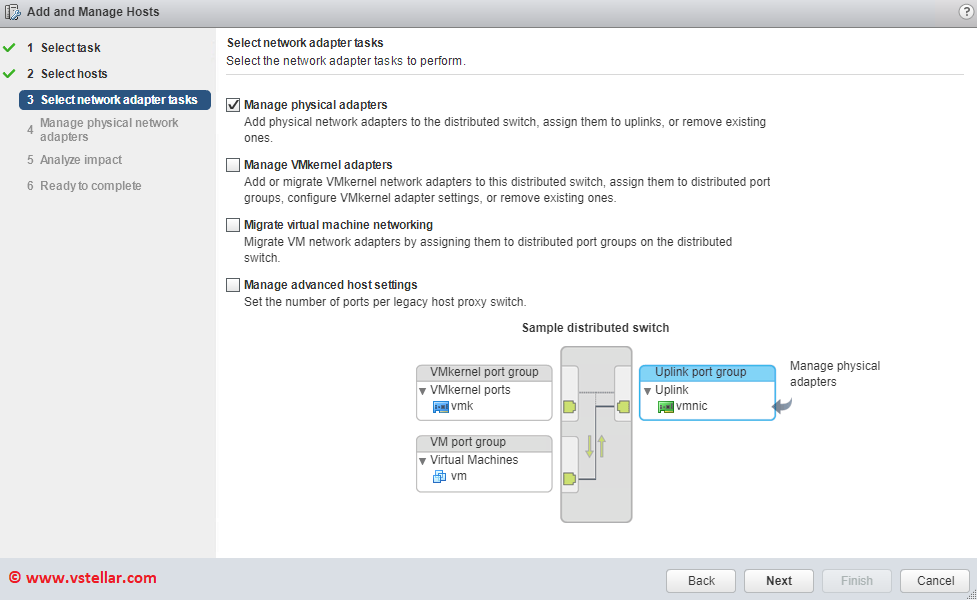
Select manage physical adapters and hit Next.
Select the physical link which is connected to port configured for port channel on physical switch and click on Assign uplinks.
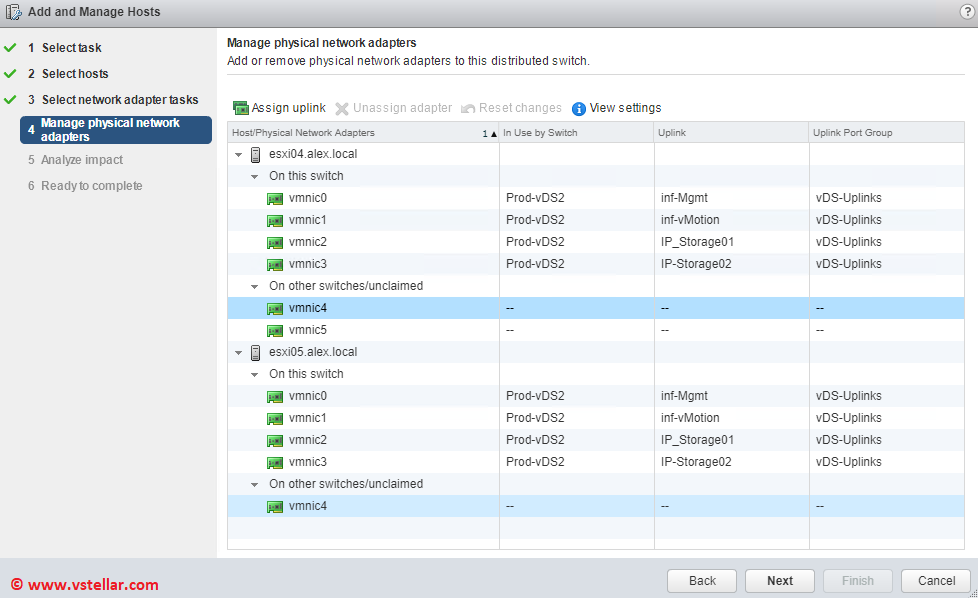
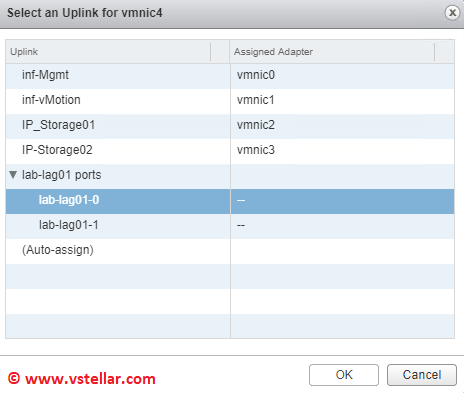
You will see 2 lag objects in the list (we discussed about this earlier in this post).
Select the lab object to which you want to add the physical link.
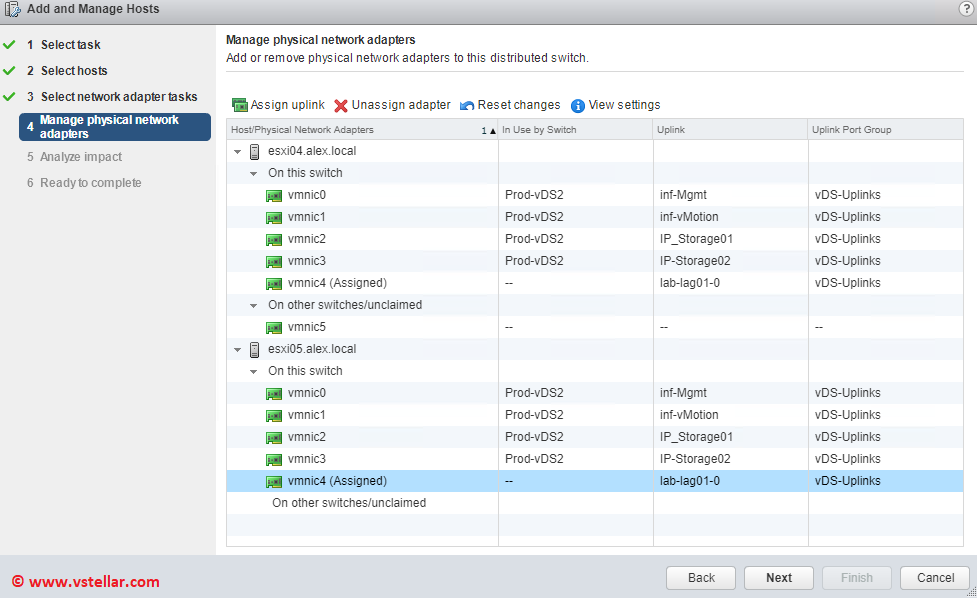
Repeat this for all Esxi host. I have only 2 Esxi host in my lab and my configuration at this point looks like below.
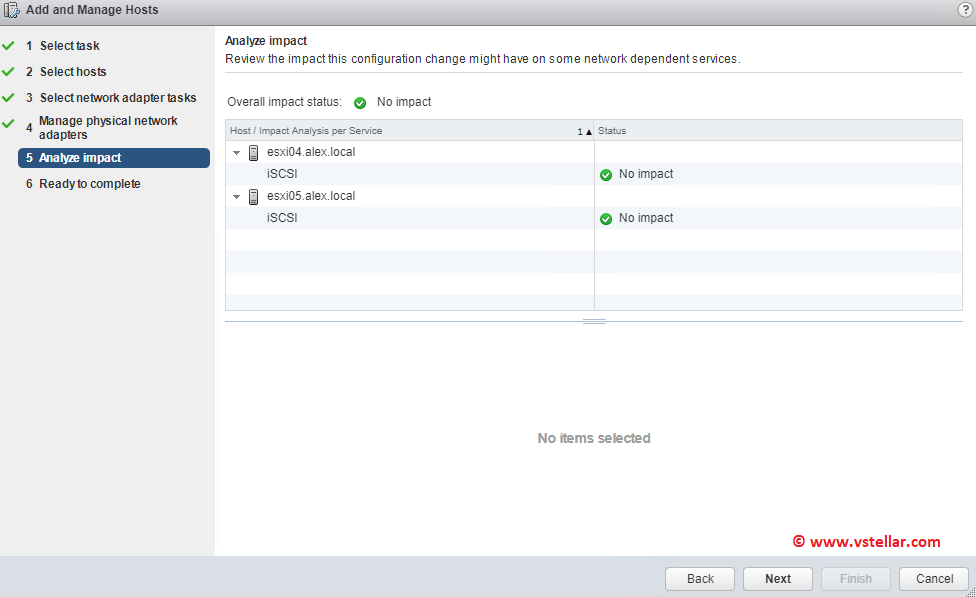
Make sure Analyze impact page reads “No Impact”.
Review your settings and hit finish.
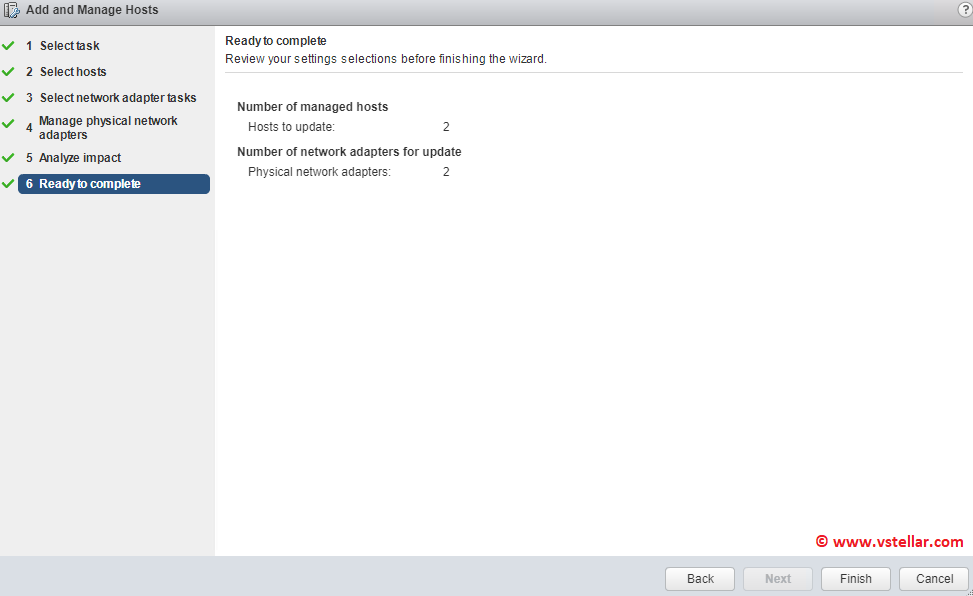
Now you will be returned back to migration wizard.
Click on option 3 this time.

Again select “Teaming and failover” and hit Next.
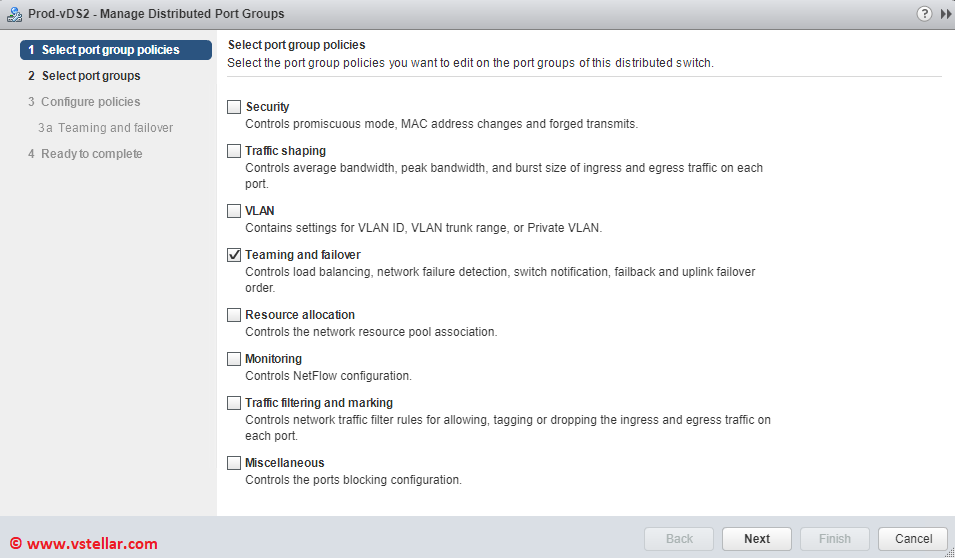
Select the portgroup which we added to LAG configuration earlier.
Now make the LAG as active uplink and the standalone physical link as unused.
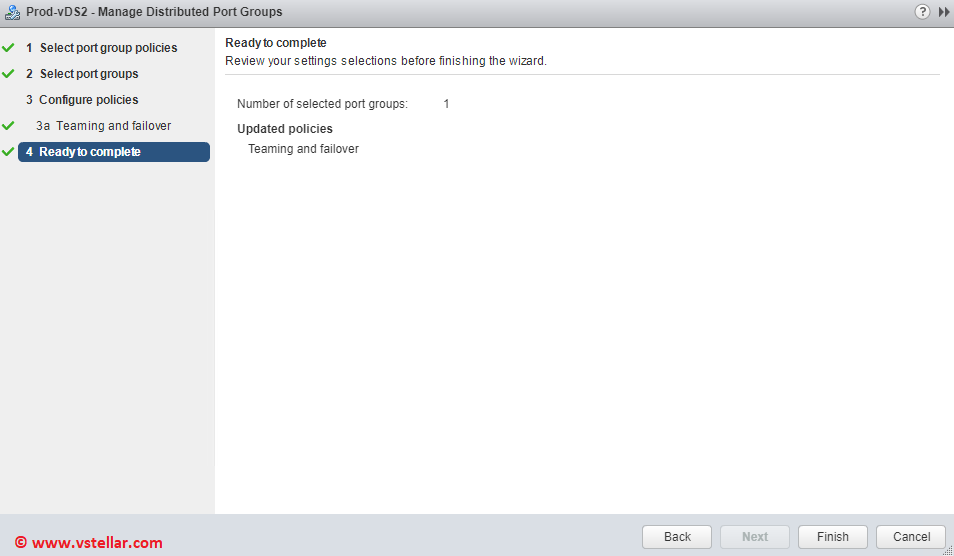
Review your settings and hit Finish.
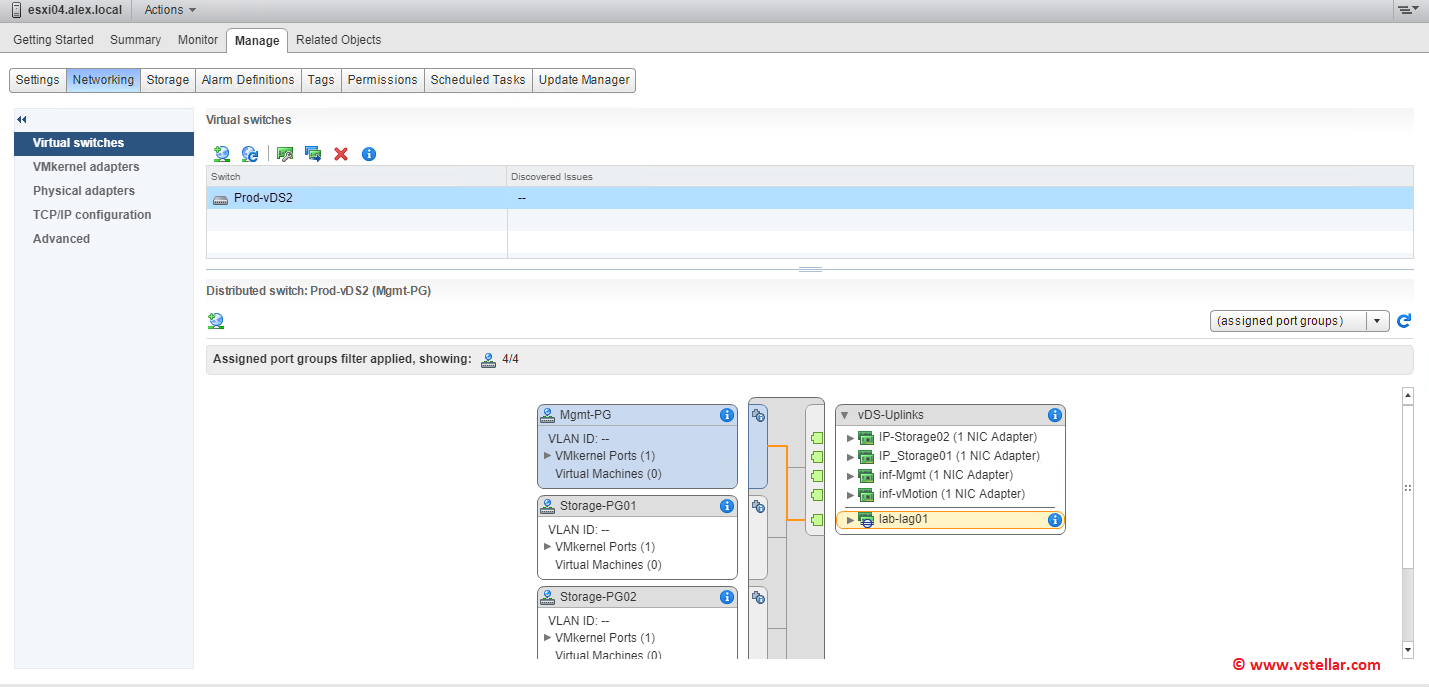
Now if you go the Esxi host networking view, you will see that the LAG is present there.
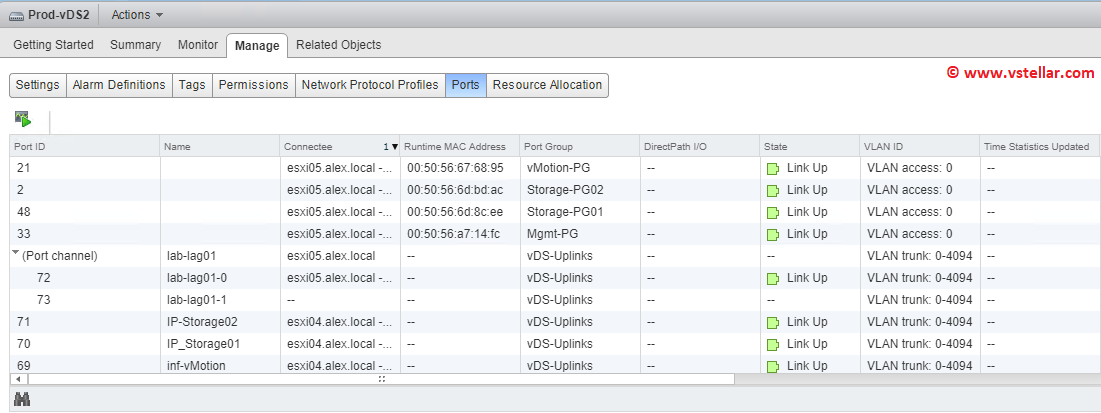
Also if you select vDS > Manage > Ports, you will see an extra item there i.e (Port Channel)
And thats it. We have now finished vSphere side of configuration needed for LACP.
Additional Readings
How MLAG interacts with the host
Enhanced LACP Support with vSphere 5.5
Advanced LACP configuration using esxcli
The Safest Way to Convert to LACP
I hope you find this post informational. Feel free to share this on social media if it is worth sharing. Be sociable 🙂
