Last year I wrote a post on how to install and configure VUM and UMDS, but never got chance to connect UMDS to VUM and ended up downloading patches directly on VUM server via internet.
Once again I am playing with UMDS in lab and in this post we will cover why we need UMDS and how to configure it.
I am not covering steps for installing VUM/UMDS here because they are pretty straight forward and if you are new to these things, you can read the instructions about installation steps from here.
What is Update Manager Download Service?
Update Manager Download Service (UMDS) is an optional component which you can deploy with update manager. We can download upgrades for virtual appliances, patch metadata, patch binaries and notifications etc using UMDS.
Why we need UMDS when VUM is there?
Its a obvious question to ask that why we need UMDS when VUM is capable of downloading and installing patches on Esxi hosts/vApps. The answer of this lies in 2 use cases discussed below:
- If the security policies in your your environment deny Internet access for the Update Manager VM(s), you can configure UMDS on a server that has Internet Access and automate the export process and transfer files from the UMDS to the Update Manager server by setting up a Web Server on the VM on which UMDS is installed.
- There is a one to one mapping between VUM and vCenter and if you have multiple vCenter servers in your environment, you can save yourself from deploying ‘n’ number of VUM servers and just configure a single repository in UMDS and pointing all the VUM servers to that central repository and thus saving space/resources.
After you download patch data and notifications with UMDS, and export the downloads so that they become available to the Update Manager server, Update Manager deletes the recalled patches and displays the notifications on the Notifications tab.
Exploring UMDS
Post installation of UMDS, you can use the vmware-umds command to configure the UMDS server. This executable is located in the installation directory of UMDS, which defaults to C:\Program Files (x86)\VMware\Infrastructure\Update Manager.
To list the current configuration of UMDS, run ‘vmware-umds -G’ command
|
1 2 3 4 5 6 7 8 9 10 11 12 13 14 15 16 17 18 19 20 |
PS C:\Program Files (x86)\VMware\Infrastructure\Update Manager> .\vmware-umds -G Configured URLs URL Type Removable URL HOST NO HOST NO https://hostupdate.vmware.com/software/VUM/PRODUCTION/main/vmw-depot-index.xml HOST NO https://hostupdate.vmware.com/software/VUM/PRODUCTION/csco-main/csco-depot-index.xml VA NO http://vapp-updates.vmware.com/vai-catalog/index.xml Patch store location : C:\Patch-Store Export store location : Proxy Server : Not configured Host patch content download: enabled Host Versions for which patch content will be downloaded: embeddedEsx-6.0.0-INTL embeddedEsx-5.0.0-INTL embeddedEsx-5.1.0-INTL embeddedEsx-5.5.0-INTL Virtual appliance content download: disabled |
To list all available option with umds, run vmware-umds command without any arguments
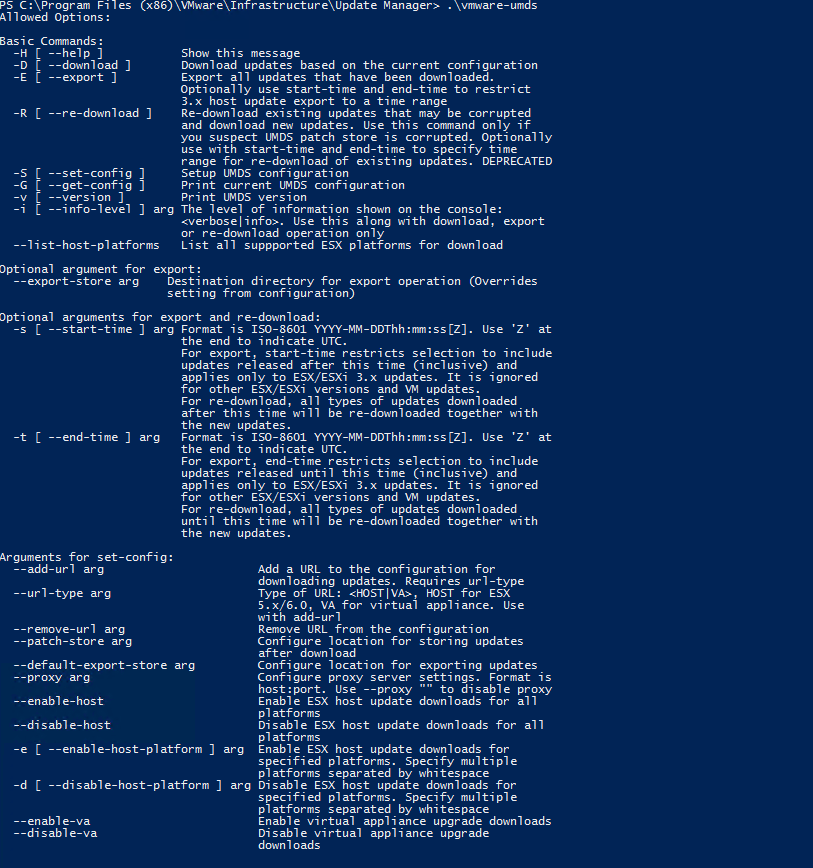
You can list the host platforms that is supported by UMDS 6.0 by running below command:
|
1 2 3 4 5 6 |
PS C:\Program Files (x86)\VMware\Infrastructure\Update Manager> .\vmware-umds.exe --list-host-platforms Supported ESX Host platforms: embeddedEsx-5.0.0 embeddedEsx-5.1.0 embeddedEsx-5.5.0 embeddedEsx-6.0.0 |
Configure URLs for Hosts and Virtual Appliances
By default VUM have few URL’s configured for downloading the patches etc. You can add/remove additional download URL’s for Host and VA as shown below:
|
1 2 3 4 5 6 7 8 9 10 11 |
Add a download URL for host updates vmware-umds -S --add-url https://download_URL/index.xml --url-type HOST Add a download URL for virtual appliance upgrades vmware-umds -S --add-url https://download_URL/index.xml --url-type VA Remove a URL so that UMDS does not download data from it anymore vmware-umds -S --remove-url https://download_URL/index.xml |
Configuring UMDS and connecting it to VUM
1: Disable patch download for older version of Esxi hosts
By default UMDS 6.0 is configured to download host patches for Esxi 5.0/51. If your environment do not have any 5.X hosts, you can disable patch downloads for these by running below command:
|
1 2 3 4 |
PS C:\Program Files (x86)\VMware\Infrastructure\Update Manager> .\vmware-umds -S -d embeddedEsx-5.0.0-INTL File path = C:\Program Files (x86)\VMware\Infrastructure\Update Manager\downloadConfig.xml Setting up UMDS configuration Host update downloads for platform embeddedEsx-5.0.0-INTL: Disabled |
I have disabled all 5.X versions in my lab setup.
2: Enables the download of ESXi host updates only
If you do not wish to update any virtual appliance in your environment using VUM, you can disable the downloads for VA’s by running below command:
|
1 2 3 4 5 6 7 8 |
PS C:\Program Files (x86)\VMware\Infrastructure\Update Manager> .\vmware-umds -S --enable-host --disable-va File path = C:\Program Files (x86)\VMware\Infrastructure\Update Manager\downloadConfig.xml Setting up UMDS configuration Host update downloads for platform embeddedEsx-5.0.0-INTL: Enabled Host update downloads for platform embeddedEsx-5.1.0-INTL: Enabled Host update downloads for platform embeddedEsx-5.5.0-INTL: Enabled Host update downloads: Enabled Virtual appliance upgrade downloads: Disabled |
You can play around other options available with enabling/disabling downloads as show below:
|
1 2 3 4 5 6 7 |
Enable download of both ESXi host updates and virtual appliance upgrades vmware-umds -S --enable-host --enable-va Enable download of virtual appliance upgrades only vmware-umds -S --disable-host --enable-va |
Change the UMDS Patch Repository Location
Default directory where UMDS stores all downloaded patches etc is C:\ProgramData\VMware\VMware Update Manager\Data\. You can change it by running below command:
|
1 2 3 4 5 6 |
PS C:\Program Files (x86)\VMware\Infrastructure\Update Manager> .\vmware-umds -S --patch-store C:\Patch-Store File path = C:\Program Files (x86)\VMware\Infrastructure\Update Manager\downloadConfig.xml Setting up UMDS configuration Directory for storing downloaded updates: C:\Patch-Store Directory C:\ProgramData\VMware\VMware Update Manager\Data\ is no longer used as the patch store. You may want to delete its contents or move it to the new location C:\Patch-Store Registry Updated80000002::SOFTWARE\VMware, Inc.\VMware Update Manager::C:\Patch-Store |
Note: If you are running the commands from windows powershell, you need elevated access to power shell else you are gonna get registry can’t be updated error.
Downloading and Exporting Patches
Run ‘vmware-umds -D’ command to instruct UMDS to download patches based on current configuration. Once the download is completed, you will see the details about number of patches downloaded, size of the download etc.

Once the download of patches is completed, we need to export it so that VUM server can use these. There are 2 ways of doing so:
1: Export the downloaded patches to an external drive and use it for importing it on VUM server. You can do so by creating a new directory for exporting the patches and then running the export command as shown below:
|
1 2 3 4 5 6 7 8 9 10 11 12 13 |
PS C:\Program Files (x86)\VMware\Infrastructure\Update Manager> .\vmware-umds -E --export-store C:\Patch-Repo INFO - Initializing connection pool INFO - Registering sequences INFO - Validating database version Starting export of updates... INFO - Exporting ESX 3x update metadata and packages INFO - Exporting ESX 4x and third party update metadata and packages INFO - Exporting data to folder :C:\Patch-Repo INFO - Copying file. Source file:C:\Patch-Store\hostupdate\__hostupdate20-consolidated-index__.xml, Destination file: C :\Patch-Repo\hostupdate\__hostupdate20-consolidated-index__.xml WARN - No host update meta data found. INFO - Packages exported: 0 INFO - vendor index contains 3 vendors. |
2: Second method is exporting via IIS. You need to add IIS role in your UMDS server. I am not going to cover the steps for IIS installation as there are tons of articles available on internet for doing so.
Once the IIS role has been installed, we need to add our patch repository directory as a virtual directory in IIS server.
Connect to the Web Server via IIS manager and select the default website and right click on it to add a virtual directory. Provide an alias name and location of directory where UMDS downloaded the patches
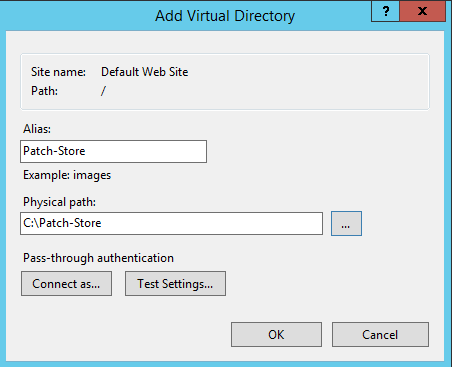
Once the directory is added, select it and click on MIME Types.

add .vib and .sig file extensions as MIME types.
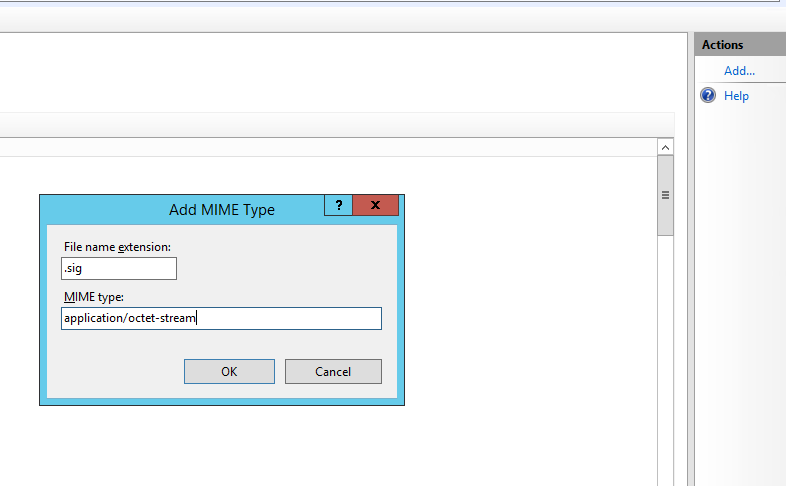
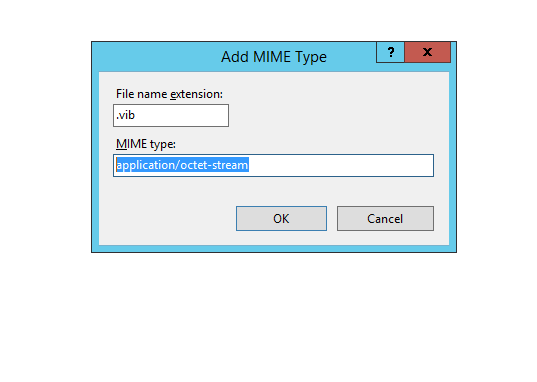
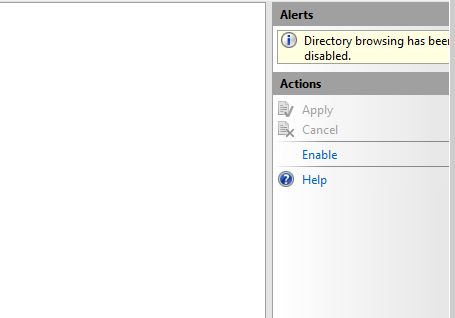
Once the MIME types have been added, select the virtual directory once again and click on Directory Browsing

Enable the directory browsing so that we can access it over URL
Form your VUM server, try accessing the virtual directory by typing http://UMDS-FQDN/virtualdirectoryame

Configure VUM to use the shared repository instead of direct Internet Connection
Login to Web Client, navigate to Update Manager, select the VUM Server and move to the Manage tab. Go to Settings-> Download Settings and click Edit

Select Use a shared repository and enter the URL for the download location configured previously
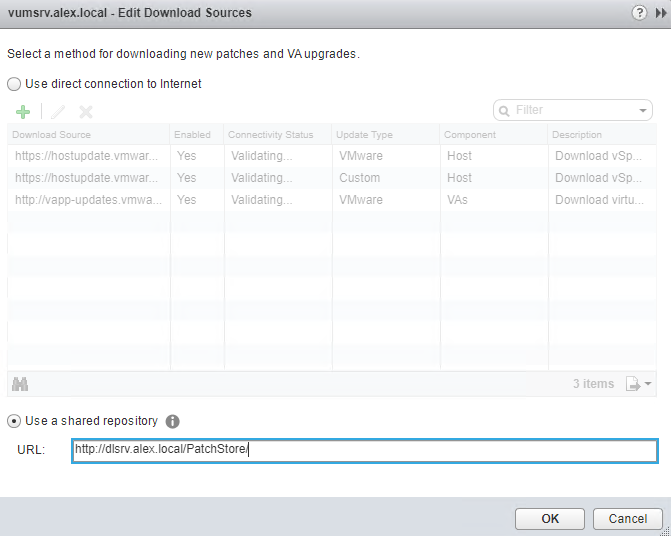
Verify the configuration by refreshing the Web Client

And that’s it. VUM will now download the patches from UMDS instead of internet.
In next post we will see how to create baselines and remediate Esxi hosts.
I hope you find this post informational. Feel free to share this on social media if it is worth sharing. Be sociable 🙂
