This week I was trying my hands on upgrading NSX to version 6.2.4 which was released earlier this year in August.
I had no experience earlier with upgrading NSX manager and associated components, so I spent a lot of time in reading blogs and watching videos on how to perform the upgrade.
Before starting with upgrade process please consult the NSX 6.2.4 Release Notes and also follow VMware KB-2144295 which explains recommended minimum versions for VMware NSX for vSphere, ESXi, vCenter Server and Guest Introspection Driver (GID).
To keep track of latest versions you can use vTracker or the Latest Versions page hosted on www.virten.net
You can follow the below upgrade matrix to find out the upgrade path available in your environment.
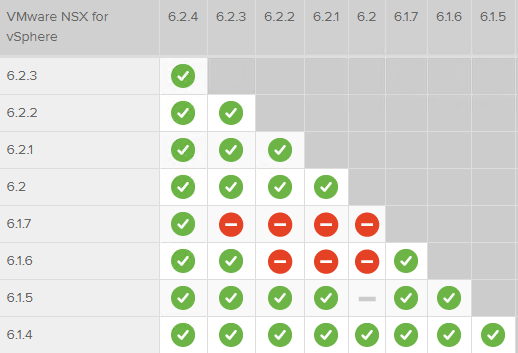
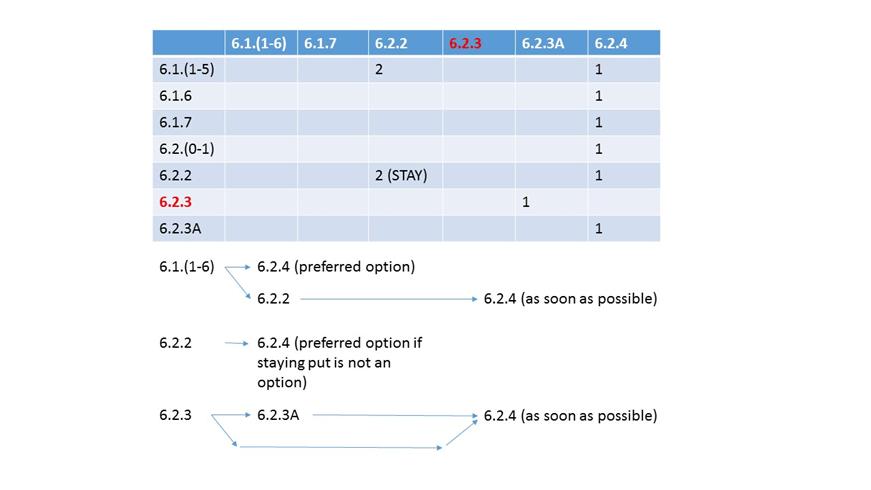
While going through the blogs on how to start upgrading NSX to 6.2.4, I came across screenshot of a cool table which Anthony has posted on his Blog.
This table gives you important info on how and when to upgrade from previous versions of NSX and also it gives a great overview of the pathways required to get to 6.2.4.
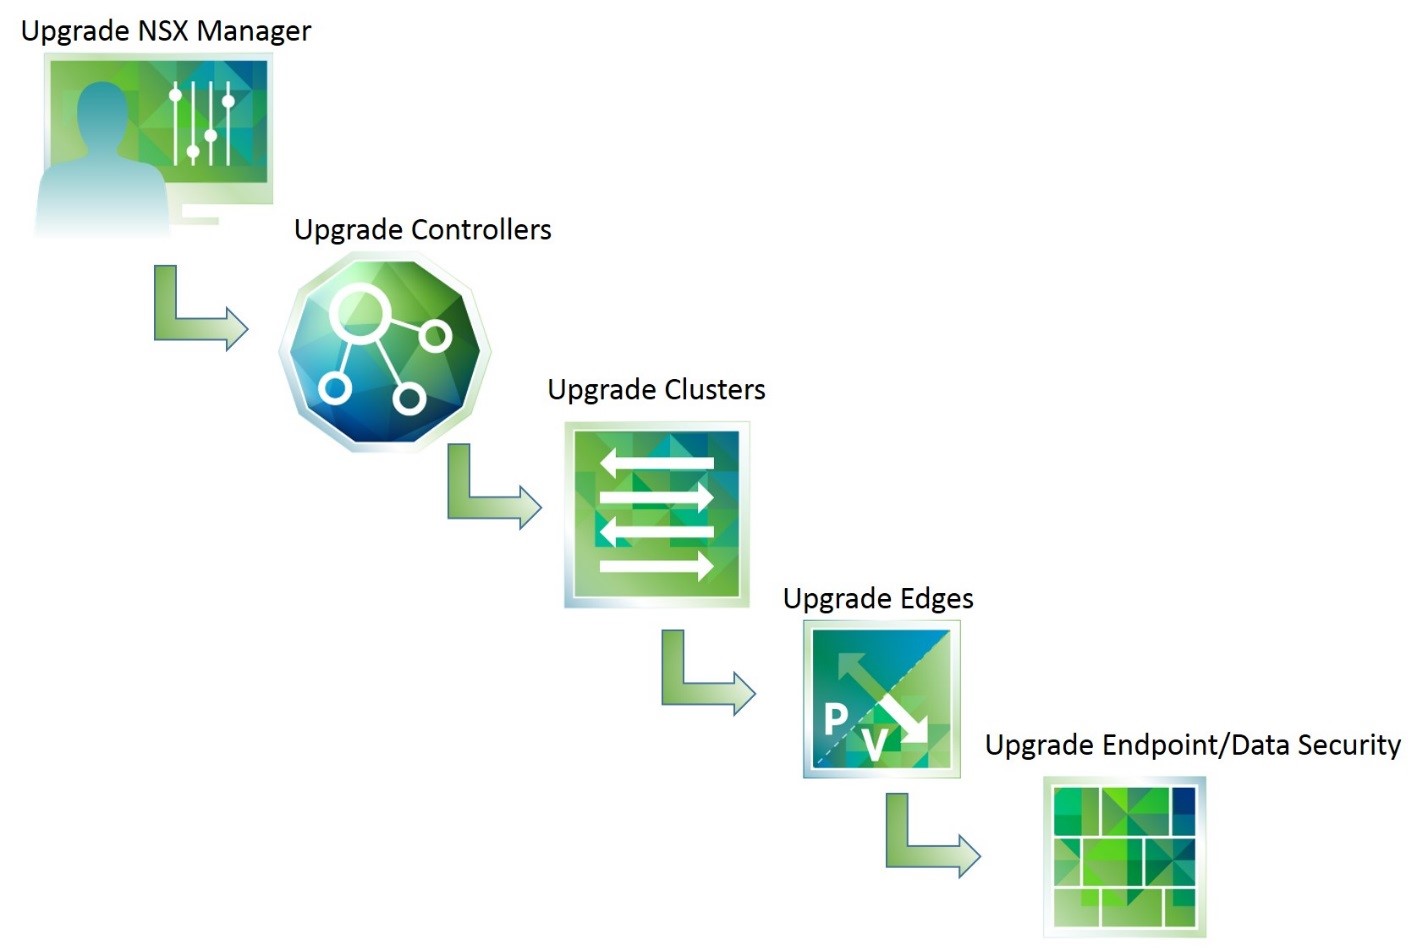
Below screenshot provides a high level overview of the upgrade procedure:
Pre Upgrade Considerations:
- Consult NSX release notes.
- Download NSX upgrade bundle and check MD5.
- Take backup of the NSX infrastructure. Snapshot the NSX manager VM prior to upgrade, take backup of configuration from Web-Client.
Additionally you can:
- Take backup of vCenter Server database.
- Snapshot vCenter Server and vCenter Server database.
To start with the upgrade process, go to the NSX download page and download the upgrade file ‘NSX for vSphere 6.2.4 Upgrade Bundle’
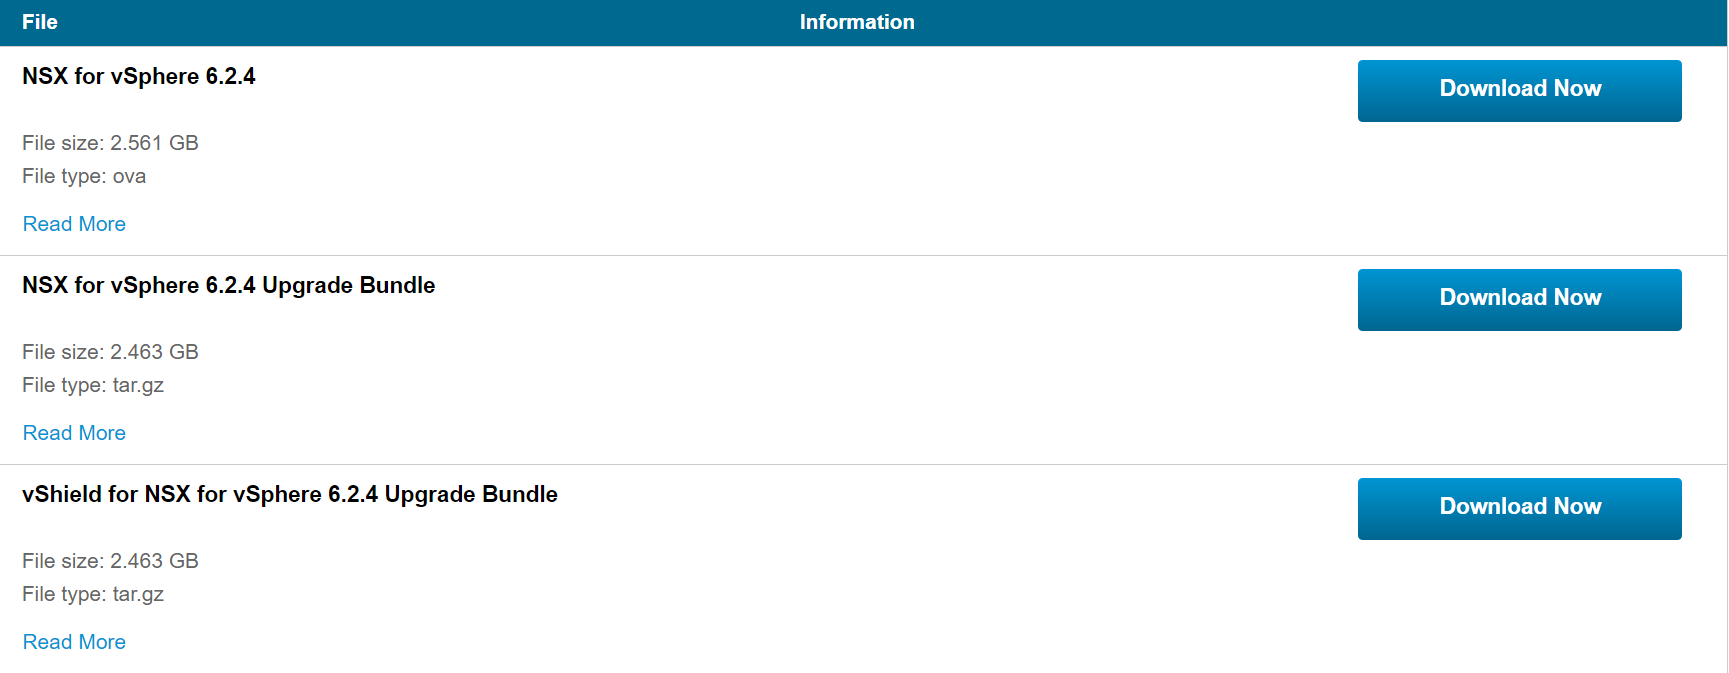
Verify the download upgrade bundle file name ended with tar.gz Some browser may remove the gz extension, if the file look like:
VMware-NSX-Manager-upgrade-bundle-6.2.4-XXXXX.tar
Change it to:
VMware-NSX-Manager-upgrade-bundle-6.2.4-XXXX.tar.gz
Lets start with upgrade process.
*******************NSX Manager Upgrade**************************
1: Login to NSX manager admin console and click on Upgrade button.

2: From the Manage page, click on upgrade button.

3: Click “Browse” and open the download upgrade file and click Continue:

4: System will take some time to upload the file.

Note: NSX Manager will reboot during upgrade process, traffic flow of existing VM workloads will not affected during this step.
5: Post upload of file you will be presented with below page. Choose if you want to enable SSH and participate in Customer Experience Improvement Program .
Click Upgrade to proceed.
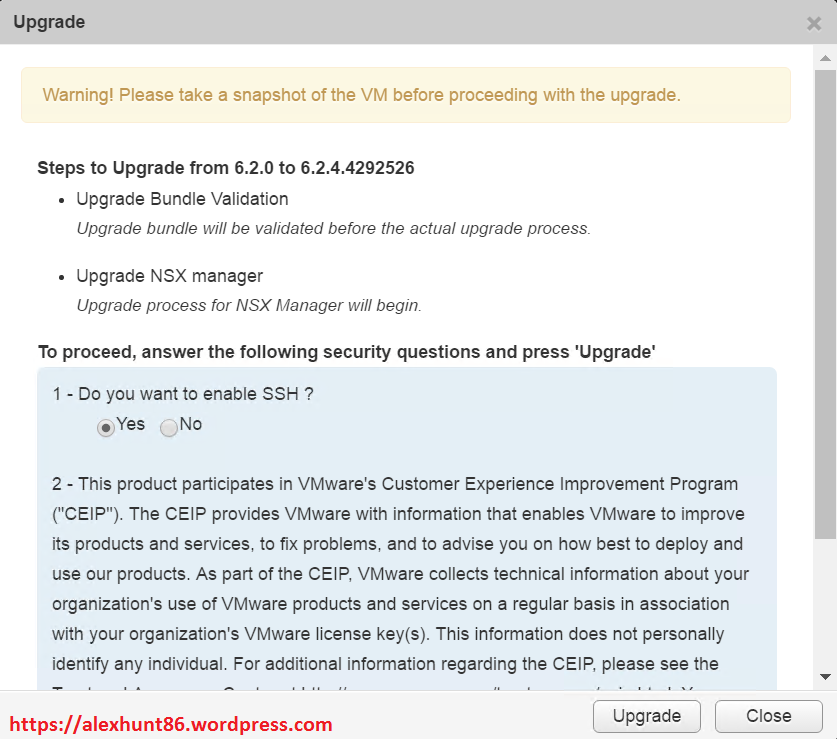
6: Wait for upgrade to complete.

7: Post upgrade is complete you can verify the NSX manager version.
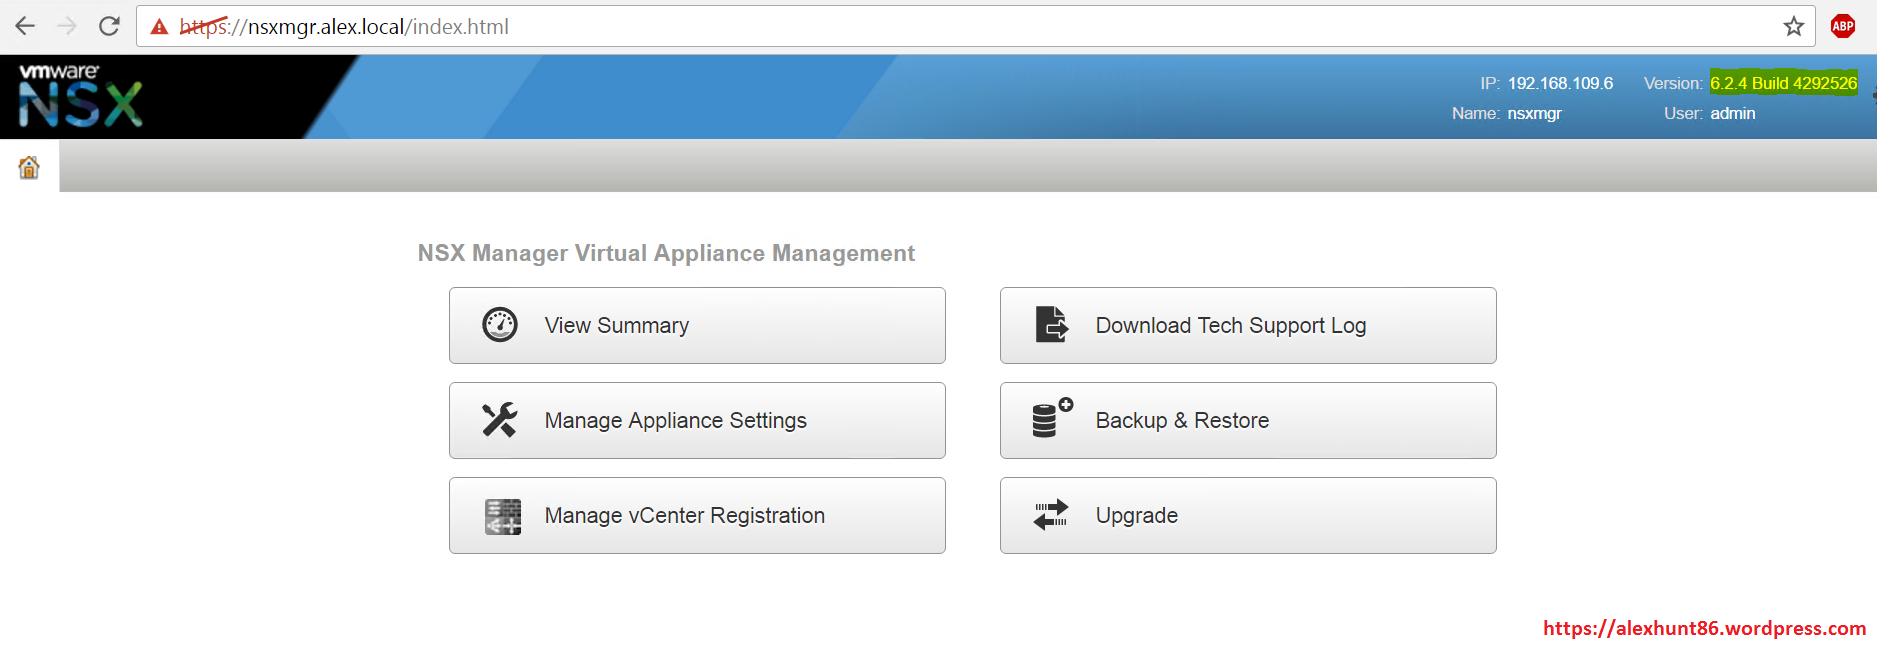
8: Make sure all services are running on NSX manager before proceeding with Next steps of upgrade.
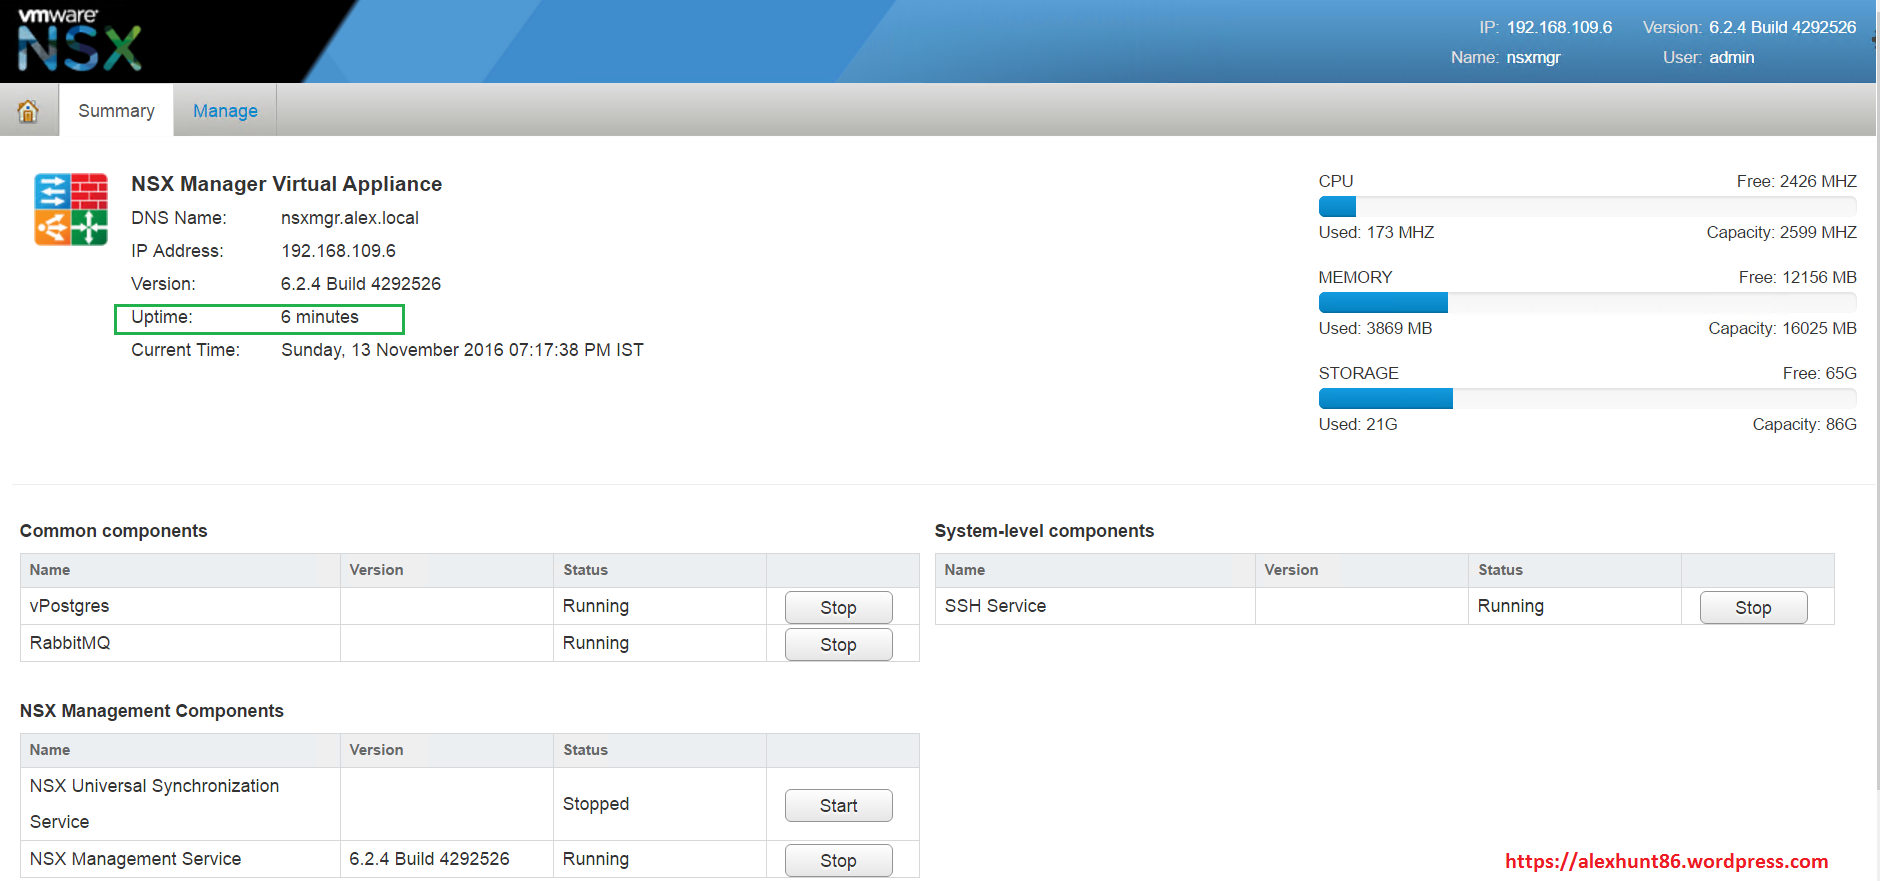
*************************NSX Controller Upgrade*************************
Next part of the upgrade process is to upgrade the NSX controllers.
1: To update NSX controller cluster, login to vSphere Web Client and go to Networking&Security > Installation and Click on Upgrade Available button.
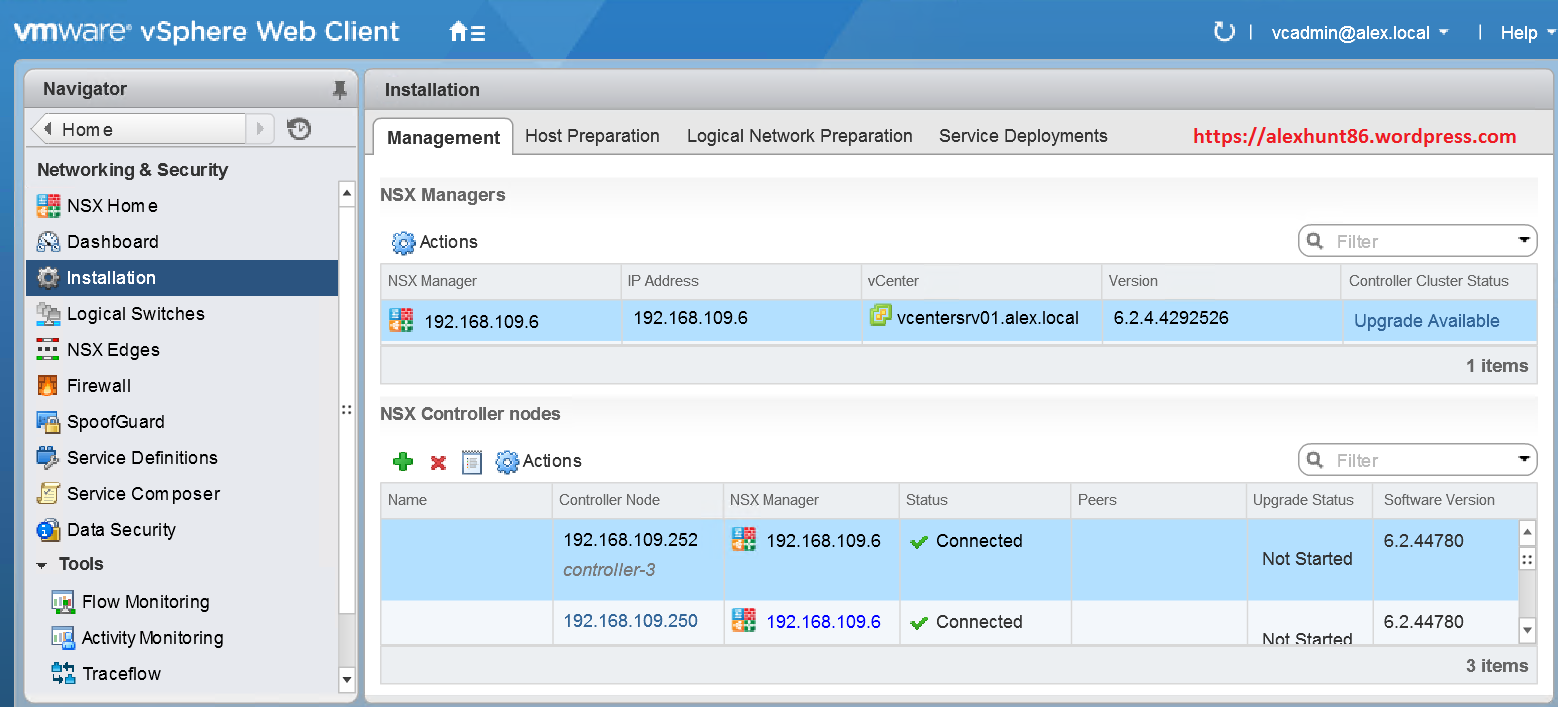
2: Click on “YES” to proceed with Controllers upgrade.

3: Wait for upgrade to complete. In my case it took more than 20 minutes to complete the upgrade process.
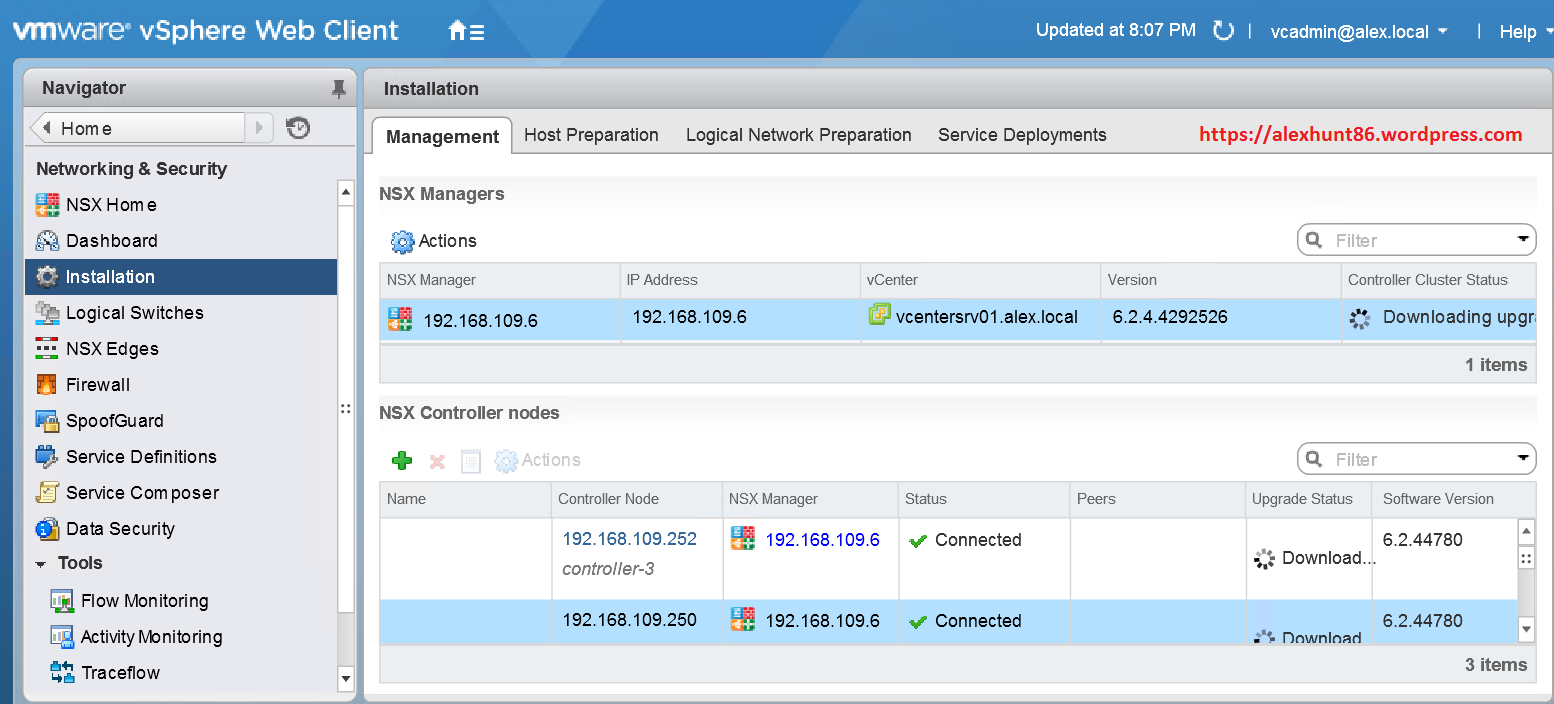
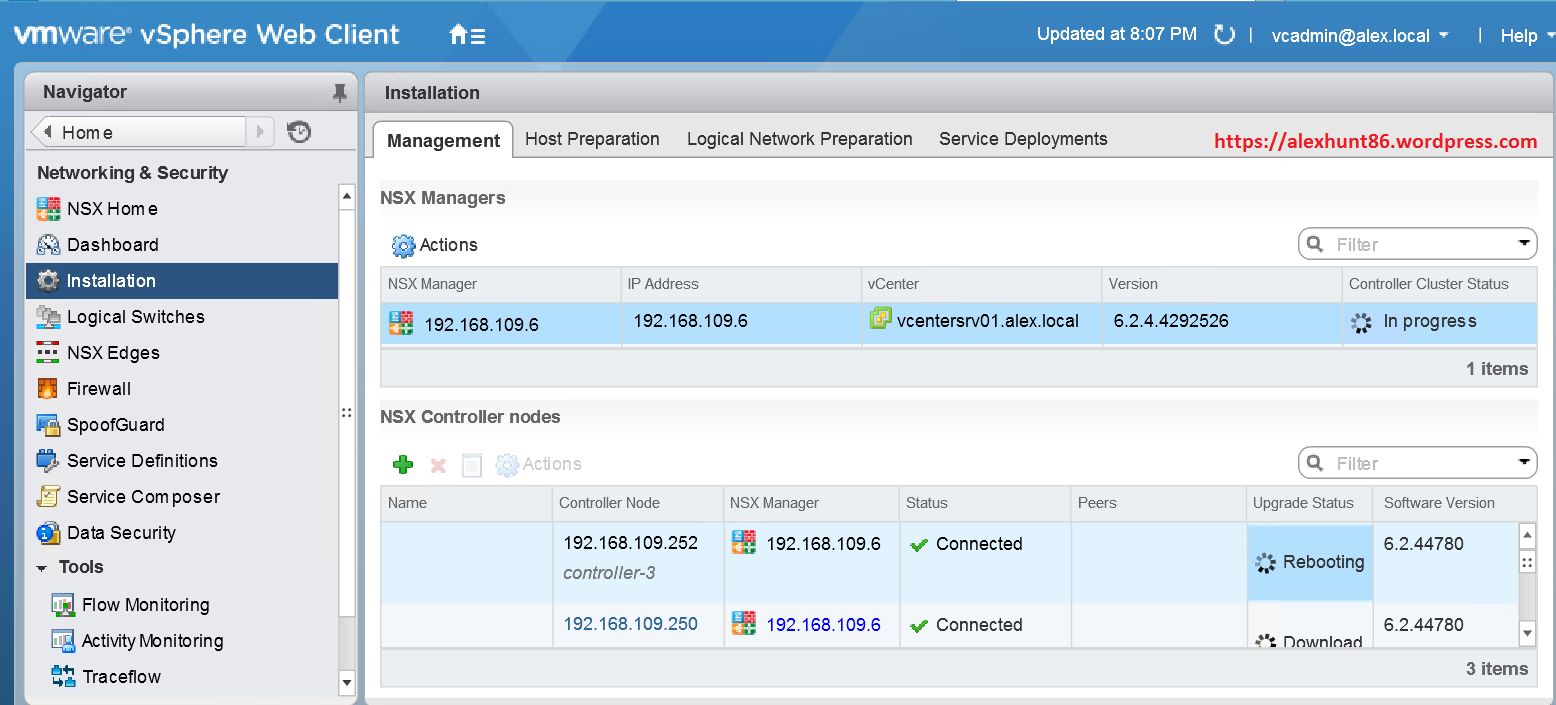
4: The controller nodes will be rebooted during the upgrade process. Patience is key here.
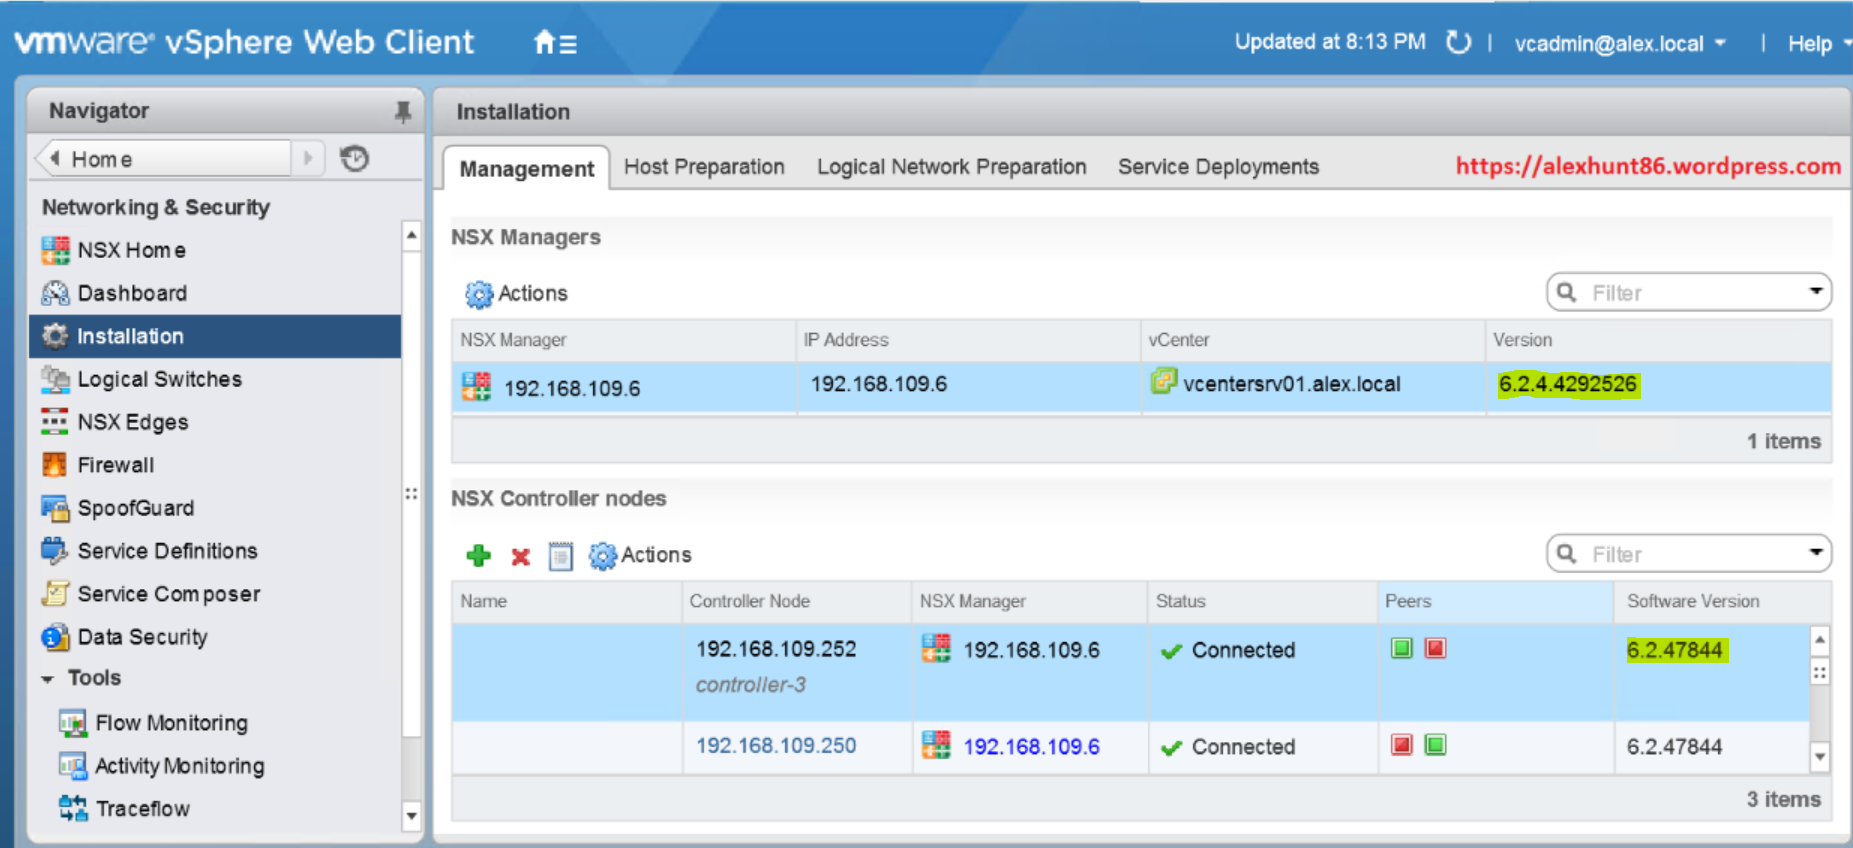
5: Post upgrade process is complete, you can verify the version.
****************************Upgrade Compute Cluster***********************
Next task in upgrade process is to upgrade NSX VIB’s on host cluster. During the upgrade cluster task, Esxi hosts requires reboot. reboot of host will not have any effect on the data planes as DRS is there to move VM around when host reboot will take place.
Important Note before proceeding with host cluster update: If you running with only 2 or 3 hosts cluster (probably in lab environment) and if you have created DRS anti-affinity rules to separate the NSX controller nodes, it will prevent DRS from evacuating VM’s off this host and thus halt host reboot process (overall upgrade will be halted).
Please disable anti-affinity rule for control cluster nodes or DLR/Edge VM’s (if you have created any).
1: To start upgrading the compute cluster, navigate to Networking & Security > Installation > Host Preparation tab and click on Upgrade available.
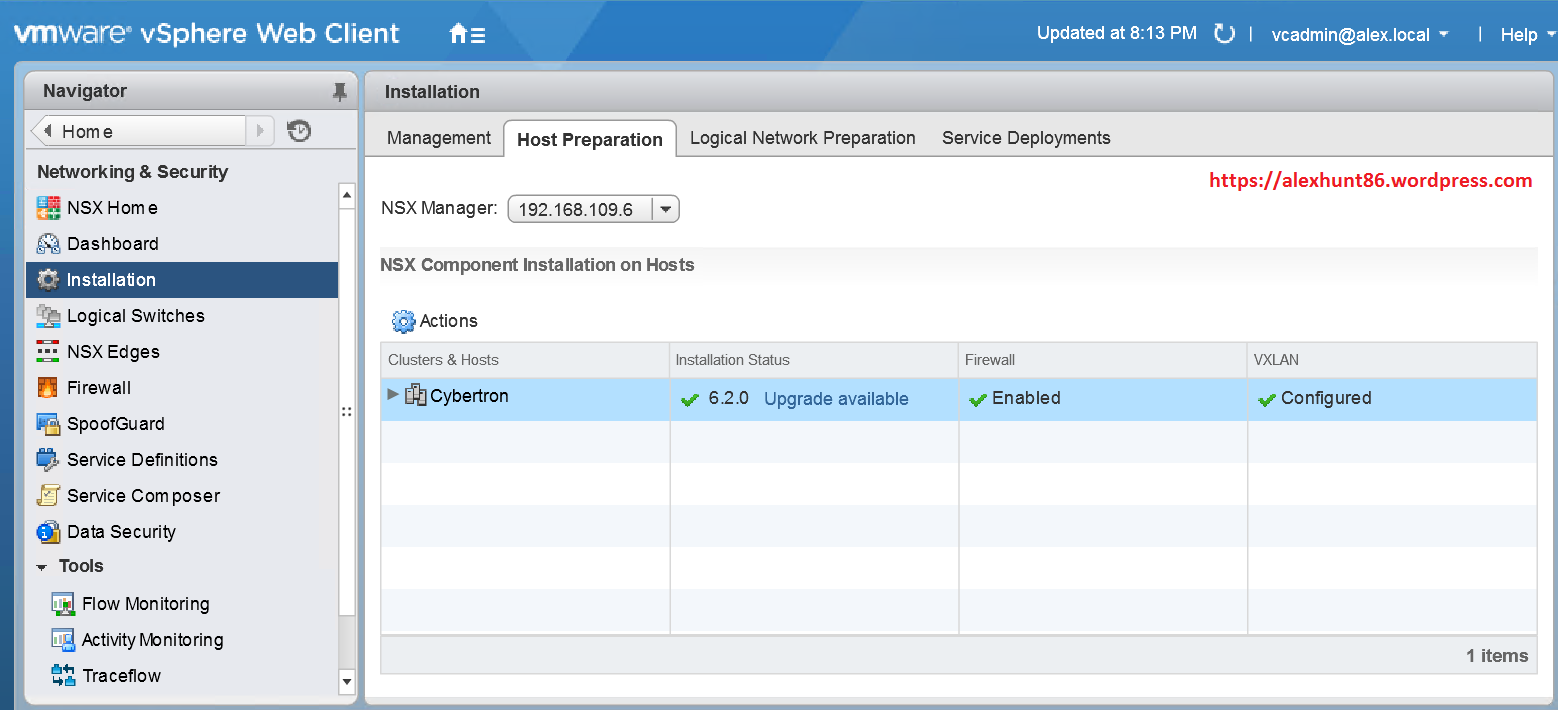
2: Click on ‘Yes’ to start with compute cluster upgrade.

3: On expanding the cluster you can see upgrade is in progress. In vSphere Client uninstalls and install tasks will be visible , basically process uninstalls old VIB’s and install new VIB’s.
Because old VIB’s are uninstalled, Esxi hosts needs a reboot to complete the uninstall of old VIB’s.
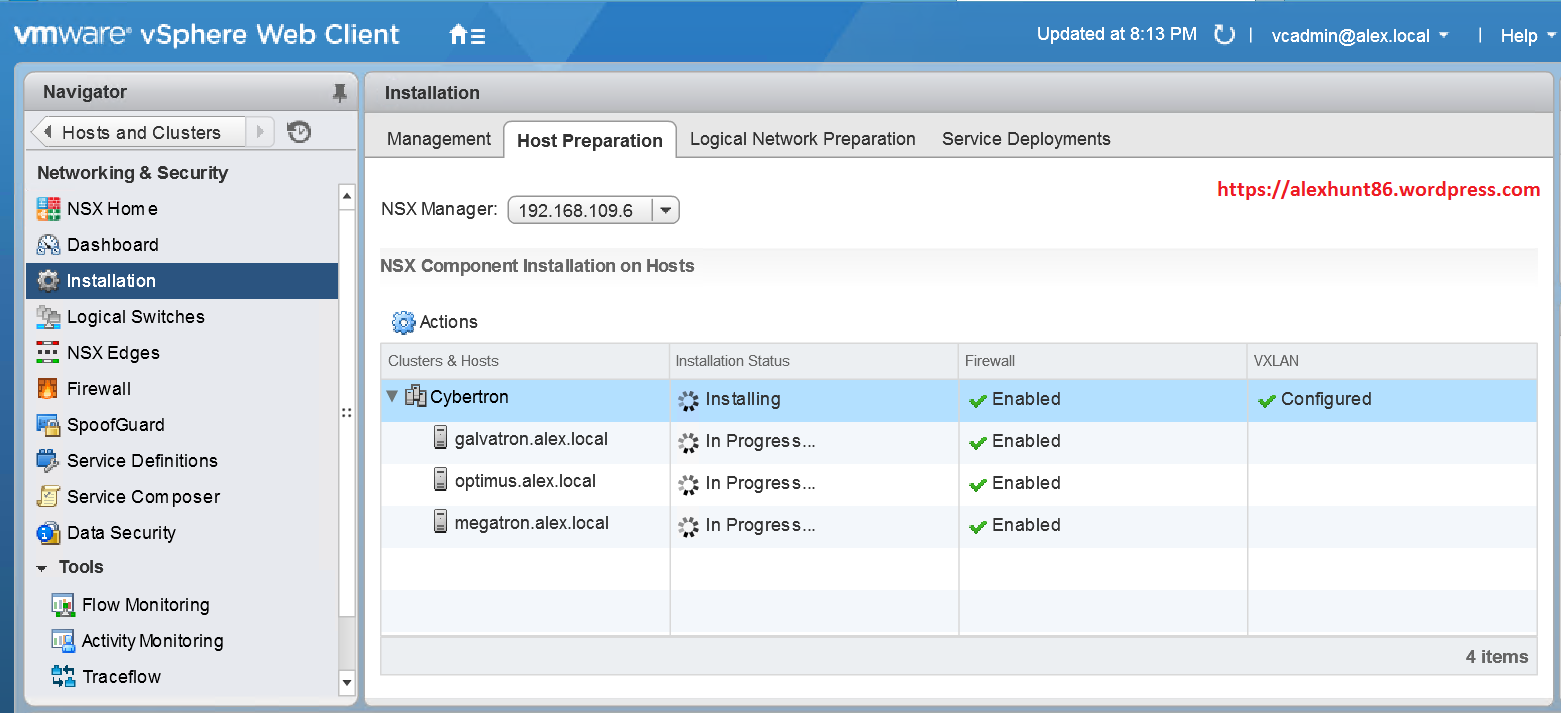
4: If you see Installation Status as ‘Not Ready’, click on red error and hit resolve all.
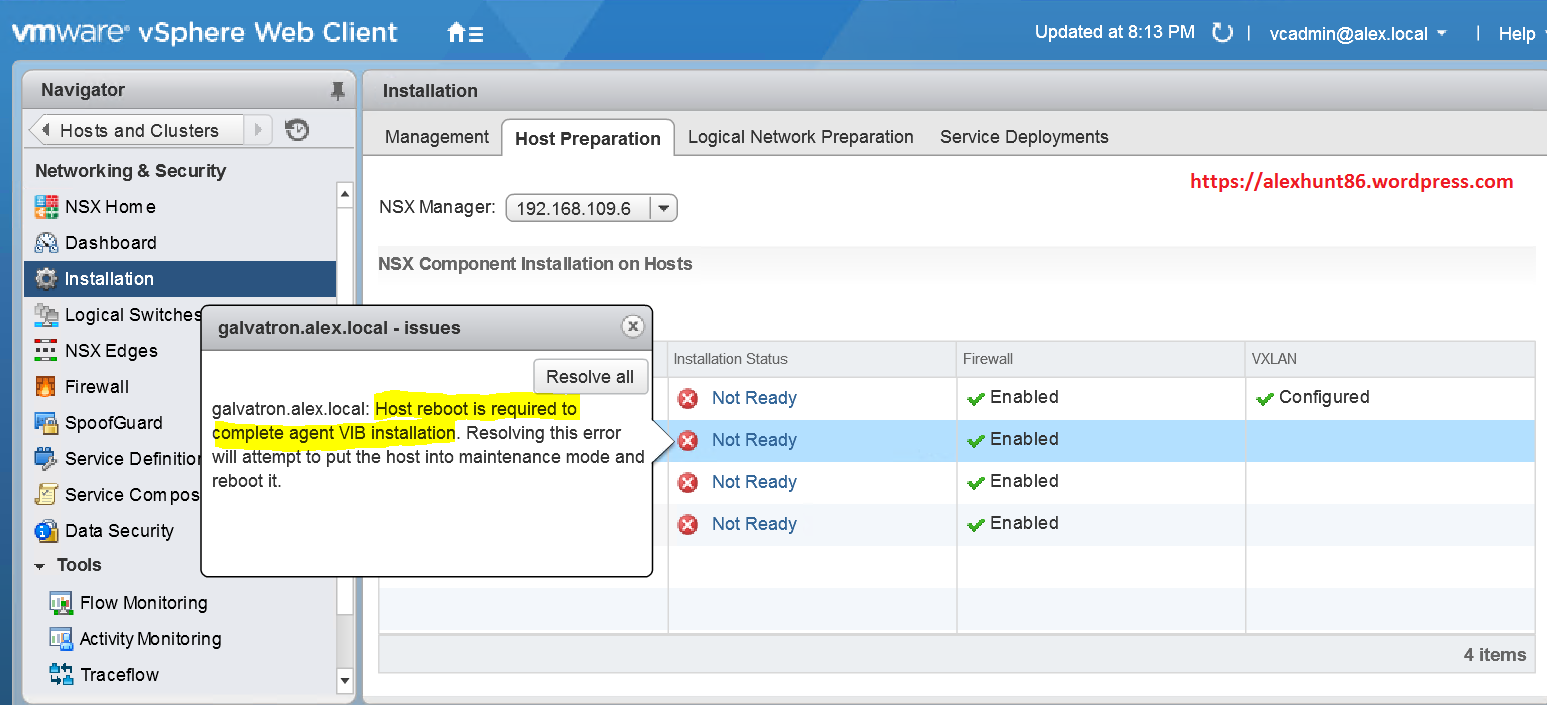
5: In vSphere Client you will see that DRS has starting migrating the VM’s, putting host in MM and reboot the host.

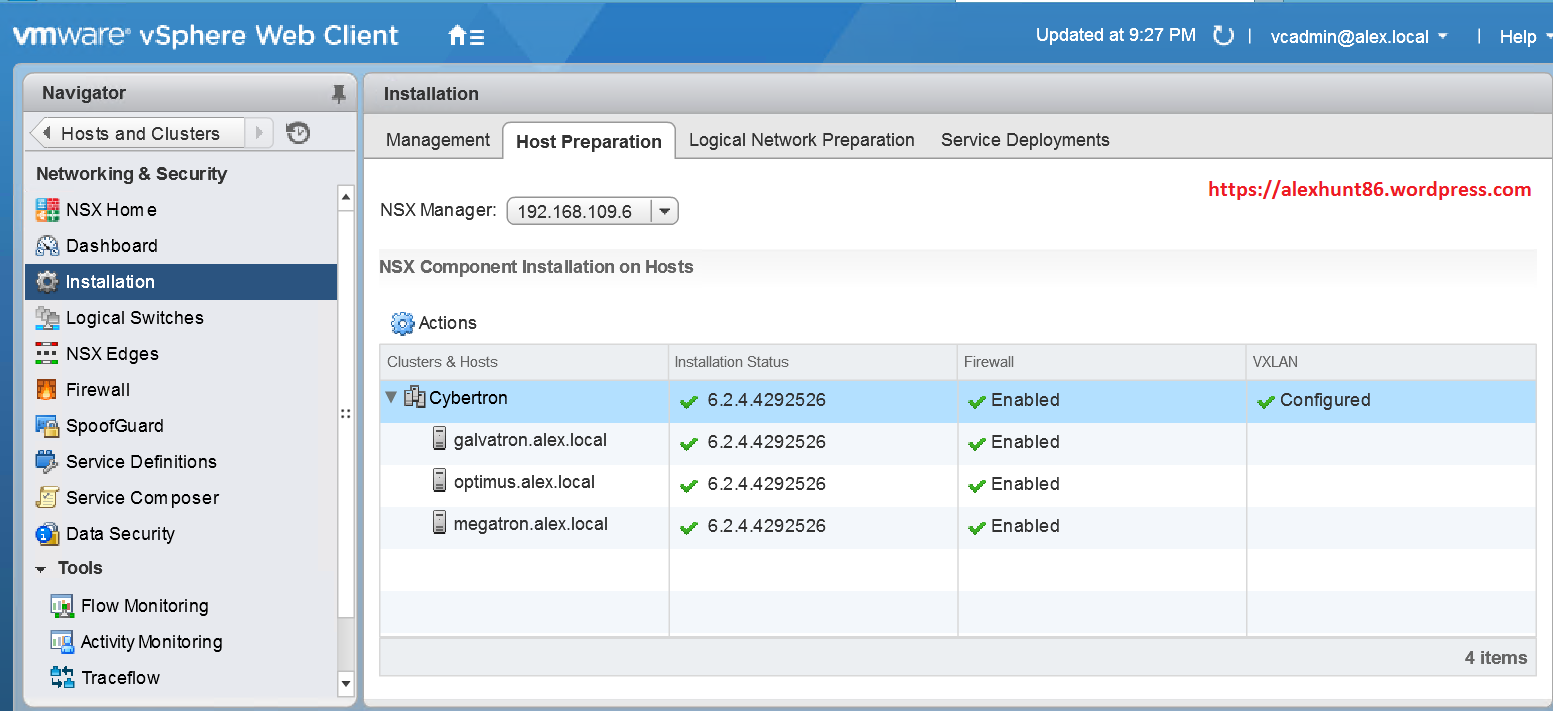
6: Post reboot of Esxi hosts you can see the host update is completed
***********************Upgrade DLR and ESG’s****************************
1: To update DLR/ESG’s version, navigate to Networking & Security > NSX Edges and select the DLR or ESG and right click on it and chose Upgrade version.
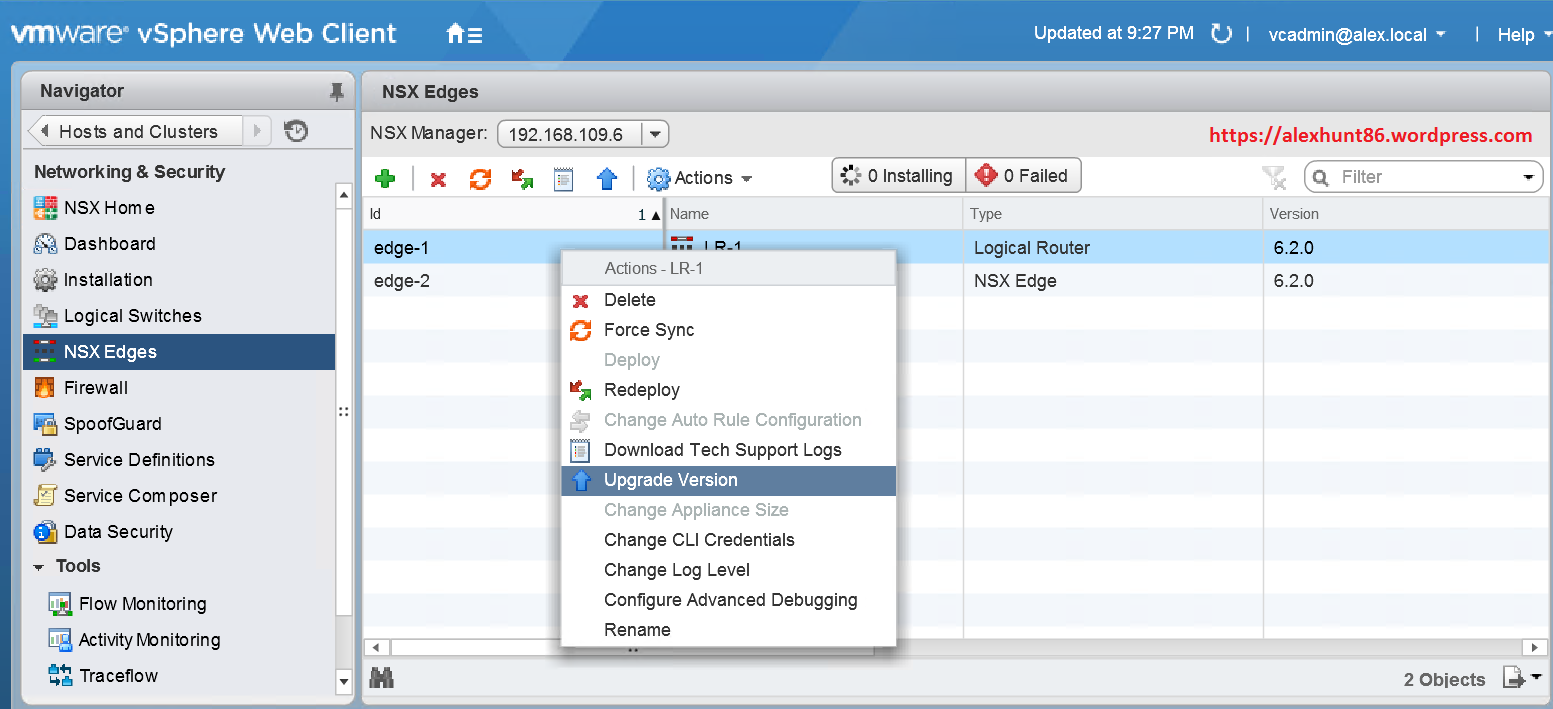
2: Click on ‘Yes’ to start upgrading edge version.
You get a warning that there will be service disruption. Please refer NSX documents carefully to understand the impact of the upgrade.

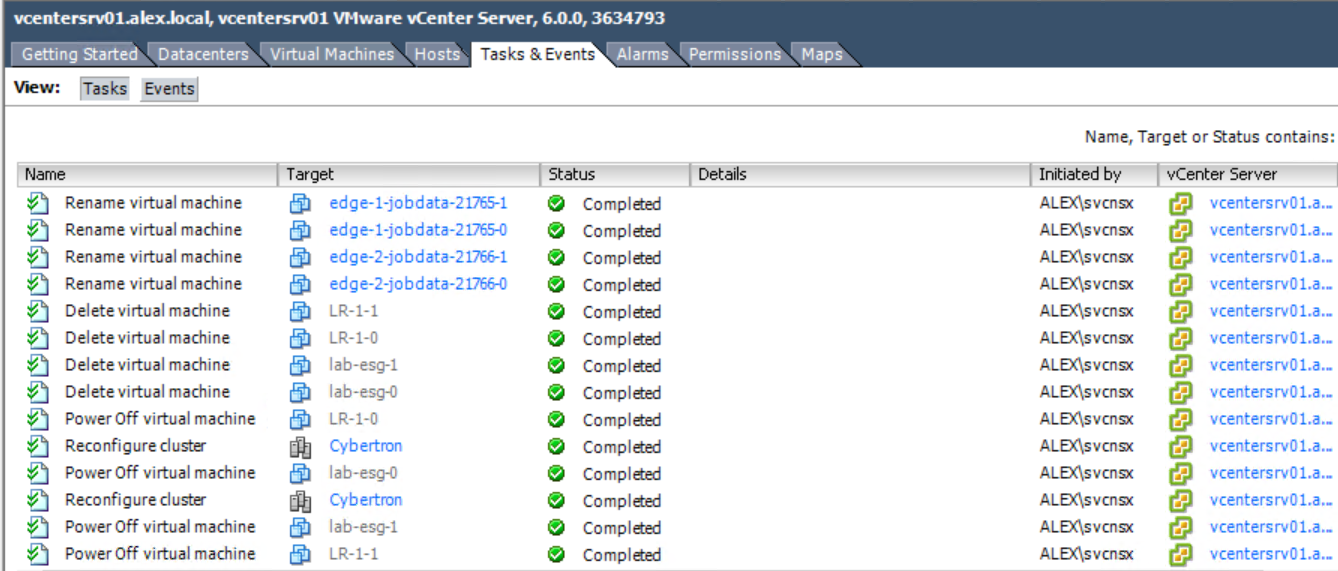
3: During the upgrade process new ESG VM is deployed alongside the existing one, when the new ESG is ready, old ESG vnic are disconnected and new ESG vnic’s connected.
You can see all these tasks in vCenter Inventory.
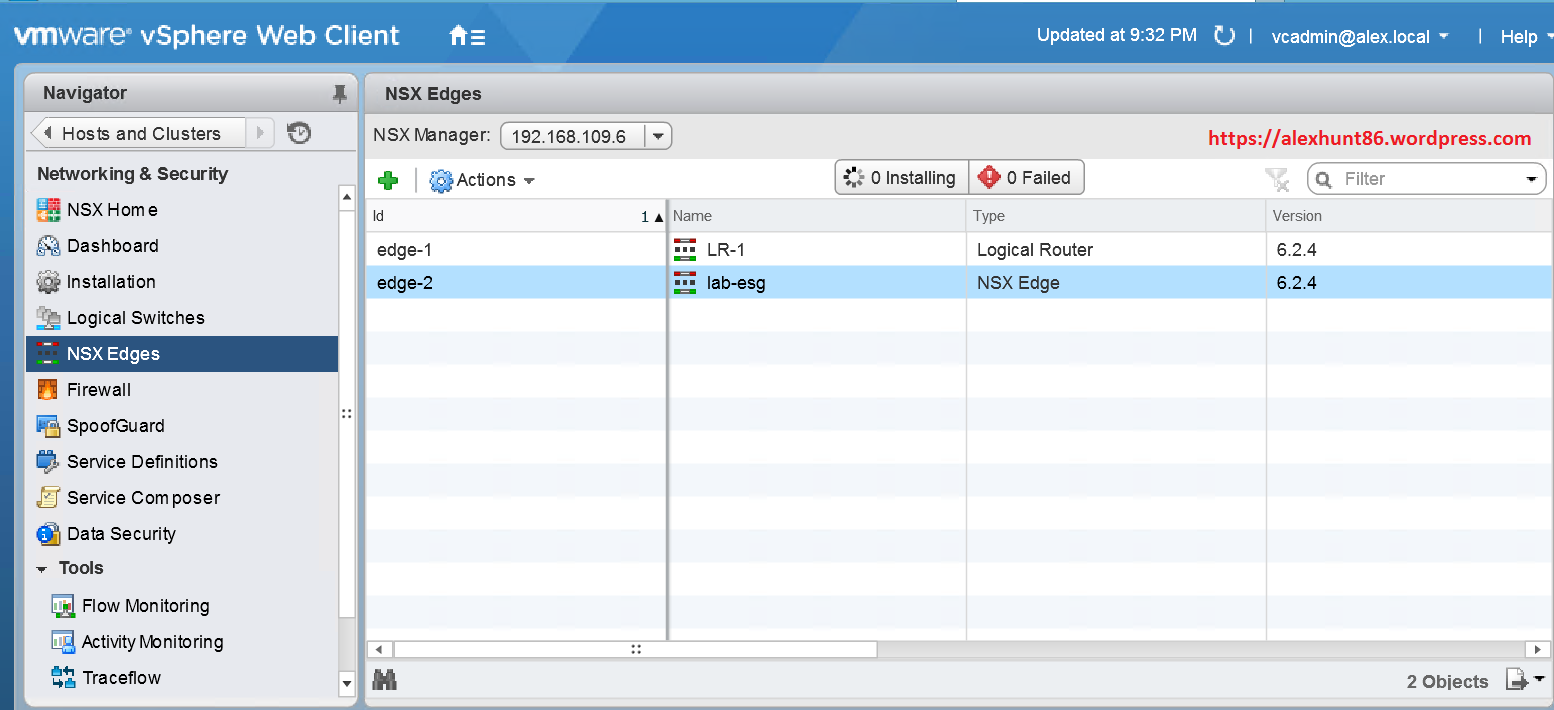
4: Post upgrade verify that DLR/ESG status is deployed and at correct version.
I hope this post is informational to you. Feel free to share this on social media if it is worth sharing. Be sociable

One thought on “Learning NSX-Part-10-Upgrade NSX Manager From 6.2 to 6.2.4”