In last post of this series we saw the prerequisites that needs to be configured in vCenter Server before start deploying the replication appliance. In this post we will see how to deploy vSphere Replication appliance.
If you have missed earlier posts of this series then you can access the same by clicking on below links:
1:Introduction to vSphere Replication
2: Lab Setup
3: Preparing vCenter for Replication
Let’s dive into the installation process of replication appliance.
The vSphere Replication appliance is available in ovf format. Download the ovf file from here.
1: Login to vCenter Web Client and select the Esxi host where you want to deploy the replication appliance and right click on it and choose Deploy OVF template.

2: Browse to the directory where you have downloaded the ovf file and hit Next.

3: Review the ovf details and hit Next.

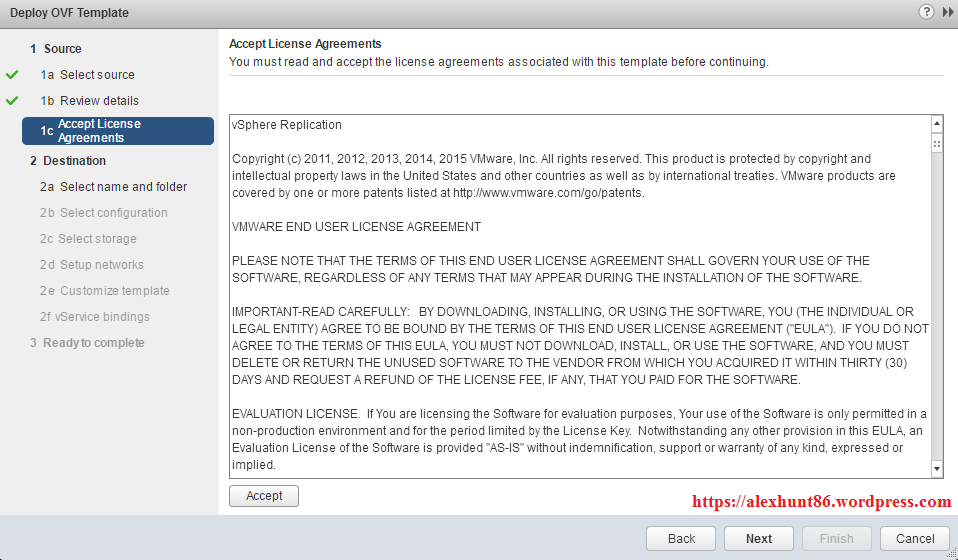
4: Accept the EULA and hit Next to continue.
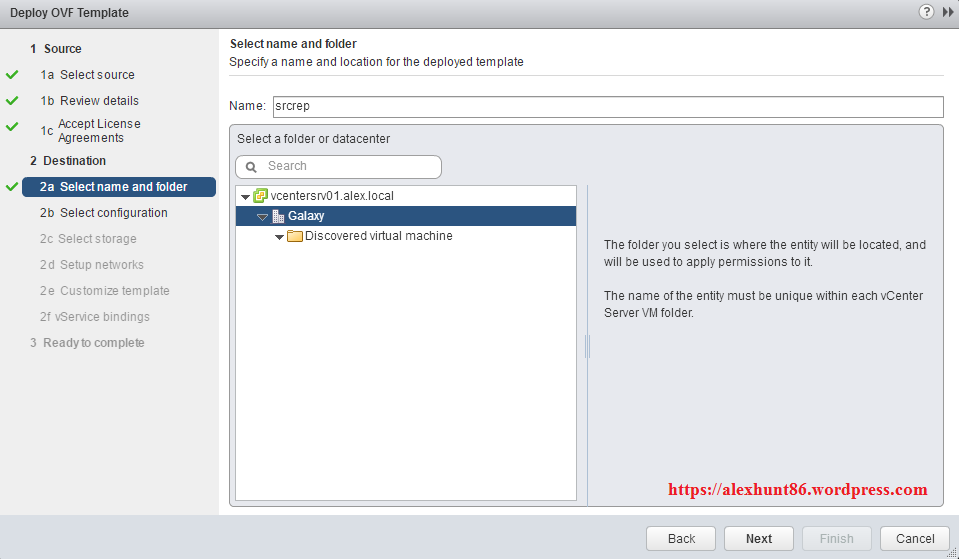
5: Provide a name for the replication appliance and choose the location where it will be deployed. Hit Next to continue after making the selections.
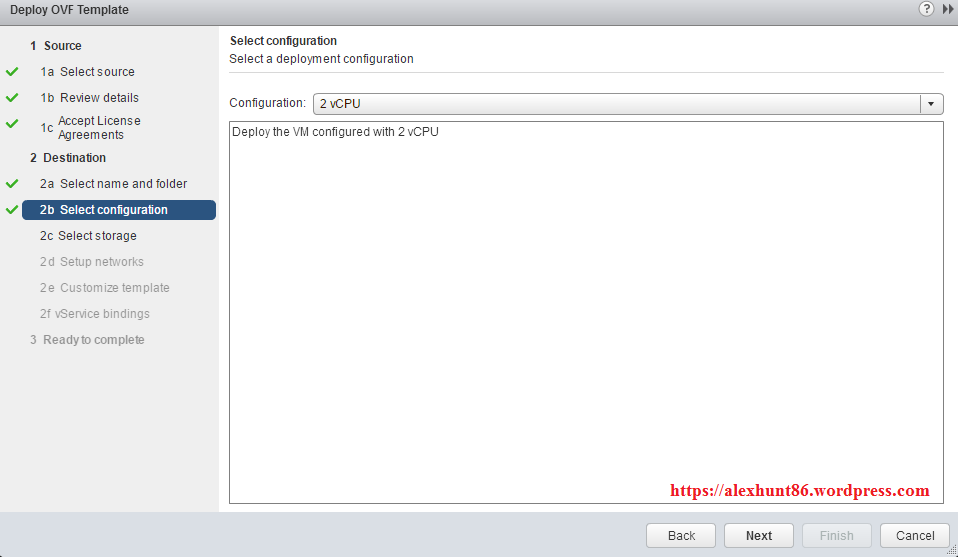
6: Under Select Configuration page, select the number of vCPU that you need to allocate to the replication appliance. By default it is deployed with 4 vCPU, but for smaller deployments or lab environment you can go with 2 vCPU. Hit Next to continue.
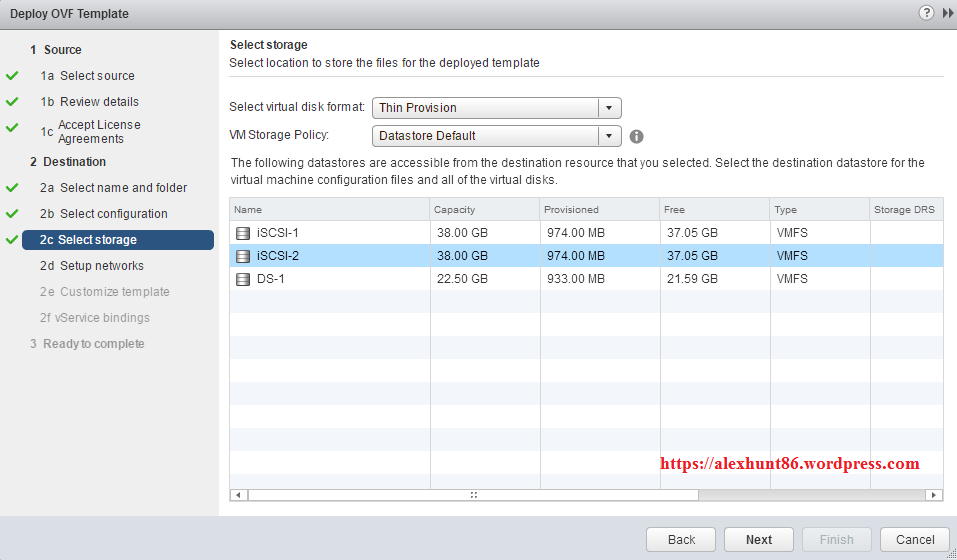
7: Select the datastore where the appliance will be deployed and select the provisioning type from select virtual disk format drop down menu. For lab deployments Thin Provision just works fine, but for production you might need to go with thick provision. Hit Next to continue.
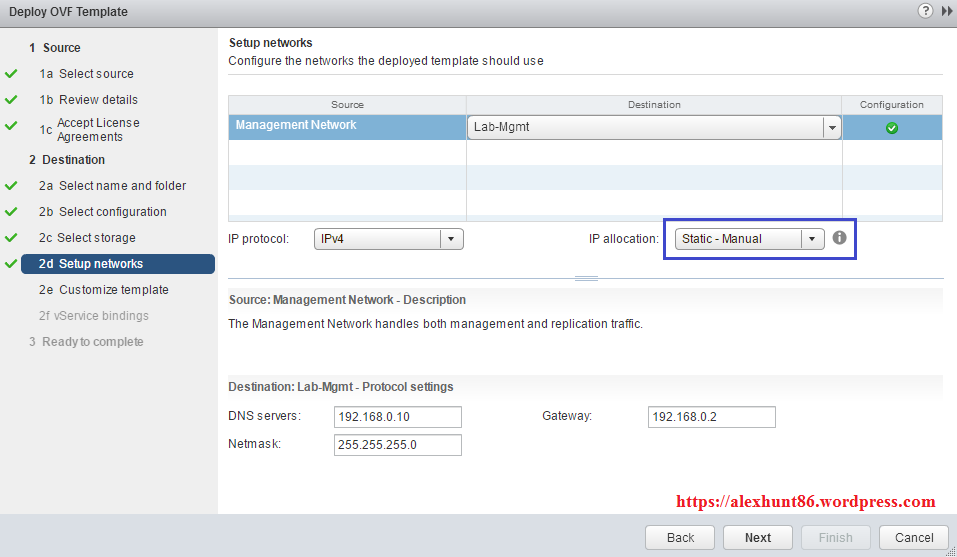
8: Under setup networks page, select the portgroup for the Management Network of the replication appliance. Select Static-Manual from IP allocation if you dont have a DHCP server in your environment. Punch in the DNS/Netmask and Gateway details.
If you are wondering where we have to define the IP address of the replication appliance then the answer is that the actual IP assignment for the replication appliance happens on next page.Hit Next to continue.
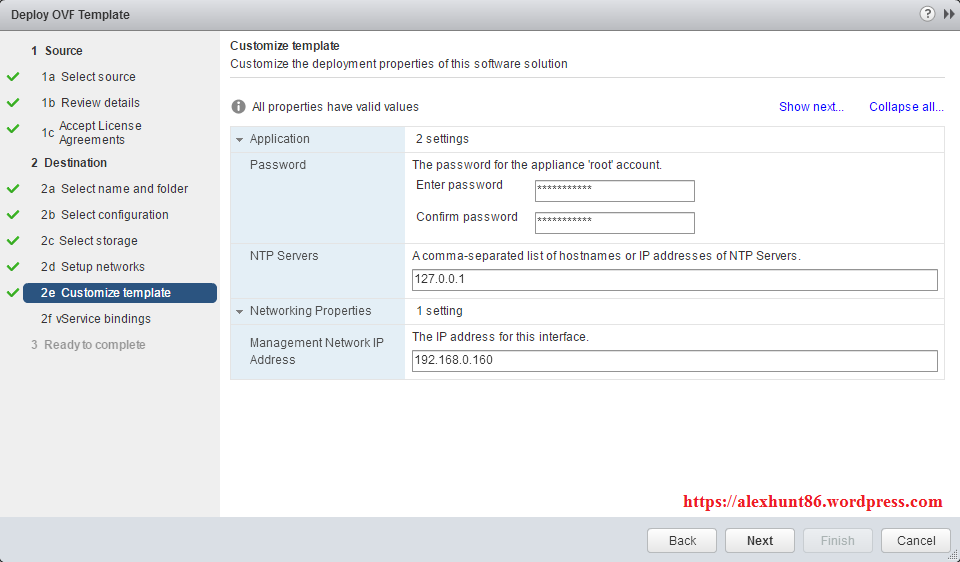
9: On customize template page, define the root password of the appliance and the IP address that will be used to manage the appliance. Hit next.
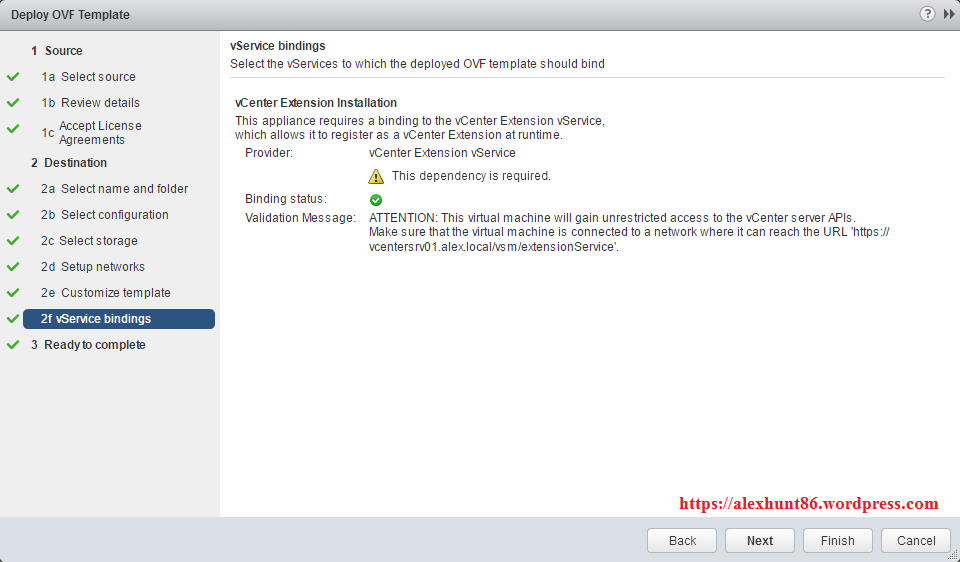
10: Under vService bindings, dont proceed until you see binding status as green.
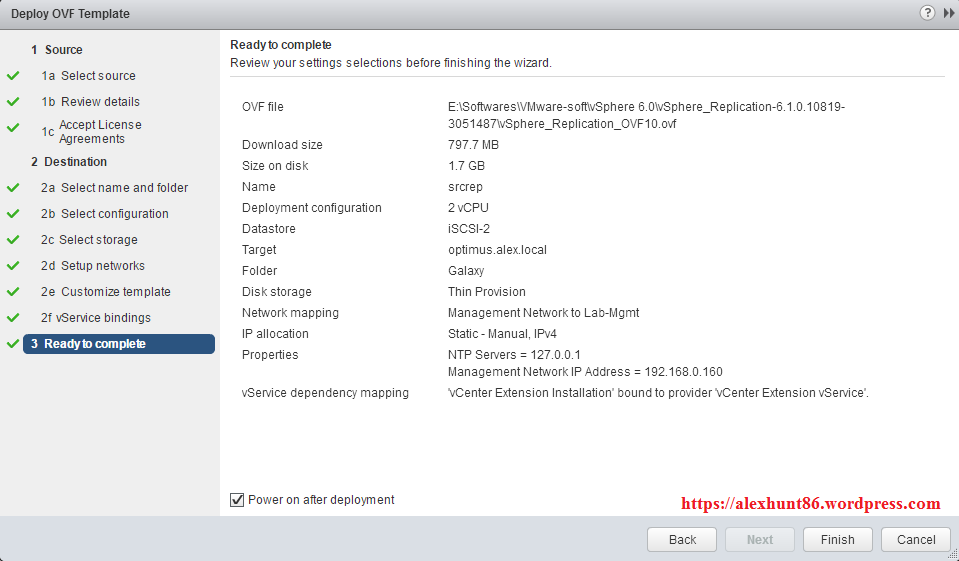
11: On Ready to complete page review your settings and finish to start the deployment.
12: Wait for deployment to finish. You can monitor the progress under recent tasks.

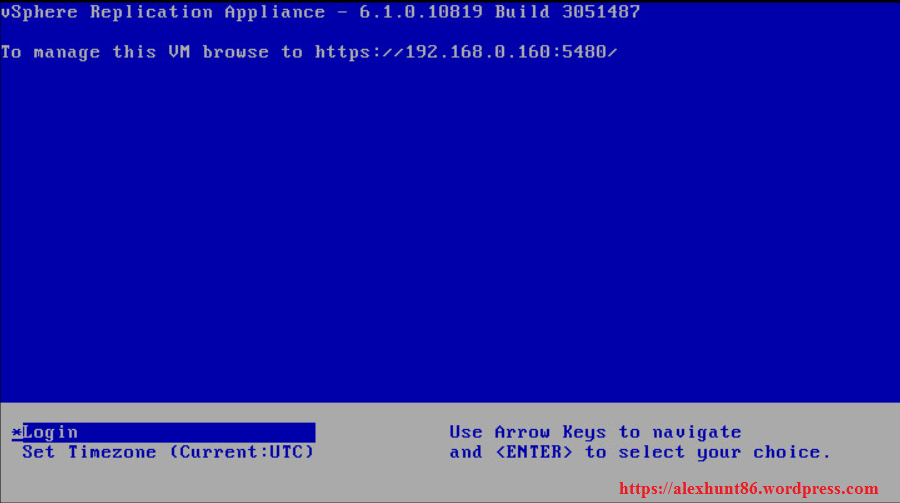
13: After deployment is finished and VM is booted up you will see below screen which displays the URL for managing the appliance.
I hope you enjoyed reading this post. Feel free to share this on social media if it is worth sharing. Be sociable 🙂

3 thoughts on “vSphere Replication-Part 4: Deploying vSphere replication Appliance”