In last post of this series we had learnt how to install Esxi server 6 and we found installation of Esxi 6 hypervisor has not changed much and it is pretty much same as like previous version.
If you have missed earlier posts of this series then you can access the same by clicking on below links:
3: Installing and Configuring Esxi Server 6
In this post I’m going to walk you through the installation of VMware vCenter Server 6.0. The way vCenter server was installed in past has now changed big times. Earlier we had a choice to install SSO, Inventory Service, vCenter Server and Web-Client all on same machine or have a distributed architecture where all components were spread across multiple servers.
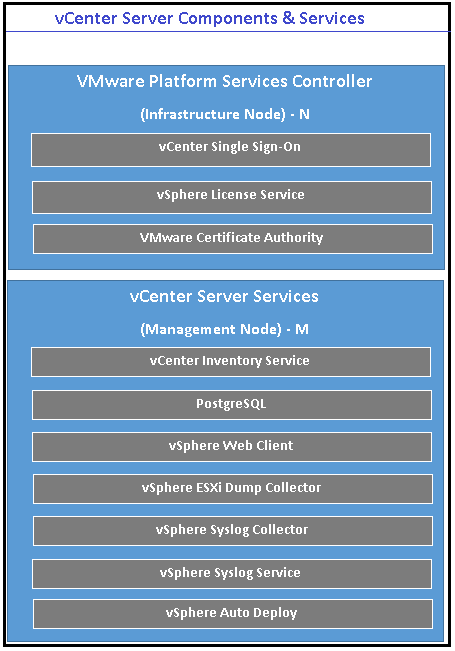
With vSphere 6.0 VMware introduced concept of PSC. Now we have only 2 nodes in vCenter deployment. One can hold PSC and other can hold vCenter Management Server itself or both on a single node. It’s not like previous version where we we had 4 nodes if we go for full distributed architecture.
Where PSC holds components like SSO, VMCA and Licensing Server (previously held by vCenter Server), the vCenter Management Server consolidates all the other components such as Inventory Service & Web Client services along with its traditional management components.
The following diagram gives you a brief overview of what has been said above:
Which deployment mode should I choose?
There are 2 ways in which vCenter Server can be deployed:
1: vCenter Server With Embedded PSC
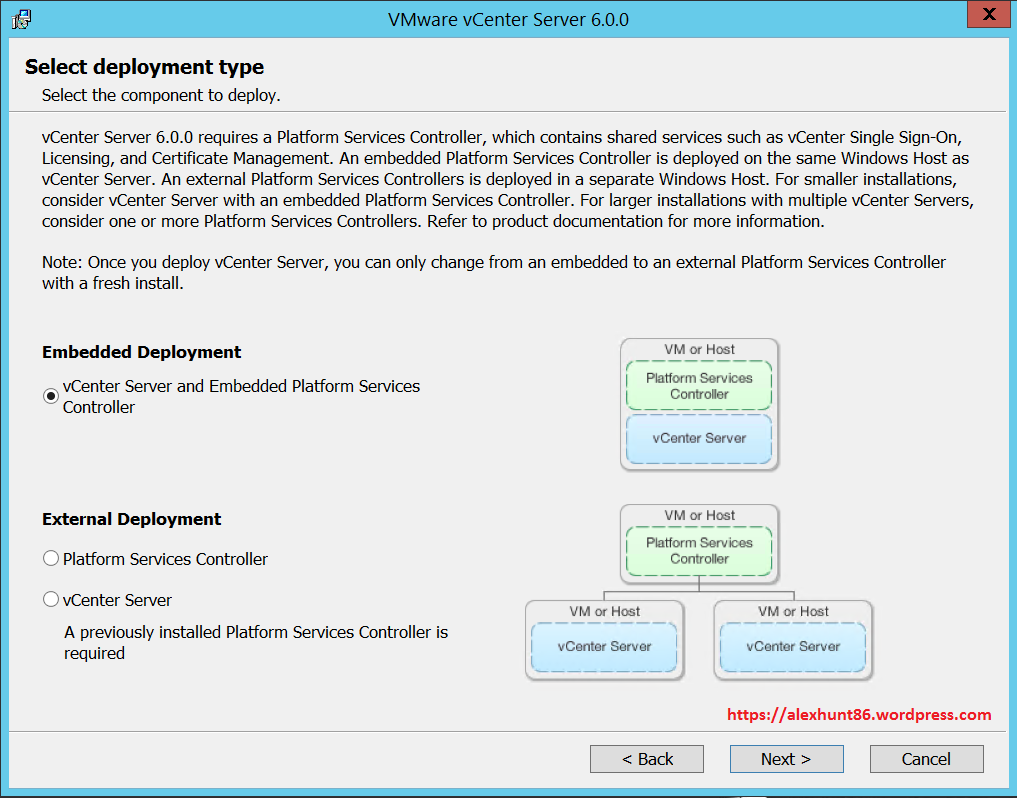
With embedded PSC, vCenter Management Server and PSC both are installed on same node. It is meant for standalone sites where vCenter Server will be the only SSO integrated solution. Embedded PSC mode is:
- Sufficient for most environments. Easiest to deploy and maintain
- Multiple standalone instances supported
- Replication between embedded instances not supported
- Supports Windows based vCenter & vCSA
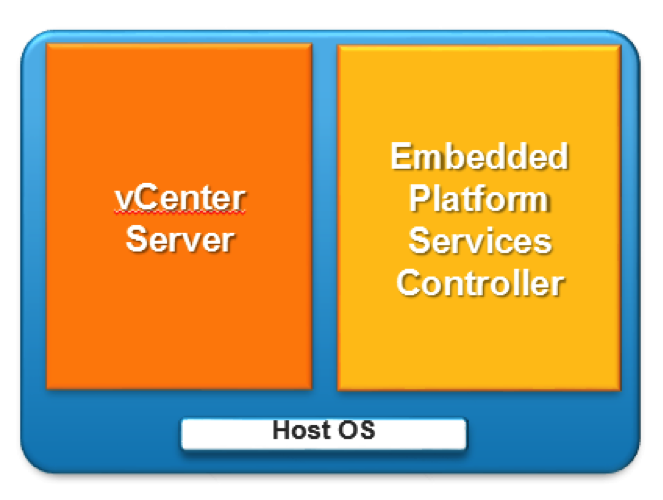
Graphic Thanks to VMware.com
2: vCenter Server with External PSC
In this deployment mode the PSC is external to the vCenter Server. In this mode multiple vCenters can be linked to single PSC or we can have multiple PSc as well for high availability.
This is a recommended deployment mode when you have multiple vCenter server instances that needs to be linked and has a fast growing architecture. With this deployment mode scaling up is very easy. This mode:
- Reduces footprint by sharing Platform Services Controller across several vCenter Servers
- Deploy more than one PSC to provide high availability within the infrastructure.
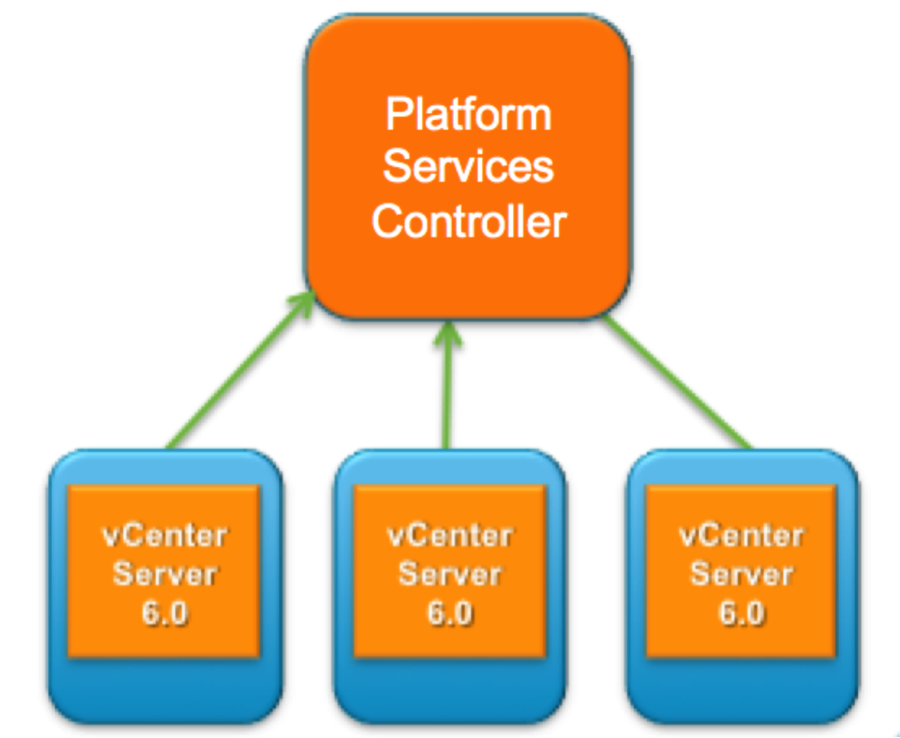
For more information on various deployment topologies, you can refer VMware KB-2108548
Windows based vCenter Server or vCenter Server Appliance ?
Till vSphere v5.5 this was a big question for everyone whether they should go for a Windows based vCenter installation or go for pre-built linux based vCSA because of the difference in scalability support by both version. This is not the case anymore.
With VMware vSphere 6 vCenter Server Appliance (vCSA) now offers same scalability as provided by windows based vCenter Server installation. Earlier there was a limitation with vCSA that it cannot support huge infrastructure where you have a lot of Esxi hosts and virtual machines running.
This has forced customers to use windows based vCenter installation which could cost them an additional license for windows server instance and if they are planning to use external database then a database license as well. It is no more the case as vCSA now supports same scalability as compared to its windows based counterpart and thus saving some money for customers.
However there is a limitation with using vCSA. If you are planning to use VMware Update Manager (VUM) in your environment then you have to deploy an additional instance of Windows server. But if you are using Windows based vCenter Server you can install VUM on same machine where vCenter management server is installed or can deploy additional node dedicated for VUM depending upon your requirements.
This choice becomes much harder when you want to use embedded vPostgres database in your vCenter Server deployment.
The embedded vPostgres on Windows is limited to 20 hosts and 200 virtual machines. The vCenter Server Appliance supports embedded vPostgres at full scale, 1000 host and 10,000 virtual machines and is the recommended database for the vCenter Server appliance.
vCenter Installation Requirements
1: OS Requirements: Following is the list of operating system supported for Windows based vCenter Server installation:
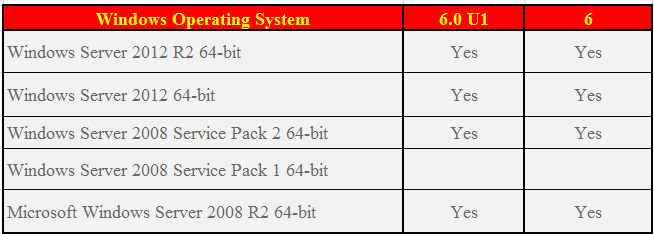
2: Windows based vCenter Storage Requirements
The following table depicts the storage requirements for windows based vCenter Server.

For storage requirements for vCSA and other deployment model please follow VMware KB-2107948
3: DNS Ready: Make sure vCenter FQDN is resolvable
4: NTP Ready: Make sure that all components on the vSphere network have their clocks synchronized. If the clocks on the machines in your vSphere network are not synchronized, SSL certificates, which are time-sensitive, might not be recognized as valid in communications between network machines.
5: vCenter Server for Windows Database Requirements
The embedded vPostgres database for Windows vCenter installation supports up to 20 hosts and 200 virtual machines.
vCenter Server for Windows also supports external database. Supported databases for the windows installation are:
- SQL 2008 R2, SQL 2012 and SQL 2014
- Oracle 11g and 12c
6: Static IP for vCenter: Make sure you are using static IP for your vcenter Server.
vCenter Server Installation in Action
OK, enough of theory now. let’s jump into action and see how vCenter Server is installed.
In my lab I am deploying Windows based vCenter on Server 2012 R2 Datacenter edition as VM in VMware Workstation. I have assigned 2 vCPU, 8 GB RAM and 50 GB hard disk to this VM
My vCenter hostname is vcentersrv01.alex.local and I have verified name resolution is working fine. This system is joined to domain.
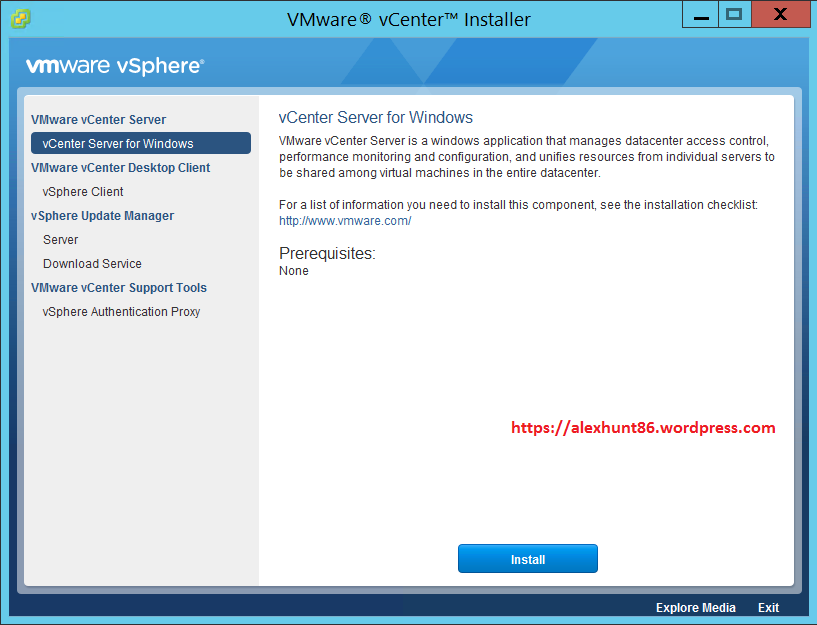
1) Mount the vSphere 6.0 installation media. Execute the “autorun.exe“
The installation wizard appears. In the left pane select “vCenter Server for Windows” and click on Install.
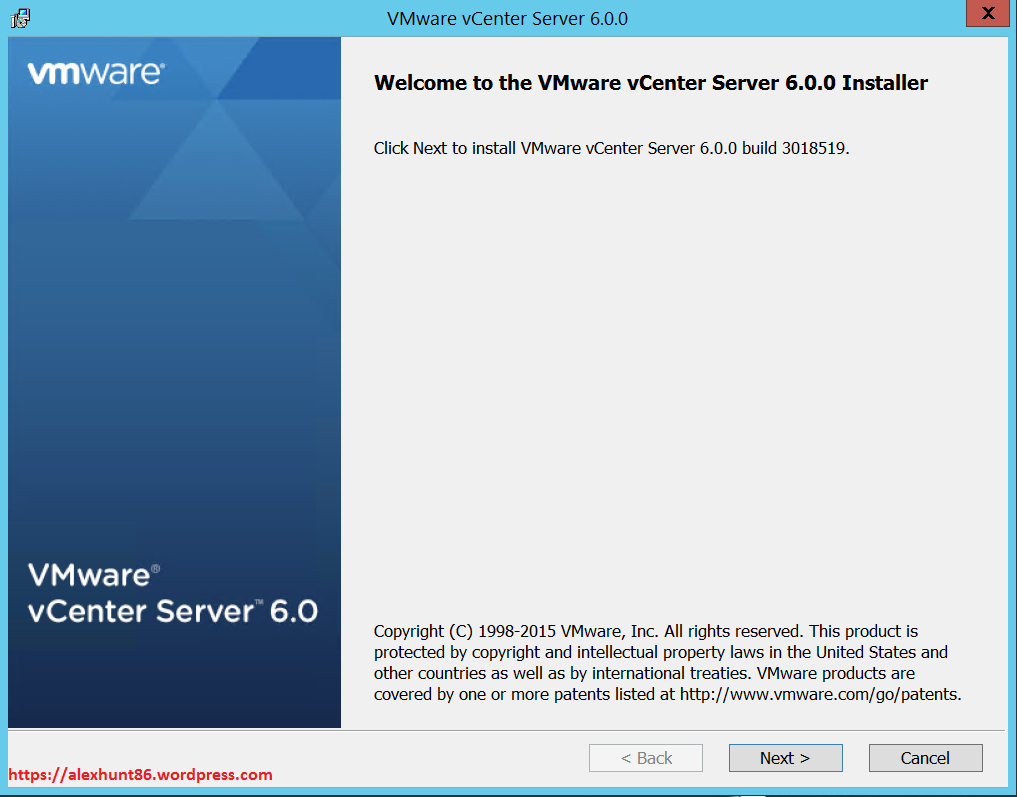
2) In the “VMware vCenter Server 6.0.0” window, press “Next”.
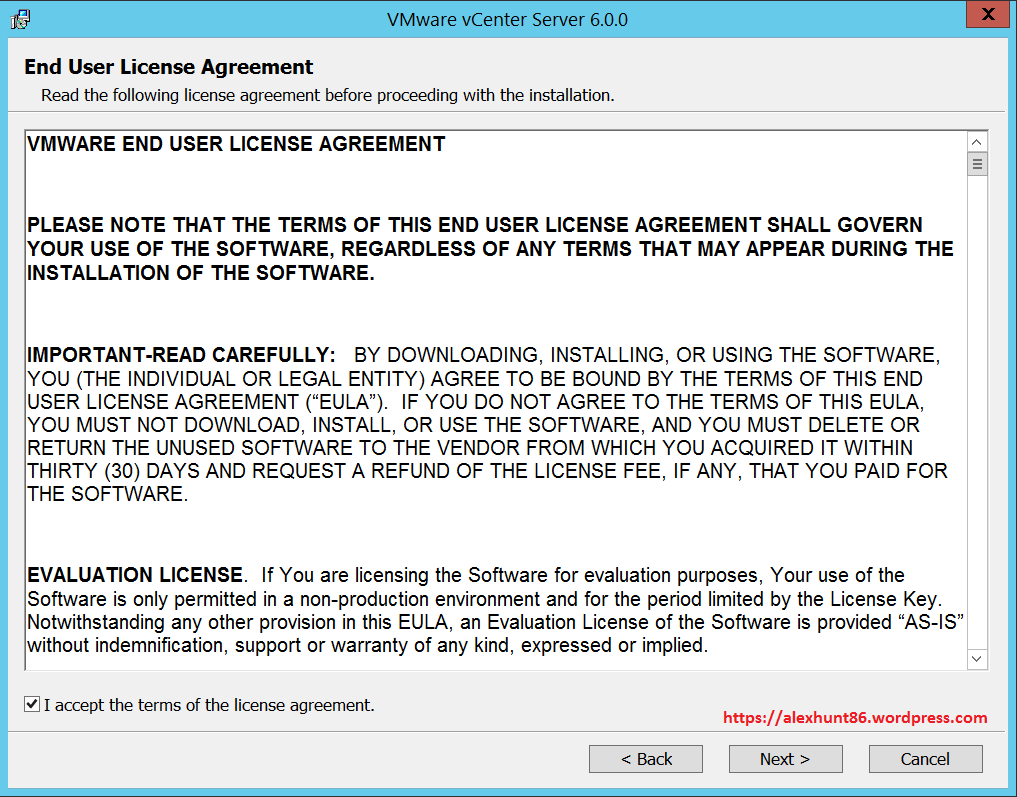
3) Accept the licence agreement and select “Next”.
4) Under Select Deployment type choose “Embedded Platform Services Controller” and press “Next”.
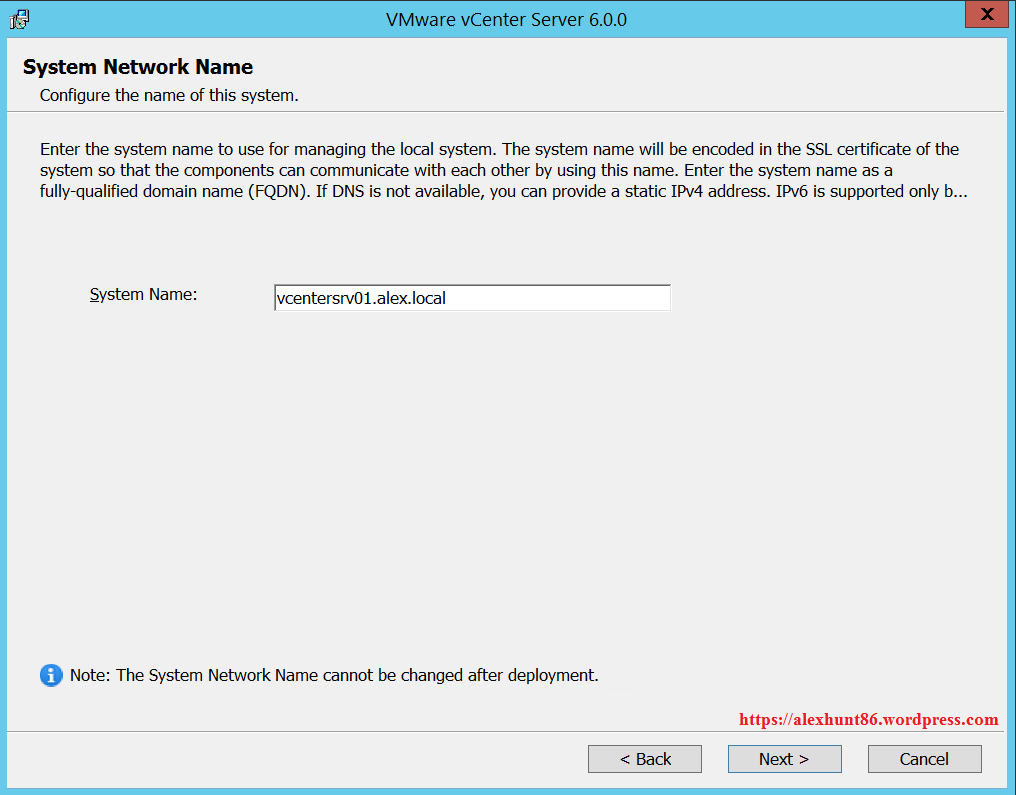
5) Verify the “System Name” is a valid FQDN and press “Next”.
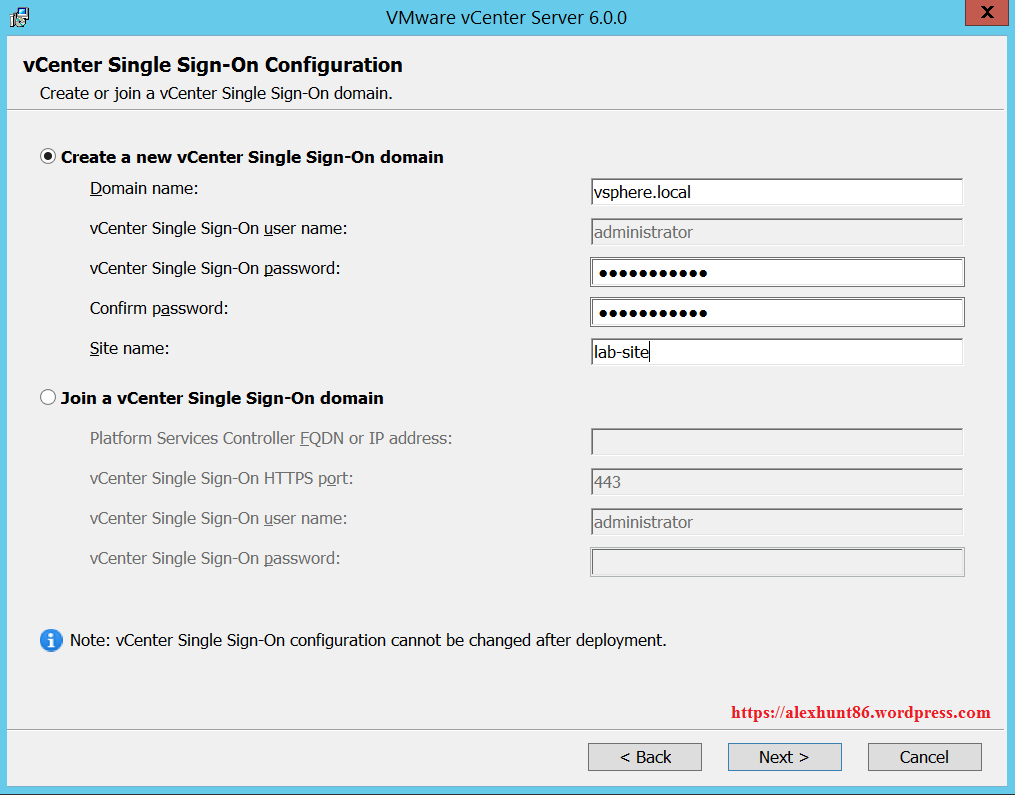
6) On “vCenter Single Sign-ON Configuration” page select Create a new vCenter Single Sign-on domain. and enter the “Domain Name”, “Password” for administrator user and “Site Name”and press next.
7) In the “vCenter Service Account” window, select “specify a user service account” and supply the username in format Domainusername and the password for service account and press “Next”.
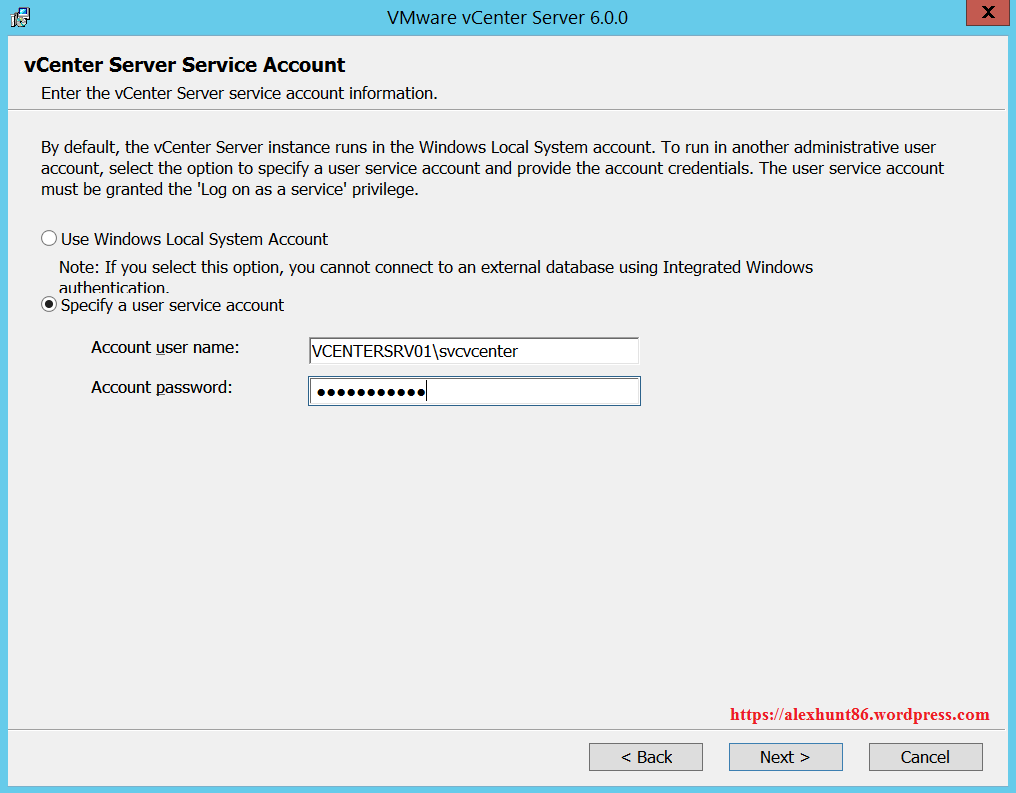
Word of Caution: If you are planning to run your vCenter Server using a dedicated service account then make sure it has been granted “Log on as a service” rights and added to local Administrator group of same machine where you are installing vcenter Server, else you are going to encounter below errors:
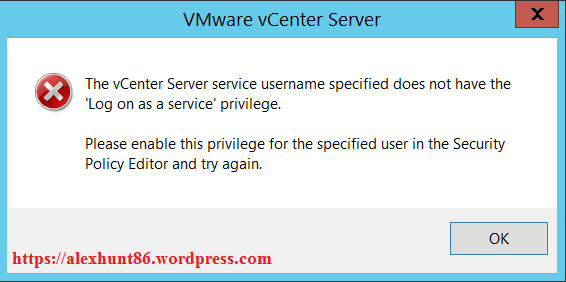
To resolve this error, Select Administrative Tools –> Local Security Policy –> under Local Policy select User Rights Assignment, right click on the policy
1. Log on as a batch job
2. Log on as a service select properties,
add required user information and continue installation.
The second error which you will encounter is
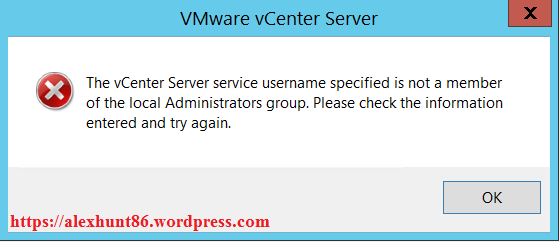
to resolve this issue go to Run and type “compmgmt.msc” and hit enter. Select Local users and groups and under groups select “Administrators” group and add the domain user to this group.
8) On “Database Settings” page , select “Use an embedded database (vPostgres)” and press “Next”.
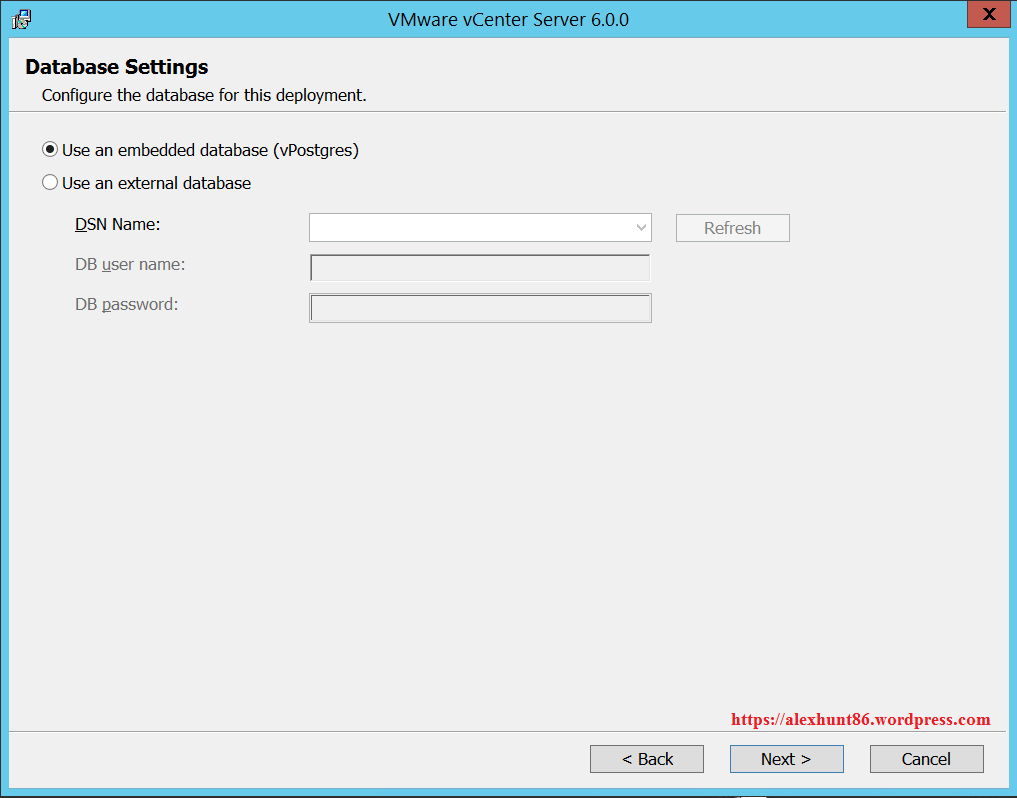
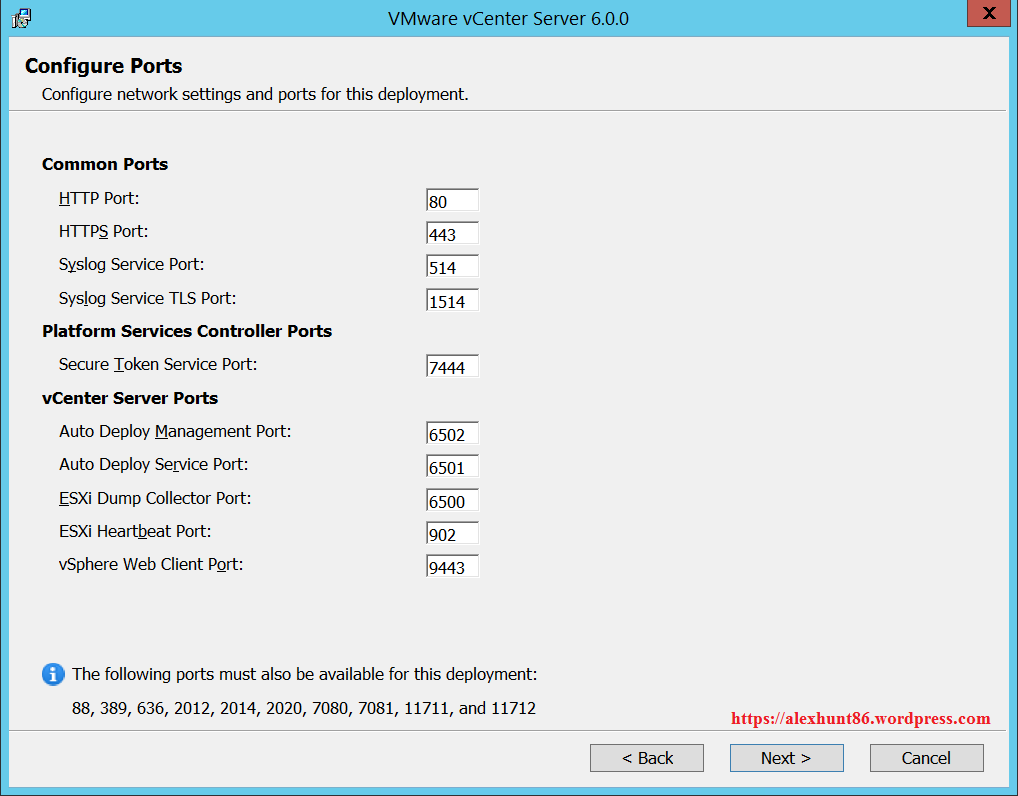
9) On “Configure Ports” page, verify the default ports and press “Next”.
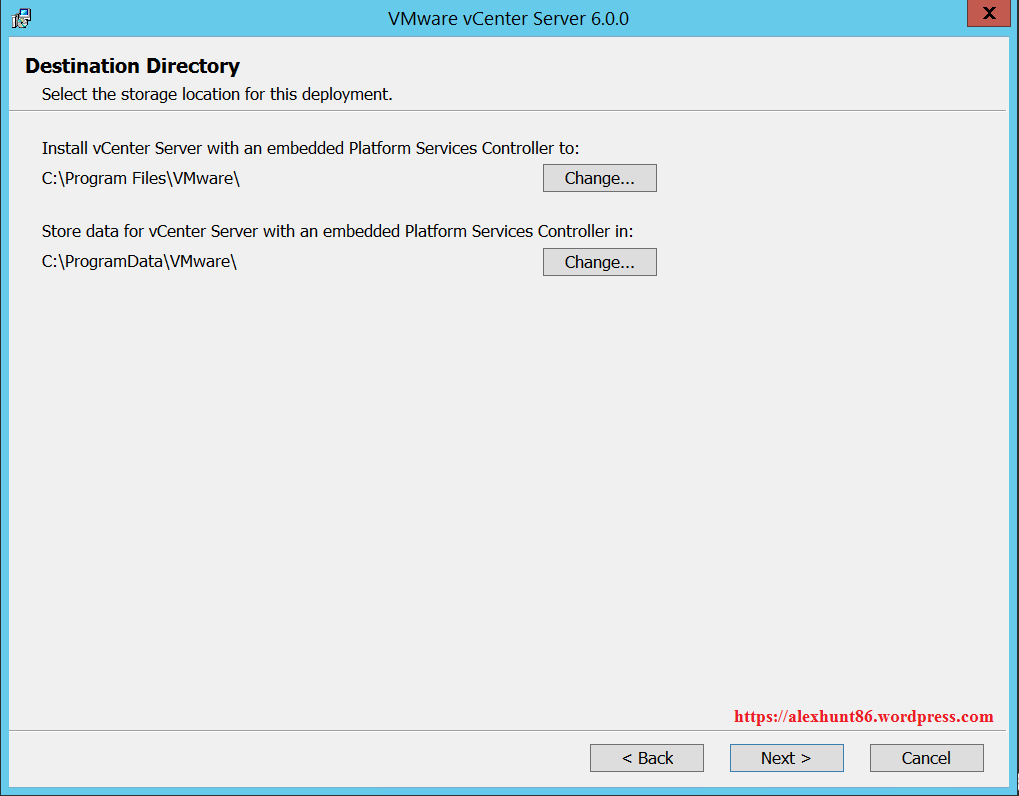
10) In the “Destination Folder” window, change the destination folder if necessary and select “Next”.
vCenter Server can only be installed to a location where the directory names consist of alphanumeric characters and spaces. Make sure the volumes support short names, otherwise “spaces” in the folder names will not be supported.
11) On ready to Install page review your settings and if everything is OK hit Install button.
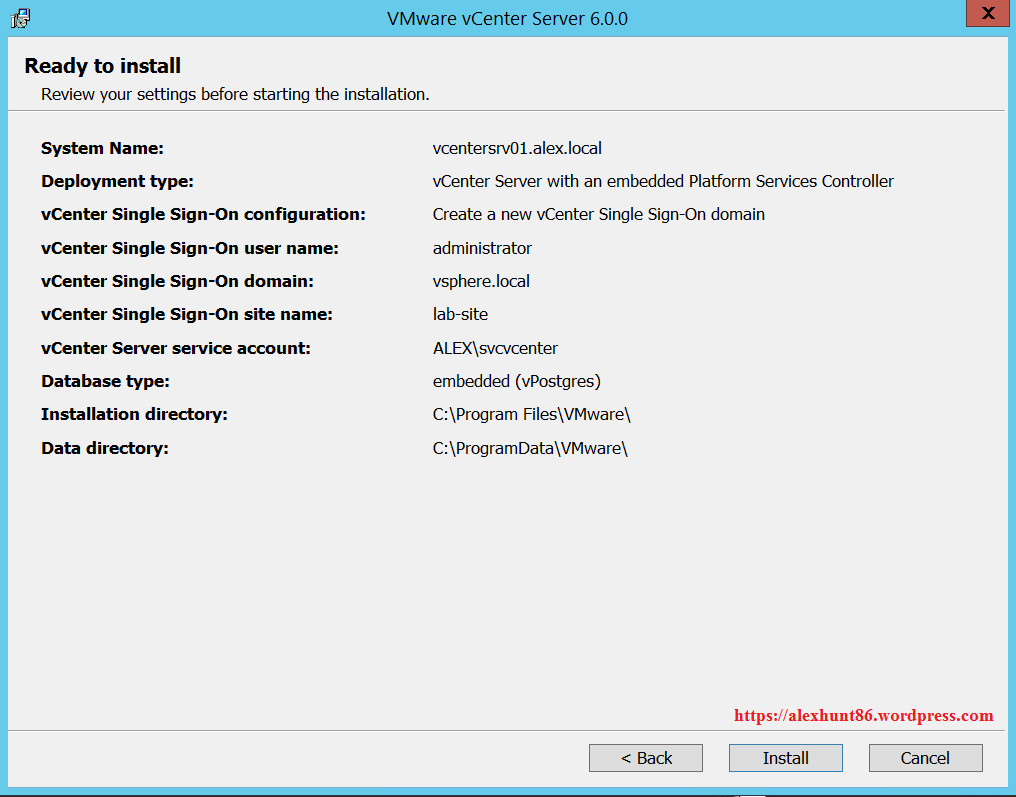
12) Let the installer run and install the components
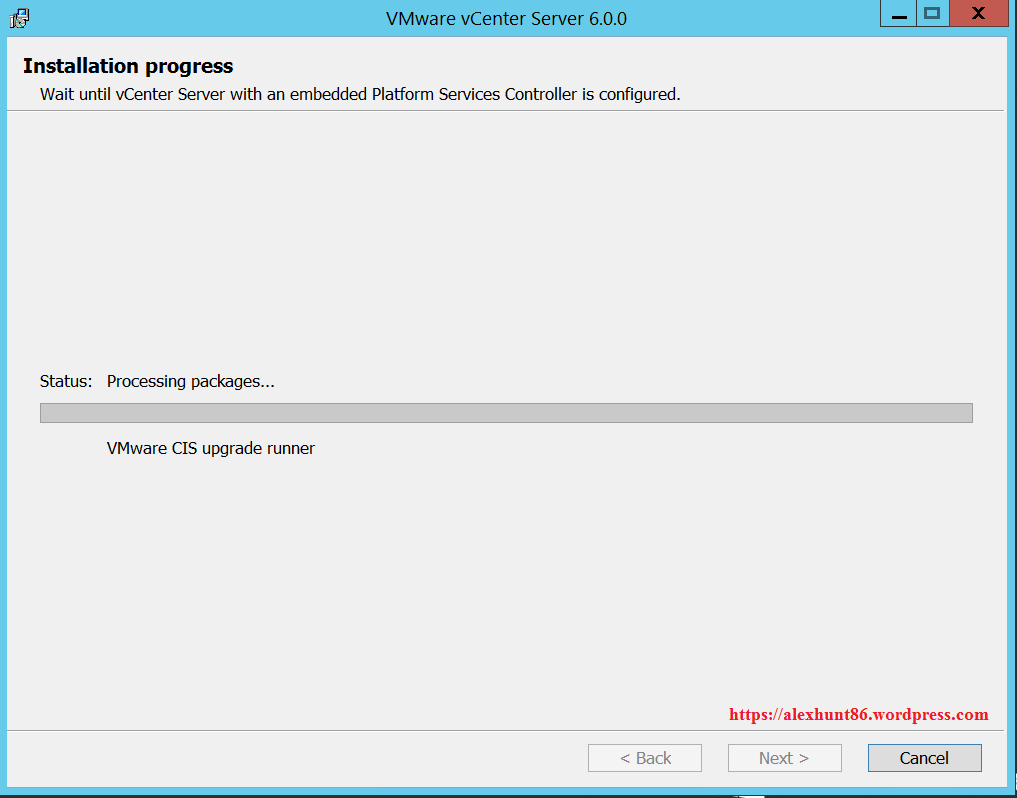
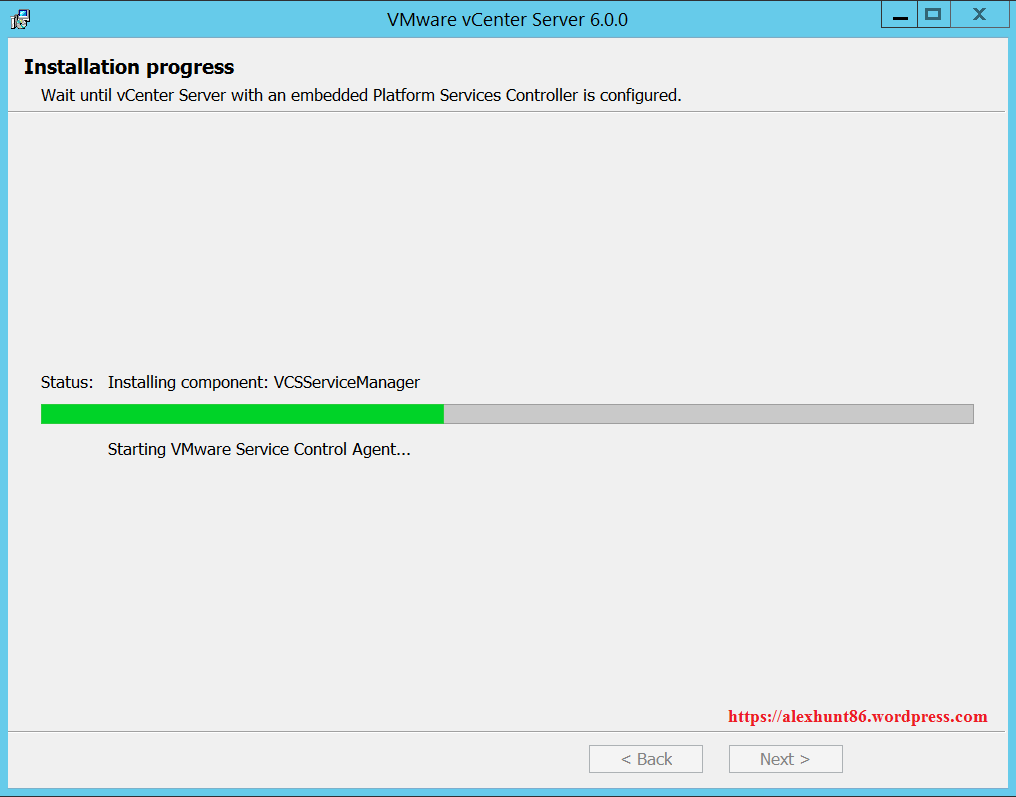
At this time sit back and relax. Put your favourite music on your music system and grab a cup of coffee as the installer gonna take some time to complete the installation.
13) Once the installer has finished installation, Click on Launch vSphere Web-Client and then click on Finish button to complete installation.
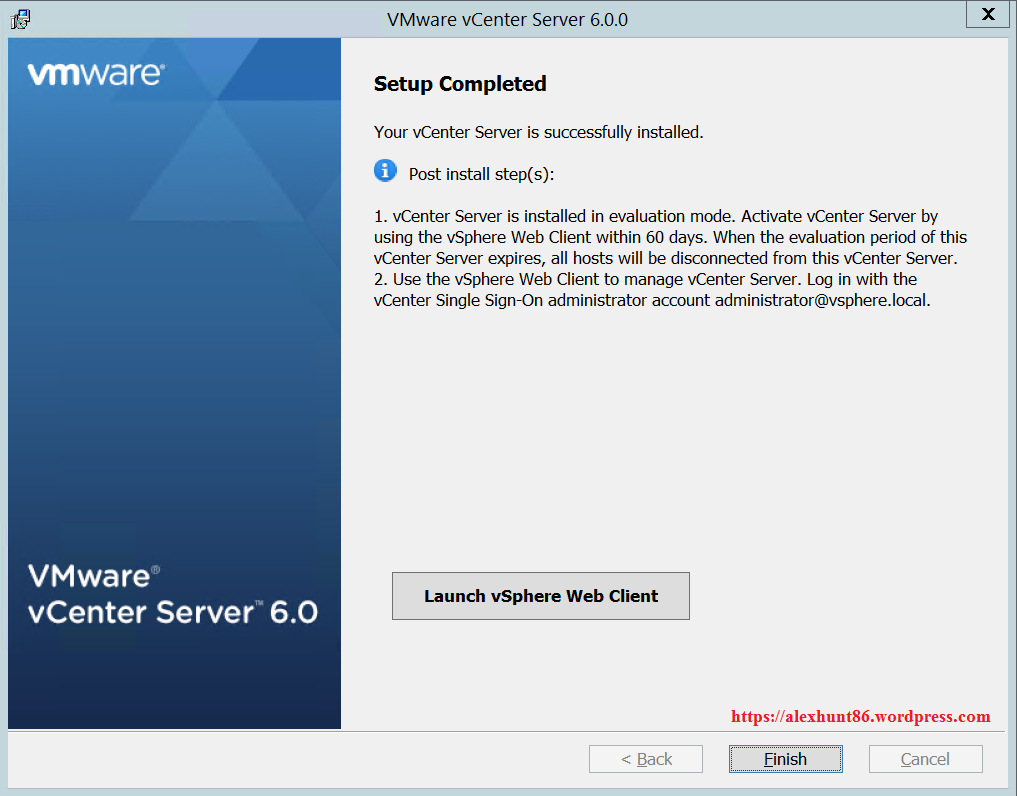
14) Login to Web-Client using administrator@domain-name (which you chose at the time of installation)
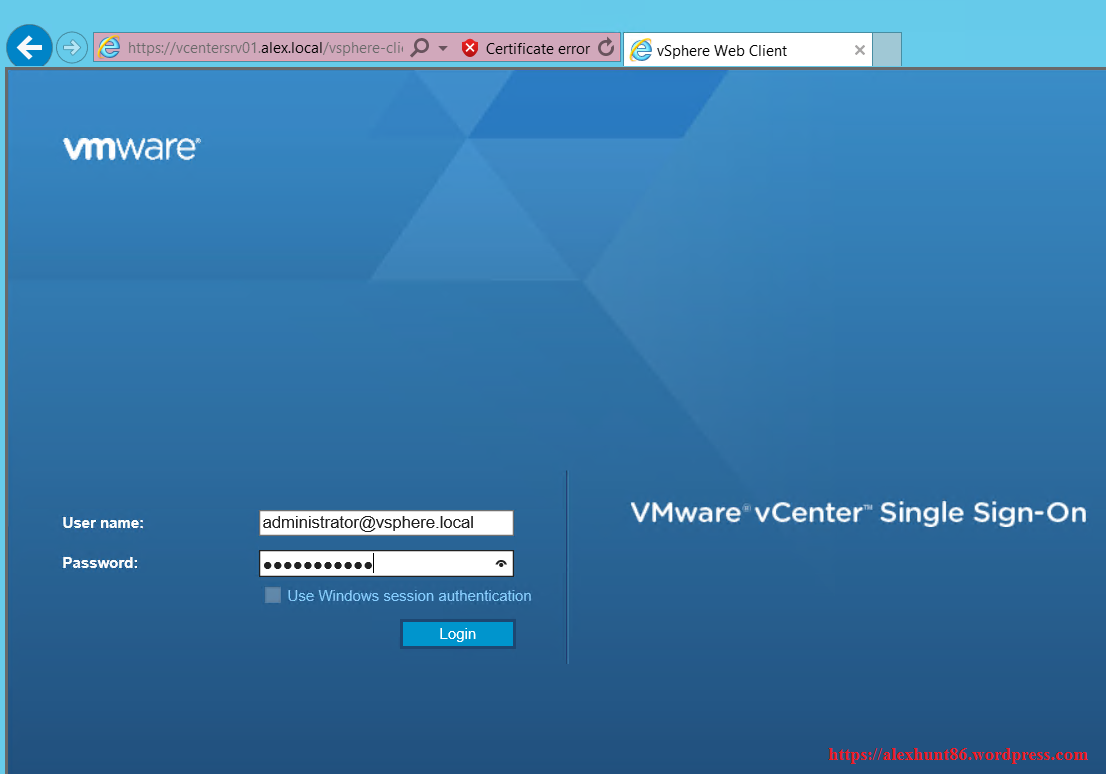
With this installation of vcenter Server 6 has been completed. In the next post of this series we will look at the configuration of vCenter Server 6.
I hope you enjoyed reading this post. Feel free to share this on social media if it is worth sharing. Be sociable 🙂

8 thoughts on “vSphere-6:Part 4-Install vCenter Server 6”