Entitlements allows you to grant users and groups access to Services and/or Blueprints as well as determine what actions they can perform with them. Entitlements offer a significant amount of flexibility in how you provide access to services through the catalog, who can access those services, what actions they can perform, and what is any approvals are required.
Entitlements are made up of three components. Services, Catalog Items, and Actions. You can choose to entitle complete Services which encompass all Items within the service or just select catalog Items. You can also determine what actions the users that belong to the entitle can perform against all the catalog items that are a part of the entitlement.
Within entitlements you also have the ability to assign approvals to Services, Catalog Items, and actions.
If you have missed earlier posts of this series then you can access the same by clicking on below links:
2: Installing and Configuring vRA Identity Appliance
3: Installing and Configuring vRA Appliance
4: Installing and configuring IaaS Components
7: Creating and Configuring Fabric Groups
8: Creating Business Groups and Reservation
9: Creating and Publishing Blueprints
10: Creating Service
Now we will see how to create entitlements.
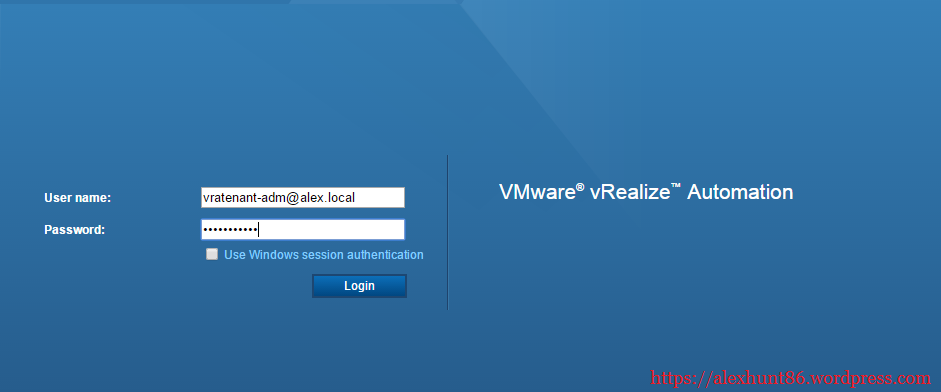
To create new entitlements login to vRA console as Tenant Admin
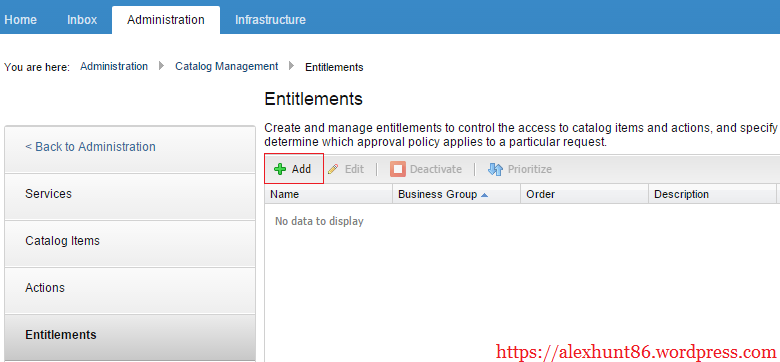
Navigate to Administration ->Catalog Management ->Entitlements
Click “+” to add a new Entitlement.
Complete the required fields:
- Enter a Name and detailed
- Description for the Entitlement.
- Set Status to “Active”
- Search for Users & Groups to entitle to these items. I have selected 2 users here: alexhunt and manish.
- Click “Next”…
Note: The user selection here should map to the same users which were added to the business group. I have only created one business group in my lab “IT-Support” and have added the above 2 users at the time of group creation. You can verify the same from my post Create Business Groups and Reservations
Next on the Items & Approvals screen is where we will entitle the services, catalog items, & Actions. If you entitle an entire service you do not need to add the catalog items from the service under catalog items.
In the “Items & Approvals” tab, add the desired items, actions, and approvals.
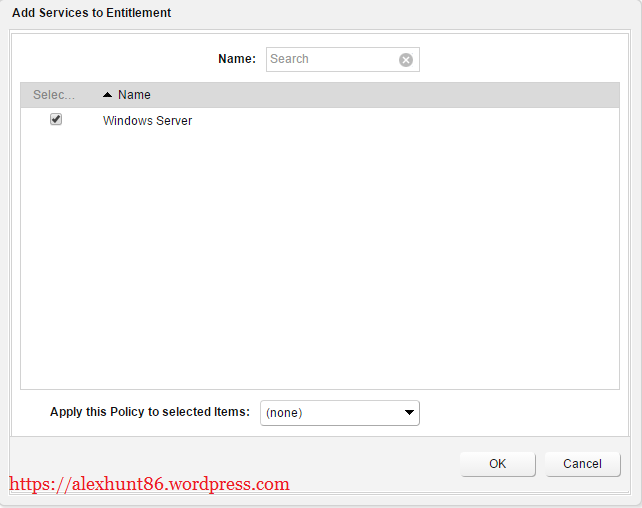
Entitled Services – click “+” and select the previously-configured IaaS Service catalog from the list
I have added the Windows Server service which I created in my last post Creating Service to this entitlement. Click OK after making your selection.
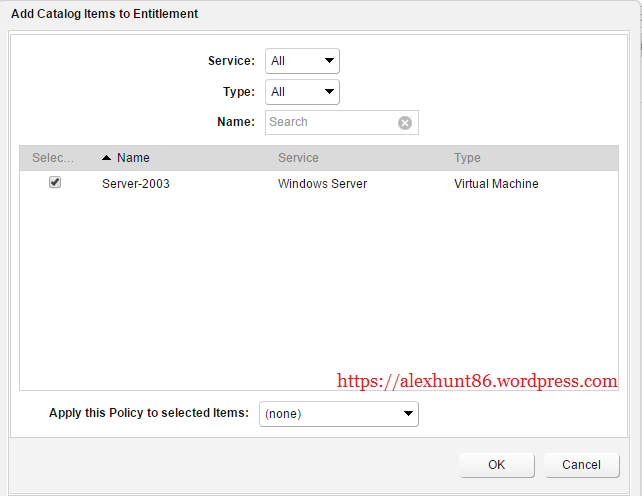
Entitled Catalog Items – click “+” and select the desired IaaS Catalog Items (Blueprints) from the list.
Select “All” in Service and Type fields and from the list select the Catalog Item that will be added to this Entitlement. I have created only one blueprint in my lab so I don’t have many options to select. Click on OK button after making your selection.
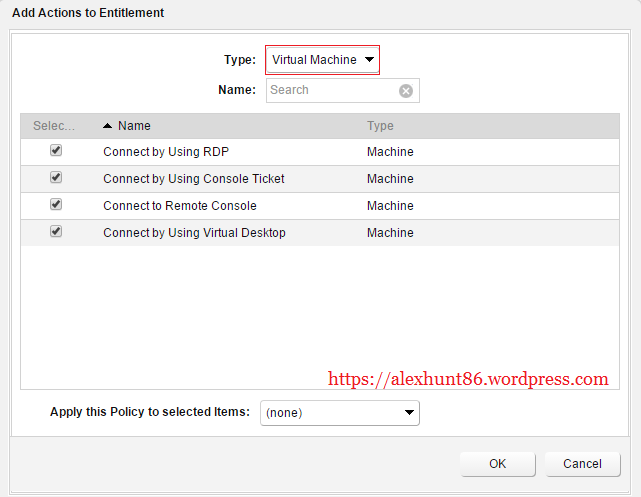
Entitled Actions – click “+” to add all the desired resource Actions to this Entitlement.
Actions are “day 2” operations that determine which actions users can perform on a machine after it has been provisioned. (These actions override the operations configured at the Blueprint level)
Select “Virtual Machine” from Type field and select the corresponding actions which a user can perform. I have selected all as there are not much options here. Hit OK once you are done with selection.
Finally the Entitlement screen will look like as shown below.
Your newly created Entitlement will be visible under Entitlements list.
With this we completed creating Entitlements.
In next post of this series we will look into how an end user provision a new virtual machine from this Entitlement.
Share this post on social media if this post is informational to you. Be Sociable 🙂





13 thoughts on “vRealize Automation- Creating Entitlements”