Introduction
In this post, I will discuss replacing NSX self-signed certificates with CA-signed certificates with a Subject Alternative Name (SAN) extended attribute.
Note: This article applies to NSX v4.2 and higher versions. For NSX version >= 4.0/4.1, refer to the next post of this series.
What is a SAN attribute, and why should I use it?
A Subject Alternative Name is an extension used in digital certificates that allows a single certificate to secure multiple domain names, subdomains, or IP addresses. Think of it as a way to tell your web browser, “This certificate is valid for more than just one website.” Instead of providing separate certificates for each domain/machine, a single SAN certificate can cover numerous domains, simplifying maintenance and boosting security.
In a typical NSX deployment, you deploy 3 NSX Manager nodes and configure a VIP address. Each NSX node comes with an out-of-the-box, self-signed SSL certificate. Also, when you configure a VIP address, NSX automatically configures a self-signed certificate for the VIP. In a production environment, it is recommended that you replace the self-signed certificates with CA-signed certificates to improve security.
If you are not using a wildcard certificate or a certificate with SAN entries, you have to generate a signed certificate for all 3 nodes and the VIP. This is a time-consuming process and introduces additional overhead each time you want to rotate certificates. Thus, using a certificate with SAN entries simplifies the process and reduces time.
Types of certificates in NSX
Let’s first discuss the types of certificates in NSX before moving on to the process of replacing the self-signed certificates.
There are three categories of self-signed certificates in NSX.
- Platform Certificates: Platform certificates are used for internal communication within NSX and external authentication when you access NSX manager’s GUI/API.
- NSX Services Certificates: NSX service certificates are user-facing for services such as load balancer, VPN, and TLS inspection.
- Principal Identity Certificates: This is used for machine-to-machine communication. For example, communication between local and global managers in NSX federation.
Platform Certificates in NSX
Platform certificates are further categorized as:
- API (previously known as Tomcat): This serves as a server certificate for the API/GUI client reaching the NSX manager nodes on port 443.
- Cluster (previously known as mp-cluster): This certificate serves as a server certificate for API/GUI clients reaching NSX cluster VIP on port 443.
- Other certificates: Certificates specifically for other purposes, including NSX Federation, Cluster Boot Manager (CBM), and Central Control Plane (CCP).
To learn more about NSX certificates, see the product documentation.
NSX Certificate Replacement Procedure
The process of NSX certificate replacement can be divided into the following steps:
- Certificate Generation
- Certificate Request
- Certificate Replacement
Note: The following procedure assumes that you have a Microsoft-based CA server in your production/lab environment and that the required certificate template is created as per the instructions documented here.
Certificate Generation
This phase entails generating the Certificate Signing Request (CSR) and extracting the PEM content from the certificate, which is subsequently sent to the registrar for the signing process.
Step 1: Create a Certificate Signing Request.
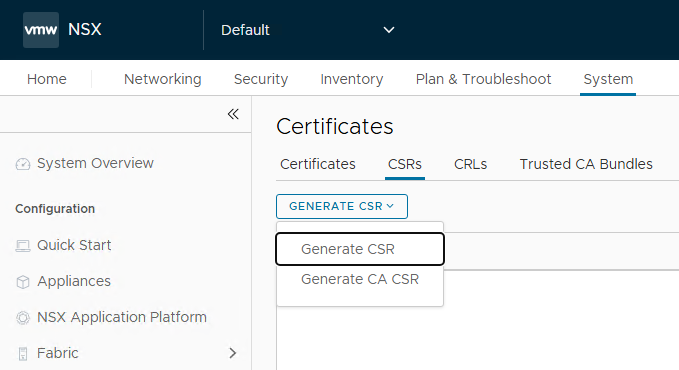
Login to the NSX manager node, navigate to System > Certificates > CSRs, and click Generate CSR.
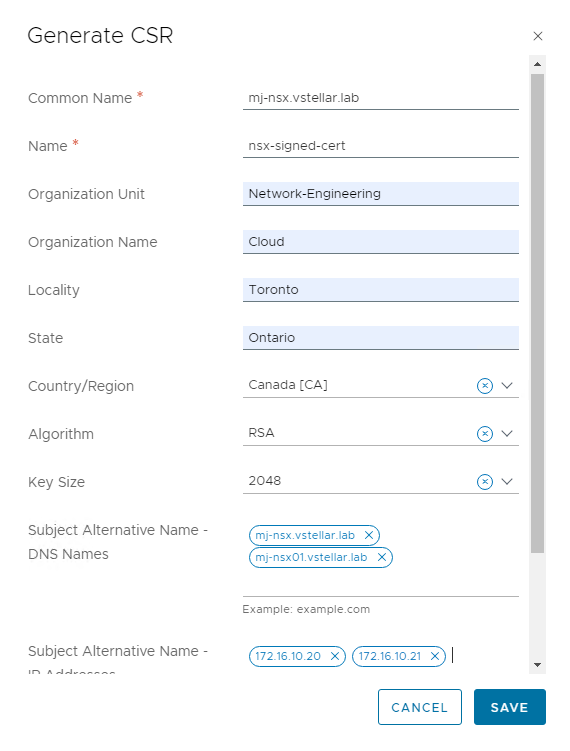
Enter the common name, DNS names of the NSX manager nodes/VIP, and the corresponding IP addresses.
In my lab, I have deployed only one NSX manager node and configured the cluster VIP.
Step 2: Extract the PEM file to be sent to the CA for signing.
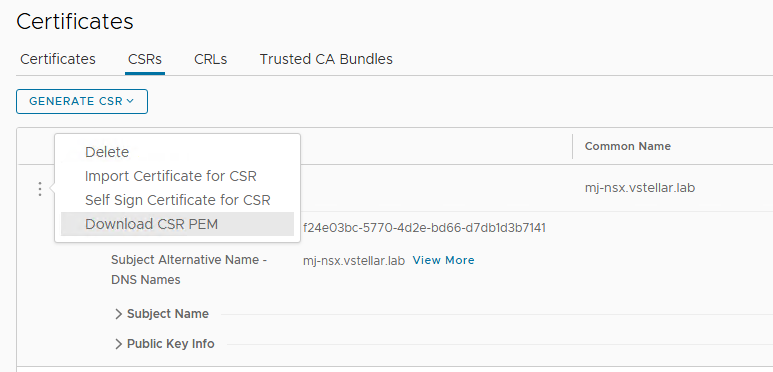
Click on the newly generated CSR and select Download CSR PEM. Open the downloaded file in a text editor and keep the content handy for the next step.
Certificate Request
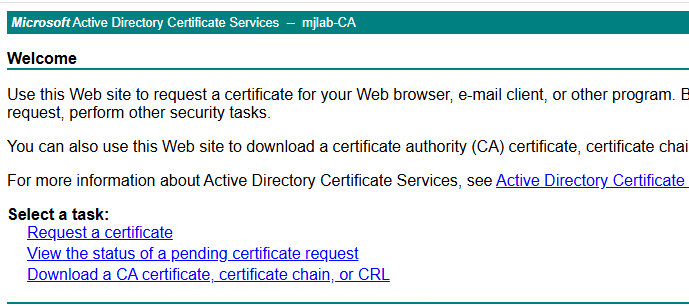
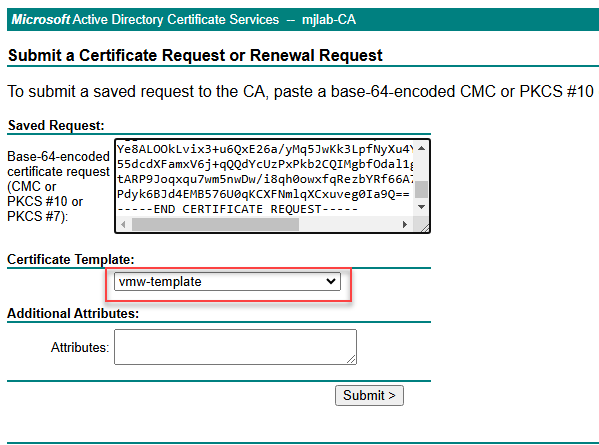
Step 3: Login to the certificate authority server and click “Request a certificate.”
Paste the content of the PEM file that you downloaded in step-2 and select the custom certificate template that you created.
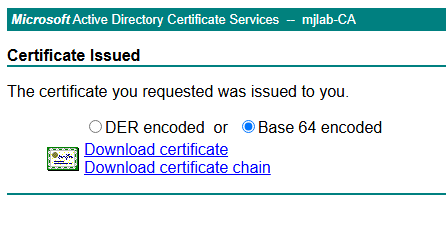
Select the Base 64 option and click Download certificate.
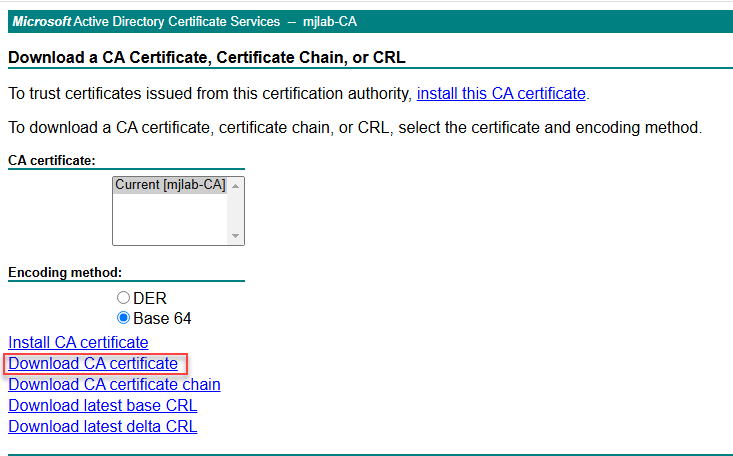
Return to the home page of the certificate authority server and download the CA root certificate by clicking “Download a CA Certificate, Certificate Chain, or CRL.”
Select Base 64 and click Download CA certificate.
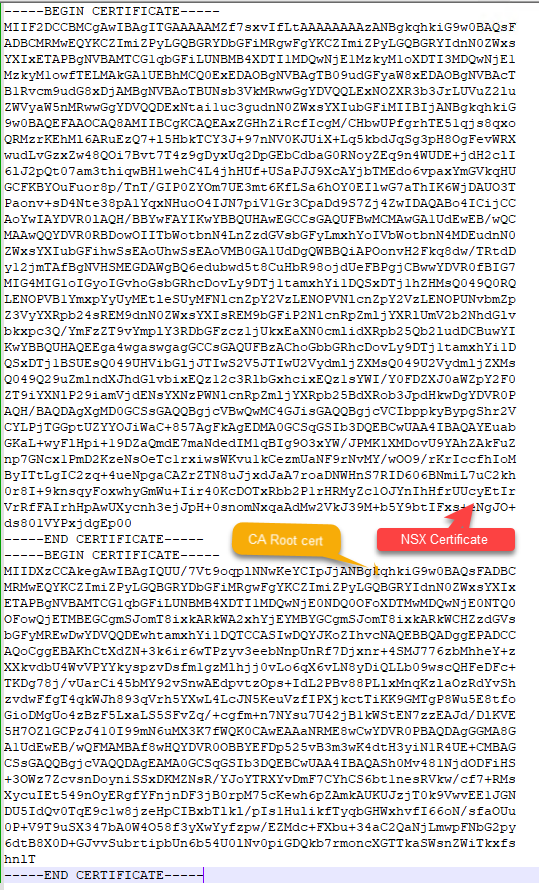
Step 4: Create Certificate Chain
Create a new PEM file by appending the contents of the signed cert followed by the content of the CA root certificate.
Certificate Replacement
Step 5: Upload Signed Certificate
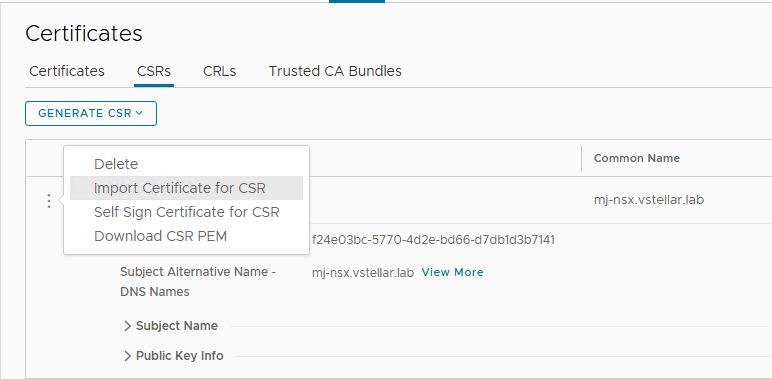
In the NSX Manager UI, navigate to System > Certificates > CSRs and locate the CSR generated in step-1.
Click on the vertical ellipsis button and select Import Certificate for CSR.
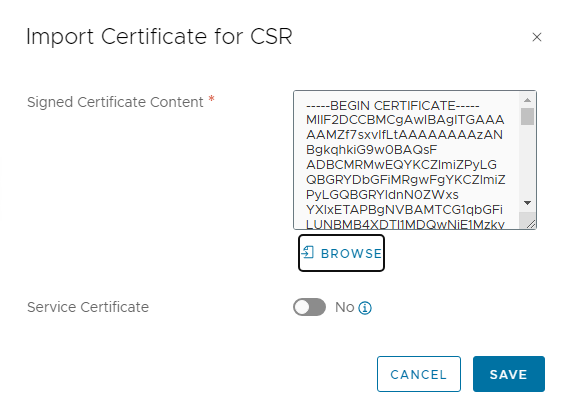
Enter the content of the certificate chain in the box and set the service certificate to No.
Step 6: Apply the signed cert to NSX Manager VIP & Node
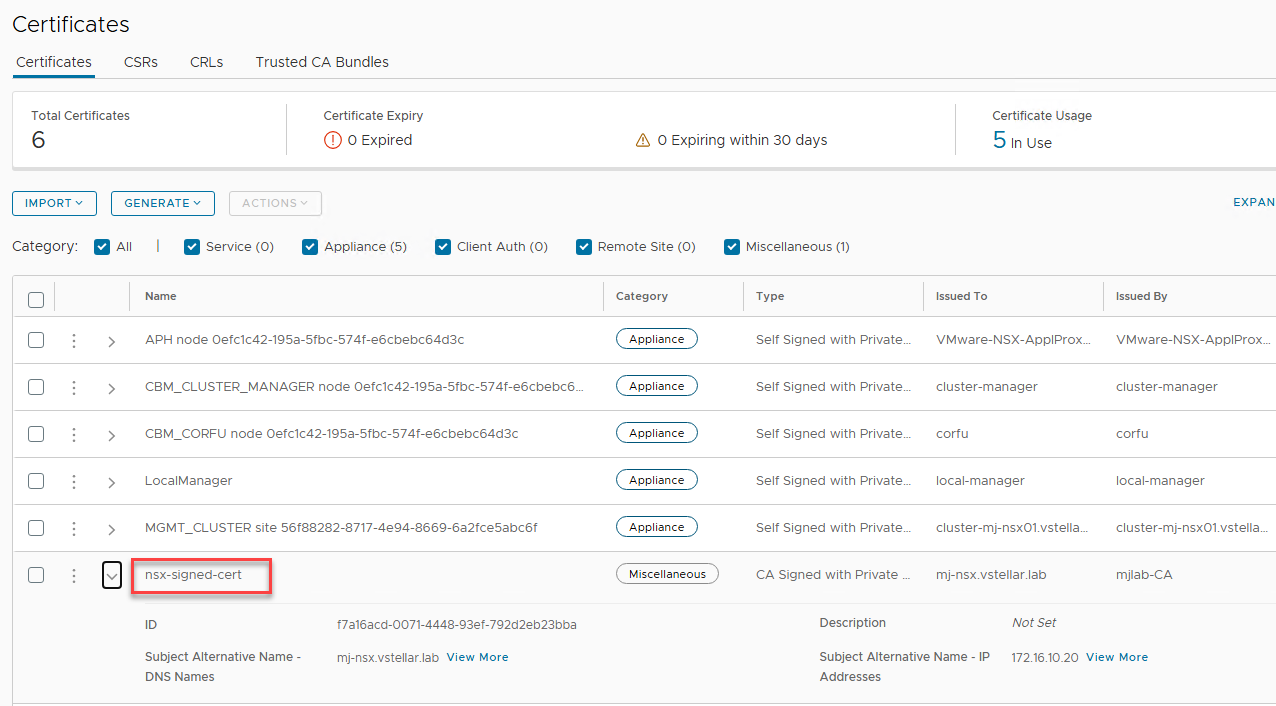
Navigate to the Certificates tab and locate the signed certificate imported in the previous step.
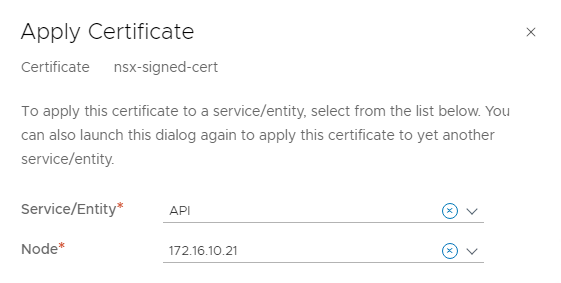
Click on the vertical ellipsis button of the certificate and select Apply Certificate.
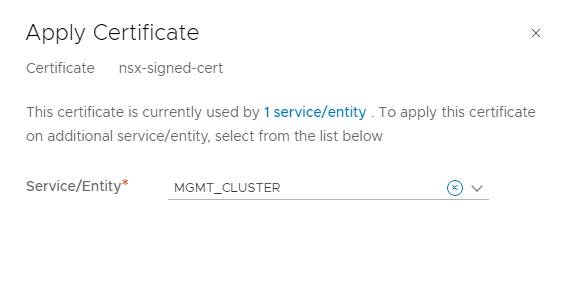
To apply the certificate to the NSX node, set the entity to API and select the node. This needs to be done for all NSX nodes.
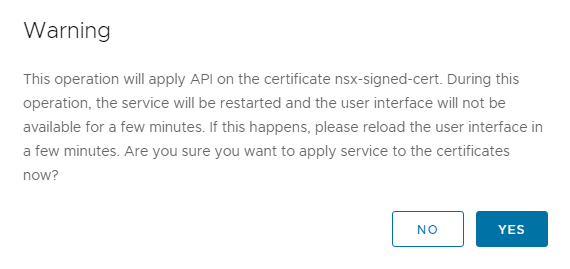
Click on the Yes button to accept the warning.
To apply the certificate to the NSX Cluster VIP, set the Service/Entity to MGMT_CLUSTER and click Save.
Step 7: Certificate Validation
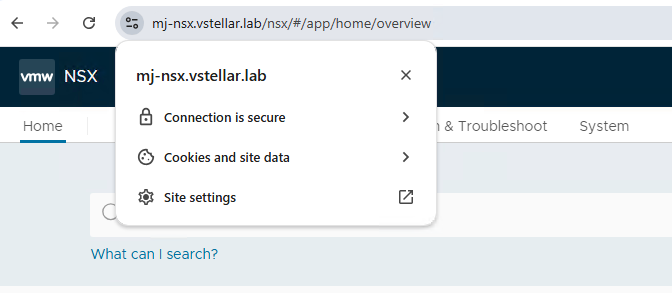
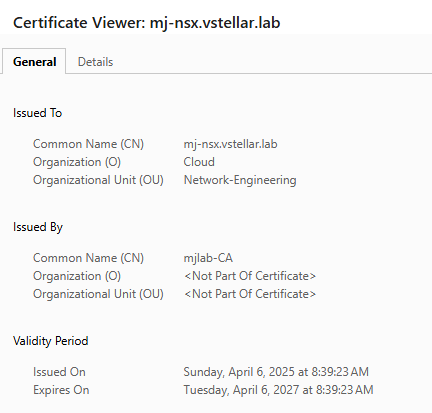
Refresh the NSX URL in the browser and validate that the certificate is applied and the certificate tab reads “Connection is secure.”
And that’s it for this post. In the next post, I will demonstrate creating and replacing certificates through API.
I hope you enjoyed reading this post. Feel free to share this on social media if it is worth sharing.

