Introduction to OIDC & OAuth 2.0
OpenID Connect (OIDC) is an identity authentication protocol that extends open authorization (OAuth) 2.0 to standardize the process for authenticating and authorizing users. The OAuth 2.0 protocol enables a third-party application (called a client) to access resources from a resource server (such as an API) on behalf of a user (referred to as a resource owner). The user provides the client with a limited access token, which it can use to request resources from the resource server.
The OAuth 2.0 protocol provides security through scoped access tokens, and OIDC provides user authentication and single sign-on (SSO) functionality. The access token issued by an authorization server verifies the identity and consent of the user.
VMware Cloud Director can be integrated with an external OIDC provider to import users/groups created in the upstream IDP. The Service Provider imports users/groups in VCD and associates them with appropriate roles. The imported users can then login to VCD using the credentials configured in the IDP.
In this post, I will walk through configuring OKTA as an Identity Provider and its integration with VCD.
Configure OKTA IDP
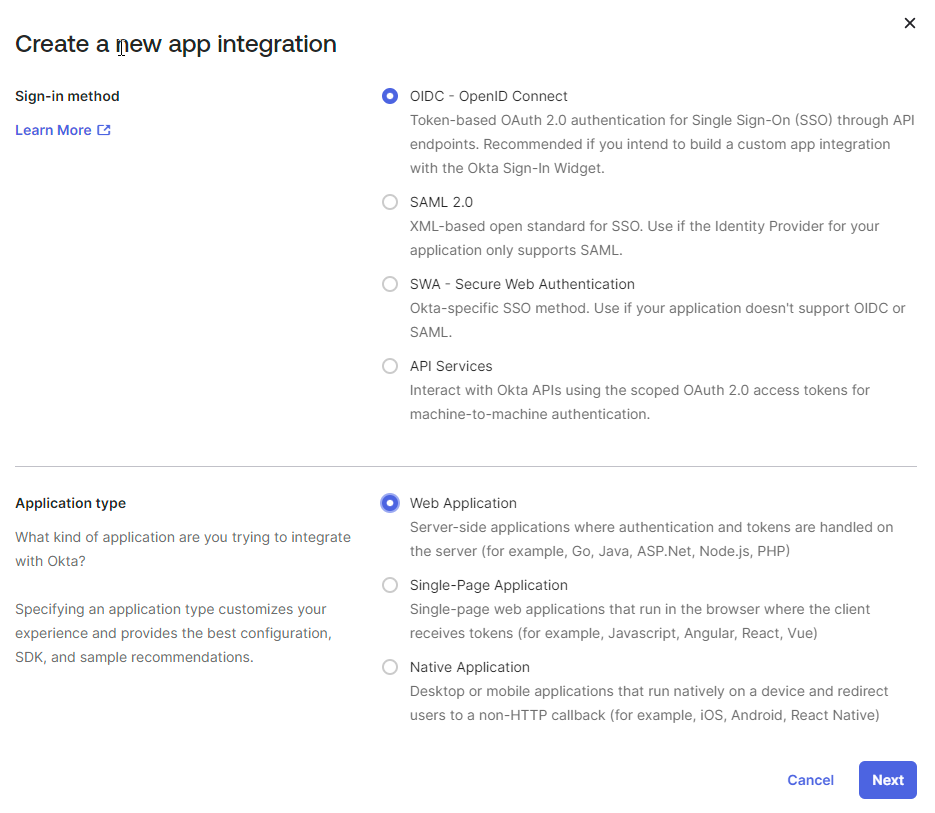
1: Login to the OKTA portal, navigate to the Applications tab, and click the Create App Integration button.
2: Select OIDC as the sign-in method and Web Application as the application type
3: Choose an app integration name and optional logo.
4: Under Grant types, select Client Credentials and Authorization Code.
5: Sign-in redirect URIs: The Sign-in redirect URI is where Okta sends the authentication response and ID token for the sign-in request. The URL differs for the provider and tenant login.
- For Provider Login: https://<vcd_fqdn>/login/oauth?service=provider
- For Tenant Login: https://<vcd_fqdn>/login/oauth?service=tenant
6: Sign-out redirect URIs: The user gets redirected to this URI by Okta when your application contacts it to end the user session. Typically this is the same as the Sign-in URI.
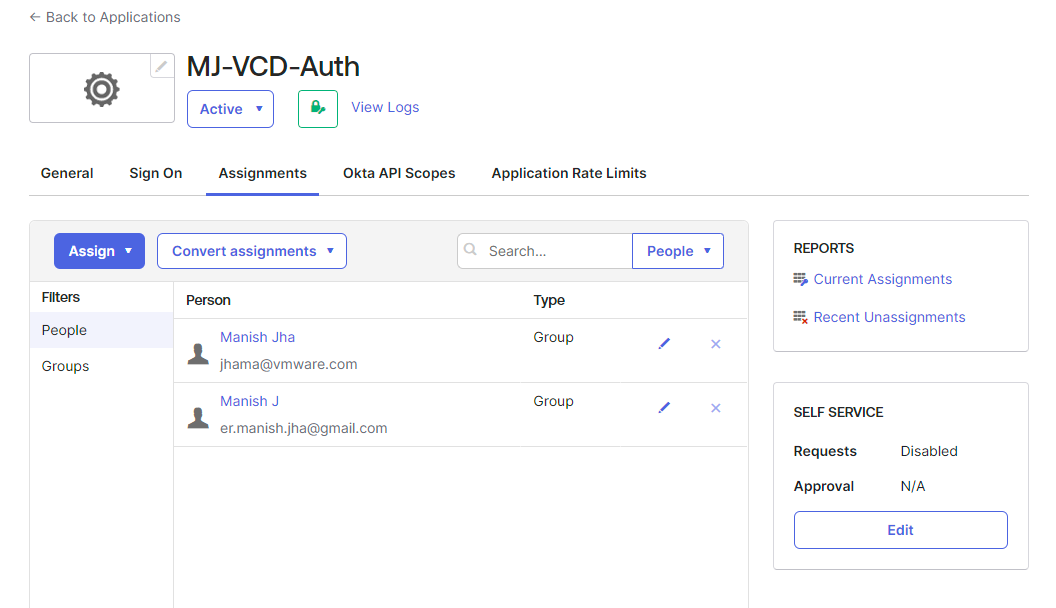
7: Under Assignments choose the right level of access control. The default access method grants login access to everyone in the Okta org on this app integration.
Since this is a lab environment, I chose the default access method. In a production environment, you must limit access to specific users/groups.
Clicking on the save button creates the app integration and allows you to configure additional settings for this app.
The Client ID and Client secret values are displayed on the General tab. Make a note of both values as you need them when configuring OIDC settings in VCD.
Integrate VCD with OIDC
1: Login to the VCD portal using provider credentials and navigate to Administration > Identity Providers > OIDC, and click the configure button.
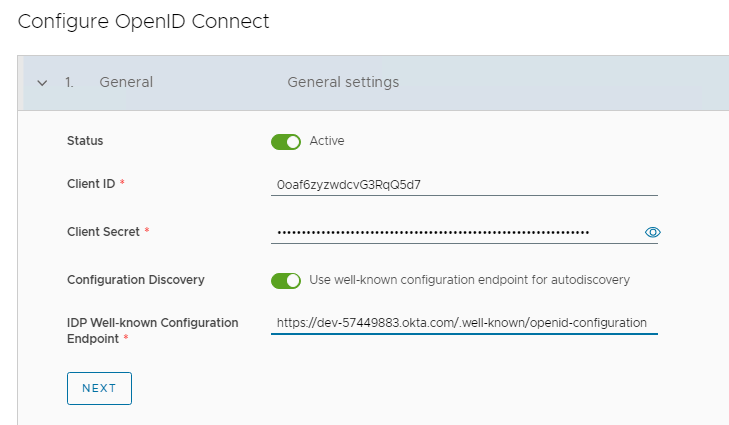
2: Using the toggle button, change the OIDC status to Active and enter the Client ID and Client Secret that you noted previously.
4: Enable Configuration Discovery using the toggle button and set the IDP Well-known configuration. This is typically https://idp_url/.well-known/openid-configuration
Note: Enabling Configuration Discovery is optional. If you did not enable Configuration Discovery, you have to specify the Endpoints section manually.
5: Endpoint Configuration: Although “Endpoint” information will automatically appear when you click “Next,” it is important to check and validate the populated information.
6: Scopes: The scopes are used by VCD to grant access to user information. The scopes specify the access rights that an access token has to user information when it is requested by a client.
I have the following scopes configured in my lab.
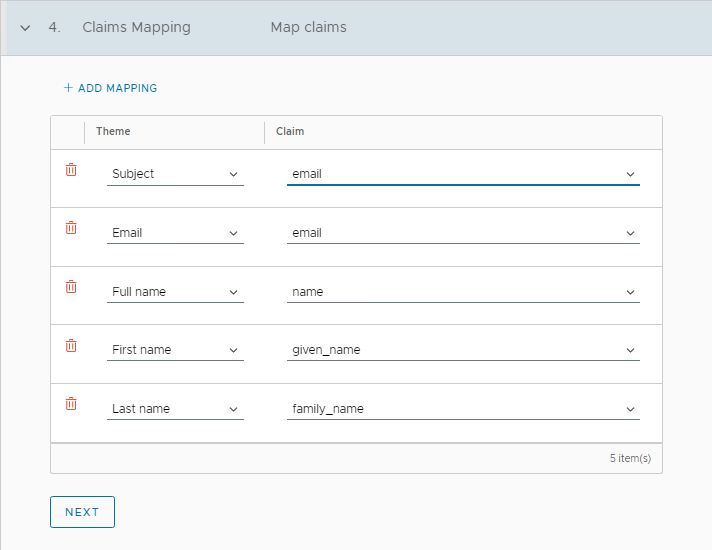
8: Claims: OpenID Connect (OIDC) scopes are used by an application during authentication to authorize access to a user’s details, like name and email. Each scope returns a set of user attributes, which are called claims. Once the user authorizes the requested scopes, the claims are returned in an ID Token.
Claims Mapping is essential for VCD to interpret the token/user information correctly during the login process.
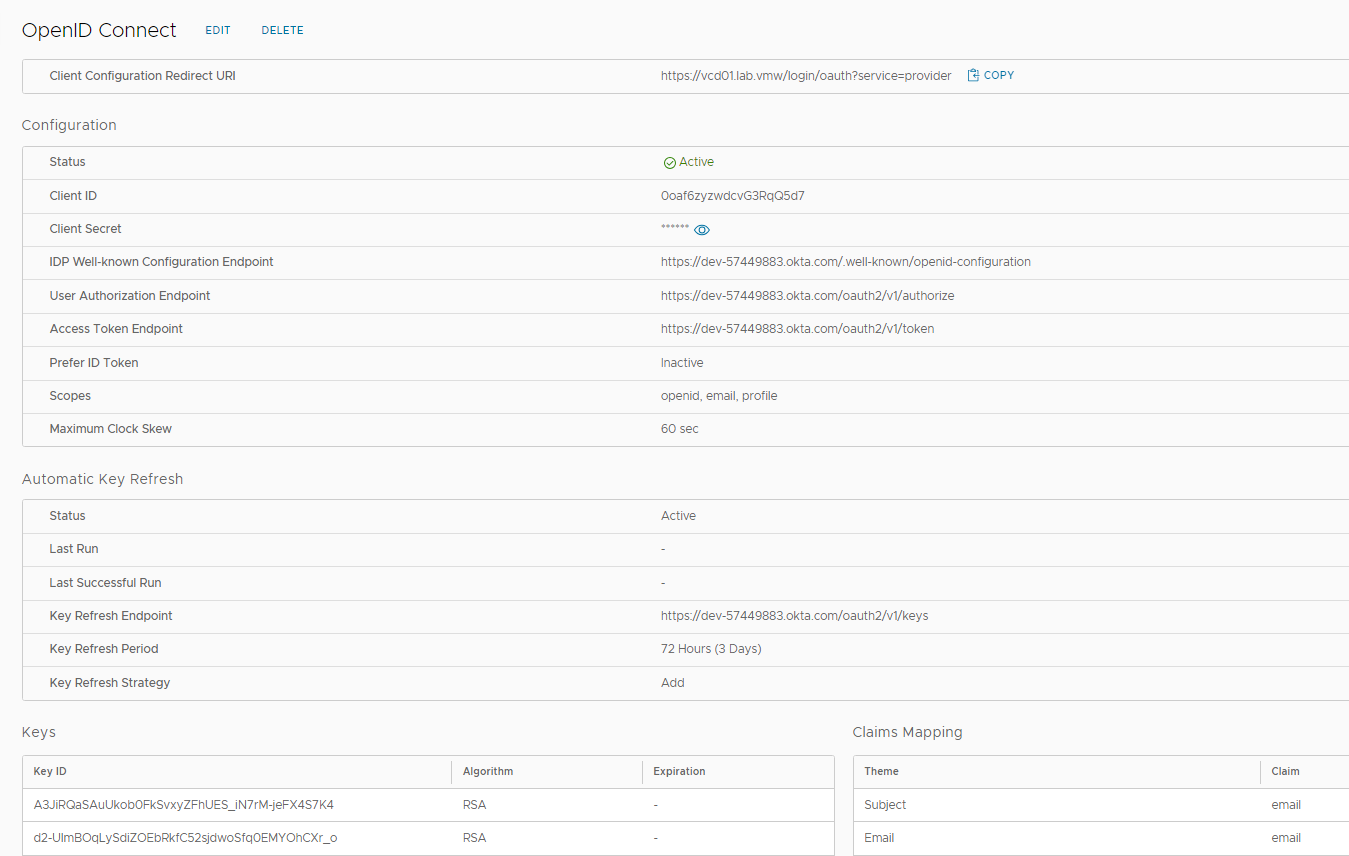
Note: In the Okta developer account, the username is an email address, so I configured the Subject and Email to claim type email. These settings vary from IDP to IDP.
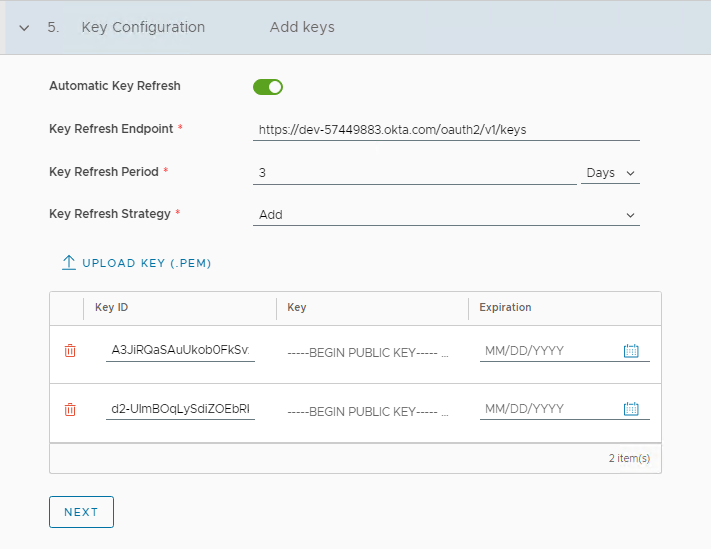
9: Key Configuration: To facilitate secure client login, OIDC uses a public key cryptography mechanism. A private key is used by the OIDC provider to sign the JWT Token and it can be verified by a 3rd party using the public keys published on the OIDC provider’s well-known URL. These keys form the basis of security between the parties.
From VCD version 10.3.2 onwards, VCD supports Automatic Key Refresh for OIDC. You can enable automatic refresh using the toggle button.
- Key Refresh Endpoint: This should get populated automatically as you choose to enable Configuration Discovery in step 4.
- Key Refresh Strategy: The following key refresh strategies are supported in VCD.
- Add: Adds the incoming set of keys to the existing set of keys. All keys in the merged set are valid and usable. This is the preferred option in most of the cases.
- Replace: Replace the existing set of keys with the incoming set of keys.
- Expire After: You can configure an overlap period between the existing and incoming sets of keys. You can configure the overlapping time using the Expire Key After Period, which you ranges from 1 hour up to 1 day.
10: If you want to customize the Sign in with OIDC button label that appears on the VCD login page, enter a new custom button text and click on Save.
11: Clicking on the Save button presents the currently configured settings. You can edit the settings or wipe it (if you want to start fresh) using the delete option.
Import users and Groups from Okta
I have created a couple of users in Okta and granted them access to the VCD app.
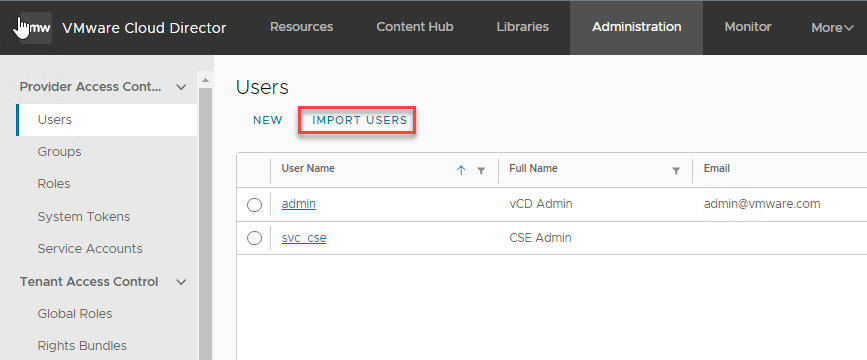
To import the users from Okta to VCD, navigate to the Administration > Users tab and click on the Import Users button.
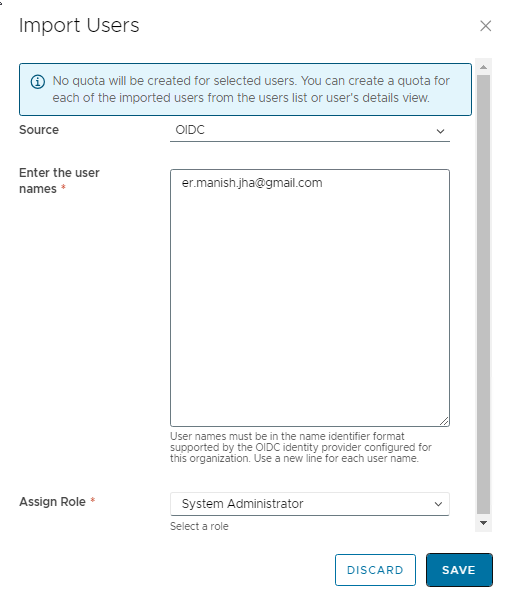
Select Source as OIDC and type the username in the username box and map it to the appropriate role and click on Save.
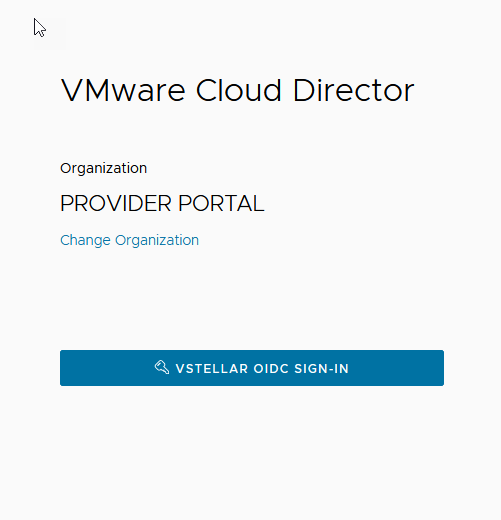
Logout from the VCD portal. When you type the login URL again, you will see an option to login using OIDC credentials.
The login process redirects you to the Okta portal where you can enter your credentials.
Upon successful validation of the credentials, you should be able to login to the VCD portal.
And that’s it for this post.
I hope you enjoyed reading this post. Feel free to share this on social media if it is worth sharing.


