What is NSX Guest Introspection ?
VMware NSX Guest Introspection is a security feature which when enabled, offloads antivirus and anti-malware agent processing to a dedicated virtual appliance (service vm’s).
When Guest Introspection is enabled on a cluster, it continuously update antivirus signatures, thus giving uninterrupted protection to the virtual machines running in that cluster. New virtual machines that are created (or existing virtual machines that went offline) are immediately protected with the most current antivirus signatures when they come online.
Components of NSX Guest Introspection
The main components of Guest Introspection are:
1: Guest VM Thin Agent: This is installed as part of the VMware Tools driver. It intercepts Guest VM file/OS events and passes them to ESXi Host.
2: MUX Module: When Guest Introspection is installed on a cluster, NSX installs a new VIB (epsec-mux) on each host of that cluster. The new VIB is responsible for receiving messages from the Thin Agent running in the guest VM’s and passing the information to the Service Virtual Machine via a TCP session.
3: Service Virtual Machine (SVM): On each host in the cluster that we’ve enabled “Guest Introspection” on, NSX will deploy a Service Virtual Machine (SVM). The SVM will offload the activity needs to be done inside the VM Guest OS and communicate with NSX Manager to send updates and to get new configurations.
Below diagram from vmware summarizes the high level overview of all the NSX security related features.

NSX GI is supported via VMware Service or 3rd Party Service. If you are not using any 3rd party services, then what you get with GI is Activity Monitoring and Identity Firewall. Before we jump into lab and start configuring NSX GI, lets first understand how GI works when using vmware services.
1: Activity Monitoring Workflow
- User perform actions like read/write/create etc on a file.
- The Thin Agent installed inside guest vm intercepts the action performed on a file. The thin agent then locks the file, scans it and send it up to the SVM for further investigation.
- The Thin Agent communicates to the epsec-mux driver on the ESXi host through VMCI to pass this information onward.
- The SVM communicates to the epsec-mux driver on the ESXi host through TCP/IP and scans the file, provides information on the contents, then sends back information.
- Once information is gathered on the SVM, the SVM tells the Thin Agent to either delete or ignore the file.
2: Identity Firewall Workflow
- User login to a Virtual Machine with AD credentials.
- The login event is detected by the thin agent running inside the guest os. Thin agent updates the SVM with a user id and IP address combination.
- The SVM update the NSX manager with user details plus AD Group Memberships.
- The NSX Manager will store the user id and the IP address inside its database.
- NSX manager will then translate the Security Group to VMs and understand where the NSX firewall policy needs to be pushed.
- NSX will push the firewall policy to the related VM in the relevant security group.
- The user will be able to access the application inside the datacenter from his VM.
How to deploy NSX Guest Introspection
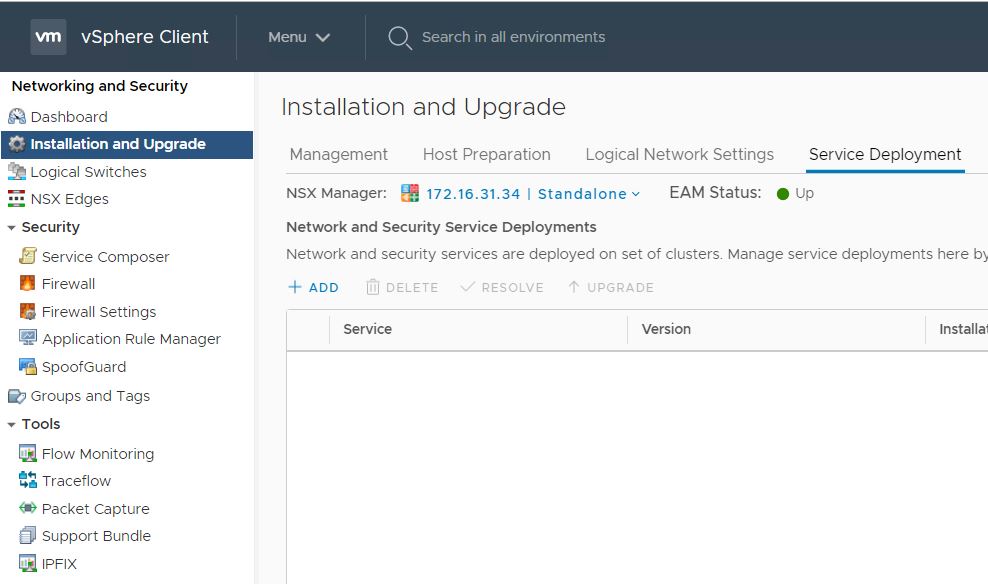
Login to vCenter Web Client and click on Networking & Security and navigate to Installation and Upgrade > Service Deployment and click on + ADD button.
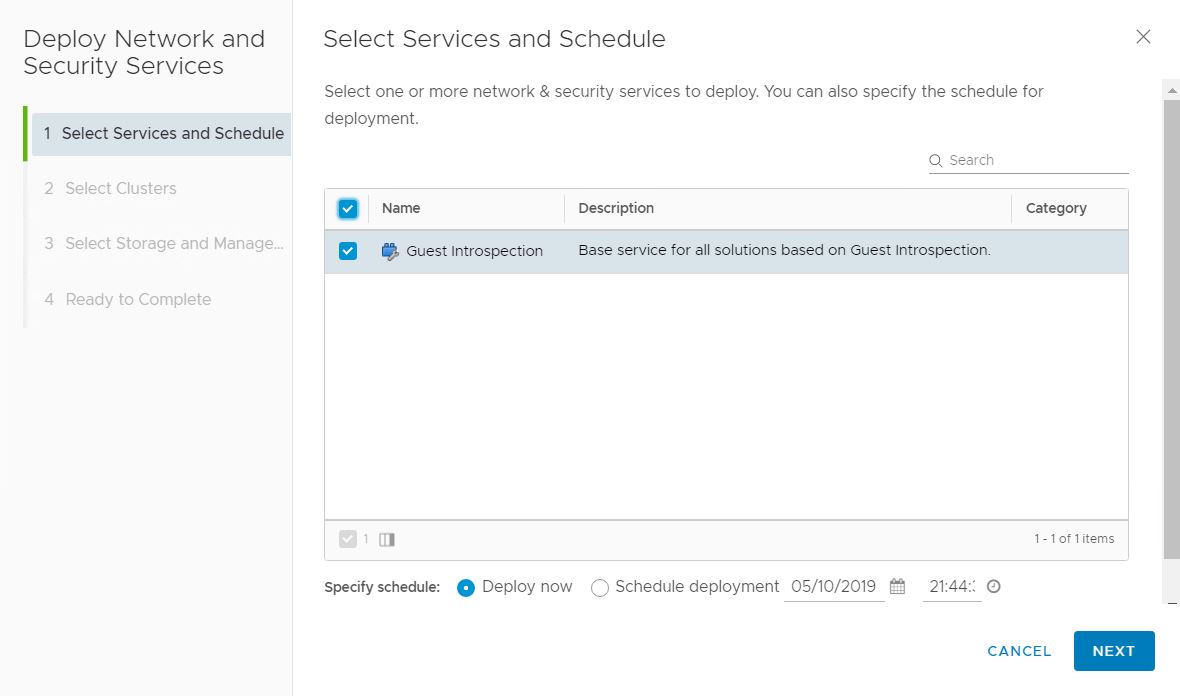
Select Guest Introspection and hit Next.
Note: You can choose to deploy the GI Service immidiately or can schedule it for later time.
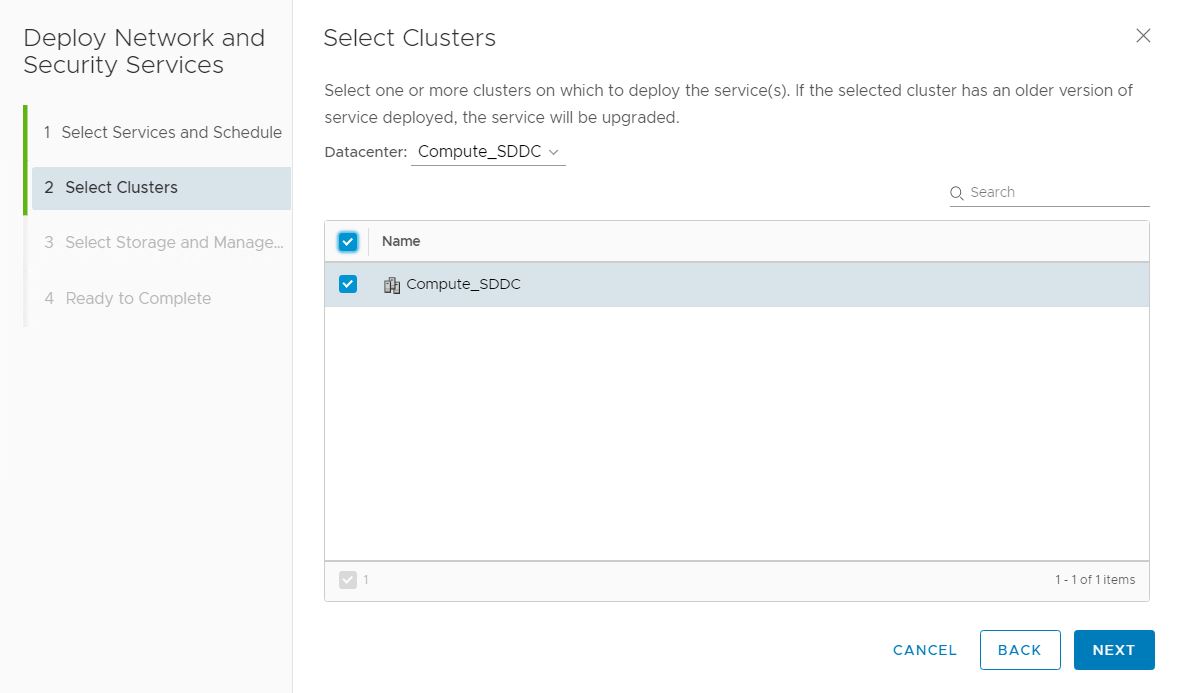
Select appropriate datacenter/cluster and hit Next.
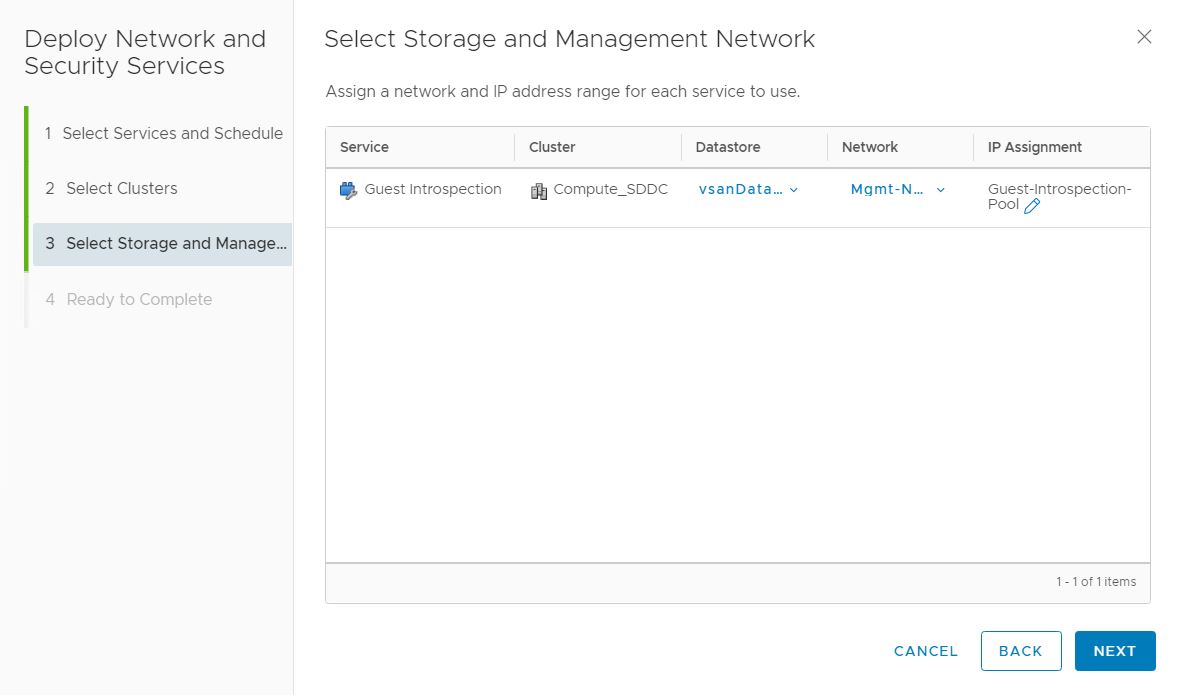
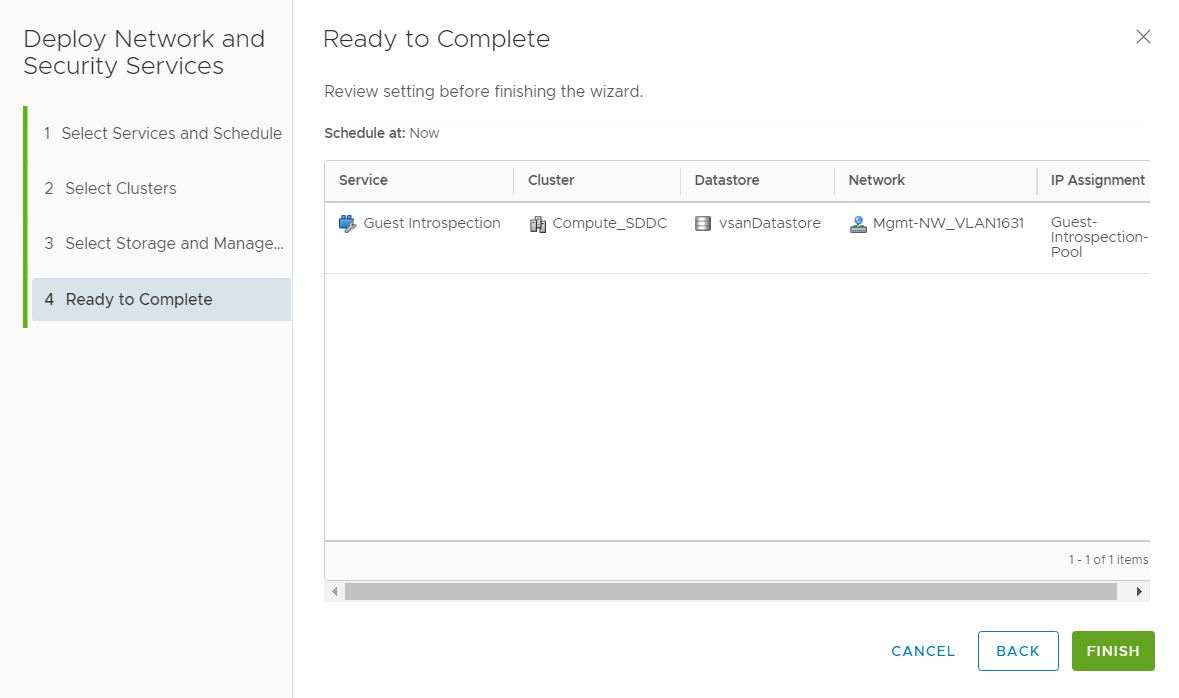
Select compute/network and storage resource for the SVM deployment.
On Ready to complete page, review settings and hit finish to start the GI service deployment.
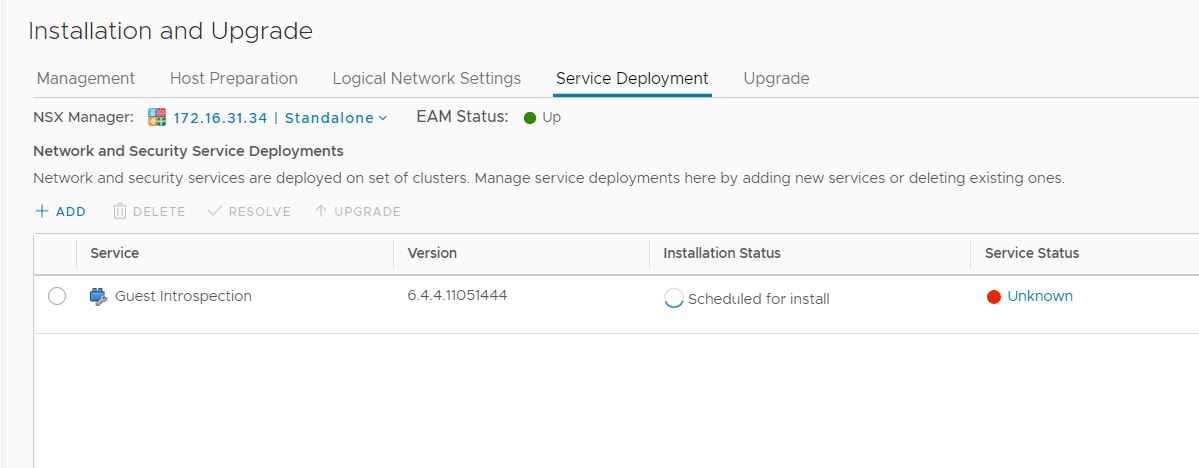
Wait for 5-10 minutes (depending on cluster size) for installation to finish.
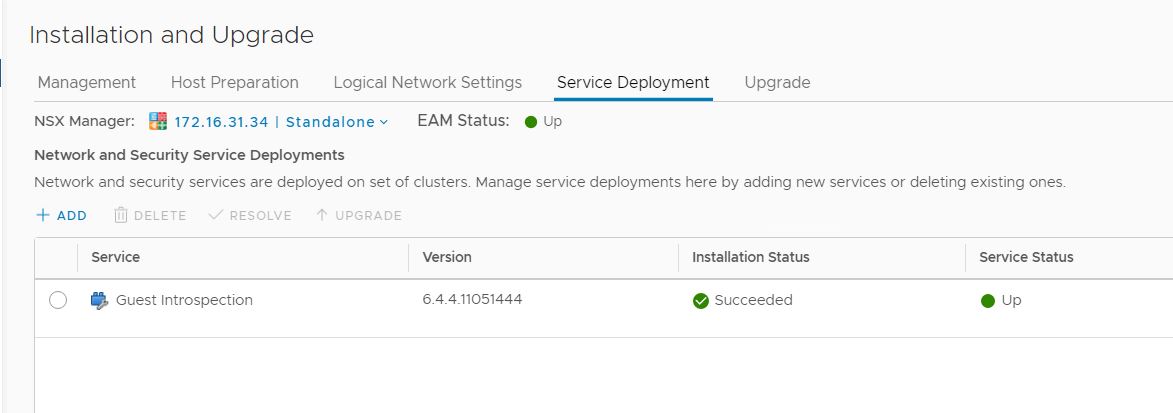
Once NSX deploys SVM on each host and each SVM configuration is completed, installation status and service status both reports as green.
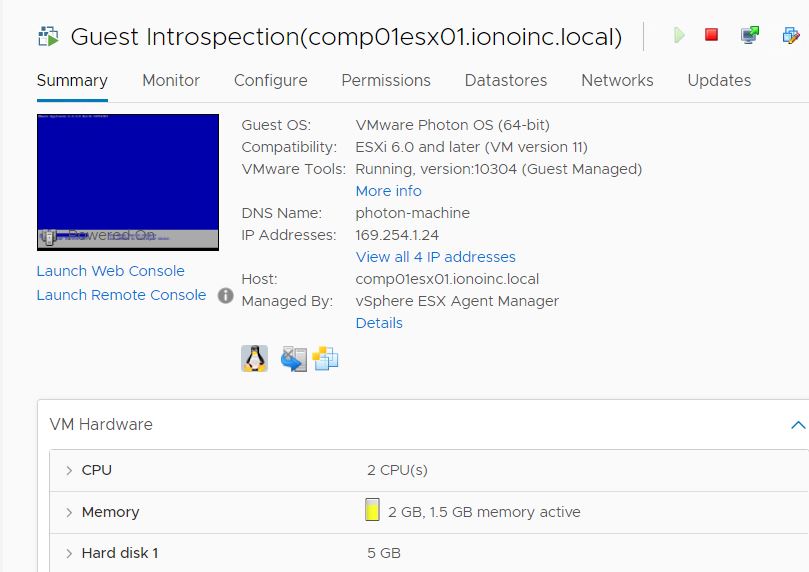
Once NSX GI installation is completed, you will find a GI SVM installed on each esxi host of the cluster. This VM is deployed with 2 vCPU and 2 GB memory. It’s a vmware photon os based vm.
Post installing the NSX GI service deployment on the cluster, we need to make sure the guest introspection services are enabled within the vm’s also. Thin agent is installed as part of the VMware Tools package. For VM that are deployed in cluster post GI enablement, thin agent drivers are installed by default, but for old vm’s we have to configure thin agent manually as it is not turned on by default.
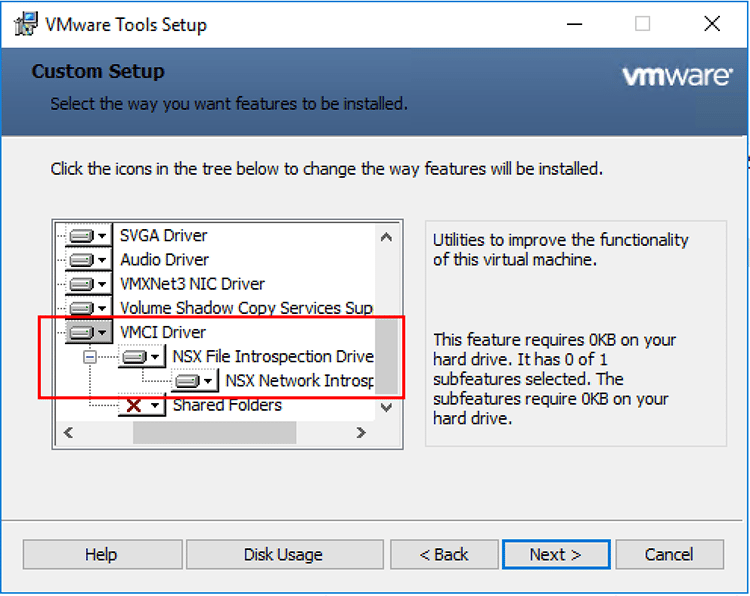
If VMware Tools is already install, we can modify the installation and include the VMCI Driver including the NSX File Introspection Driver and NSX Network Introspection Driver as shown below.
Windows virtual machines with the Guest Introspection drivers installed are automatically protected whenever they are started up on an ESXi host that has the security solution installed. Protected virtual machines retain the security protection through shut downs and restarts, and even after a vMotion move to another ESXi host with the security solution installed.
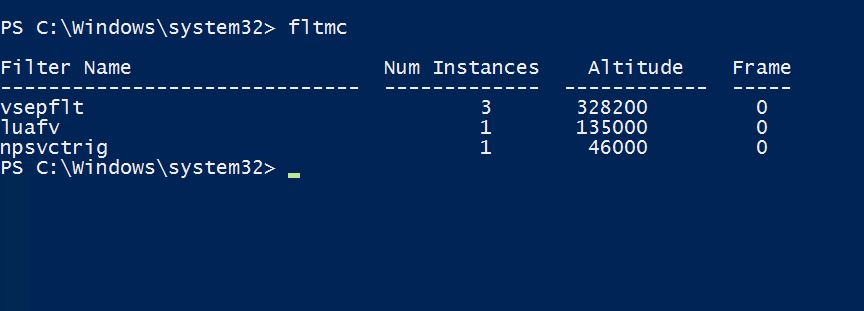
We can verify the driver is loaded by typing fltmc command. The output will show you the vsepflt filter driver is loaded.
And that’s it for this post.
I hope you enjoyed reading this post. Feel free to share this on social media if it is worth sharing
