HCX supports 3 methods for migrating VMs to the cloud:
- Cold Migration
- HCX Cross-Cloud vMotion
- HCX Bulk Migration
To know more about these migration methods, please read this post to know more about the migration methods.
HCX migrations can be scheduled from the HCX UI using the vSphere Client or automated using the HCX API. In the last post of this series, I demonstrated a few PowerCli commands that we can use for the HCX system.
API/PowerCli is an obvious choice when you think of automation. Using automation not only helps in reducing the amount of user input required in the UI but also reduces the chances of human errors.
In this post, I will show the use of HCX PowerCLI cmdlets, which you can use to automate HCX migration.
The cmdlet New-HCXMigration creates an HCX (Hybrid Cloud Extension) migration request.
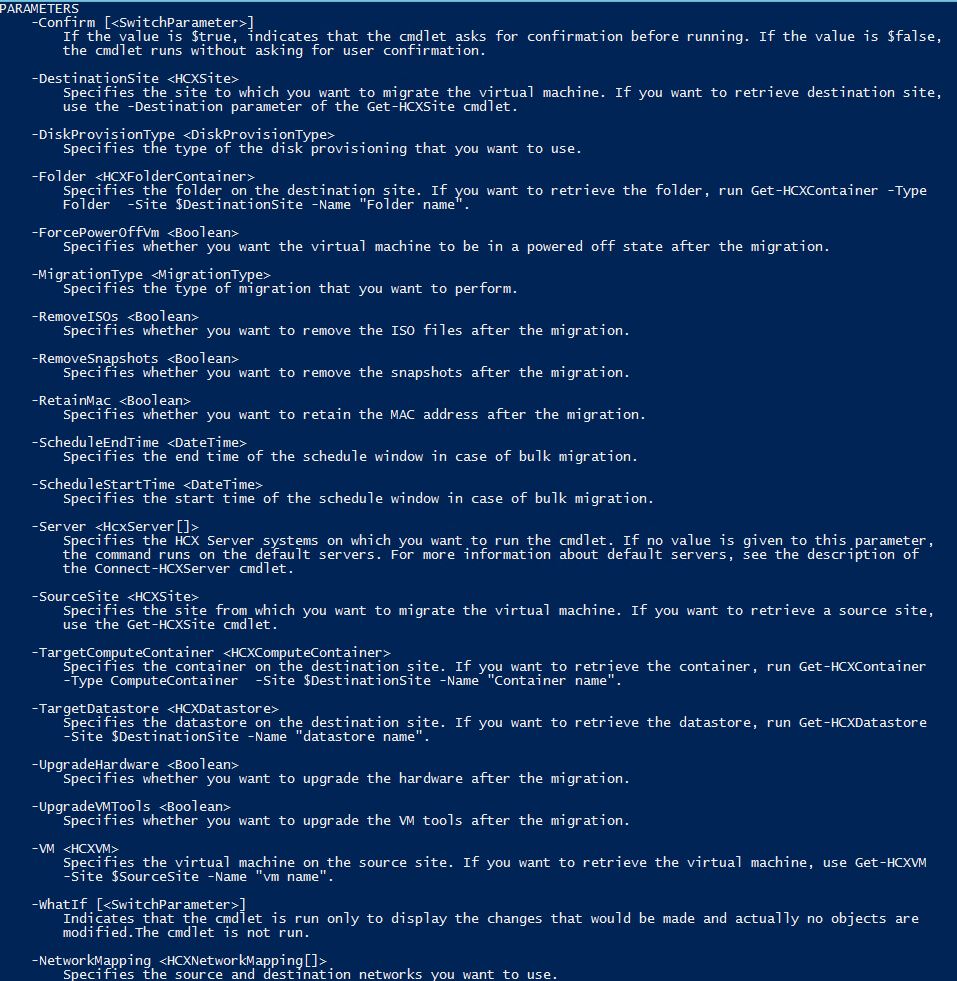
Step 1: First, we have to identify the parameters that we need to pass with the cmdlet.
Run the command “get-help New-HCXMigration -detailed” to obtain the necessary parameters
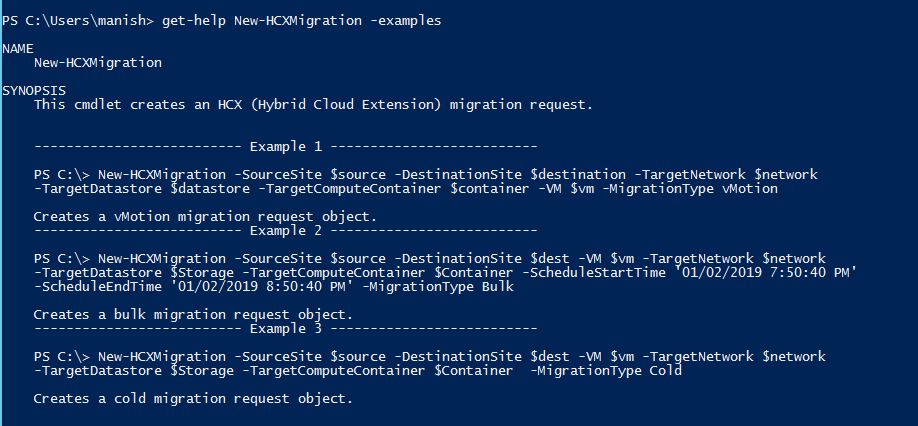
Step 2: Next, see how to pass these parameters in the migration cmdlet.
Run the command “get-help New-HCXMigration -examples” to see the full syntax of the command.
Step 3: Define necessary variables: Next, create some variables that can be passed along with the parameters. For some strange reasons, parameters were not accepting the value as such.
For example: If I pass the parameter -SourceSite and pass the value mgmt01vc01 (my source site), the command fails for me.
I created the following parameters in my case:
|
1 2 3 4 5 6 7 8 9 10 11 12 13 14 15 16 17 |
$HCXSRC = Get-HCXSite -Source $HCXDEST = Get-HCXSite -Destination $HCXCTR = Get-HCXContainer -Type Folder -Site $HCXDEST -Name "Manish" $COMPCTR = Get-HCXContainer -Type cluster -Site $HCXDEST $TargetDS = Get-HCXDatastore -Site $HCXDEST -Name vsanDatastore $VM = Get-HCXVM -Name Lin-Test01 $SourceNW = Get-HCXNetwork -Site $HCXSRC -Name 'Mgmt-PG' $DestinationNW = Get-HCXNetwork -Site $HCXDEST -Name 'HCX-DR-Test' $TargetNW = New-HCXNetworkMapping -SourceNetwork $SourceNW -DestinationNetwork $DestinationNW |
Step 4: Connect to source site HCX server.
|
1 2 3 4 5 |
PS C:Usersmanish> Connect-HCXServer -Server hcx-ent.ionoinc.local Server User ------ ---- hcx-ent.ionoinc.local administrator@vsphere.local |
Step 5: Submit a new migration request
|
1 |
New-HCXMigration -SourceSite $HCXSRC -DestinationSite $HCXDEST -Folder $HCXCTR -TargetComputeContainer $COMPCTR -NetworkMapping $TargetNW -TargetDatastore $TargetDS -VM $VM -ScheduleStartTime '03/08/2019 06:36:00 AM' -ScheduleEndTime '03/18/2019 07:36:00' -MigrationType Bulk |
Monitoring Migration
Once the migration is initiated, you can progress the migration status by running the command “Get-HCXMigration“. This command will provide you with an ID associated with a particular migration.
Once the switchover completes and the VM is migrated to the cloud, the migration status changes to “Migrated”
You can fetch details of a specific migration by passing the parameter “Id” to the Get-HCXMigration cmdlet
|
1 2 3 4 5 6 |
PS C:Usersmanish> Get-HCXMigration -Id 272594ca-409a-470d-a7fe-c0856d061190 VM Migratio State Id nType -- -------- ----- -- Lin-Test01 Bulk MIGRATED 272594ca-409a-470d-a7fe-c0856d061190 |
To see the complete list of parameters that can be passed with the Get-HCXMigration cmdlet, run the command “get-help Get-HCXMigration -detailed“
And that’s it for this post.
I hope you find this post informative. Feel free to share it on social media if it is worth sharing.


