In last post of this series, we deployed VRA’s on each Esxi host and paired the protected and recovery site. In this post we will learn about Zerto Virtual Protection Group (VPG).
If you have landed directly on this page by mistake, then I encourage you to read earlier posts of this series from below links:
1: Zerto Architecture and Components
2: Installing Zerto Virtual Manager
3: Installing Zerto Virtual Replication Appliance
What is Zerto Virtual Protection Group?
Virtual Protection Group enables virtual machines to be grouped together in same consistency group. Meaning, you can group together those virtual machines which you want to recover together in case of disaster or during test failover.
For example if you have a 3-tier VM which comprises of a DB server, An application server and a web server, then you might need to recover all 3 of them at the same time at the protected site.
VPGs can also be grouped into tiers based on target RPOs. If you have mix of workloads running in your environment where few workloads are super critical and few are least critical, then you can create a VPG which will have lowest RPO (10 secs) and place all your super critical workloads in that VPG.
Also you can define boot order for VM’s that are in a VPG. For e.g for a 3-tier application, you can define that DB server should come up first, then the app server and finally the web server.
You can also create a VPG that have only one VM. This provides flexibility of recovering just a single VM as opposed to a group of vms.
How to create a Virtual Protection Group?
VPG is created from the ZVM portal. Before creating a VPG, ensure that you have ZVM deployed on both Protected and recovery site and the 2 sites are paired. Also VRA’s are in place on both sites.
To create a new VPG, follow below steps:
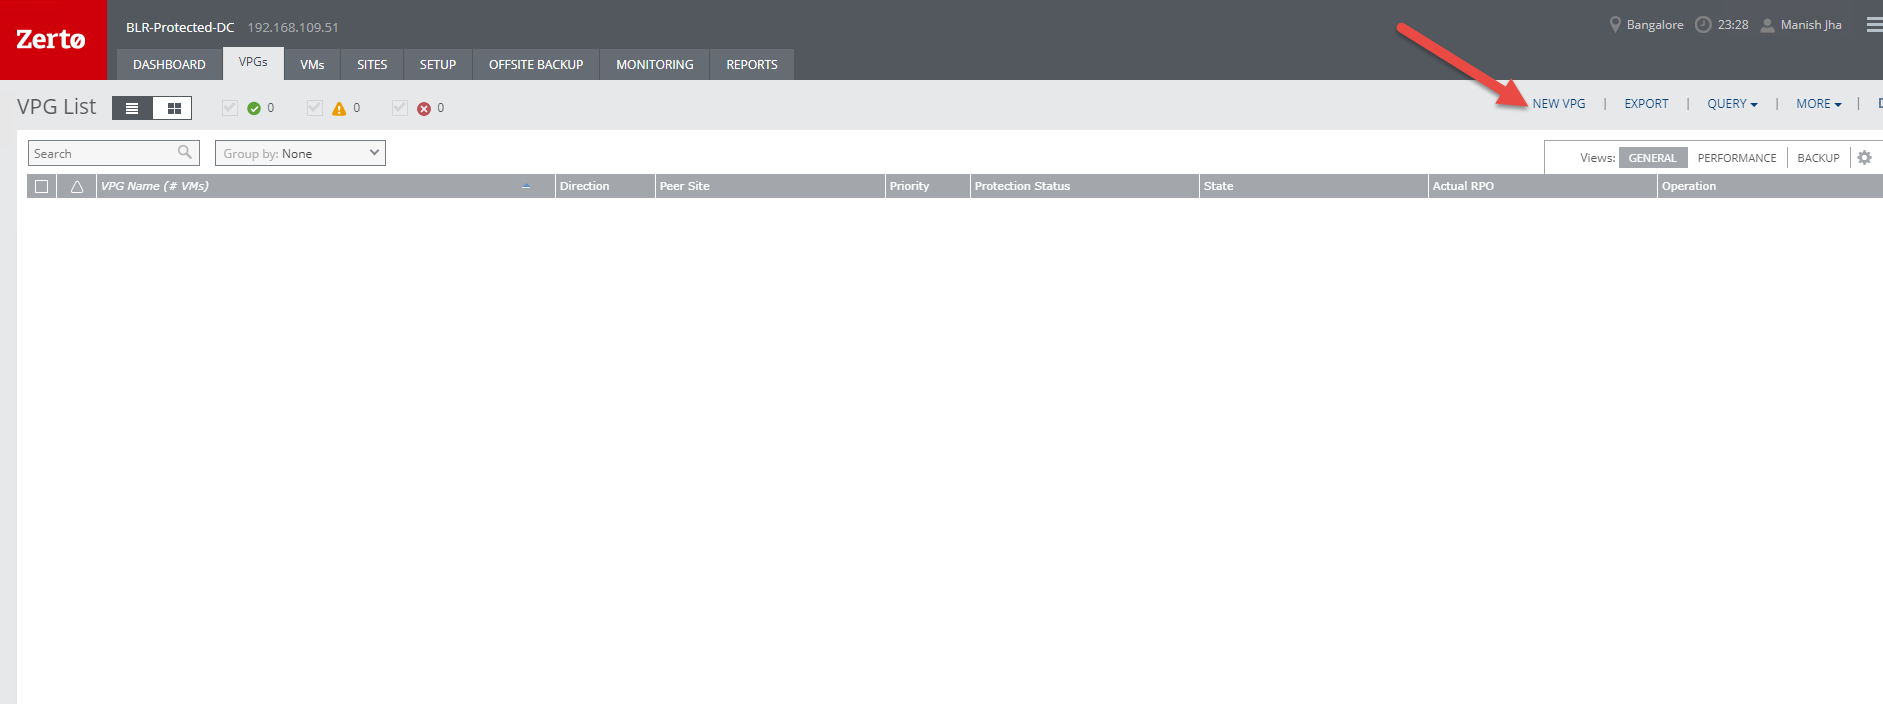
1: Login to ZVM portal and navigate to VPGs tab. Click on NEW VPG.
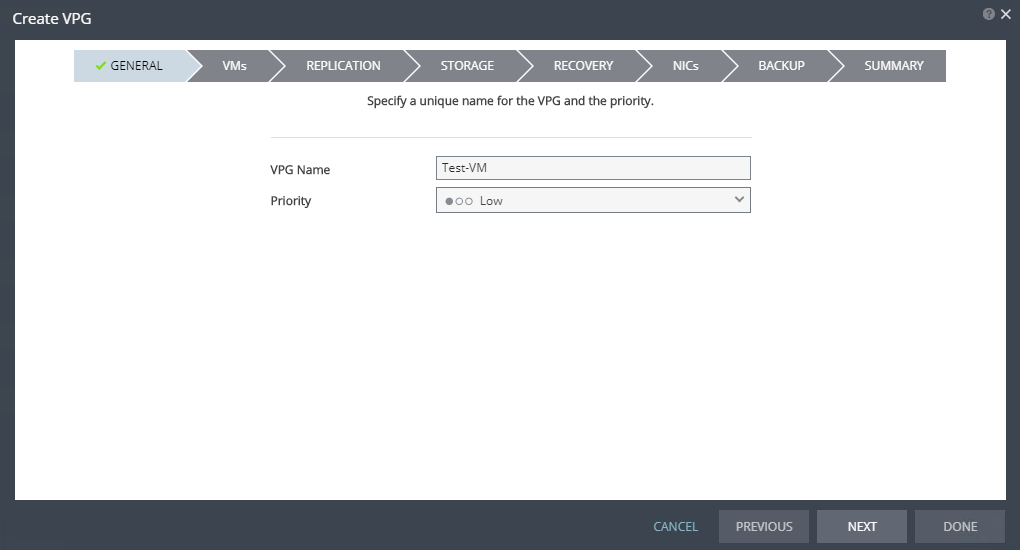
2: Provide a name for the VPG and select the priority from High,Medium and low.
The Priority level dictates the the bandwidth that will be allocated for data transfer. For example, a High Priority VPG transfers data changes first to the recovery site and then the remaining bandwidth is allocated to Medium Priority VPGs and at last to Low Priority VPGs.
Note: If you already have some VPG’s created then those VPG’s are going to receive bandwidth shares ahead of syncing VPGs. That way existing VPGs aren’t affected by the addition of a new VPG. Once the initial sync is completed for newly created VPG, bandwidth is allocated as per priority defined for the new VPG.
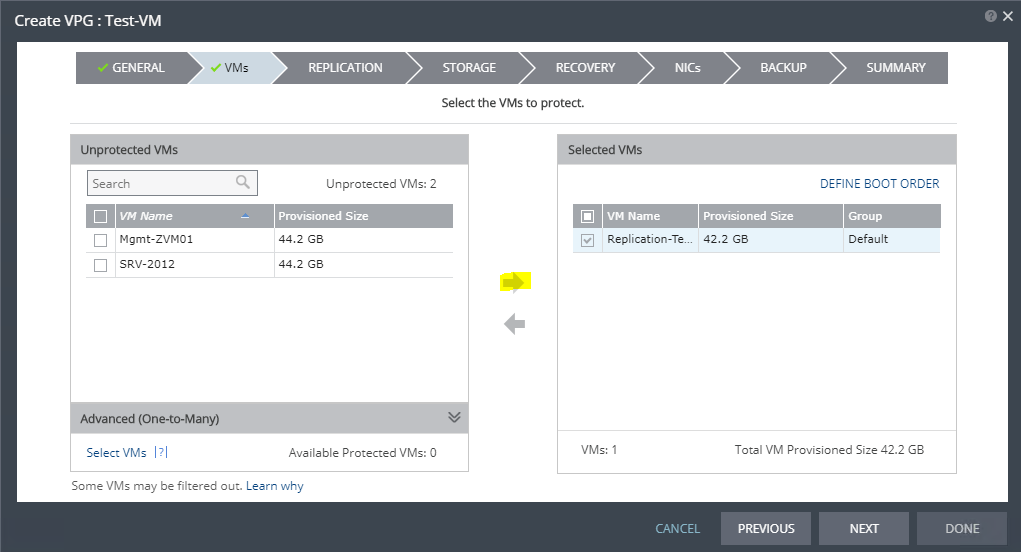
3: From VM’s tab, select the unprotected VM’s that will be part of this VPG and click on arrow (–>) button to add to this VPG. if you are adding more than one VM, you can also define the boot order for them so that at the time of recovery, these VM’s come online in selected order.
4: On the Replication tab, select the following:
a: Recovery Site: Where you want to replicate data (in case if more than one site is paired)
b: Host: You can either chose cluster or a dedicated host where VM’s will be recovered.
c: Datastore: Target datastore where replication data will be placed.
d: Journal History: By default journal history is set to 1 day. This means write commands of last 24 hours will be saved in the datastore. Journal history is maintained for each protected VM in its dedicated Datastore. When you wish to recover a VM with default journal size of 1 day, you have restore points for last 24 hours. Default Journal history is configurable from 1 hour to 30 days.
This journal size influences the amount of time for which DR test can be done. When DR test is initiated VM is formed with the volume size equal to journal size. For e.g. If default journal size is 10 hours, so all restore points after 10 hours will be overwritten by new restore point. Therefore DR test would be restricted for only 10 hours.
e: Target RPO alert: Target RPO defines how often delta’s will be synch’ed from protected site to recovery site. You can set this value to as low as 10 seconds and as high as 12 hours.
WAN traffic compression setting dictates if Zerto will compress data before transfer to the recovery site. If it is check marked, data will be compressed otherwise not.
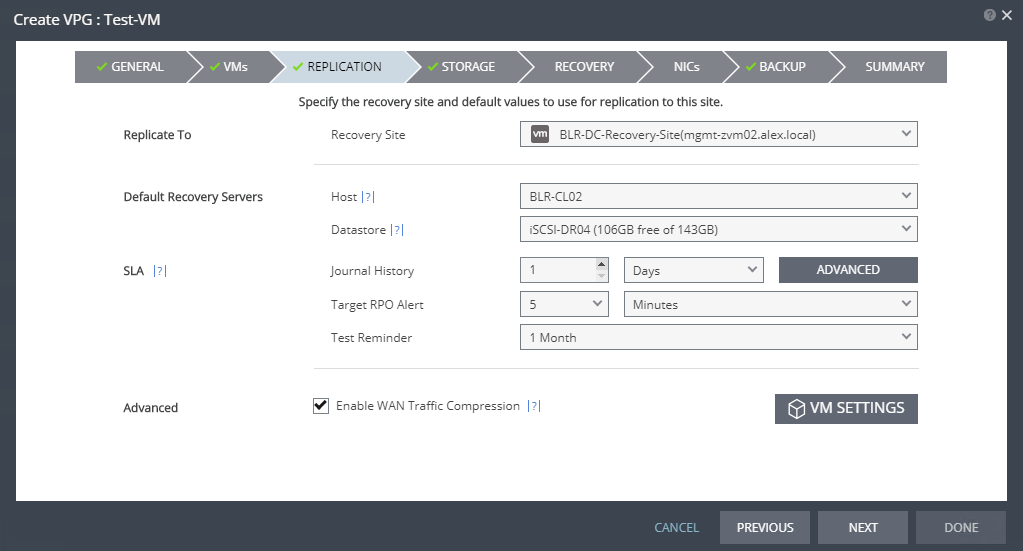
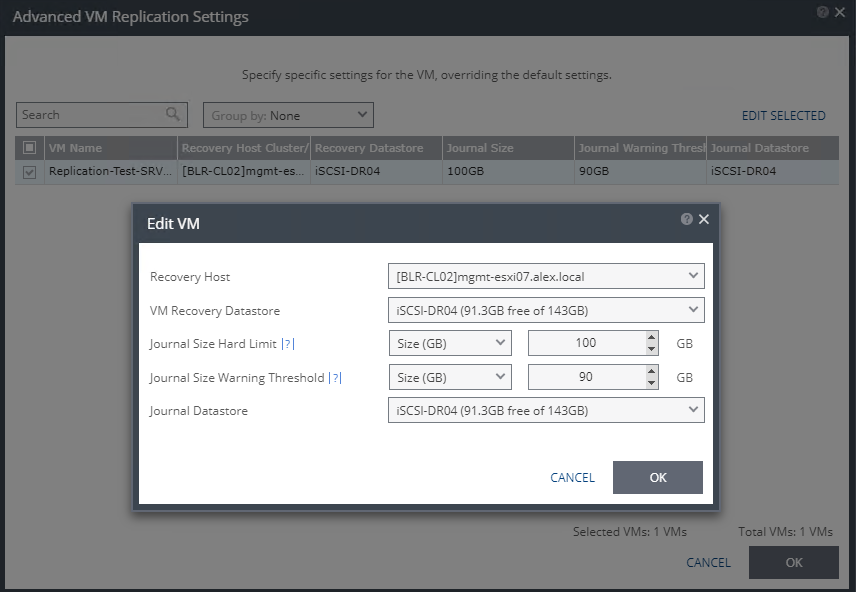
If you click on VM Settings, you can further customize recovery host, recovery datastore and journal size etc for individual VM’s. This will override the VPG level settings.
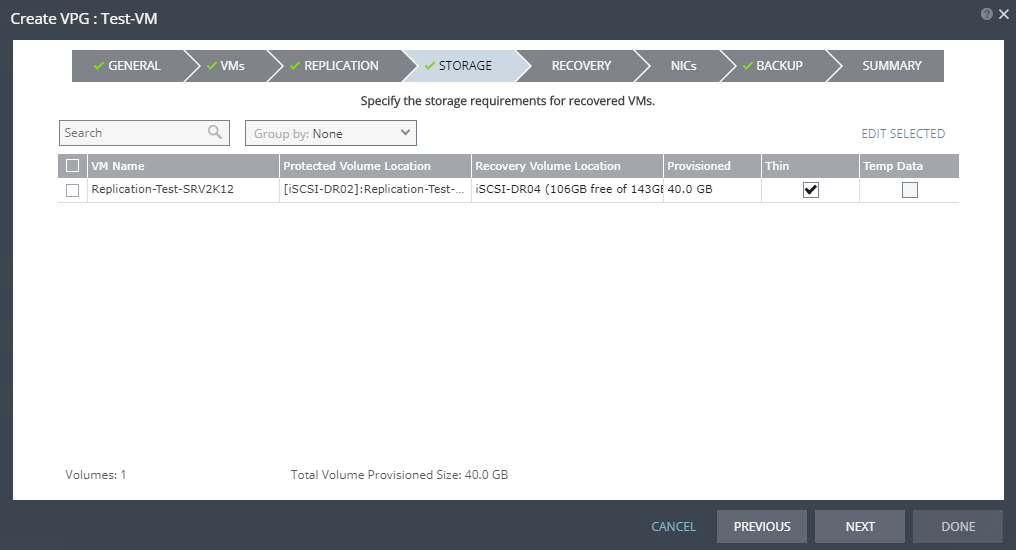
5: On the storage tab, you can define whether a protected VM in a VPG will be stored in thin or thick format at the recovery site. For individual VM’s you can define this.
A disk marked as Temp Data will perform an initial data sync, but not replicate any subsequent changes.
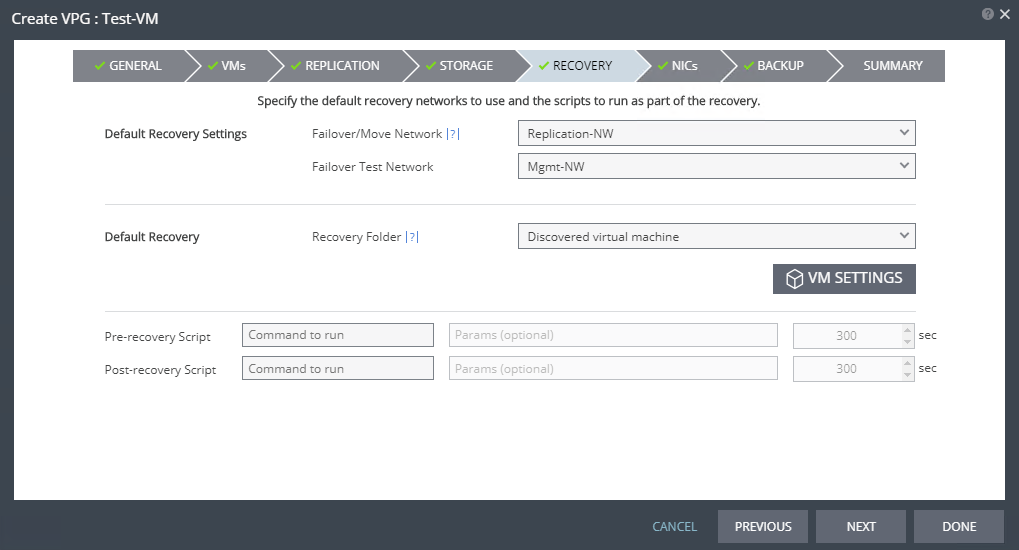
6: Next is to define the Failover network settings and recovery folder.
- Failover Move: This is the network to which a replicated VM will attach when actual recovery of VM is done.
- Failover Test: This is the network to which a replicated VM wil temporarily attach duing failover testing.
- Recovery Folder: Thsi dictates if all replicated VM’s inside a VPG will recover inside a specific folder on recovery site. If you want to define a dedicated folder, it should have been created in advance on the recovery site (at vCenter level)
You can also define pre-recovery and post-recovery scripts that will be executed on VM at the time of test failover or actual recovery.
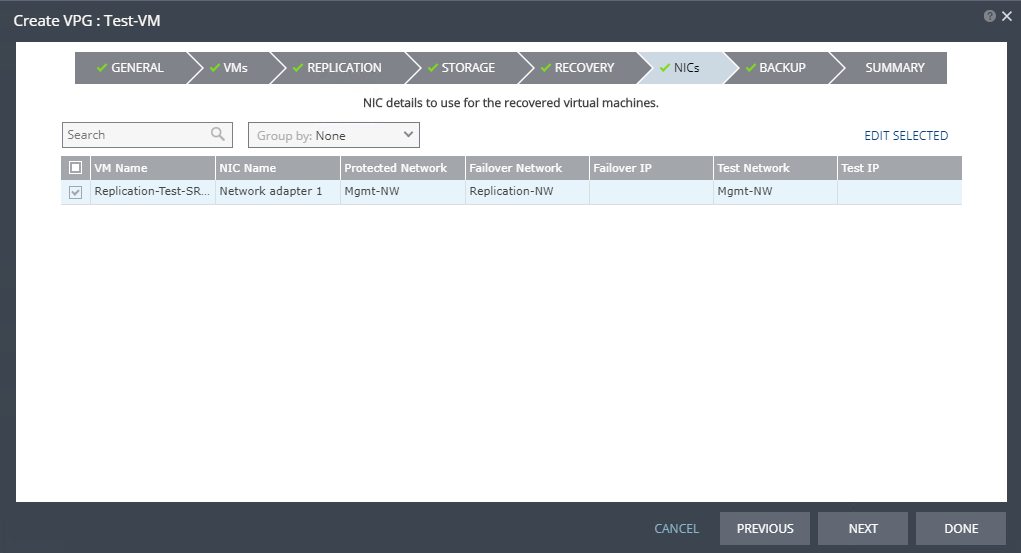
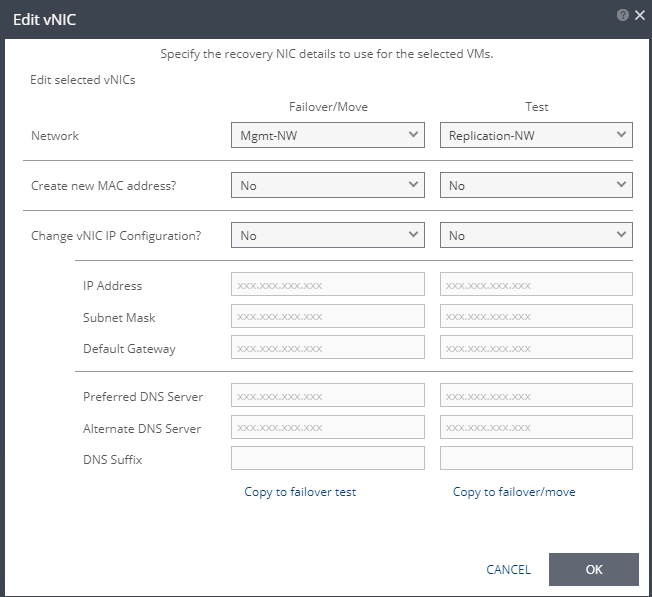
7: Under NICs, specify the recovery NIC details. If your machines have VMware Tools they can be automatically re-IP’d upon failover with the settings defined here.
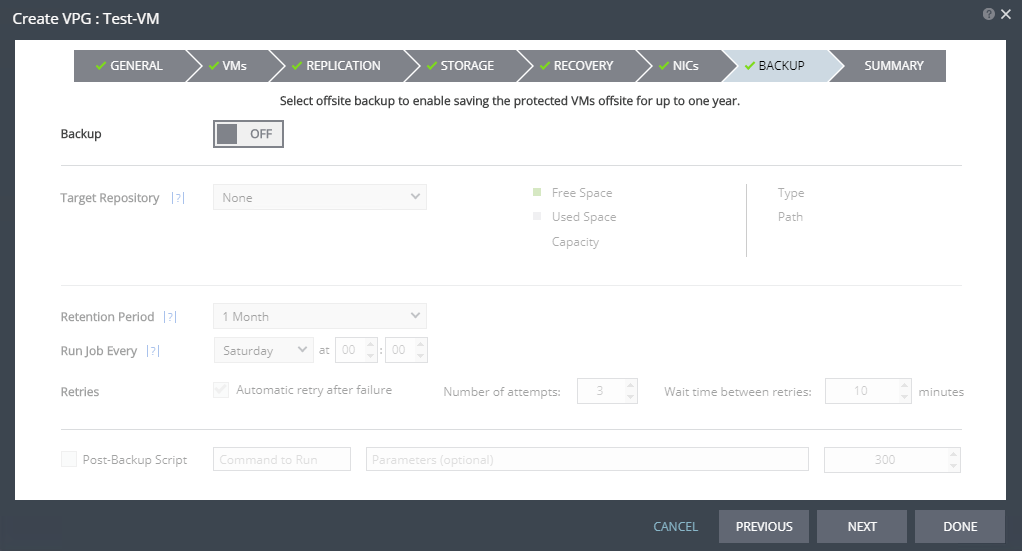
8: Select whether or not you want to create an offsite backup that can be stored for up to a year, then click Next. For this example, we are only focusing on replication, so I will leave it off.
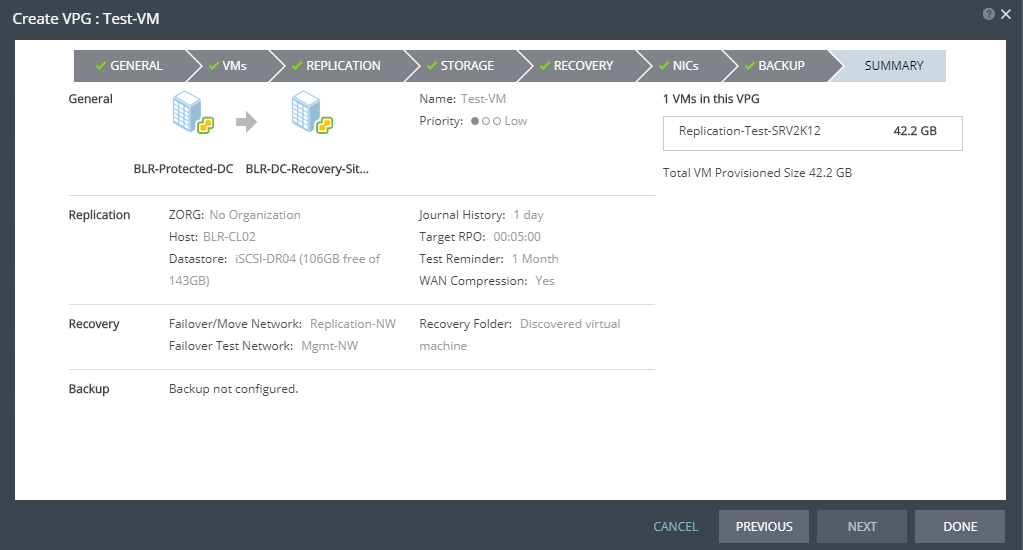
9: On summary page, review your settings and clcik on DONE button to finish the VPG creation wizard.
Post VPG creation, an initial data sync is triggered and all VM’s in the VPG starts replicating to recovery site.
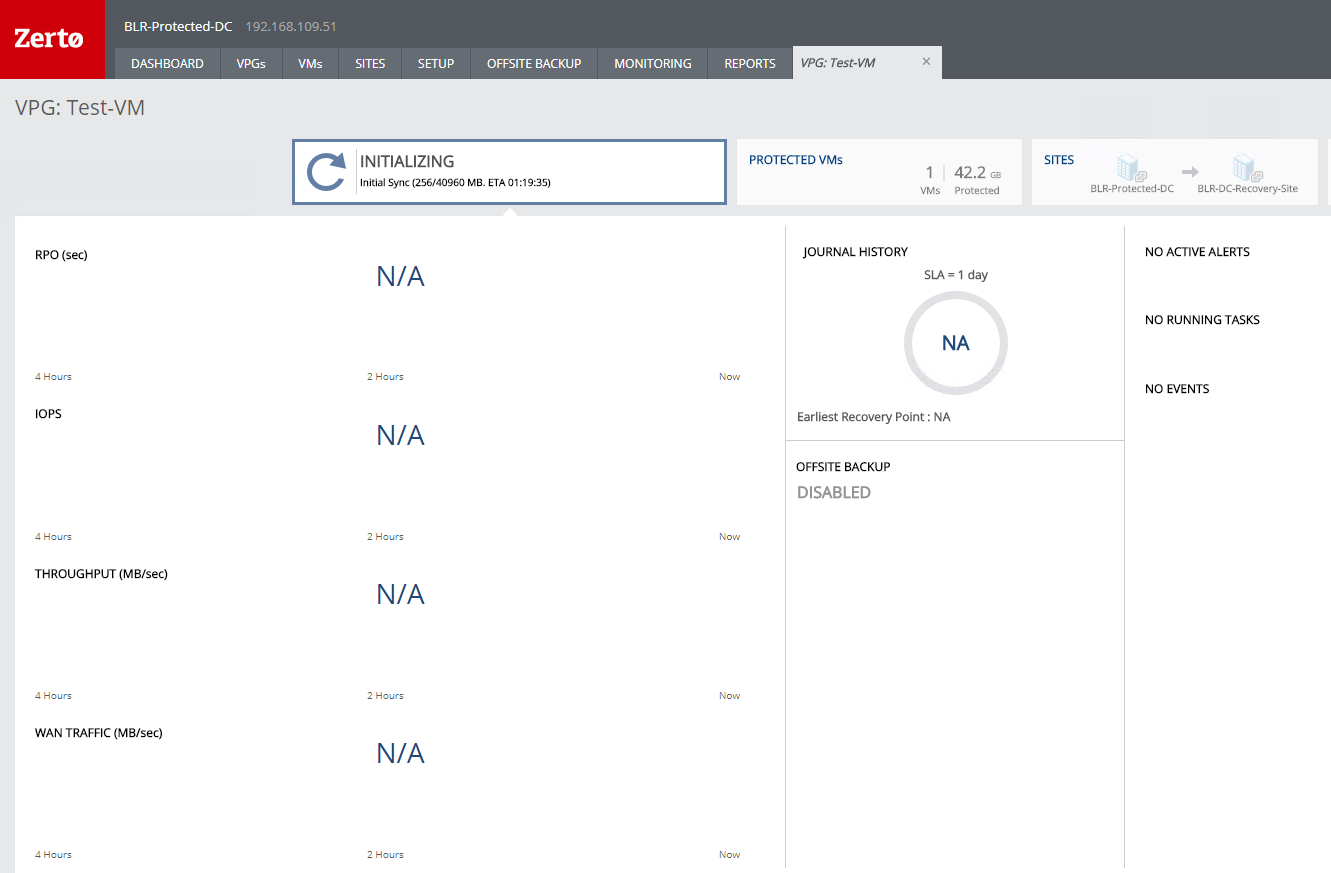
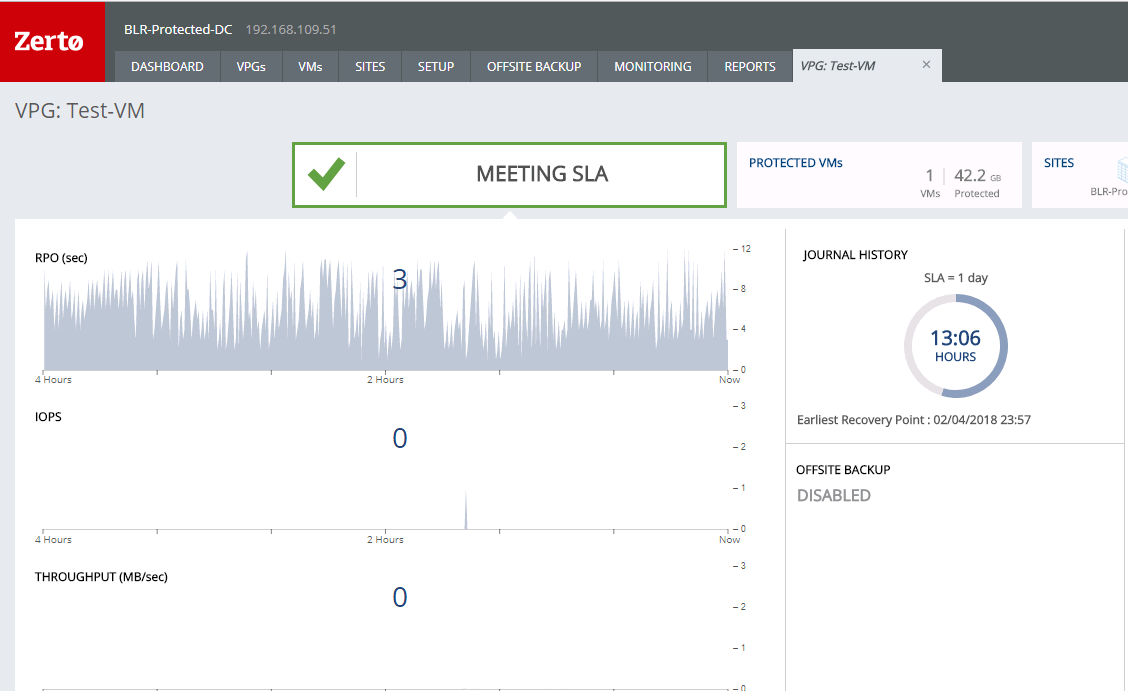
You can view the stats related to a particular VPG by clicking on it. It will open a new tab within ZVM interface and will present the details as shown in below screenshot.
And thats it for this post. In next post of this series we will learn about failover and failback process.
I hope you find this post informational. Feel free to share this on social media if it is worth sharing. Be sociable 🙂
