Objective 5.1 of VCAP6-Deploy exam covers following topics:
- Install and configure vSphere PowerCLI
- Use basic and advanced PowerCLI Cmdlets to manage a vSphere deployment
- Analyze a sample script, then modify the script to perform a given action
- Use PowerCLI to configure and administer Auto Deploy (including Image Builder)
- Create a report from a PowerCLI script
Lets walk through each topic one by one.
Install and configure vSphere PowerCLI
Installation of PowerCLI is pretty straight forward. Just run the installer and hit Next..Next.
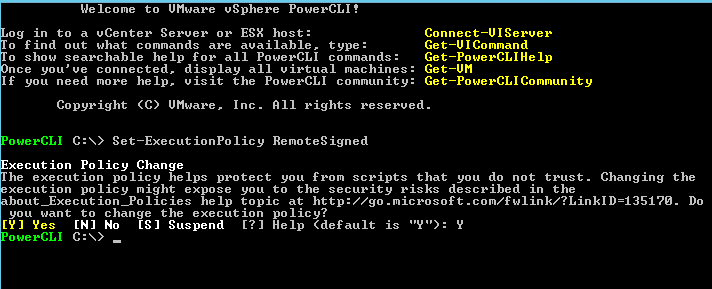
Once the installation is completed, we will need to set the Execution Policy prior to executing any command via PowerCLI.
Set the Execution Policy by running comamnd: Set-ExecutionPolicy RemoteSigned

Current execution policy can be checked by running command: Get-ExecutionPolicy
|
1 2 3 |
<span style="color: #000000;"><em>PowerCLI C:> Get-ExecutionPolicy</em></span> <span style="color: #000000;"><em>RemoteSigned</em></span> <span style="color: #000000;"><em>PowerCLI C:></em></span> |
Use basic and advanced PowerCLI Cmdlets to manage a vSphere deployment
It is not possible to show all PowerCLI commands here as the list is very long. Pluralsight have an advanced management course on using PowerCLI. VMware official documentation on this topic can be found here.
It is unclear that what kind of questions can be asked in VCAP6-Deploy exam on this topic but if you can use PowerCLI you can save a lot of time in the exam instead of waiting for the Web Client to respond / refresh.
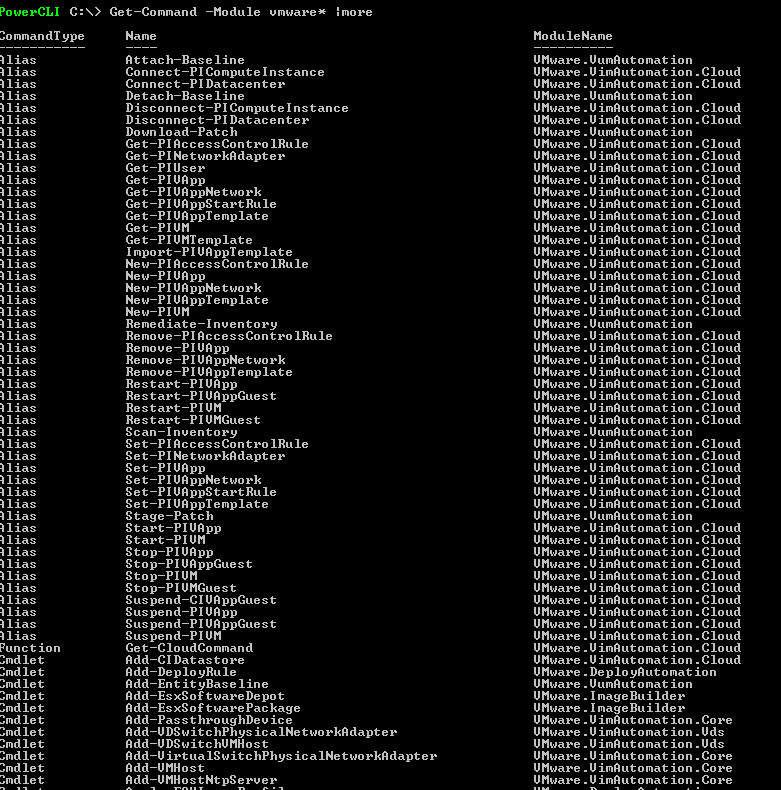
To see a full list of all VMware related Cmdlets run the following command : Get-Command -Module vmware* |more

Connect to a vCenter Server System
|
1 2 3 4 5 6 |
<em><span style="color: #000000;">PowerCLI C:> <strong>Connect-VIServer -Server vcentersrv01.alex.local -Username vcadmin@alex.local</strong></span></em> <em><span style="color: #000000;">WARNING: There were one or more problems with the server certificate for the server</span></em> <em><span style="color: #000000;">vcentersrv01.alex.local:443:</span></em> <em><span style="color: #000000;">Name Port User</span></em> <em><span style="color: #000000;">---- ---- ----</span></em> <em><span style="color: #000000;">vcentersrv01.alex.local 443 ALEXvcadmin</span></em> |
Basic commands to managed VM’s:
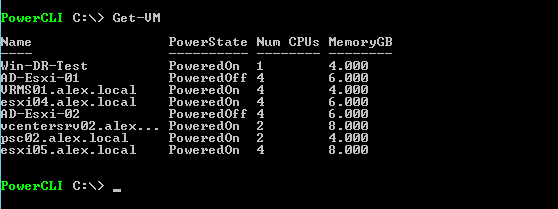
a: Get-VM: List all VM’s in the inventory

b: Get-VMGuest: Retrieve info about the OS

c: Start-VM – starting the VM
|
1 2 3 4 |
<em><span style="color: #000000;">PowerCLI C:> Start-VM Ad-Esxi-01</span></em> <em><span style="color: #000000;">Name PowerState Num CPUs MemoryGB</span></em> <em><span style="color: #000000;">---- ---------- -------- --------</span></em> <em><span style="color: #000000;">AD-Esxi-01 PoweredOn 4 6.000</span></em> |
d: Stop-VM: Power off the VM
|
1 2 3 4 5 6 7 8 |
<span style="color: #000000;"><em>PowerCLI C:> Stop-VM Ad-Esxi-01</em></span> <span style="color: #000000;"><em>Confirm</em></span> <span style="color: #000000;"><em>Are you sure you want to perform this action?</em></span> <span style="color: #000000;"><em>Performing the operation "Stop-VM" on target "VM 'AD-Esxi-01'".</em></span> <span style="color: #000000;"><em>[Y] Yes [A] Yes to All [N] No [L] No to All [S] Suspend [?] Help (default is "Y"): Y</em></span> <span style="color: #000000;"><em>Name PowerState Num CPUs MemoryGB</em></span> <span style="color: #000000;"><em>---- ---------- -------- --------</em></span> <span style="color: #000000;"><em>AD-Esxi-01 PoweredOff 4 6.000</em></span> |
Get Datastore : list information on all Datastores

Get-VmHost – list all hosts

Put a host in a variable
|
1 |
<span style="color: #000000;"><em>PowerCLI C:> $vmhost=get-vmhost -name esxi01.alex.local</em></span> |
Put host in maintenance mode
|
1 2 3 4 |
<span style="color: #000000;"><em>PowerCLI C:> Set-VMHost -VMHost $vmhost -State "Maintenance" -RunAsync</em></span> <span style="color: #000000;"><em>Name State % Complete Start Time Finish Time</em></span> <span style="color: #000000;"><em>---- ----- ---------- ---------- -----------</em></span> <span style="color: #000000;"><em> Running 0 11:38:41 AM</em></span> |
Remove host out of maintenance mode
|
1 2 3 4 |
<span style="color: #000000;"><em>PowerCLI C:> Set-VMHost -VMHost esxi01.alex.local -State "Connected" -RunAsync</em></span> <span style="color: #000000;"><em>Name State % Complete Start Time Finish Time</em></span> <span style="color: #000000;"><em>---- ----- ---------- ---------- -----------</em></span> <span style="color: #000000;"><em> Running 0 12:33:41 PM</em></span> |
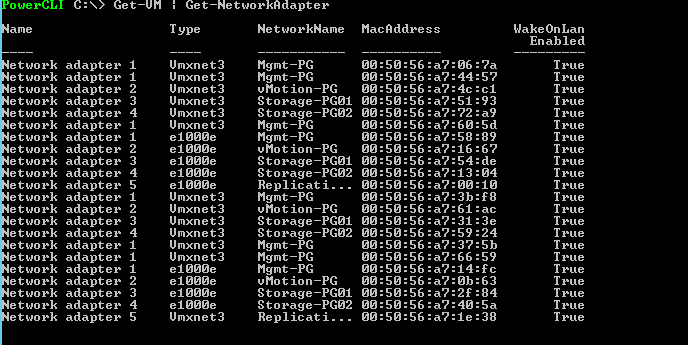
Get-NetworkAdapter: List network adapters present in VM’s

Analyze a sample script, then modify the script to perform a given action
VMware’s documentation list some examples of PowerCLI scripts which can be found here
You can use a specification provided in an XML file to automate the creation of virtual machines on vCenter Server. Here is a sample xml file for creating a test vm with 40 GB disk space
|
1 2 3 4 5 6 7 8 9 10 |
<em><span style="color: #000000;"><CreateVM></span></em> <em><span style="color: #000000;"><VM></span></em> <em><span style="color: #000000;"><Name>TestVM1</Name></span></em> <em><span style="color: #000000;"><HDDCapacity>40</HDDCapacity></span></em> <em><span style="color: #000000;"></VM></span></em> <em><span style="color: #000000;"><VM></span></em> <em><span style="color: #000000;"><Name>TestVM2</Name></span></em> <em><span style="color: #000000;"><HDDCapacity>40</HDDCapacity></span></em> <em><span style="color: #000000;"></VM></span></em> <em><span style="color: #000000;"></CreateVM></span></em> |
Procedure
1: Read the content of the myVM.xml file.
|
1 |
<em><span style="color: #000000;">[xml]$s = Get-Content TestVM.xml</span></em> |
2: Create the virtual machines.
|
1 |
<em><span style="color: #000000;">$s.CreateVM.VM | foreach {New-VM -VMHost $vmHost -Name $_.Name -DiskGB $_.HDDCapacity}</span></em> |
Note that you should have defined variable $VMHost earlier for this command to work
Use PowerCLI to configure and administer Auto Deploy (including Image Builder)
Step 1: Connect to vCenter Server
# Connect-VIServer -Server vcentersrv01.alex.local -Username vcadmin@alex.local
Step 2: Add ESXi to the Software Depot
Go to www.vmware.com and click on the version of ESXi you wish to use. Download the “ESXi Offline Bundle” ZIP file”. I am using Esxi 6.0 U3 in my lab and it can be downloaded from here
Place the zip file anywhere in your system, but remember the path. Do not unzip this file as you will need the full ZIP file for Auto Deploy.
|
1 2 3 4 |
<em><span style="color: #000000;">PowerCLI C:> Add-EsxSoftwareDepot "C:ESXi-6.0U3-Offline.zip"</span></em> <em><span style="color: #000000;">Depot Url</span></em> <em><span style="color: #000000;">---------</span></em> <em><span style="color: #000000;">zip:C:ESXi-6.0U3-Offline.zip?index.xml</span></em> |
Step 3: View/Verify the Image Profiles

Step 4: Clone the Image Profile

Step 5: Verify the New Image Profile

Step 6: Add the HA Agent Depot

Step 7: Add the HA Agent Package to the Image Profile

Step 8: Add a Deploy Rules
A Deploy rule is used to determine which hosts boot a specific version of ESXi. There are two important pieces of information needed to create the deploy rule; items and patterns. The items determine what object to associate to the ESXi host and the patterns determine which ESXi hosts are a part of the specific rule.
An example of deploy rule is shown below:
|
1 |
<span style="color: #000000;"><em>New-DeployRule -Name "Esxi6.0U3" -Item "New_Profile" -Pattern "ipv4=192.168.109.100-192.168.109.110</em></span> |
Step 10: Activate the Deploy Rule
Add-DeployRule Esxi6.0U3
Create a report from a PowerCLI script
PowerCLI commands can be exported into different formats for creating reports, the following commands are the export options.
- Export-Csv
- Export-Clixml
- ConvertTo-Csv
- ConvertTo-Html
- ConvertTo-Xml
Examples
1: Export all VM information to a CSV file
|
1 |
<em><span style="color: #000000;">PowerCLI C:> Get-VM | Export-CSV C:VMlist.csv -NoTypeInformation</span></em> |
Opening the vmlist.csv file will give you details of all the VM that are in the vCenter inventory

2: Export all host information within a cluster in HTML file
|
1 |
<em><span style="color: #000000;">PowerCLI C:> Get-Cluster "Blr-DC" | Get-VMHost | ConvertTo-Html | Out-File C:Cluster-Hosts.html</span></em> |
This is how output looks.

3: Get list of all running VM’s
|
1 |
<em><span style="color: #000000;">PowerCLI C:> Get-VM | Where { $_.PowerState -eq "PoweredOn"} | Select Name, NumCPU, MemoryMB, PowerState, VmHost | Export-CSV C:RunningVMs.csv</span></em> |

4: Retrieve status of Esxi host in a datacenter
|
1 |
<span style="color: #000000;"><em>PowerCLI C:> Get-Datacenter "Galaxy" | Get-VMHost | Get-View | Format-Table -Property Name,OverallStatus -AutoSize</em></span> |

I hope you find this post informational. Feel free to share this on social media if it is worth sharing. Be sociable 🙂
