In our last post of Configuring Networks in vCloud Director we have created External Network and Network Pools. Network Pools and External Network is consumed by the organizations and org vDC in vCloud Director.
In this post we will learn how to create organization and org vDC and will see how they utilize the network components.
1: Creating Organization
Login to web interface of vCloud Director and navigate to Home tab and click on Item no 5 “Create An Organization”
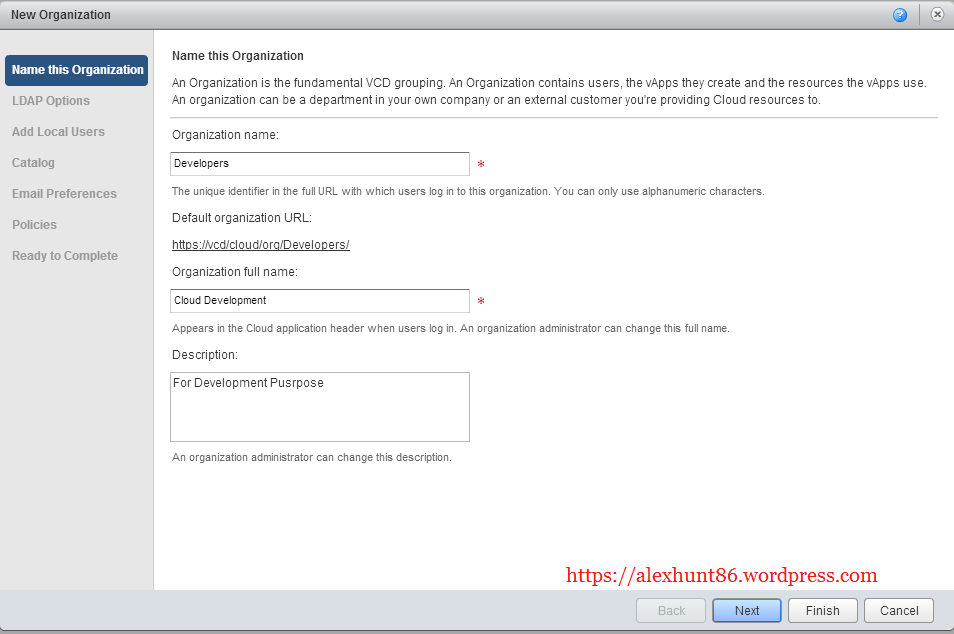
It will launch the New Organization wizard as shown below. This page lets you create the organization and generates the URL to access your organization.
Note: Organization name should not contain any spaces as it is not supported. Name of the organization affects the associated URL because naming format for URL will be https://name of vcd/cloud/org/name of your organization.
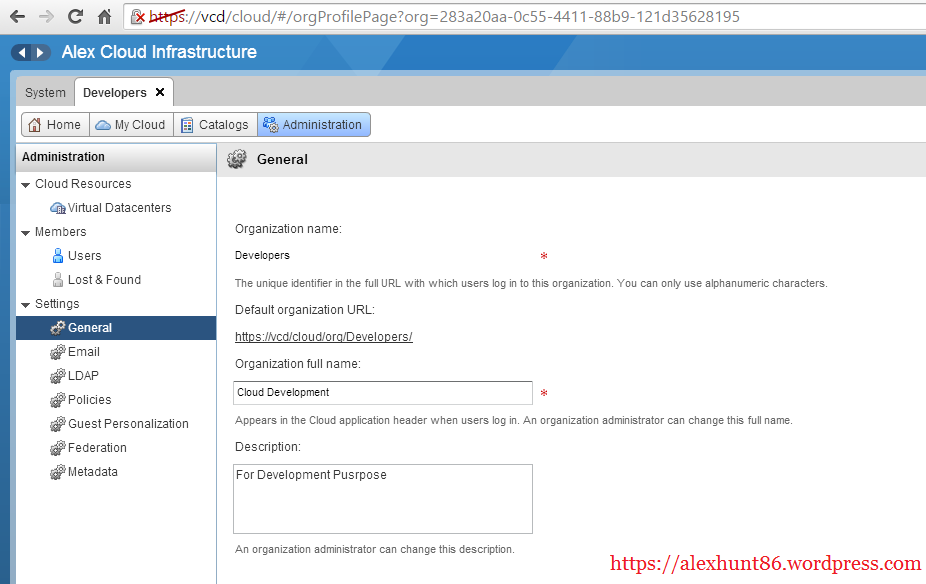
In my home lab I have chosen the name “Developers” for my organization and it generated the URL as https://vcd/cloud/org/Developers
Once you are done setting up organization name hit Next.
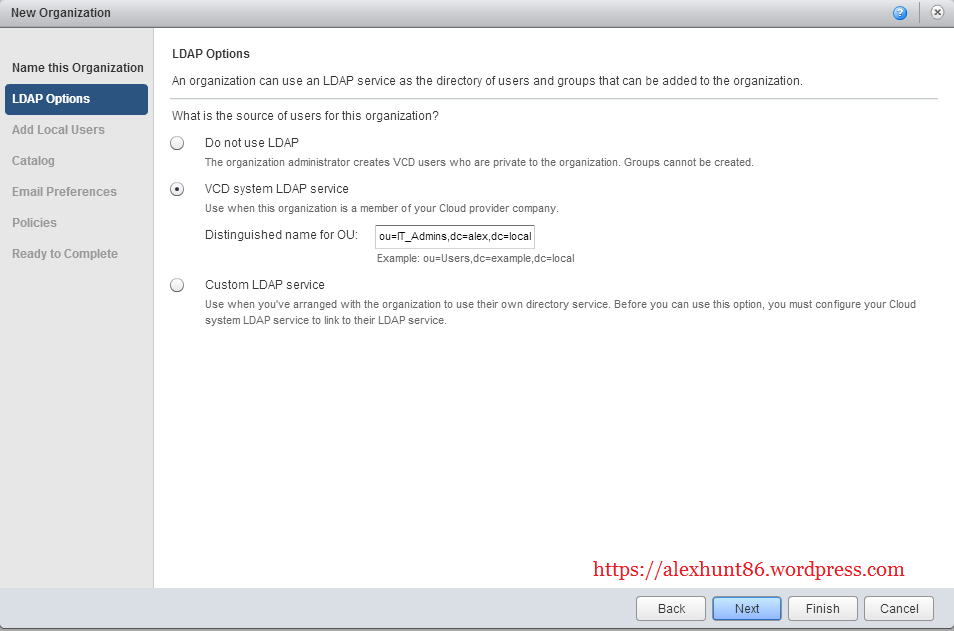
The next screen allows you to configure LDAP settings. There are 3 options available at this page:
a) Do Not use LDAP: Pretty simple. Don’t use any LDAP service at all. Instead you will use local user accounts to login to your organization.
b) VCD System LDAP Service: Selecting this option let you use the directory service (AD/LDAP) which is already configured in your environment. If you are building a private cloud for your company then this option is very useful to provide access to the users/group to the organization created in vCD.
c) Custom LDAP Service: This option can be used for public clouds. When creating organization for customers, you can use the AD/LDAP of the customer environment for granting access to user/groups on this organization. But to achieve this the LDAP service of cloud service provider must be linked to customer LDAP.
In my home lab I have used the “VCD system LDAP Service” option. When using this option you have to provide the value in the format as shown below:
ou=your_ou_name,dc=example,dc=com
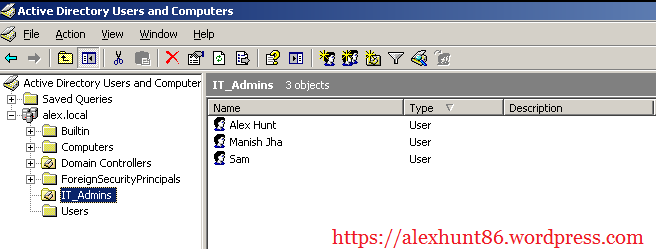
In my lab I have an OU created by name “IT_Admins” in my AD in advance and my domain name is “alex.local“.
Hit Next.
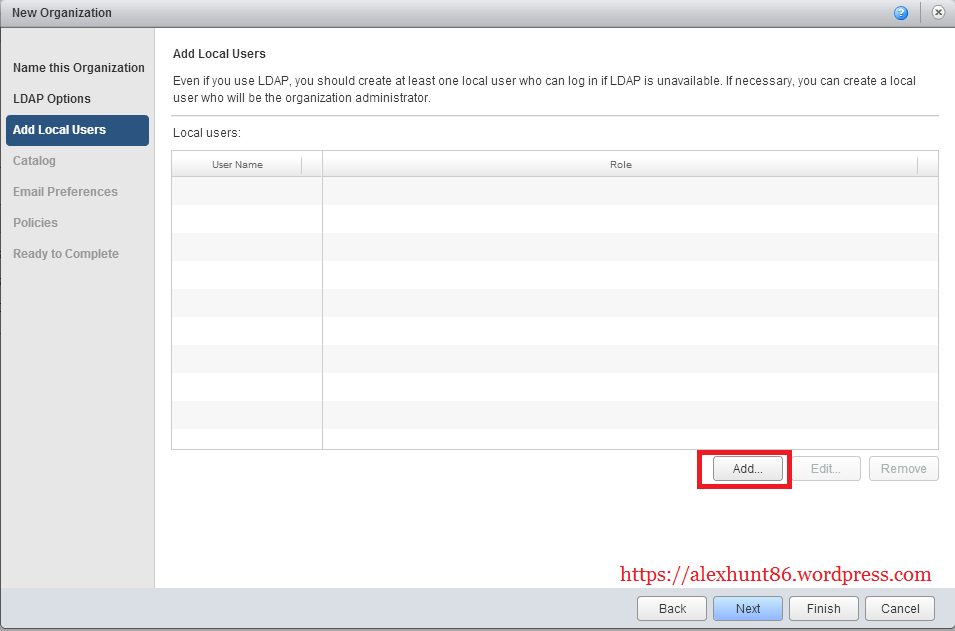
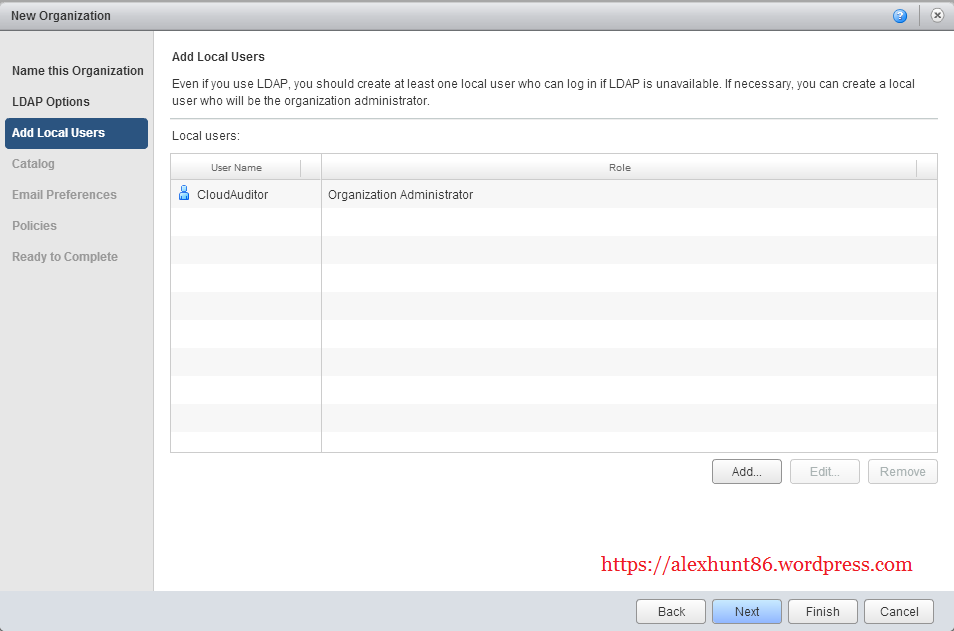
The next page of this wizard let you add local users. You may or may not chose to add local users depending upon your environment needs.
Personally I think we must add at-least one local user as it will act as a backdoor to enter your cloud environment due to specific needs or at times when you have some problem reaching your directory services (AD/LDAP)
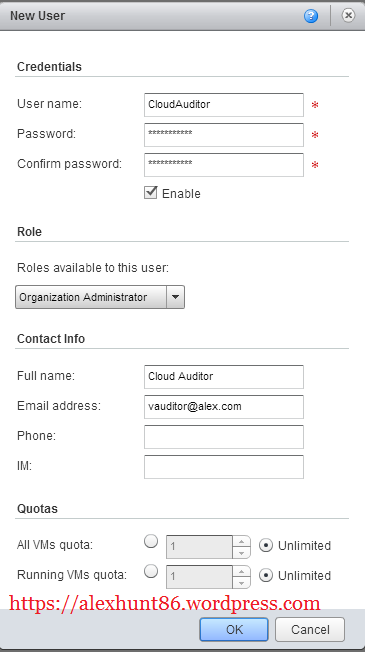
Click on the Add button to start adding local users. This user must exist in your environment.
I have added a local user named “CloudAuditor” in my lab and assigned him “Organization Administrator” role. You may add several users and map them with appropriate role. Under Role you will get a drop down menu from where you can select the available roles.
You can also set Quotas for the local user. Quota restricts the amount of resources which this user can use. There are 2 quota options available:
a: All VM’s Quota: This setting dictates how many VM’s/vApps this local user can create. You can either choose unlimited or can define an arbitrary number. Choosing unlimited gives power to utilize all the resources which have been assigned to this organization to be used by the local user
b: Running VM’s Quota: This setting imposes a restriction that how many VM’s can be run at a given time by the local user. Again you have choice to select unlimited or can define an arbitrary number.
Hit Next to continue.
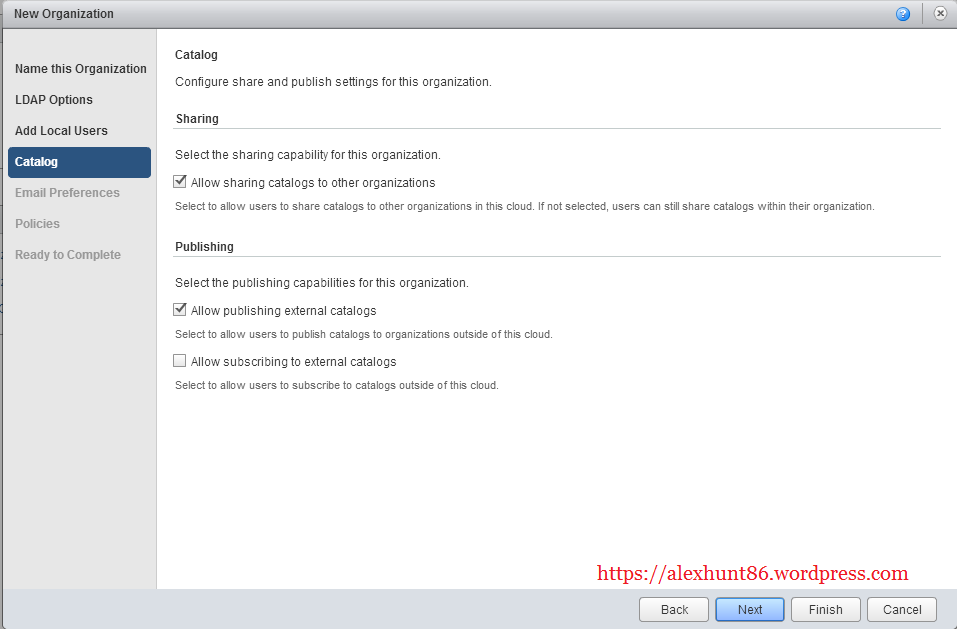
The next page allows you to configure Catalog options. Choose if this organization will supply catalogs (a library of media and OS templates) to other organizations and click Next.
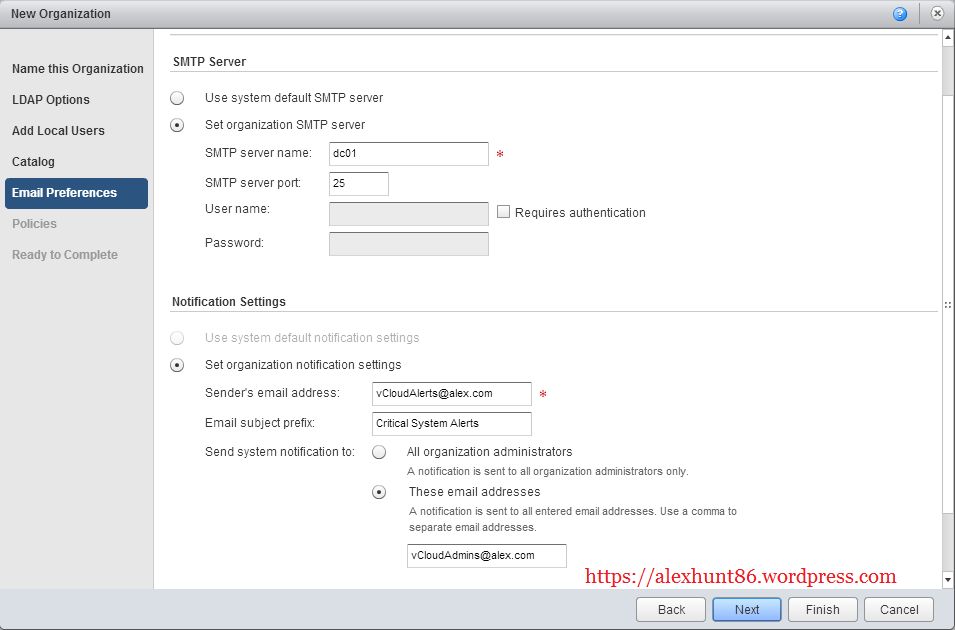
Next step in this wizard is to setup Email preferences. You have 2 options here:
a: Use system default SMTP server
b: Set Organization SMTP Server
I chose 2nd option for my home lab as I have a mail server configured and running in my environment. It will ask you following details:
SMTP Server Name: My server name is dc01 (my SMTP server running on same machine where I have configured my domain controller)
SMTP Server Port: I chose the default port 25
Username/Password field is left blank because I did not chose Secure authentication method in my SMTP server. If you are using this feature you have to give the username/password and select “Requires Authentication” checkbox.
Under Notification Settings you can set options such as sender email address, Prefix for sent emails and to whom these emails needs to be send. Once you enter all the details you can do a test email settings to verify whether or not system is able to send emails.
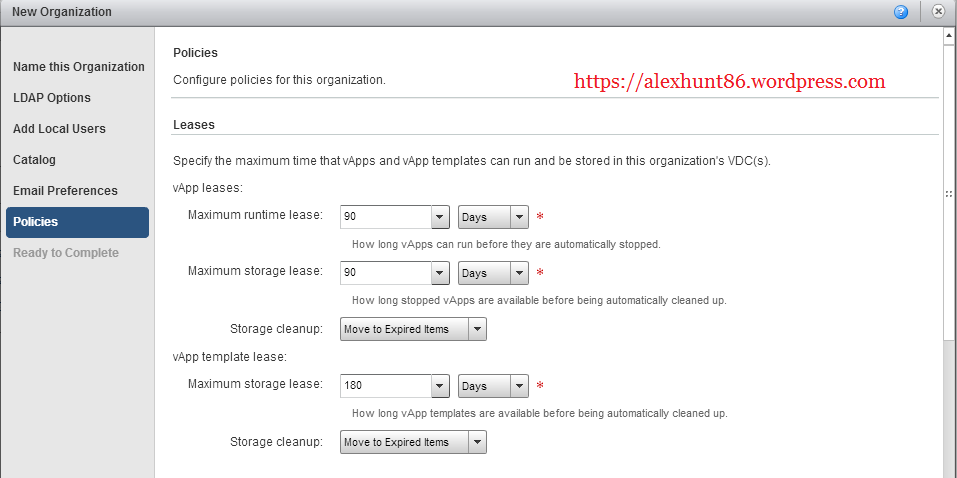
Hit Next to proceed. Next screen let you set the Policies for the vApp and vApp templates. This screen lets you select:
a: Maximum runtime lease: This is the amount of time upto which a vApp in an organization is allowed to run before it is shutdown.
b: Maximum storage lease: This is the amount of time upto which a vApp in an organization is stored on the storage before it is moved to graveyard or permanently deleted.
This option has an additional sub-option “Storage Cleanup” and it dictates whether a vApp will be moved to Expiry items(graveyard) or will be permanently deleted once storage lease limit is reached.
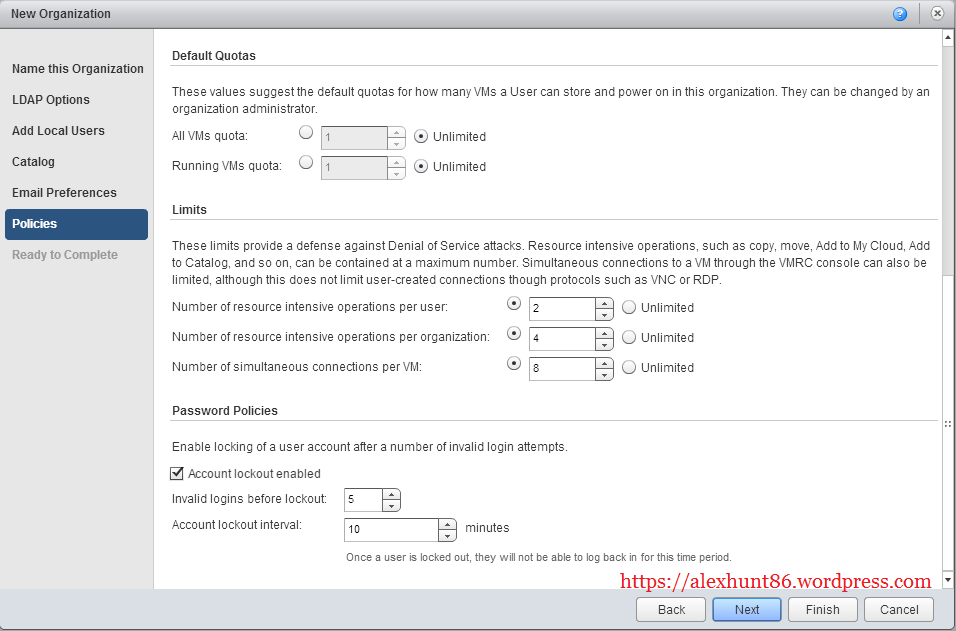
You can also define quotas/limits for the VM’s for an organization on the same page. Quota defines how many VMs a user can store and power on in this organization.
The limits restrict the number of resource operations per user, resource operations per organization and number of simultaneous connections per VM.
Under password policies you can enable locking of a user account for number of invalid login attempt and for how long account will be locked out before it is unlocked automatically. This is a security best practice so I strongly advise to use it.
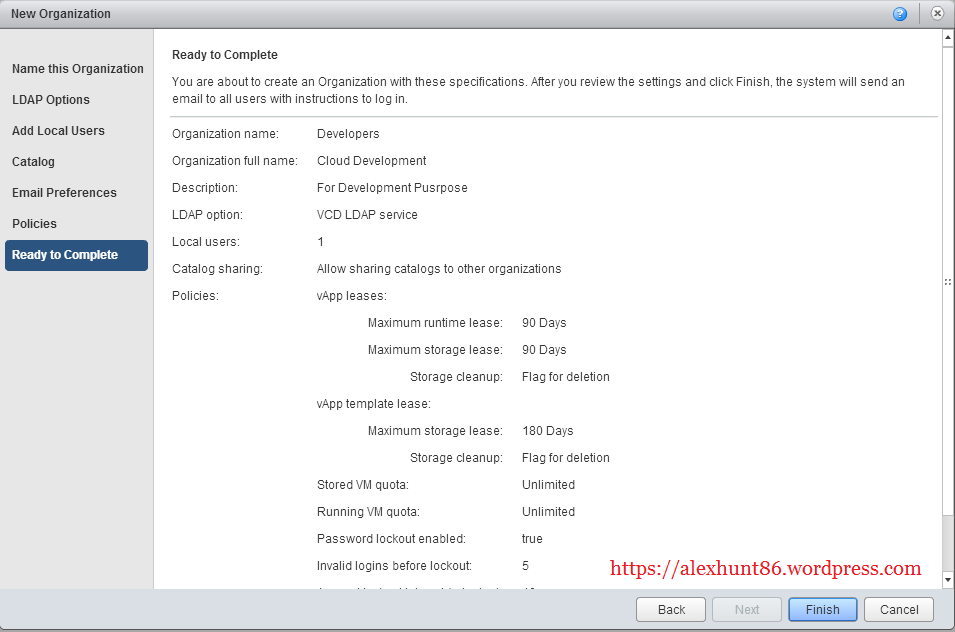
On ready to complete page you can review your settings and hit Finish to create your first organization.
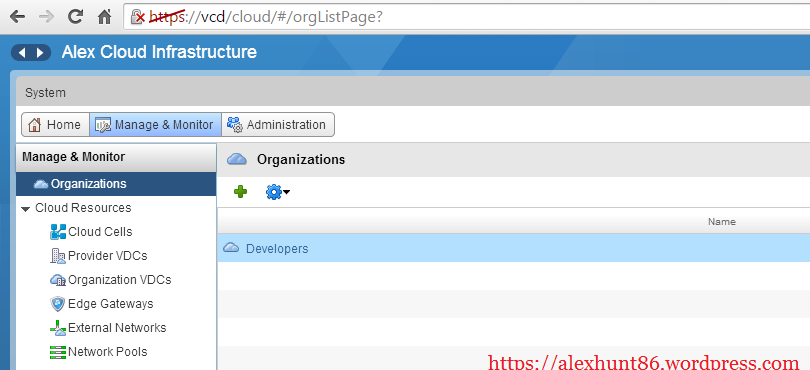
Once the organization is created you can find it in “Manage and Monitor” section under “organization”
Click on the organization to review and modify additional settings related to your organization.
click on Administration tab to see the additional configuration options.
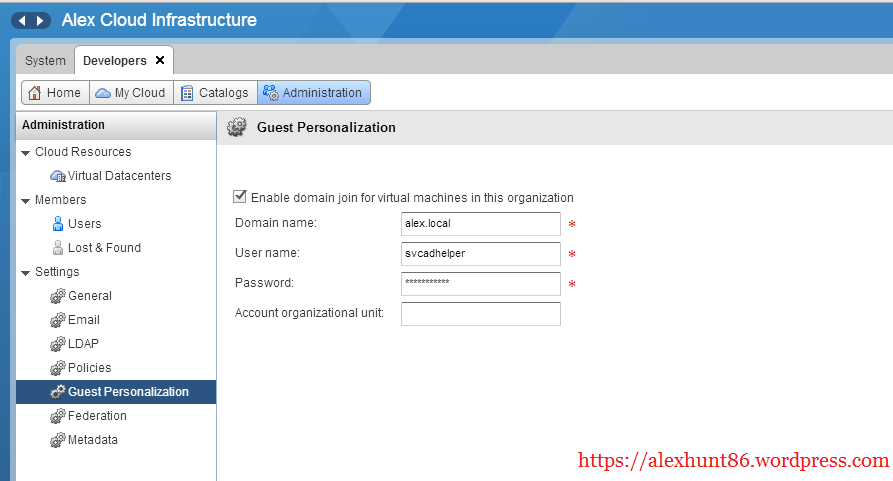
One additional setting which you can configure is defining the default domain to which a new VM will be associated when it is deployed in this organization. Here you can define:
a: Domain Name: Name of the domain to which a VM will be joined
b: User Name: Username used to add newly created VM to the domain
c: Password: Password for the user name selected above
In my lab environment I have a user named “svcadhelper” created for this purpose and my domain name is “alex.local“
In Next post of this series we will see how to allocate resources to the newly created organization.

2 thoughts on “Building a Private Cloud with vCloud Director-Part 9: Creating and Configuring Organizations in vCloud Director”